Rob Roy

Home Model Engine Machinist Forum

Help Support Home Model Engine Machinist Forum:

This site may earn a commission from merchant affiliate links, including eBay, Amazon, and others.

doubletop

Well-Known Member
Project of the Month Winner
Joined
Mar 1, 2010
Messages
865
Reaction score
82
Rather than hijack Stews thread on his 3.5" boiler build

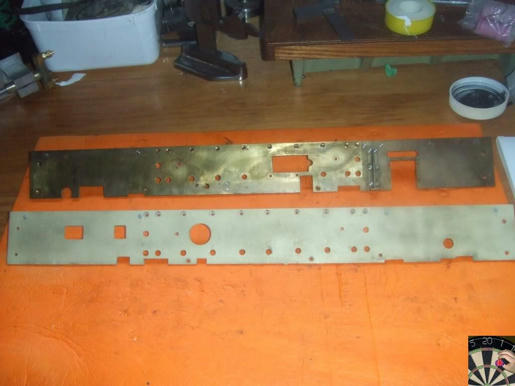
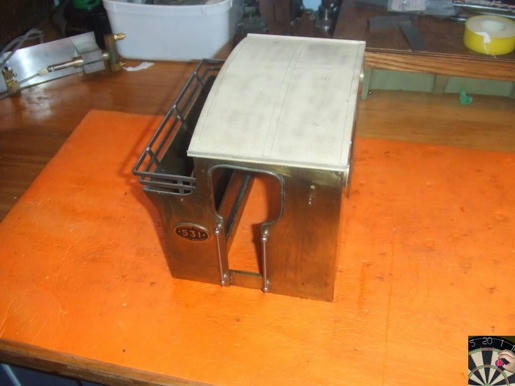
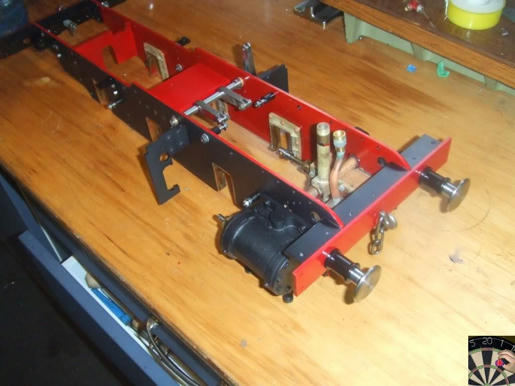
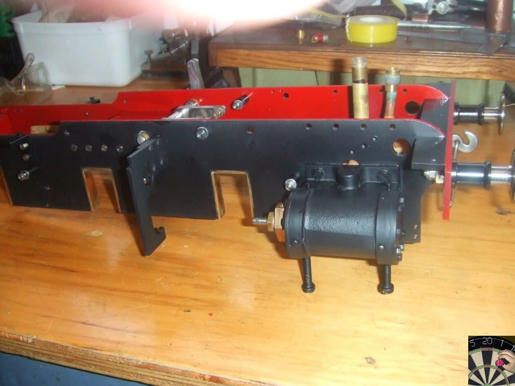
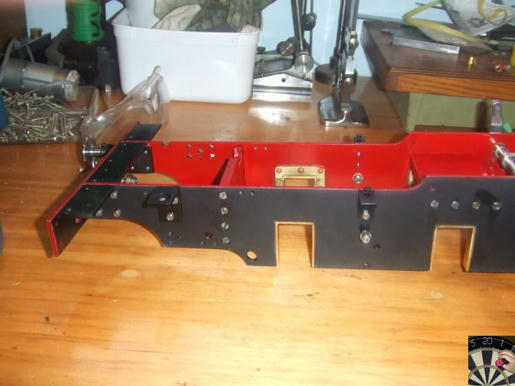
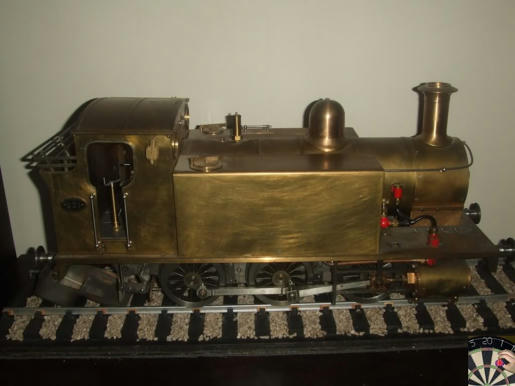
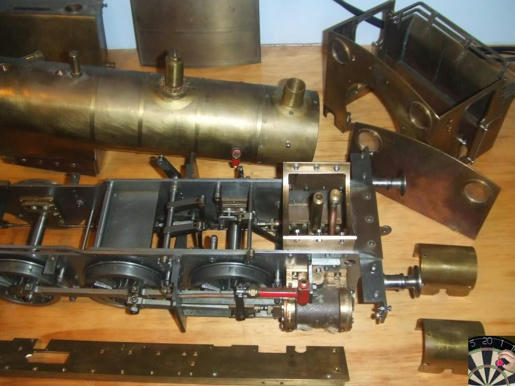
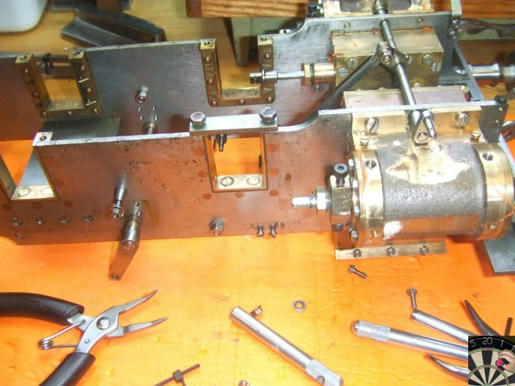
The real reason I'm on this forum is so I can get my skills to a level that I am confident to finish this off without stuffing it up. My dad started this about 1980 and its all a bit dusty as no real work has been done on this engine in about 20 years. I had intended to leave it as it was but now, and as a result of this forum, maybe not.

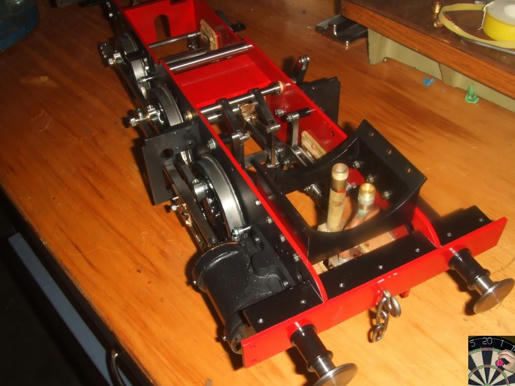
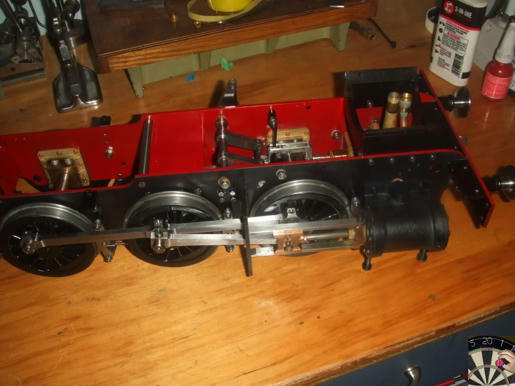
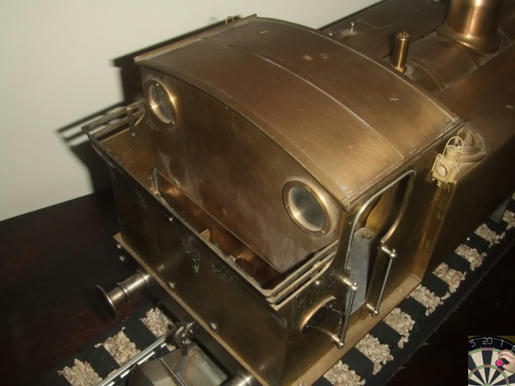
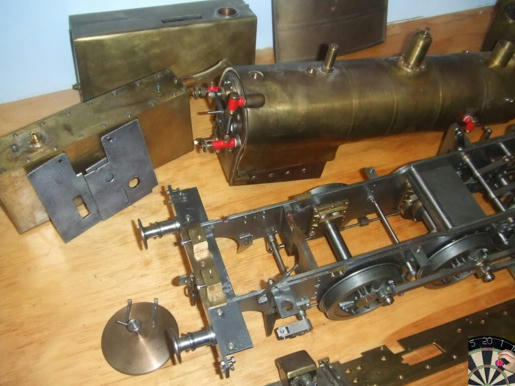
The damage on the cylinder covers was a a result of not having a jig like Stews and was done in the UK before it came to me. This engine (and the rest of my workshop) traveled unaccompanied to NZ, courtesy of Crown Movers, without any other damage or anything going missing.

y3rs58su9ruiia34g.jpg


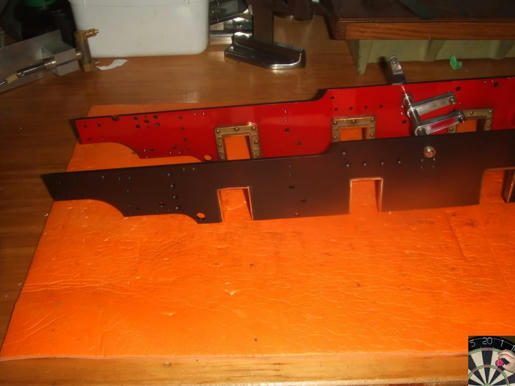
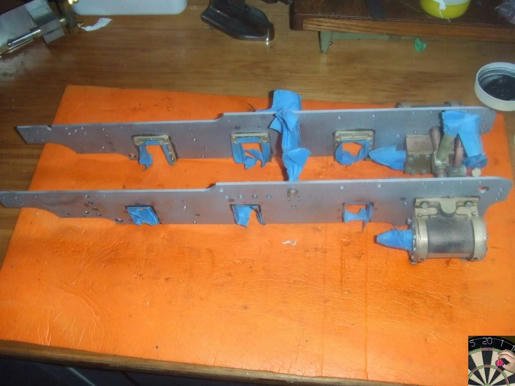
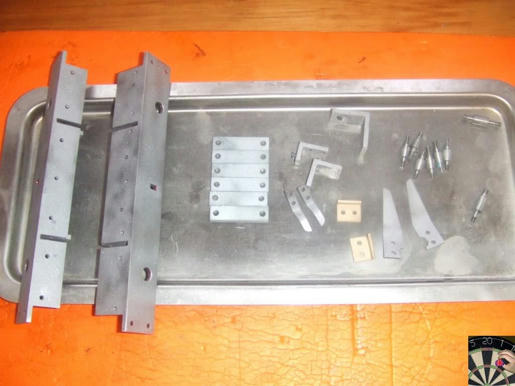
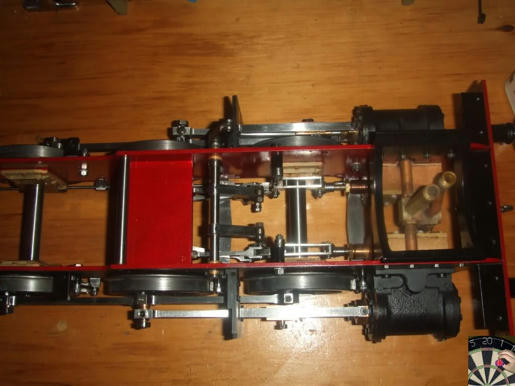
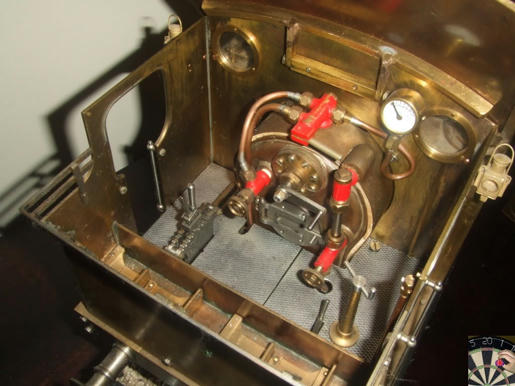
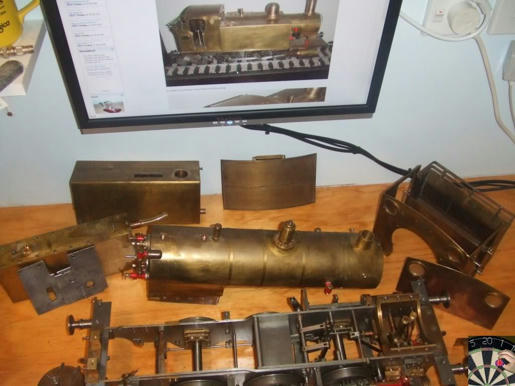
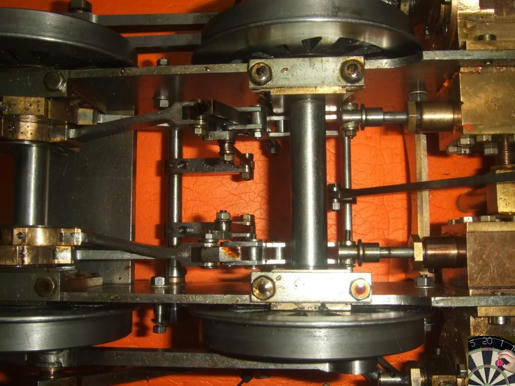
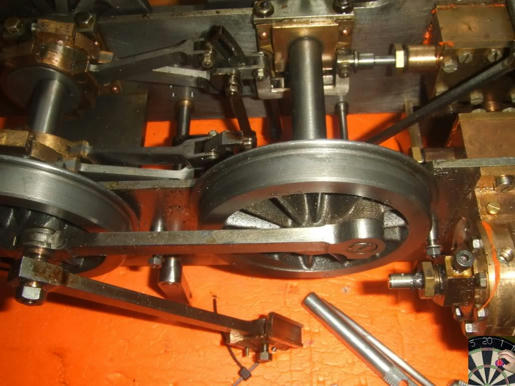
It needs a complete strip down and finishing.

fn5m4b6t61zv9mt4g.jpg


of1drssxev0djpw4g.jpg


As you can see why I am extremely interested in Stews thread.

I'm in no rush to do this and it could be another 20years before I do finish it.

Pete
 
Nice looking engine Pete Looks almost complete, have you had it running on air ?. It looks like a 5" Ajax, do you know what it is?.

Just seen the title of the thread its a Rob Roy

Cheers

Stew
 
I've not tried but when he was building it my dad used to try it out on a CO2 cylinder he'd borrow from the pub.

Its been sat in the living room since it arrived in NZ about 8 years ago.

Pete
 
  • Now I've just finished my last project what next? With all you guys help I've done my apprenticeship over the past months so today I thought I'd make a start on getting this finished.

    It's been underway for well over 20 years and has been sat in my living room since it arrived in NZ about 8 years ago. Its a bit grubby covered in dust but no rust at all. NZ has pretty high humidity so when it arrived I gave it a good spray of WD40, which seems to have done the trick.

    First thing is strip it down and see what is needed.


  • 7rv3oec70inqv8q4g.jpg
  • 9w9ngw4mruey6v04g.jpg


    b0g5p4u5zw5r04e4g.jpg


    It turns out remarkably little needs doing but its a good thing I did, a number of bolts and fittings were only finger tight. Probably as a result of a quick assembly before its trip to NZ. Apart from that:
    • The tank filler caps need finishing but most of the parts are done. One hinge to turn down and the assemblies soft soldered in place.
    • A number of screws need replacing with equivalent small hex head BA bolts. Obviously my dad had run out at some point and just used ordinary screws. I'll get some on order over the weekend.
    • Then paint it. It needs a good clean and the boiler, cab, tanks and running boards doing. But as its mild steel I also want to do the frames which will mean a further deep strip removing as much as I can to get the wheels, axle boxes and valve gear out of the way.

OK, not a full build, but hopefully interesting. I'll let you know how I go

Pete

No plans to rush it
 
What a lovely engine Pete,and a nice intro to model engineering,I am sure with some patience and help from this forum you can finish it ,Will you be painting it?
Don
 
Ron

Hopefully I can get it sorted. There's not a lot of parts left to make. But I do know where to come if I get stuck. Setting up the valve timing comes to mind but I'll ask that question when I get back to that point

Don

The plan is to get it painted and running hence the strip down

Today's efforts

hvcy50yulrtfyg24g.jpg


n158uenj2mdb1c94g.jpg


8752lqimt3ie0nc4g.jpg


h3tb9565hniydf64g.jpg


d2w1urr5tbrpp394g.jpg


Hopefully I can remember how to put it back together again ;)

Pete
 
Pete,

There sure are a lot of pieces.

I hope you took lots of pictures so you can get it back together.

I need many more years of practice before I try to make something as complex as you locomotive.

I'll be watching your progress.

SAM
 
I'm real happy you've decided to finish this. I'm sure it has a lot of meaning...and besides...that's some beautiful work. The detail is amazing.

Watching with great interest...
 
SAM in LA said:
Pete,

There sure are a lot of pieces.

I hope you took lots of pictures so you can get it back together.

I need many more years of practice before I try to make something as complex as you locomotive.

I'll be watching your progress.

SAM

Sam

Yes there are a lot of pieces but I have a good idea of how it goes back together and have taken some pictures. I've also made some notes as well as having the Martin Evans book.The biggest problem will be getting ahead of myself and assembling bits that get in the way of others, so have to take it apart again.

Believe me I need more years of practice before I try something like this. I'm just finishing off my dads efforts.

Carl

Yes it does mean a lot; my dad got to the point he couldn't finish it. The good thing is he's alive and well and watching this along with everybody else. I got a phone call from him from the UK last night with some 'advice'.

Hopefully, I'll get it back together by the end of the year, ready for the NZ summer. I'm taking the boiler to the club tomorrow night to talk to the boiler inspector. It was professionally made and I have a certificate from 1993 but its not worth the paper its written on now.

Enjoy the ride

Pete
 
Pete,

A very nice loco indeed, and a real credit to your dad.

You will need to get made a full set of boiler blanks, so it can be pressure tested again, and ask the boiler inspector what type of fitting he will require so that he can connect to it with his equipment.

So all those nice fittings will eventually have to come off as well. But not yet, see what the boiler inspector thinks first with them all on. You just might be lucky.


John
 
John

Thanks; he certainly was meticulous with it. There are a few stories of parts not being up to scratch and being remade.

On the inspection; my thoughts as well. Take it to him 'as is' and see what he says. I do intend to remove the fittings to clean up and re-paint anyway. Making a set of blanks is quite a quick job and I have some from my other boiler testing and I have the necessary 1/4 x 40 and 1/4 x 32 dies. Hopefully he doesn't want the cladding off for a visual, as well as the straps its solder tacked along the join

We'll find out tomorrow

Pete
 
Seen the boiler inspector and he's ready to do the test. I don't need to remove the cladding and rather than rock up and find it leaking like a sieve I thought I'd make the blanks and test it myself with all the fittings in place using my 'bike pump' method,

  • Filled with water using the whistle valve to let out any air.
  • Fitted pump and filled that with water.
  • Did one stroke with the whistle valve open to get rid of any air.
  • Pumped to 100psi.

I did have some leaks on the blanks and the steam dome gasket but they were easily rectified

All good to go

Pete

DSCF4977.JPG


DSCF4979.JPG


DSCF4982.JPG
 
Good luck with boiler inspector Pete

Stew
 
Thanks Stew

I'm not expecting any issues. He did a visual last week and seemed OK with what he saw. It's a commercially made boiler, with a serial number, I have the original certificate and it is clear its never been fired, so I'm pretty confident.

Pete
 
I'd started painting the frames using heat proof paint but wasn't really happy with the result and didn't think it was going to be that durable.

thp4jz88a1535cf4g.jpg


However at the club the other week we had a discussion about painting locomotives, especially mine with its brass superstructure and one of the guys suggested that it should be sand blasted to give the paint a good key. So digging around on our local version of ebay I found this.

5n67mtps8f6ldjz4g.jpg


It was new this morning but its been hard at work getting the paint off so I can start the painting job again. I've masked up everything to keep running surfaces free of grit ingress.

xae48ayspz840im4g.jpg


et38pwgvdgp36ix4g.jpg


I then started on the brass work. Two running boards one with 15 or so years of tarnish and the other blasted. I'm very happy with the results. With an etch primer hopefully the paint should stay put for a while.

0sz7n8l809odf2b4g.jpg


Cab in its original state and the roof after a blast.

nc7ri9q1hq2bzys4g.jpg


NZ$300 (£135) well spent I think.

Pete
 
That sand blaster is great, the paint now sticks to the metal! I'm much happier with the results this time

Progress since my last post and I'm now in re-assembly mode. The plan is to finish the frames and get the mechanicals back together. Then I'll do the cab etc. I still need to arrange a time with the boiler inspector for the test.

kvpx8oa5az0x4dz4g.jpg


3k48ibl2vl1wpq44g.jpg


64o9s2eejkmeao94g.jpg


Pete
 
You are doing a splendid job,it will look the business when finished
Don
 
Carl/Don

Thanks for your support on this (re) build. Hopefully I can do it justice and not stuff it up, which had been my concern up to now so hadn't considered finishing it.

I got the running gear all back together today. Things are a bit tight so I'll need to do some work on freeing it up. I also need to get a 3/8 x 26 tap so I can make an adaptor for the steam pipe and get it running on air.

gdk9jlo41ud4jbj4g.jpg


1v0rl4zj5gcs1ia4g.jpg


2e7dobb4eitecum4g.jpg


I do need to do something about the valve chests. I thought I'd leave them au natural but they just look unfinished the way they are now.

Pete
 
Back
Top