Re-make of my first engine : part 2

Home Model Engine Machinist Forum

Help Support Home Model Engine Machinist Forum:

This site may earn a commission from merchant affiliate links, including eBay, Amazon, and others.
Now that's a very interesting way to get a different look. They do that with wood turning also. How did you attach the pieces to each other.? Solder?

BTW, nice looking flywheel.

Bernd
 
Thank you Bernd.

Yes soft solder. couldn't get enough heat into it to have silver soldered it! it's quite big!

I'd never seen anyone else do it and didn't know if it would work... but it held well and machined without incident ;D


Ralph.
 
Lovely job Ralph. the new bling artist on the block.

Soft solder is perfectly good for what you have made. I have found that the new non leaded plumbers solder and associated flux does a great job. But a word of warning, always let it cool down naturally, don't be tempted to quench it at all. What happens if you quench, water is sucked into the joint and causes de-lamination. I think I have given this warning on one of my posts, but it doesn't matter if it is mentioned a few times, more people will pick up on it.

Well done

John
 
Divided He ad said:
...
DSC01541.jpg


What do you think to this one Milton?


Ralph.


P.S. Eric you were right about the workshop.... What a mess it's in now!! :big:

Holy cr@p! Ralph that is one seriously nice looking flywheel. I see a new trend coming our way.

Eric
 
That flywheel really is a first class piece of work Ralph ......... and a cracking idea to boot 8)

CC ............. aka ........... Dave ;)
 
Noice, very noice indeed! That's what I like about originality and creativity. It's just so...original...and...creative. ;D
 
Well I'm a very happy man right now ;D Thank you.

Just off out to make a few other parts. You never know I might just get this one finished!?... Then I can make a steam engine, or stirling, or a turbine (I like those :D ) :-\ ?


Ralph.

 
Nice Job! I've actually thought about a laminated flywheel. Only difference is I had thought about laminating a thick ring onto either side of a disk to reduce the amount of material I would have to remove.

Chuck
 
cfellows said:
I had thought about laminating a thick ring onto either side of a disk to reduce the amount of material I would have to remove.

To me that's what makes it stand out, the brass hub and brass lamination's on the periphery (errr........ or outside edge ::) )

;) Dave
 
That is one great looking flywheel. I've never seen one like it. Way to go :bow:

Cheers,
Phil
 
It goes to show great minds..... Chuck ;) Thank you Phil, much appreciated. I think it could be used again in the future... Takes a while though!

Tonight I got a little more done.

I finished the flywheel.
DSC01555.jpg


Also took a few photo's of it on the mock up. (nothing is tightened yet)
DSC01558.jpg

DSC01557.jpg

DSC01556.jpg


Next, the base!

Ralph.
 
Ralph your work is amazing!

You have a machinist's heart with an artist's eye.

I don't know what brought you here, but I sure am glad
that you are here!

Rick
 
Eric and Rick,

Thank you both :-[

I do what I think looks good and then hope it works! ??? ... Put a bit of planning into this one though ;D

Well I'm off to the model show in Harrogate ;D I'll post some pics tonight probably? Hopefully the kind of stuff to make us all want to build more ;)


Ralph.
 
OK. Today we see the base... It's not as good as it could be but it is the first attempt at such an item and therefore I'm reasonably happy with it.... here goes...
DSC01582.jpg

From this....


DSC01599.jpg

To this (in only 4 hours ish!)

DSC01600.jpg

Then this...

DSC01602.jpg

To this....

DSC01605.jpg

Then this.


Then I went all Bogstandard on it's a#@ !! (well I tried!! ;D )

DSC01607.jpg

DSC01608.jpg

DSC01610.jpg

DSC01616.jpg

The bolt is holding it down whilst the glue sets.

The turning wasn't too bad for a first attempt I think.... But here is a closer pic for you to see why I need to do better... The pattern is ok, it's just it seems to have picked up on random swirls?
DSC01618.jpg


All comments will be taken to heart!!! :big:
Seriously though, let me know where I went wrong and I'll try to do better in future ;D


Ralph.
 
Ralph,

Looking great, as you have most probably guessed by now is that the bit of failure on the RT was because as you move away from centre the circumference gets larger.
You need to do a lot of calculations for each separate row to end up with roughly the same overlap. That's why I tend to stick with straight lines.
But you have now got the general idea. So onwards and upwards.

I personally think, after the first row of turning, I would have stopped, the contrast that you had there looked fantastic. Sometimes, less is best.

Don't worry about if ever you make a mistake. I do it all the time. I kick my own, the cats and dogs a**es, flat down on a piece of 400 W&D (that is good enough for engine turning) and try again.

Well done.

Definitely going to become King of Bling.

A quick spray of the secret weapon, Mr Sheen, will keep the wood and ali looking real good.

John
 
Yes I looked at that for about 10 min's John! ::) It had kind of an eye look about it! But I decided that I wanted to carry on the experiment with the engine turning.
I changed the size of the burr (rubber dofor you gave me) to the smaller one half way through did one rotation and then returned to the larger one and closed up the spacing on a run or two just to see what effects I could get :)

I have learned a little And will trust the first thought a bit more later in my build career.

Still don't know how to stop the picking up on the burr? Some of the swirls were quite rough looking? I'll figure that one out?
What kind of rpm do you usually use for the turning of engines? ???

Don't know about this king business ??? (this little smiley has my type of crown on him!! :big: )

Thanks for the polish tip, I will utilise it very soon :)


Ralph.
 
I normally use what speed the miller is on, it doesn't seem to matter. But I would err towards the higher speeds.

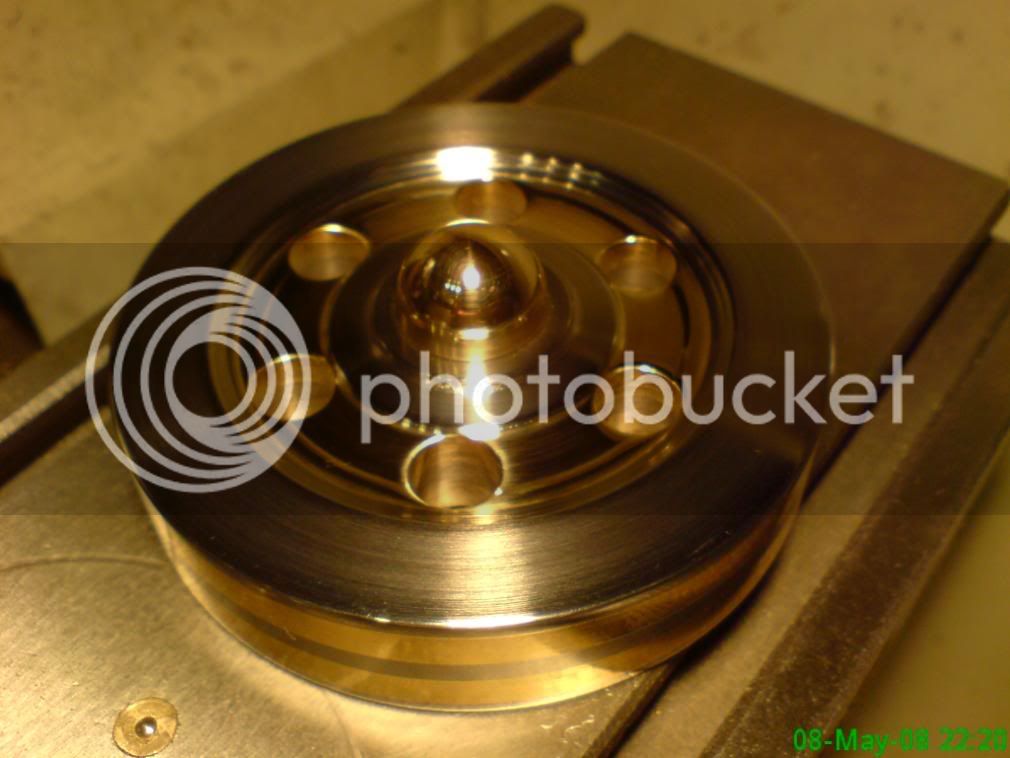
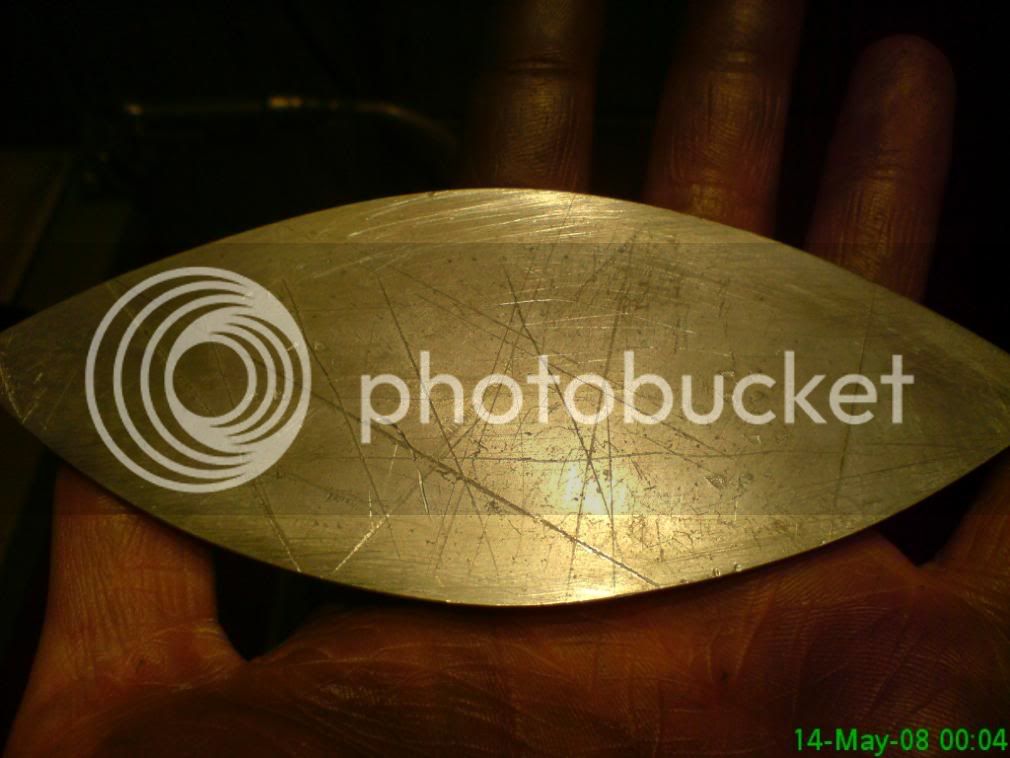
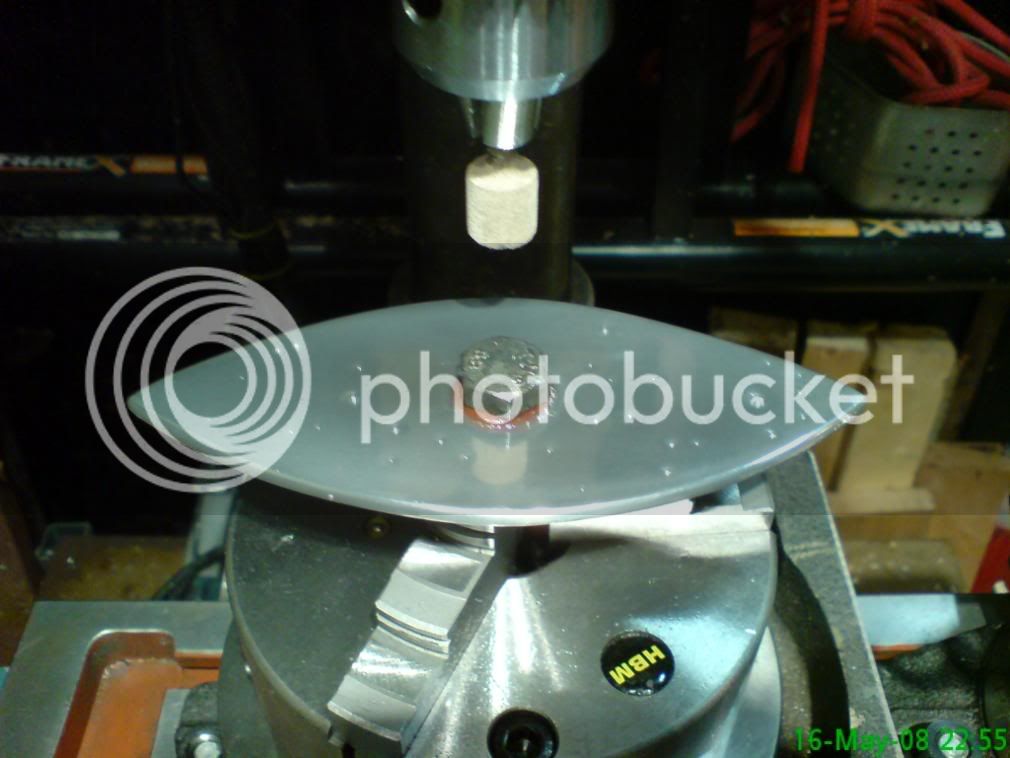
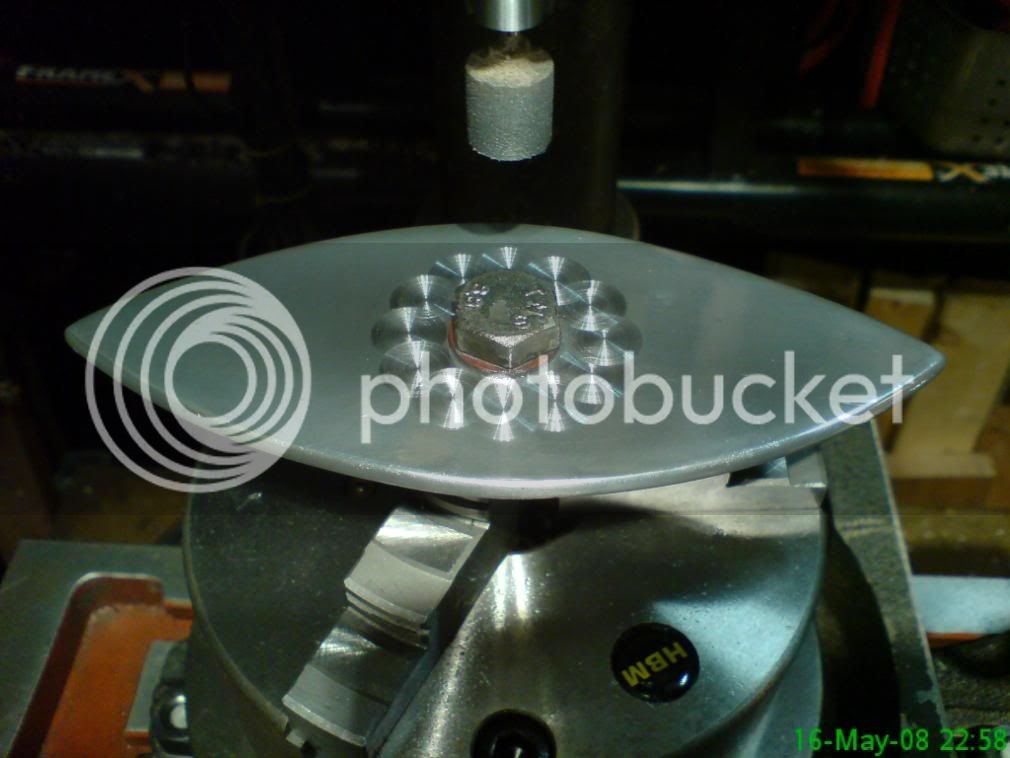
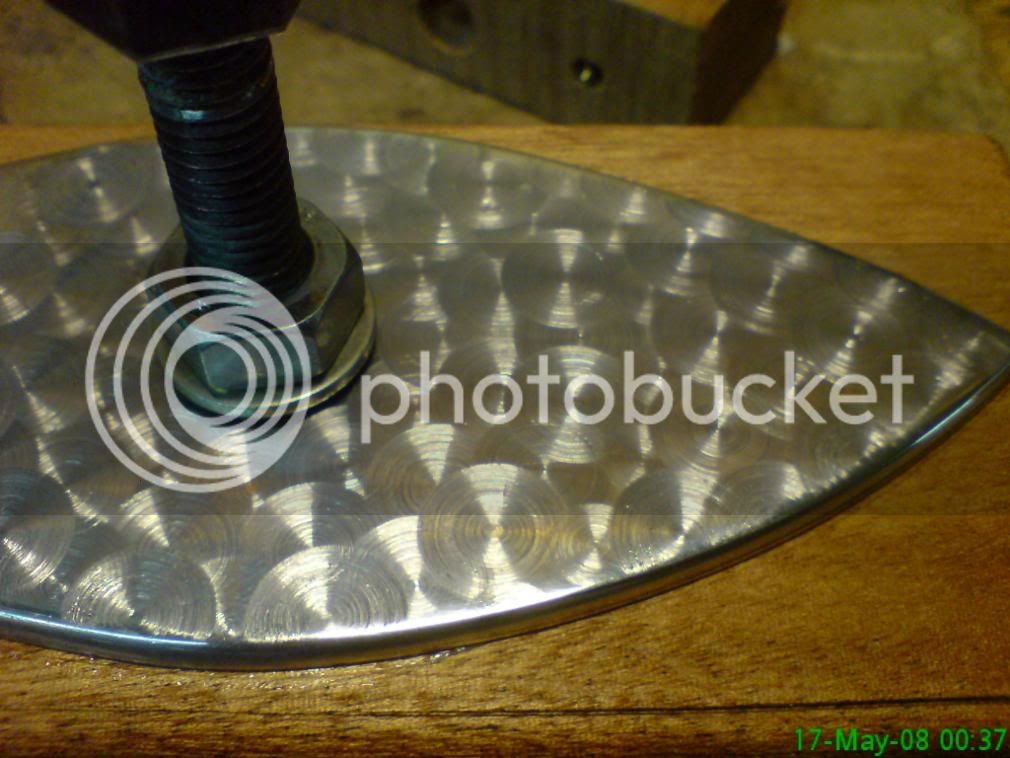
The scuffing could be caused by a few things, very soft material, not enough lube, or just pressing down too hard, but I suspect there was a build up on the bottom of the cutter, of ali swarf. What you can do is put a bit of rough W&D with lube, between the cutter and the job every so often, and go thru the cutting motions, just to clean the bottom face. I normally check the quality after every line, then if it is a bit rough, clean off and go over again.

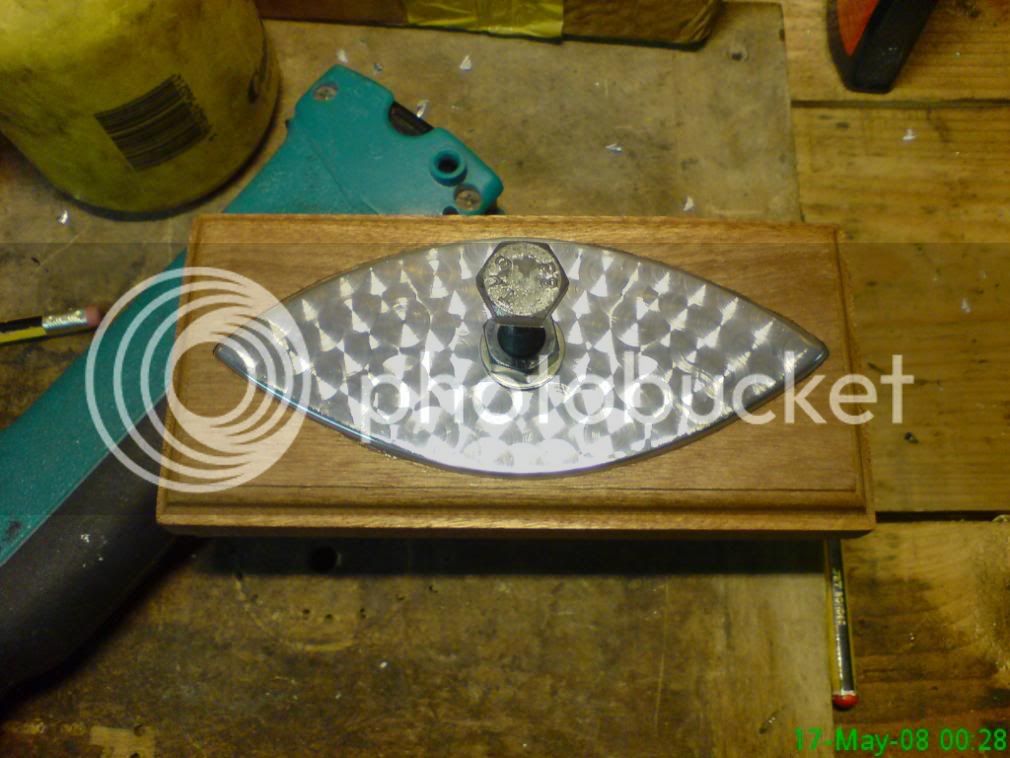
You don't have to use the cutters I gave you, there are lots of ways to get the same effect. It is just that I find these much better than everything else I have tried.

John
 
Ralph....
Bogster has been trying to pawn that "King of Bling" title off on anyone he can, ever since we hung it on him a few months ago.. Watch out... now, he's trying to hang it on you this time around...ROFL

That's some seriously sweet eye candy you've got going on there. The engine turning is tricky. I would probably have to agree that the single ring of swirls was most effective. You could also run a straight line from the tips back to that same circle to hide the overlap of the last full circle and have a totally different look.

I REALLY LIKE IT!!

Steve
 
Well I like the ones you gave me John... They seem to do the job very well! I'll blame operator error on this one (virgin E.T. !!... Do you think Mr Branson might be interested in that catchy title? ;) )

I'll try harder next time, or technically 'softer'! Armed with my knowledge of errors I can try to correct any mistakes... This one is now firmly staying the way it is because it is now fixed to the wooden base!

Thank you Steve...As I said it is staying this way now! However there is nothing stopping me from creating new bases further down the line... It only screws in to the heli coil ;D

DSC01614.jpg


I'll look out for any hanging of titles too!! :big:


Ralph.
 

Latest posts

Back
Top