


BobWarfield
Well-Known Member
- Joined
- Dec 27, 2007
- Messages
- 1,151
- Reaction score
- 1
Well, it too a look of doing, but I finally came up with a DRO for my lathe that Cedge doesn't already have on his! LOL, just teasing!
I was facing our little flywheels for the Team Build and was seeing some funny business on lengths. So, I got to thinking about a set of cheap digital calipers I had that I particularly do not like and how I ought to chop them up and make a DRO out of them for my compound. The project is a lot like making a DRO for your mill's quill.
Anyway, I don't have any progress pictures because I just threw it together out of scraps. I made it easy to take of the machine, it just clamps in place, and it is primarily useful when you're set up to feed for facing and not with the compound at an angle.
It looks like this:
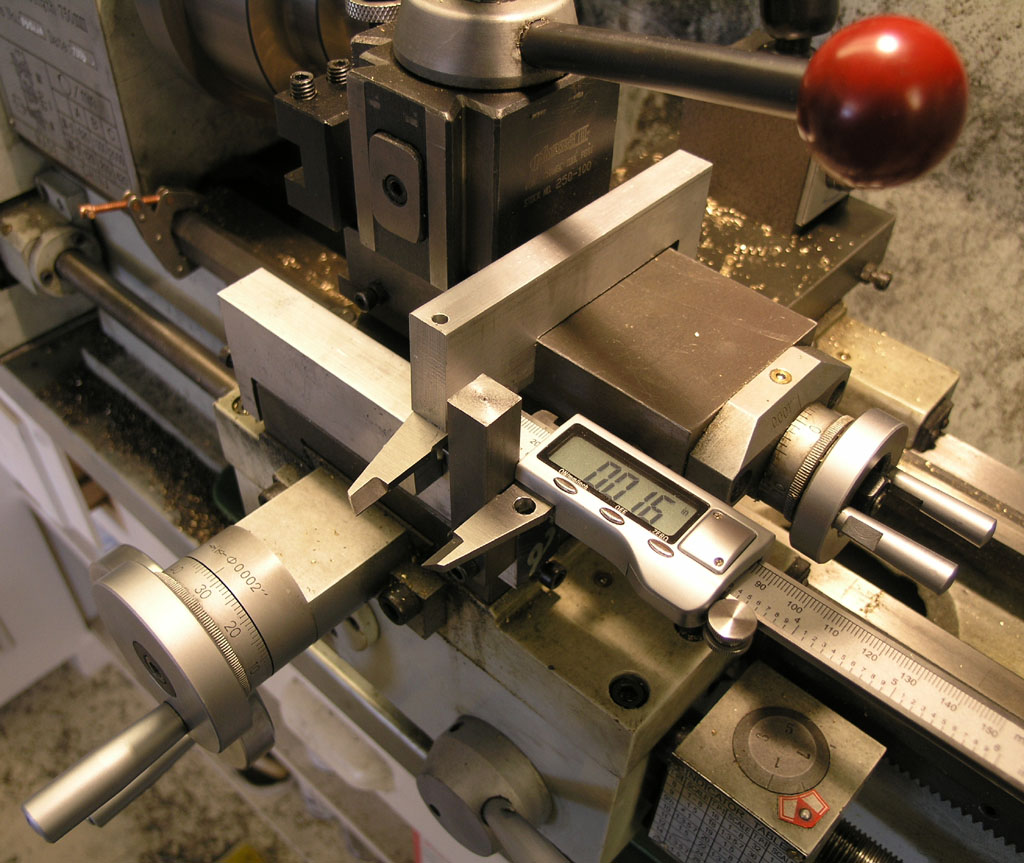
The two clamps are milled out of aluminum. The calipers are bolted to the underside of the top clamp. You then measure against the vertical reference bar to see what's doing. It didn't take much to knock it together. You'd want something more elegant if you were going to leave it mounted, but this worked well for my application and was ready to go after about 2 hours of fooling around. It has proven to be more accurate than the dial on the lathe as well.
You could also just rig up a plunger-style indicator on a mag base, but this was fun to play with. My plunger doesn't have much travel, else I might have used it.
Cheers,
BW
I was facing our little flywheels for the Team Build and was seeing some funny business on lengths. So, I got to thinking about a set of cheap digital calipers I had that I particularly do not like and how I ought to chop them up and make a DRO out of them for my compound. The project is a lot like making a DRO for your mill's quill.
Anyway, I don't have any progress pictures because I just threw it together out of scraps. I made it easy to take of the machine, it just clamps in place, and it is primarily useful when you're set up to feed for facing and not with the compound at an angle.
It looks like this:
The two clamps are milled out of aluminum. The calipers are bolted to the underside of the top clamp. You then measure against the vertical reference bar to see what's doing. It didn't take much to knock it together. You'd want something more elegant if you were going to leave it mounted, but this worked well for my application and was ready to go after about 2 hours of fooling around. It has proven to be more accurate than the dial on the lathe as well.
You could also just rig up a plunger-style indicator on a mag base, but this was fun to play with. My plunger doesn't have much travel, else I might have used it.
Cheers,
BW