Quick change toolposts---again

Home Model Engine Machinist Forum

Help Support Home Model Engine Machinist Forum:

This site may earn a commission from merchant affiliate links, including eBay, Amazon, and others.
The main thru-bolt is a monster, at 0.558" dia. the plate it screws into is 2.24" x 2.519" x 1/2" thick. I can only assume that I will have to open up the existing 0.410 dia. hole in my topslide to about 0.568 to give a bit of clearance. The existing 0.640" x 1.042" slot in the underside of my topslide will have to be opened up, probably to at least 0.750" wide x 1.042" long, and the plate milled down to 0.874" square to fit fit into the slot.--I just tested the plate with a hacksaw, and its soft, so that shouldn't be a problem.
quickchange-2001.jpg
 
At a very quick glance with the new QCTP just setting in place, it looks like the height will be about perfect. Keep in mind that I have a 0.100 spacer under my topslide right now, so the whole topslide including the quick change toolpost will set down another 0.100" when the spacer is removed.
quickchange-5001.jpg
 
Brian, somebody probably makes a sleeve 5/8 to 1/2 to use 1/2 inch dia Boring bars. I made mine from 5/8 Drill Rod. Step Drilled it to 1/2 dia. then slit it. Works fine. Also did one to tahe my 3/8 boring bar. ironman
 
Additionlly, you could put a sleeve in the tool post and use a small clamp bolt....just a thought.


Dave
 
I hold 1/2" boring bars in the V of the BXA2 type tool block rather than trying to sleeve down the boring bar holder. The latter is probably a more rigid setup, but my way works OK for what I do. Will a 1/2" bar fit in the V of your #2 holder?
 
I have opened up the hole through my toplide to suit the diameter of the new centerbolt and milled the slot larger for the new nut. Unfortunately, my topslide has a round, 0.189" deep counterbore on the far side which means I could only go about 0.025" deeper with the recess for the nut, as I didn't want to thin down the web of material between the two recesses enough to weaken it. The recess for the nut is only 0.183" deep now, and thats not enough to hold a threaded connection. What I will do is mill the plate down to that thickness, put a good 45 degree chamfer on the head of the centerbolt and weld it all around the plate. The threaded connection will keep it square and true, and the weld will keep the threads from pulling out under stress.
topslideholemilled001.jpg
 
There isn't very much left of that 2" x 1/2' plate, but what there is left is a good fit into the recess prepared for it. I caught about 3 threads of the post, and welded all the way around it.---It shouldn't pull out!!! I can still remove the plate and post if I want to.
weldedpost003.jpg

weldedpost004.jpg
 
Looks good Brian. That should hold together and stand up to normal clamping pressure.

I had the impression that your lathe was the Busy-bee Emco clone 9x20. Looking at the tool post it seems that you have the Prazi clone? 10x18, is that correct?

Was just curios. Never saw a full shot of your lathe.

-MB
 
So there we are--All buttoned up and finished. The fit seems fine, as far as tool height is concerned. I will obviously have to do some playing around with it untill I get a feel for adjustment, etcetera, but the installation went fine.
installationfinished003.jpg
 
Looks good Brian. Thm: I bet you'll love it. The only problem is you can never have enough holders. :D Gives you something to do between projects though......

Cheers

Jeff
 
Interesting Thread Brian. I have the same lathe and may do something similar.

Is the stop assembly on your lathe which appears in that last photo your own design? Did you post a build thread on it?
 
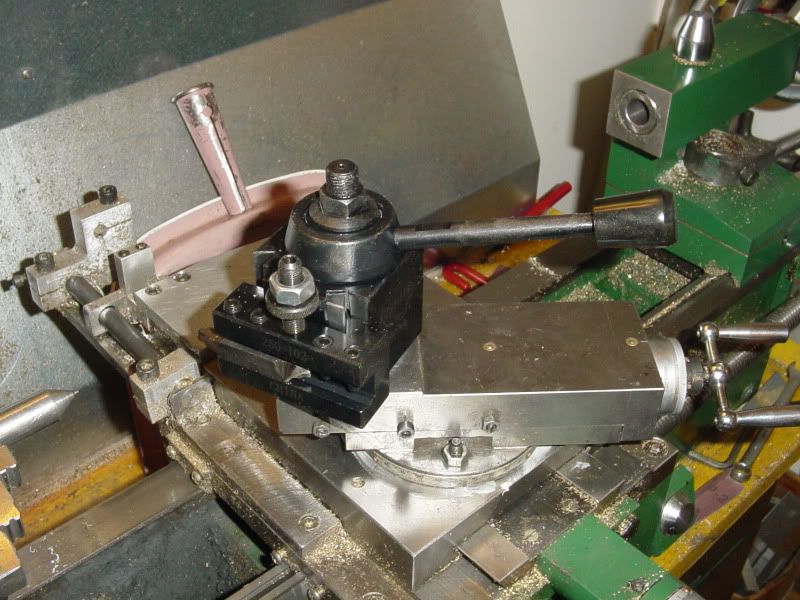
And what would any new tool report be worth without some feedback as to what it cost and how well it worked? The quick change toolpost and holder set that I bought at Little Machine Shop was item #2280, and retailed for $155.00. I see on the invoice a $5.00 charge for handling?? and a $27.95 charge for shipping---Now we're up to $187.95, and when I picked it up at the post office I got to pay $26.00 for the privelage of being a Canadian citizen (taxes).----So----Call it a round $214.00 my cost. The tools seem very well made, from steel, not aluminum, and a very nice black oxide finish on all of the non mating surfaces. The holders are not hardened, as I checked with a hacksaw---(more on that later.)
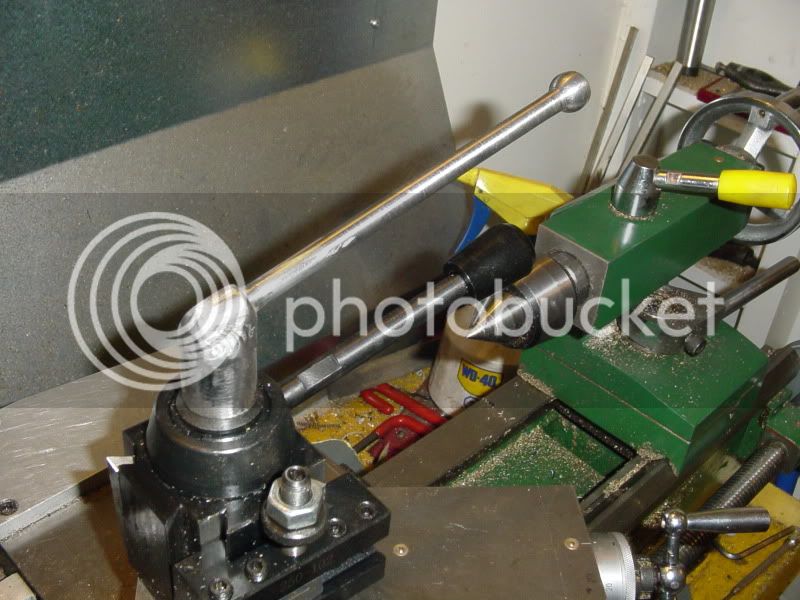
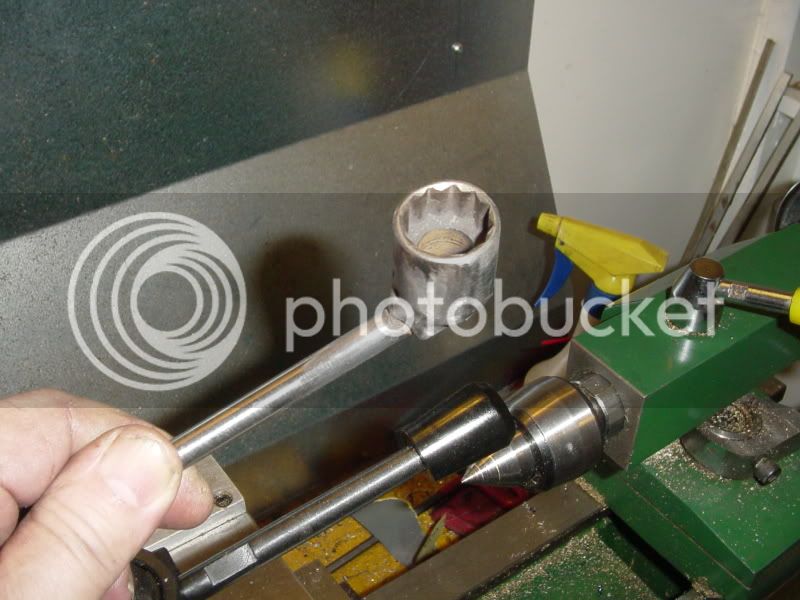
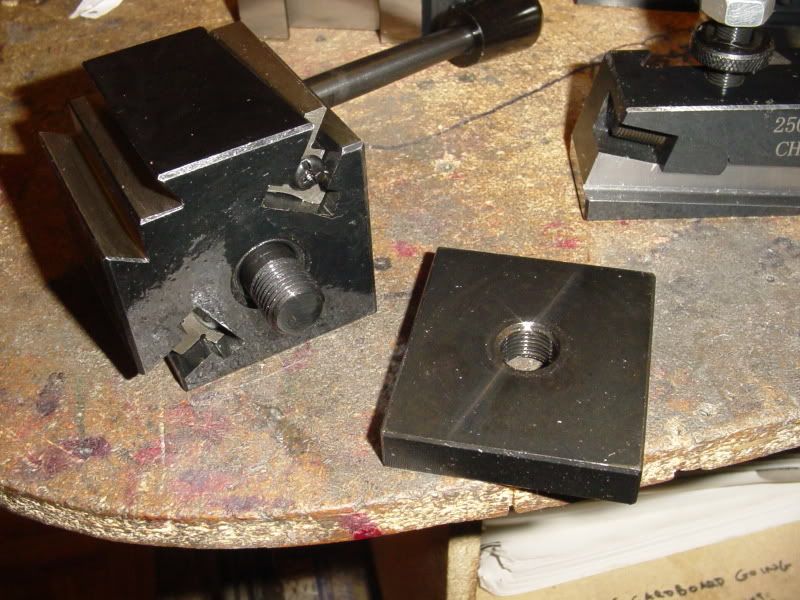
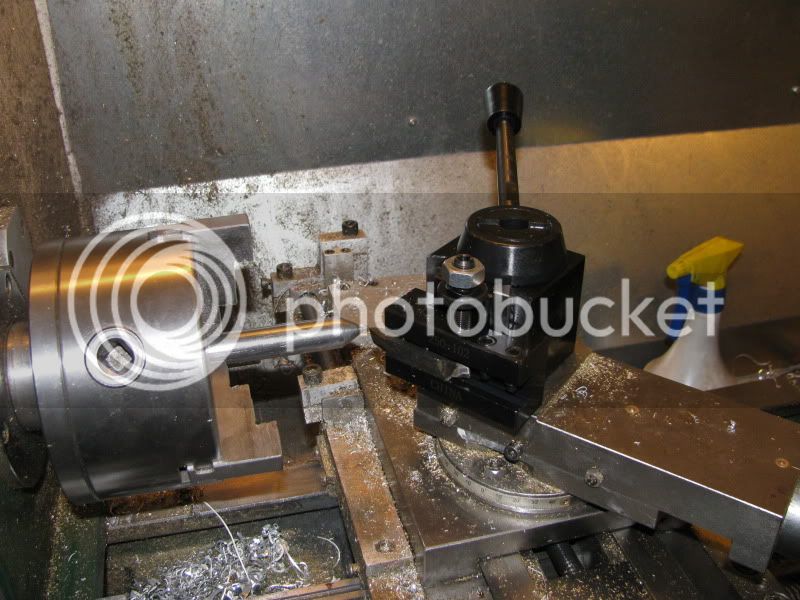
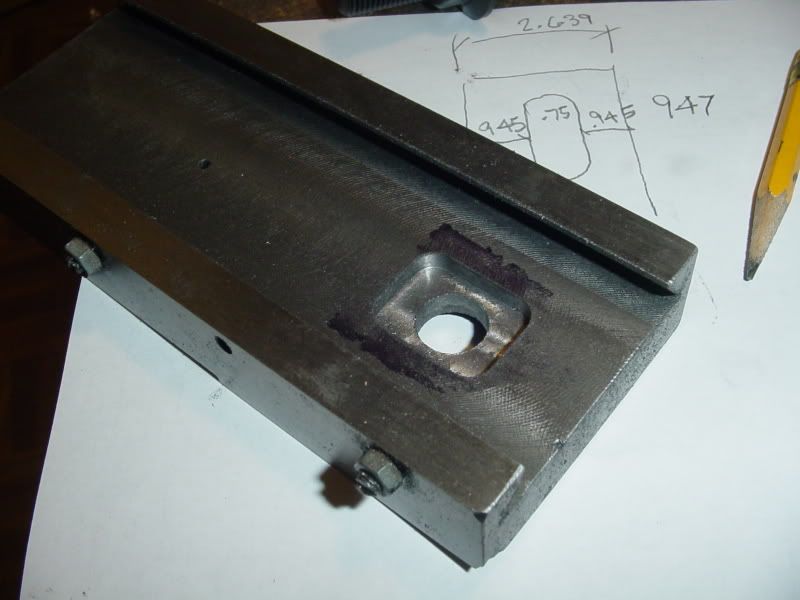
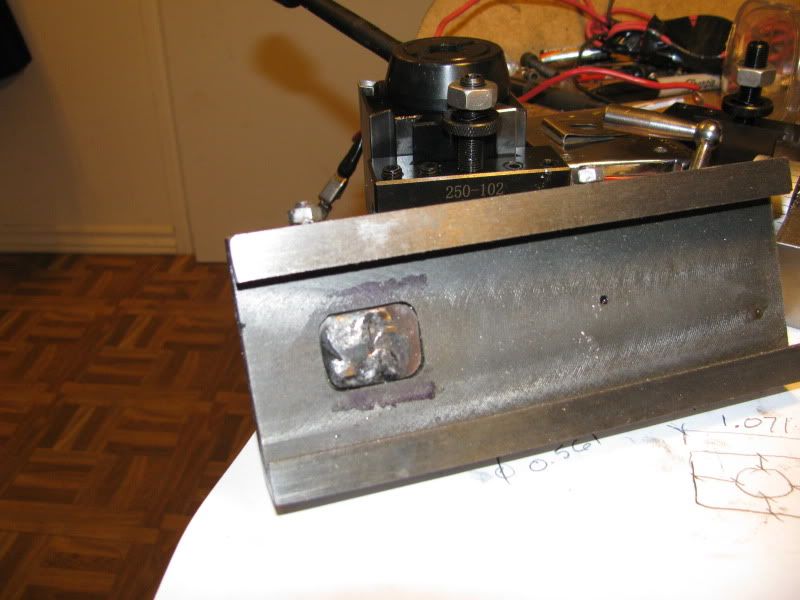
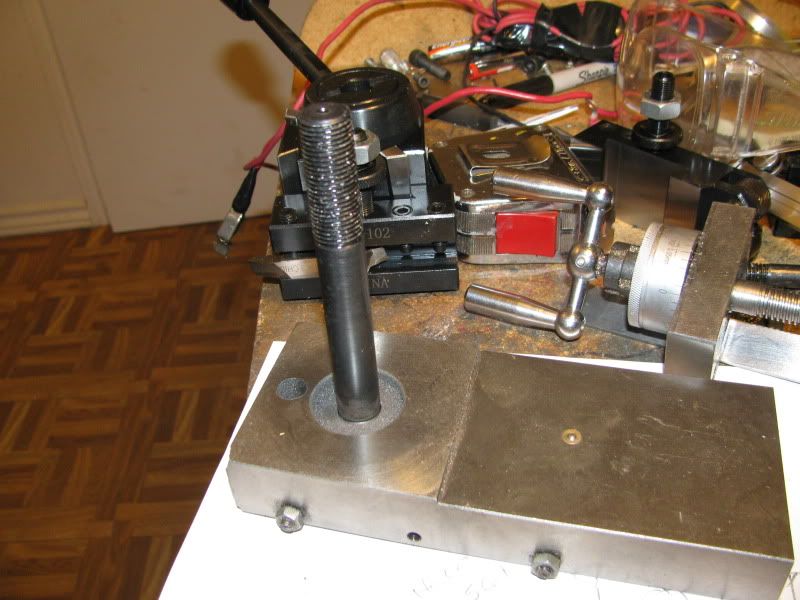
The holders are 2.95" long, with 4 set screws each to clamp the cutting tool. The slot to hold the tool is 0.553" wide, and 0.445" deep, so they would hold a 1/2" square shank tool, but are perfect for a 3/8" square cutting tool. With a 3/8" square cutting tool in the holder, I can lower the holder untill the tip of the cutting tool is about 0.247 below the center of my chuck, so probably a 1/2" square tool would fit but you would have very little downward adjustment left. The two toolholders are great. The cut-off tool holder slot is 0.546" wide x 0.192 deep, and seems to hold my 1/2" x 1/8" cut off tool just fine. It has a sliding wedge type affair to clamp the cutting tool in place, and it works---I cut off a peice of 1/2" diameter steel just to test it. The knurling tool seems to be functionally useless, as its the type where you have to use the compound rest crossfeed to push it into the work to create the knurl.---However, the good news is that it already has a 0.553" wide x .445" deep slot half the length of itself, with 2 setscrews. I tested it with my hacksaw and its soft, so probably I will cut the knurling end off it, mill the slot all the way through, and add two more set screws to make a third tool holder. My old "squeeze type" knurler had a rectangular shank .409 thick x 0.625" deep---A quick trip over to the mill and the 0.625" was quickly reduced to 0.530" so it would fit into one of the new toolholders. I didn't do any testing of the boring tool holder, as I will have to make a split bushing to hold my 1/2" shank boring tools. What I didn't realize untill right now are the trade offs involved with a quick change toolpost as opposed to the other type which came on my lathe. With my old holder, you had to mess around with different thicknesses of shims to get the cutting tool set at the correct height----BUT--- You could loosen off the handle without a wrench and rotate the whole toolpost to easily achieve whatever angle of contact the tool had with the peice being turned, then lock it in place again via the handle---No wrench required. With the new Quick Change Toolpost, its exactly the opposite. Tool height adjustment is very quick and easy, but to change the aspect of tool to workpeice, you need a wrench to loosen off the toolpost bolt in order to rotate it into the proper position, then again the wrench is required to lock it in place. Only time will tell how much of an agravation that is going tobe. So, there you have it. My first tool review of 2011.---Brian
 
Woodguy said:
Interesting Thread Brian. I have the same lathe and may do something similar.

Is the stop assembly on your lathe which appears in that last photo your own design? Did you post a build thread on it?
Yes, and Yes--There is a thread SOMEWHERE on this forum showing the step by step procedure to build it. It works great.----Brian
 
Alls well that ends well----I made up a split bushing from a peice of 3/4" dia. mild steel round bar, 3" long, then drilled and remed it to 1/2" inside dia. I split one side full length on the bandsaw and put it into the boring tool holder. It grips my 1/2" shank boring bars just fine-----I bored out an existing hole in a peice of stock to see if the tool stayed aligned and didn't turn in the holder, but its as steady as a rock.
 
Brian Rupnow said:
Tool height adjustment is very quick and easy, but to change the aspect of tool to workpeice, you need a wrench to loosen off the toolpost bolt in order to rotate it into the proper position, then again the wrench is required to lock it in place. Only time will tell how much of an agravation that is going tobe.
I keep a socket and driver handy (make from 1/2" steel square stock unless you have a spare ratchet) to adjust my toolpost, though prefer to keep it square to the compound as much as possible.

 
Brian, here's another idea. I saw it used somewhere on the internet.

Cut a cheap ratchet down to about 3" to 4", or use a stubby ratchet.

This will allow you to keep it out of the way, but in place and handy! :idea:

-MB
 
MB, you can also buy fancy handles to do that job. E.g.

http://www.monroeengineering.com/adjustable_handles/page002.htm

You can get ones with female thread, rather than the male thread shown in the link.

The handle is spring loaded. To adjust it you lift it up, then it freely rotates, when you let the spring pull it back down it locks in position. The Australian company Hercus used to have them as part of the standard arrangement on their lathes at one point. They were good handles.

Steve
 
This may not be the perfect solution to the wrench requirement for turning the direction the toolpost is facing, but it comes darn close. I had an old set of 3/8" drive sockets that I inherited from my dad. I took the 3/4" socket, which fits the nut on top of my toolpost, and drilled the center out to 0.570", to clear the post, made up a handle out of 5/8" steel stock, and welded them together. Now the handle lives "in place" all the time, and doesn't bounce off nor flop around, it clears everything, and if I want to, I can lift it off and hang it up somewhere.
handle002.jpg

handle003.jpg
 

Latest posts

Back
Top