


mklotz
Well-Known Member
Photographing model engines or, indeed, any sort of small metallic object, can be difficult. Even if one turns off the dreaded flash, hot spots and reflections can make for an unattractive photo. One way that photographers solve this problem is with a light box.
I had long intended to make a light box from some muslin and a cardboard box but one day, while strolling the aisles of Amazon, I came across this:
http://tinyurl.com/5tfmapn
My wife was after me for father's day suggestions so last Sunday one magically showed up at the homestead.
I like it well enough to recommend it and, if I'm recommending, I think it only fair to provide a brief review...
The entire package looks like this:
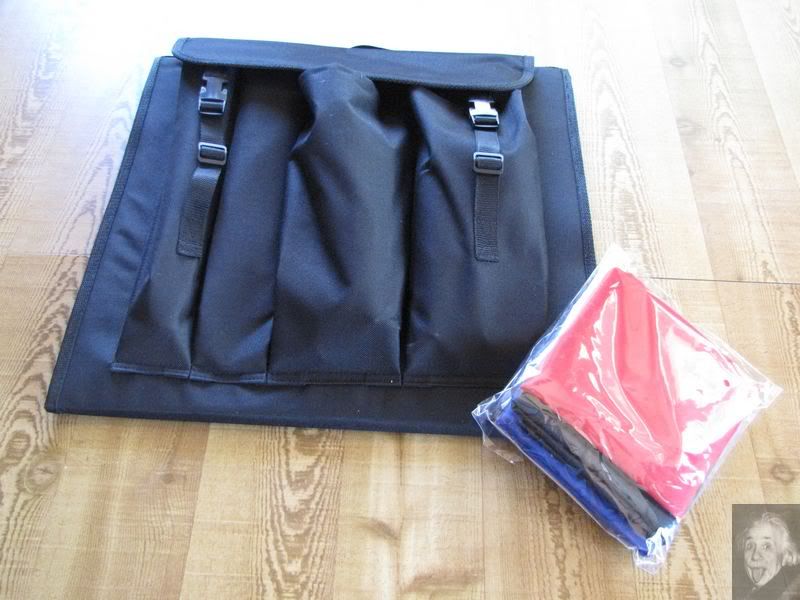
The black case contains the tripod and the two photo floods. In addition it unfolds to form the light box.
Aside: One of the problems with making one's own box is making it foldable for storage; a large empty box just takes up too much room. This neat package can slip behind a bookcase.
The separate envelope contains four colored cloth backdrops - white, red, blue, black.
Aside: One secret of good model photography is to use a neutral color, UNPATTERNED AND UNTEXTURED backdrop.
When all assembled, the setup looks like this:
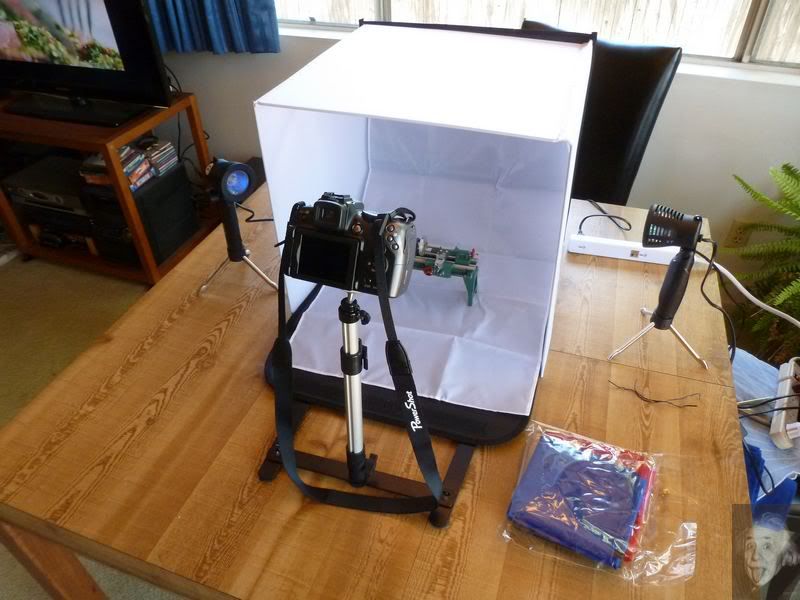
The translucent panels that form the light box are held in place with Velcro along the edges; the back drop cloth attaches similarly. The two halogen lights have built-in tripods that drop out of their bases when the cap is unscrewed and each has a separate on-off switch.
The 'tripod' is really a monopod that attaches to a folding set of flat legs. The monopod has a tilt feature at the base and a ball joint camera mount at the top. While it's perfectly adequate, I must say that I prefer my miniature pan-tilt tripod. With the monopod structure, camera vibration can be a problem, especially so for larger cameras. Use the time-delay setting on your camera to allow time for the oscillations to damp out after pushing the shutter button.
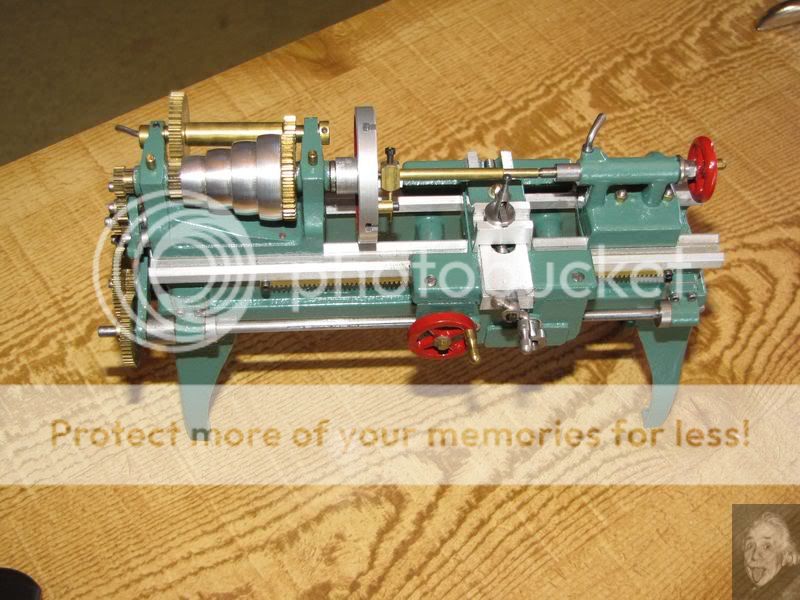
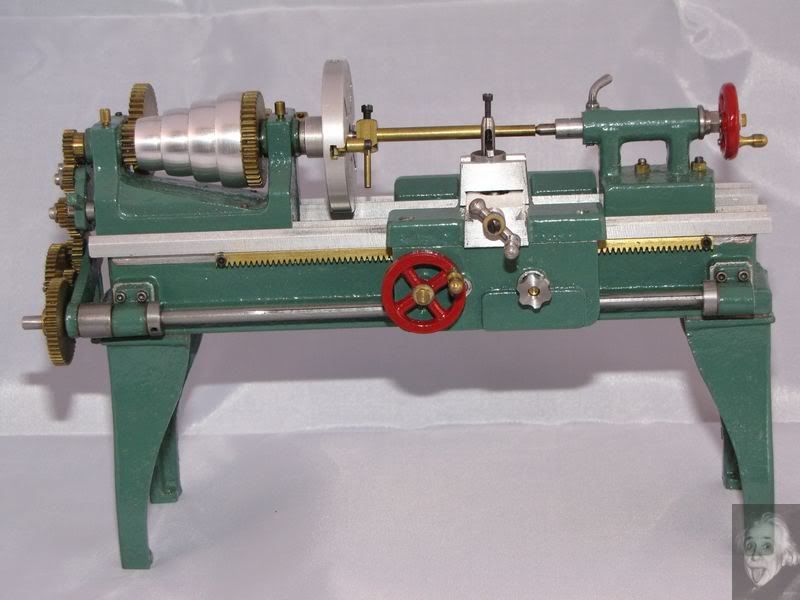
First, for comparison, I took a picture of the subject using ambient light:
Not terrible but also not great. Note how the table top pattern detracts from the subject.
Next I took the same shot using the automatic flash setting on the camera:
About all one can say for it is that it's brighter - way brighter. Lots of hot spots and reflections - not a shot I would treasure. When taking pictures where you are in control of the lighting, turn the camera flash off. Flash wielded by an expert photographer can do wonderful stuff (though he seldom uses the one mounted to the camera) but, for duffers like us, it's far better to leave it off and use controllable lighting.
With the subject in the light box, I first tried a flash shot with the exterior lights off:
Not nearly as bad as the flash shot above but look at all those shadows. Ugh.
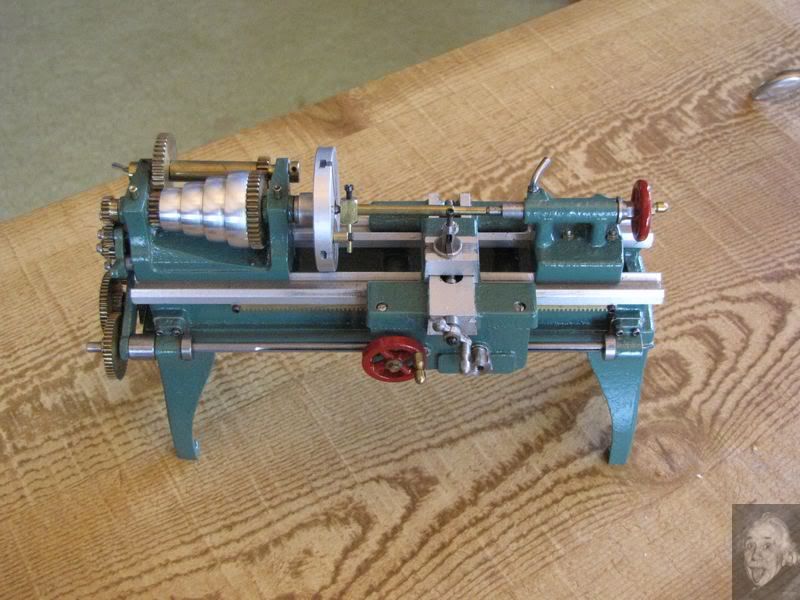
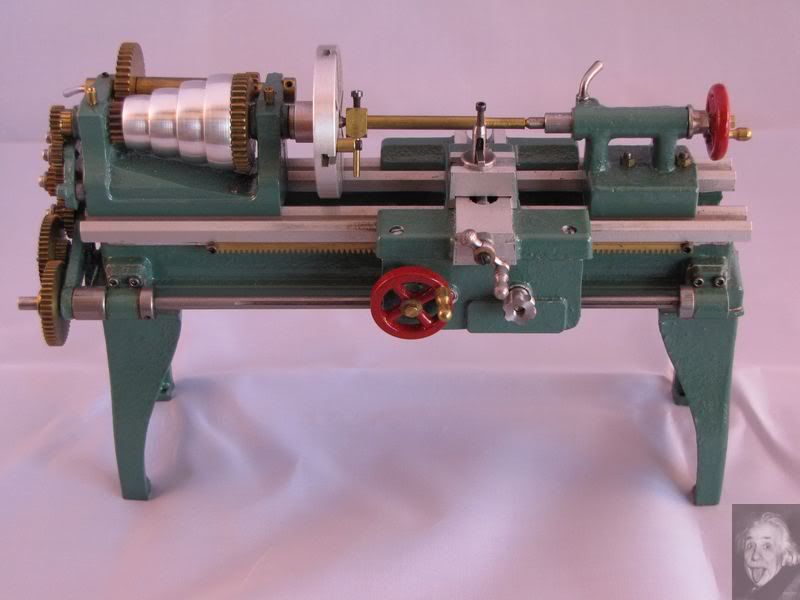
Finally, I took this shot with no flash and using the exterior floods. It's a little "warm". I probably need to adjust the white balance but... no shadows, no hot spots and no reflections. For the first shot with a new toy, I'm happy. I'm looking forward to more experiments.
Aside: I'm hoping that George Britnell will chime in on this thread. His photographs of his marvelous engines are so professional that I'm guessing he uses a light box too. Perhaps he'll be able to provide some further hints.
I had long intended to make a light box from some muslin and a cardboard box but one day, while strolling the aisles of Amazon, I came across this:
http://tinyurl.com/5tfmapn
My wife was after me for father's day suggestions so last Sunday one magically showed up at the homestead.
I like it well enough to recommend it and, if I'm recommending, I think it only fair to provide a brief review...
The entire package looks like this:
The black case contains the tripod and the two photo floods. In addition it unfolds to form the light box.
Aside: One of the problems with making one's own box is making it foldable for storage; a large empty box just takes up too much room. This neat package can slip behind a bookcase.
The separate envelope contains four colored cloth backdrops - white, red, blue, black.
Aside: One secret of good model photography is to use a neutral color, UNPATTERNED AND UNTEXTURED backdrop.
When all assembled, the setup looks like this:
The translucent panels that form the light box are held in place with Velcro along the edges; the back drop cloth attaches similarly. The two halogen lights have built-in tripods that drop out of their bases when the cap is unscrewed and each has a separate on-off switch.
The 'tripod' is really a monopod that attaches to a folding set of flat legs. The monopod has a tilt feature at the base and a ball joint camera mount at the top. While it's perfectly adequate, I must say that I prefer my miniature pan-tilt tripod. With the monopod structure, camera vibration can be a problem, especially so for larger cameras. Use the time-delay setting on your camera to allow time for the oscillations to damp out after pushing the shutter button.
First, for comparison, I took a picture of the subject using ambient light:
Not terrible but also not great. Note how the table top pattern detracts from the subject.
Next I took the same shot using the automatic flash setting on the camera:
About all one can say for it is that it's brighter - way brighter. Lots of hot spots and reflections - not a shot I would treasure. When taking pictures where you are in control of the lighting, turn the camera flash off. Flash wielded by an expert photographer can do wonderful stuff (though he seldom uses the one mounted to the camera) but, for duffers like us, it's far better to leave it off and use controllable lighting.
With the subject in the light box, I first tried a flash shot with the exterior lights off:
Not nearly as bad as the flash shot above but look at all those shadows. Ugh.
Finally, I took this shot with no flash and using the exterior floods. It's a little "warm". I probably need to adjust the white balance but... no shadows, no hot spots and no reflections. For the first shot with a new toy, I'm happy. I'm looking forward to more experiments.
Aside: I'm hoping that George Britnell will chime in on this thread. His photographs of his marvelous engines are so professional that I'm guessing he uses a light box too. Perhaps he'll be able to provide some further hints.


