No lathe or mill just using what I have

Home Model Engine Machinist Forum

Help Support Home Model Engine Machinist Forum:

This site may earn a commission from merchant affiliate links, including eBay, Amazon, and others.
really like your post Danny you are doing a great job,I would like to pick your brains if I can,how did you do such a good job of the seat,I made a wooden RR for my daughter and made a mess of the seat
DSC03463.jpg

see what I mean
Don
 
Last edited:
Danny
Your craftsmanship is really something to see. It is really a treat to see such fine work basically done by hand. It proves once again that you don't need a shop full of machine tools to create some really beautiful pieces.
Thank you for sharing.
Ernie J
 

Hello Ernie and Don, thank you for the kind words.

Ernie, I learned a lot from reading and looking at photo hasimproved my projects. Thank you again for the fine comments.

Don, I looked at the photo you sent and it is very nicewoodwork and craftsman ship for sure.

This is the second scratch built model I have accomplished,the one last year is my profile photo and of course this 1886 Benz. I havelearned a lot between the two and to get to the seat, on the Benz. Just so youknow, I had a time of it on the 1915 Speedster; I am no expert but here is whatI learned.

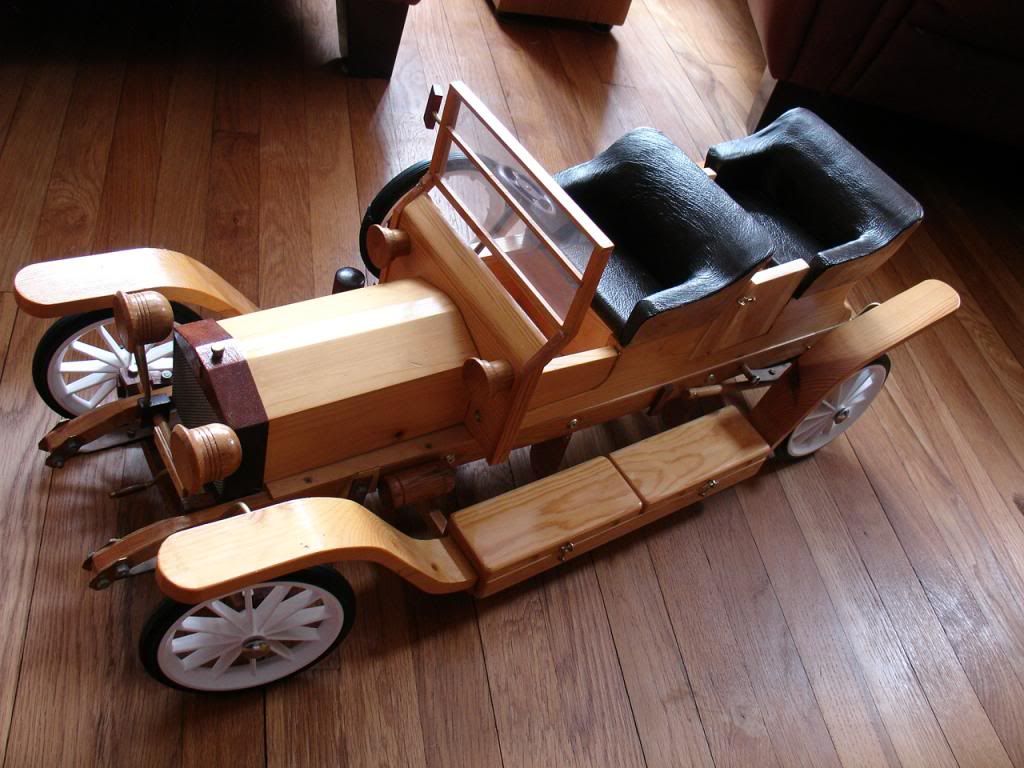
The 1915 is just about like your wooden model. On the seatsI made the seat pan a little bigger by only thickness of the material. I thenmade a second seat pan out of .010 aluminum,took a little hammer work, a very small hammer to pound it into a wooden moldof the seat pan. Once fitted and with room to spare, I learned that super gluewill make a seat work out well. I cut a thin piece of foam and super glued itto the aluminum pad. Once it was set I heated the material with a hair dryerand starting on the back side of the pan insert, and gluing it to the foam,worked it until it was glued and pressed into the foam. Once it was finished Itwas glued into the wooden pan on the car and the glued edges were hidden by thewood seat pan.

On the 1886, I cut all the seat pieces from thin imitationleather, cut a ¼ thick foam the size of the seat, turned all the parts insideout, while watching MASH on TV, I took needle in hand and stitched it up. Oncecomplete (leaving the back open) I turned it right side out, stuffed it, tooksome kind of pin I got from a craft store, pressed them through and bent a Jhook back into the seat. The back is a wooden pattern of the seat, foam gluedon the material heated and stretched over, The mounting bolts were put inbefore the foam and as you can see on the back a second board hides the glueddown material.

I hope I have not dragged on with this and hope it makes sense.

Thank you,
 
All in all, Looks rather nice.

Putting real pressure on yourself, get good tools and you will have to be nigh perfect...
 
Thanks for that Danny,I shall remake the seat when the mood takes me,looking forward to seeing your finished model.
Don
 
Danny - congratulations on some excellent workmanship and many thanks for sharing your adventure and methods with the group.

You are certainly an inspiration.
 
Hello to all! Have been gone for the past 4 weeks with no internet. I have a 2 month old grandson who has under went 2 major surgeys he is doing well. I hope to get back on track with my project. Thank you to all for the kind comments on the 1886 .
 
Nice to hear that your grandson is doing well. I hope he continues to do so. Maybe one day he will inherit the beautiful models you are making.

Jim
 
Good day, Thank you all for the concerns of my family. My grandson is doing great. Thank you for the support on my 1886 Benz. I hope to get back to work on it once I get set up in the new rent room here is Alaska. I also hope there is a 2MM tap. Will post updates soon.
 
Well, the bit and tap arrived and I get back on the 1886 Benz, It took a couple of days to get the valves and push rods installed. Kind of excited on how it is turning out. Never thought I could get it to look right. Making the exhast vale was a trick. I ended up using the spring our ot an ink pen for the valve spring. Thank you to all for the kind words. I will push on and tru to finish it up.

installed Valves 1.jpg


valves.jpg
 
Thank you Jim, it has been fun chatting with everyone on this great site.


Stillworking to finish this project. I added the gas vapor tank, gas tank and someplumbing. I added the wooden handle for the steering tiller. I carved it from apencil. I have not had luck finding some thin leather for the drive belt but, Iwill keep looking. I have to make the battery/tool box, add the wiring, cleanthe brass, and stain the wood. It has been a fun challenge.


IMG_20130422_200954_799.jpg


IMG_20130422_194142_028.jpg


IMG_20130422_211139_036.jpg


IMG_20130420_170942_317.jpg
 
Finished the 1886 Benz today. It has been a fun and learning priject. Thank you all for the kind words during this build. I am going to start the drawings for a 1912 Indian Motorcycle.

I have enjoyed following all the great works and outstanding craftsmanship everyone here has posted. Thank you, Danny

Picture1.jpg


Picture2.jpg


Picture3.jpg


Picture5.jpg
 
A great achievement Danny, congratulations and thanks for posting

Jim
 
Fantastic Model danny:cool:
pete
 

Latest posts

Back
Top