- Joined
- Oct 29, 2011
- Messages
- 287
- Reaction score
- 2
I'm sure this is all old hat for you experienced machinists, but this was only my second chuck backplate that I've made so a couple of things had me scratching my head.
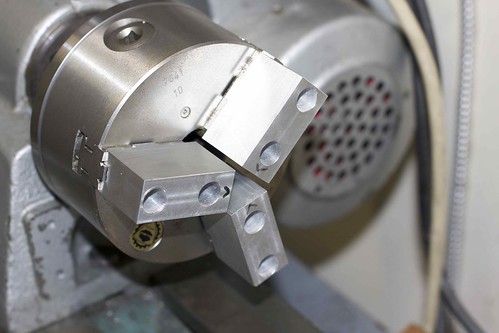
So I got a pretty good deal on this Bison 5" 3-jaw on eBay:
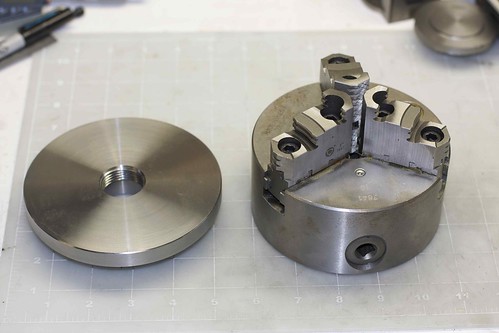
and you can see beside it the backplate that I ordered. My lathe is a 1962 Emco Maximat "Standard", which has a Myford-style spindle thread: 1 1/8 12TPI. Now backplates with that thread are as rare as hen's teeth in the US. Bob at New England Brass and Tool can supply one, but for $155! So I went with Arc Euro Trade in England, and got two for £16 each, and with shipping it was still only about $100. They are a nice fit on the spindle nose, too.
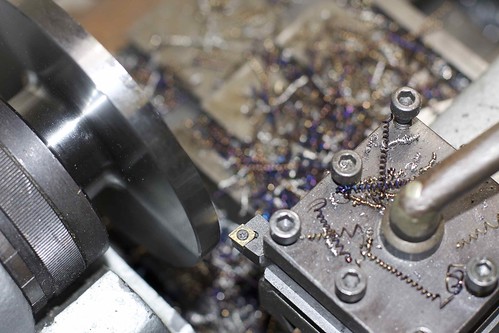
Once the backplates arrived it was time to turn one down for the chuck. I skimmed the face, then turned down the edge about 1/8", leaving a boss in the middle which was a close fit to the chuck body. I managed to get a nice fit. The steel of the backplate machined very nicely, leaving some pretty blue chips:
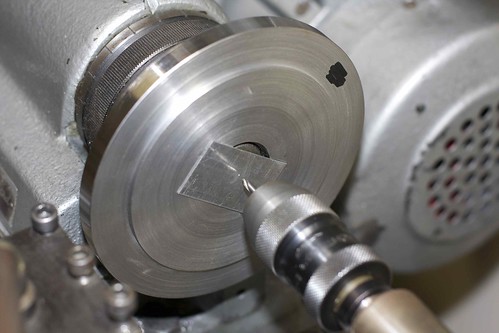
Now the next part was to locate the bolt holes. I don't have a DRO, and since the backplate has a hole in the center, it's tricky to mark out with dividers. So I ended up sticking a bit of Al sheet over the center with superglue. Then a small tap on that with a center drill gave me a center I could work from:
Next problem. Machining the backplate had tightened it on the spindle pretty well, and there was nothing to grab onto to get it off! That required a trip to the hardware store to get a strap wrench which did the trick!

For marking out the bolt holes I got the hole pattern from the Bison documents (54mm radius), and used dividers to mark that radius in six spots around the edge. The center point is raised above the edge by just over 1/8", but some quick math showed that it wasn't necessary to worry about how that affected the radius I just marked out. Then, without changing the dividers, I marked off six divisions around the circumference of the scribed circle; that marks off a hexagon, so the alternate points give me the 3 bolt hole locations.
I then clamped the backplate down on the milling table and drilled the 3 holes, cleaned up the burrs, and tested the fit. It was good!
And finally the acid test: how bad was the runout?
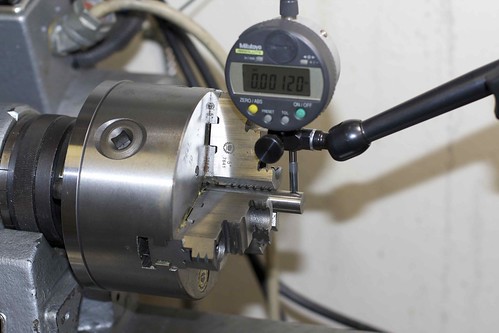
I get a max of 0.0012" (after zeroing on the opposite site, which I assume is the normal way to measure TIR?) , which I'm pretty happy with. I also checked the steps on the jaws, and they seem quite accurate, which is better than my Bison 4-jaw.
So I got a pretty good deal on this Bison 5" 3-jaw on eBay:
and you can see beside it the backplate that I ordered. My lathe is a 1962 Emco Maximat "Standard", which has a Myford-style spindle thread: 1 1/8 12TPI. Now backplates with that thread are as rare as hen's teeth in the US. Bob at New England Brass and Tool can supply one, but for $155! So I went with Arc Euro Trade in England, and got two for £16 each, and with shipping it was still only about $100. They are a nice fit on the spindle nose, too.
Once the backplates arrived it was time to turn one down for the chuck. I skimmed the face, then turned down the edge about 1/8", leaving a boss in the middle which was a close fit to the chuck body. I managed to get a nice fit. The steel of the backplate machined very nicely, leaving some pretty blue chips:
Now the next part was to locate the bolt holes. I don't have a DRO, and since the backplate has a hole in the center, it's tricky to mark out with dividers. So I ended up sticking a bit of Al sheet over the center with superglue. Then a small tap on that with a center drill gave me a center I could work from:
Next problem. Machining the backplate had tightened it on the spindle pretty well, and there was nothing to grab onto to get it off! That required a trip to the hardware store to get a strap wrench which did the trick!
For marking out the bolt holes I got the hole pattern from the Bison documents (54mm radius), and used dividers to mark that radius in six spots around the edge. The center point is raised above the edge by just over 1/8", but some quick math showed that it wasn't necessary to worry about how that affected the radius I just marked out. Then, without changing the dividers, I marked off six divisions around the circumference of the scribed circle; that marks off a hexagon, so the alternate points give me the 3 bolt hole locations.
I then clamped the backplate down on the milling table and drilled the 3 holes, cleaned up the burrs, and tested the fit. It was good!
And finally the acid test: how bad was the runout?
I get a max of 0.0012" (after zeroing on the opposite site, which I assume is the normal way to measure TIR?) , which I'm pretty happy with. I also checked the steps on the jaws, and they seem quite accurate, which is better than my Bison 4-jaw.
")