deere_x475guy
Well-Known Member
Hello gang, I wasn't real sure where to put this as it really isn't work in progress, rather just updating parts on an older engine I built.
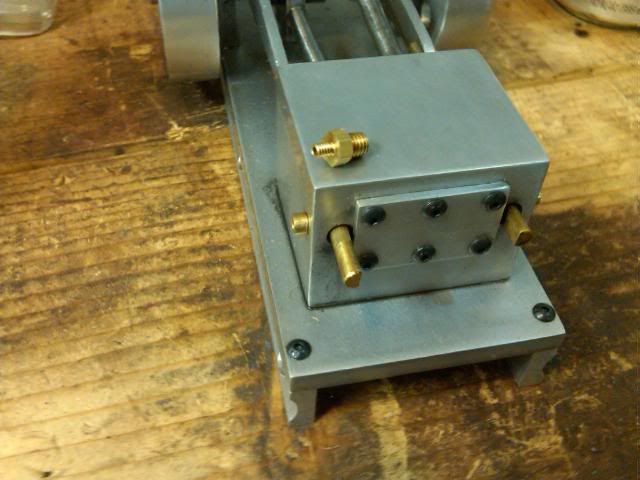
The air inlets never really held the 1/4'' plastic tubing very well. They were just brass rod that I threaded with an 1/8" hole drilled in them and a short smooth piece for the tubing to go over. DUH... Well for the 1st team build one of the pieces I did was the air inlets and Tin Falcon was kind enough to give me some pointers on how to go about making the barbs. I ended up grinding a tool just for the barbs and I used it again today to make the new air inlets.
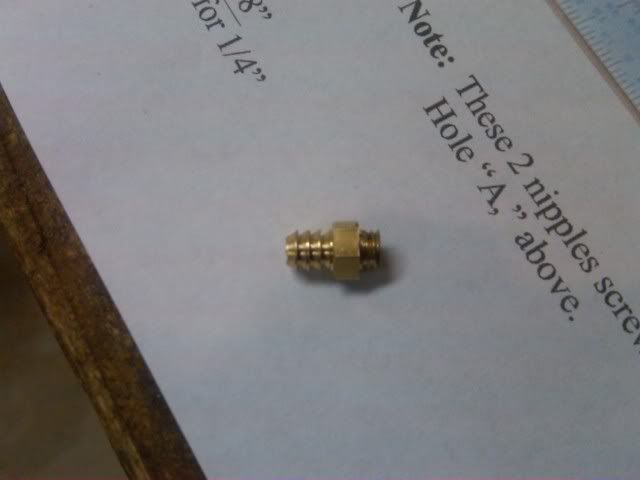
In the photo below you can see the original inlets and on top of the head is one of the connectors I built for the team build #1. The barbed end on this one is to small for my hose and the threads are not the same so I am off to build two more per Tins instructions.
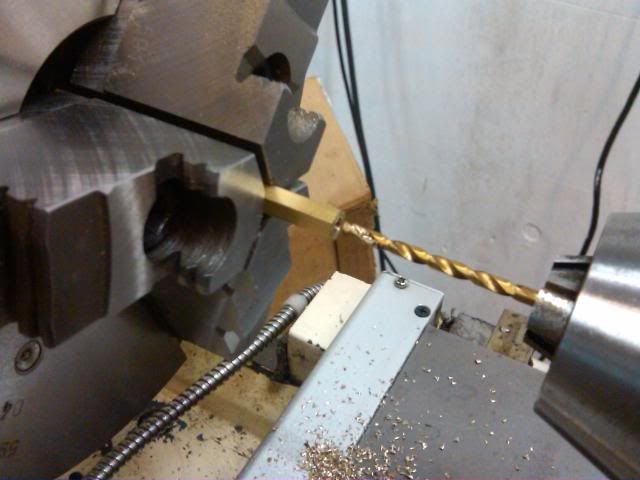
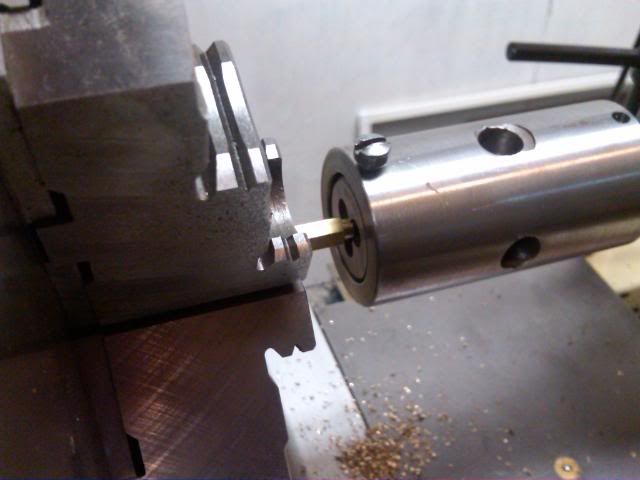
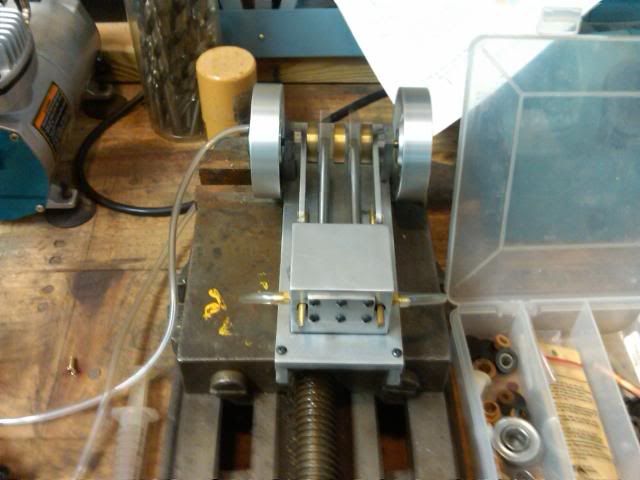
The first step was to center drill then drill 1" deep with an 1/8" drill. This depth will allow me to make two parts.
The next step was to turn the OD to .190 for a length of approx. .400.
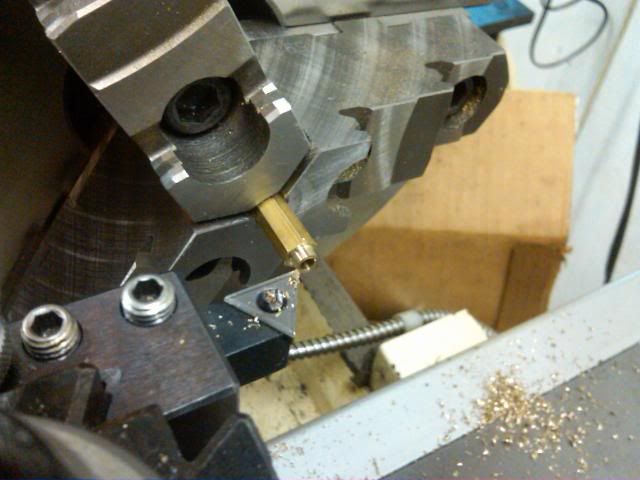
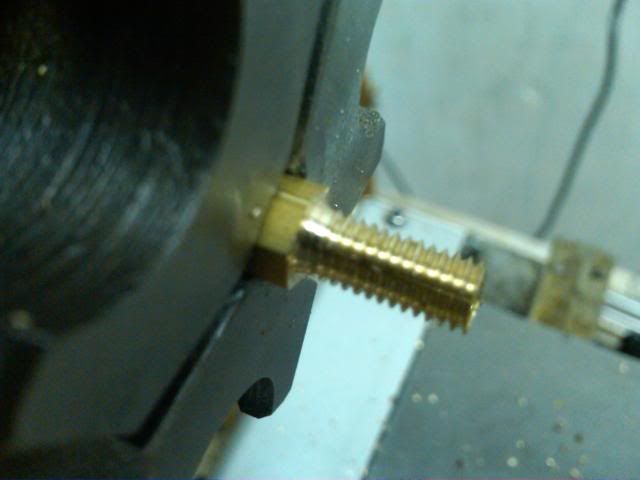
I didn't center point the threads for this as a die is much quicker when you have the correct one. I usually turn the die around after making the threads just so that I can thread as close as possible to the shoulder.
Here we have the threading done and next I will part off the at .100 so the air inlet doesn't jam against the valve once installed.
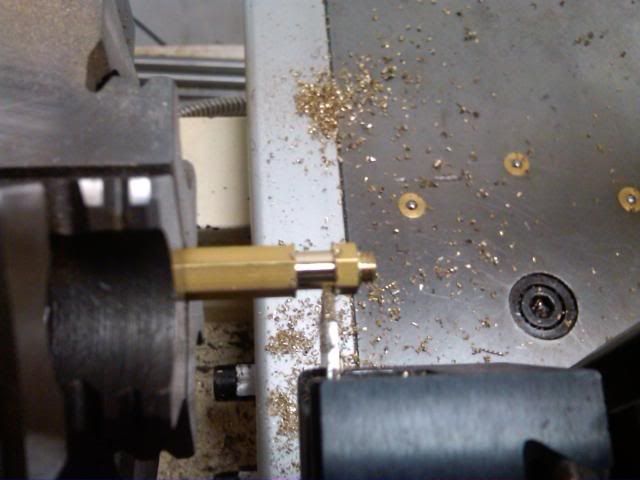
Now I need to turn a section to a dia. of .200 for a length of .200. I did this with my parting tool by taking just a little off the diameter at at time.
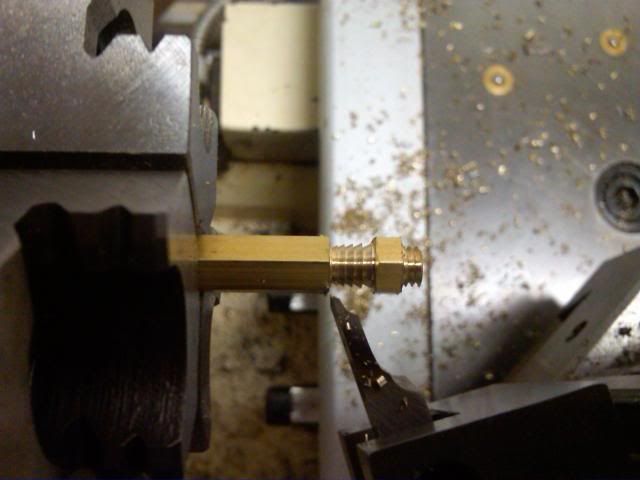
Next step was to make the barbs with my super custom self made barb cutting tool ;D. I chose a random angle for my compound that looked good and started barbing away. I parted off with the barb tool also. This gave a nice angled nose to the barb to make it easier to get the hose on.
Here is a shot of the ST with the new air inlets with barbs on her and running happily w/o worry of hoses falling off
Here is a short video I took:
[ame]http://www.youtube.com/watch?v=CAIiyXUvGx8[/ame]
Sorry about the quality of some of the pics and the video, I used the camera and video recorder on my Blackberry.
The air inlets never really held the 1/4'' plastic tubing very well. They were just brass rod that I threaded with an 1/8" hole drilled in them and a short smooth piece for the tubing to go over. DUH... Well for the 1st team build one of the pieces I did was the air inlets and Tin Falcon was kind enough to give me some pointers on how to go about making the barbs. I ended up grinding a tool just for the barbs and I used it again today to make the new air inlets.
In the photo below you can see the original inlets and on top of the head is one of the connectors I built for the team build #1. The barbed end on this one is to small for my hose and the threads are not the same so I am off to build two more per Tins instructions.
The first step was to center drill then drill 1" deep with an 1/8" drill. This depth will allow me to make two parts.
The next step was to turn the OD to .190 for a length of approx. .400.
I didn't center point the threads for this as a die is much quicker when you have the correct one. I usually turn the die around after making the threads just so that I can thread as close as possible to the shoulder.
Here we have the threading done and next I will part off the at .100 so the air inlet doesn't jam against the valve once installed.
Now I need to turn a section to a dia. of .200 for a length of .200. I did this with my parting tool by taking just a little off the diameter at at time.
Next step was to make the barbs with my super custom self made barb cutting tool ;D. I chose a random angle for my compound that looked good and started barbing away. I parted off with the barb tool also. This gave a nice angled nose to the barb to make it easier to get the hose on.
Here is a shot of the ST with the new air inlets with barbs on her and running happily w/o worry of hoses falling off
Here is a short video I took:
[ame]http://www.youtube.com/watch?v=CAIiyXUvGx8[/ame]
Sorry about the quality of some of the pics and the video, I used the camera and video recorder on my Blackberry.