My shop

Home Model Engine Machinist Forum

Help Support Home Model Engine Machinist Forum:

This site may earn a commission from merchant affiliate links, including eBay, Amazon, and others.
Eric,

I would agree on the power feed, it was a great addition to the mini mill. The feedback is nice and it does stop if you try a too fast feed rate or run to the end of the travel.

Thanks for the tip on the pins for the dro with the q-tip, I'll keep that in my back pocket if they start to give me fits.

My shop REALLY isn't always THAT clean......... ::)

-Regards, Bret
 
Well, after having my mill and lathe in my living room in their packing crates for about 3 months while waiting to clear and prepare my workshop, I've finally got them in there!!!

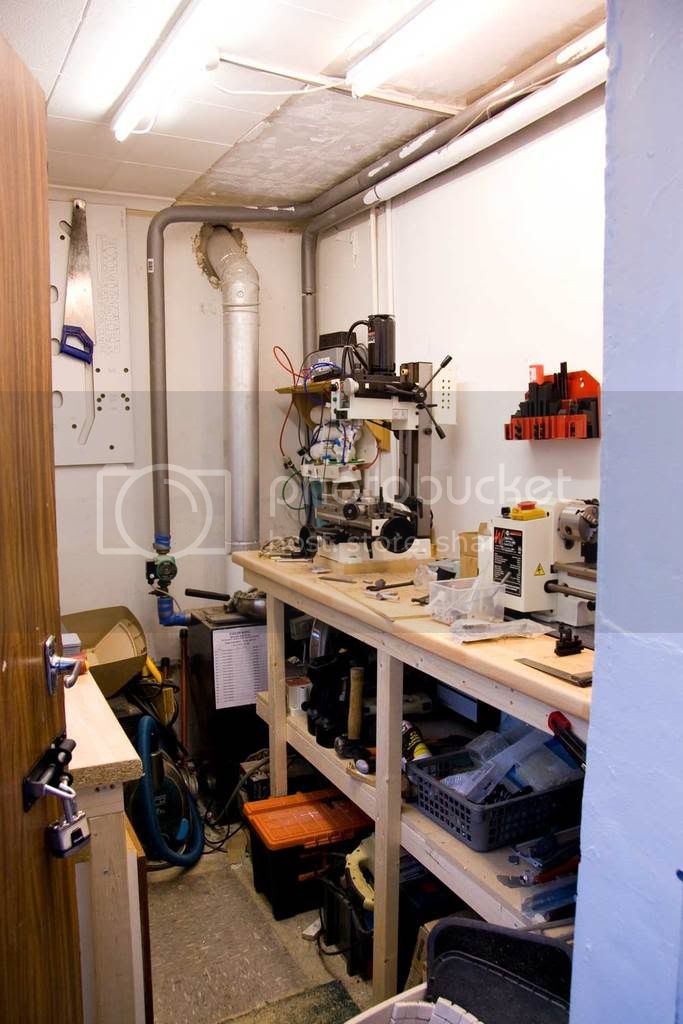
I had to build two benches, one for the mini-lathe and mini-mill, and the other for general assembly / disassembly / other non-mill/lathe functions. My workshop is about 5ft wide and about 10ft long and also houses our central heating oil-burner which also keeps the workshop warm and dry.

So without further ado, here are some pics of my little shop.

1st up is a view from the door.
_MG_5654-workshop-from-door.jpg


This is the bench with the lathe and mill mounted. ( please note the exceptional cleanness and tidyness :big: )
_MG_5655-lathe-and-mill.jpg


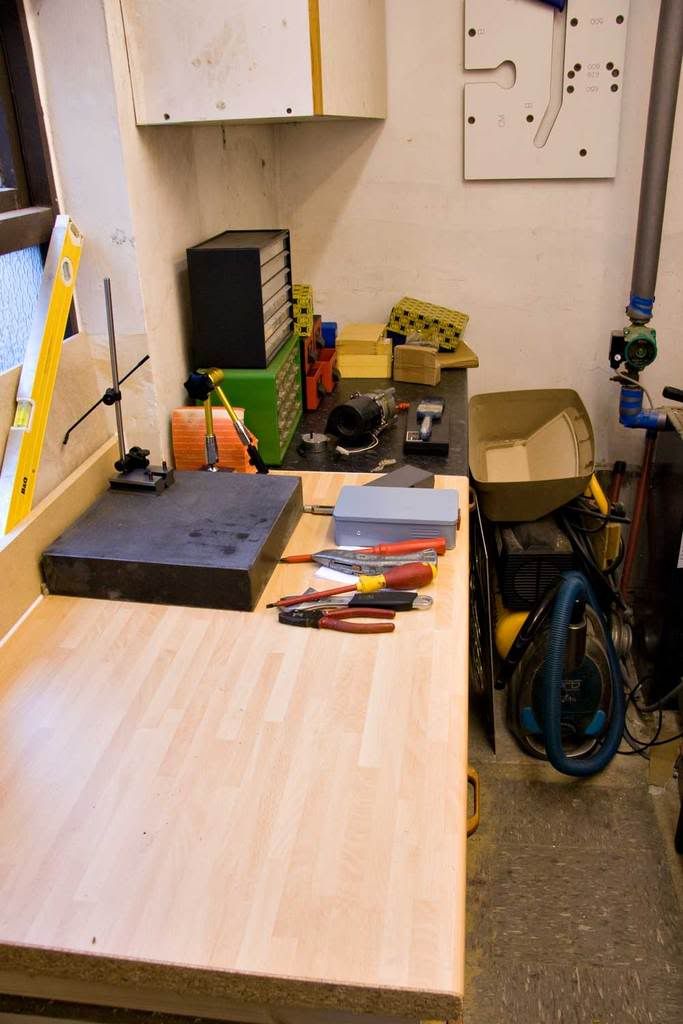
Here is the other bench
_MG_5661-setup-bench.jpg


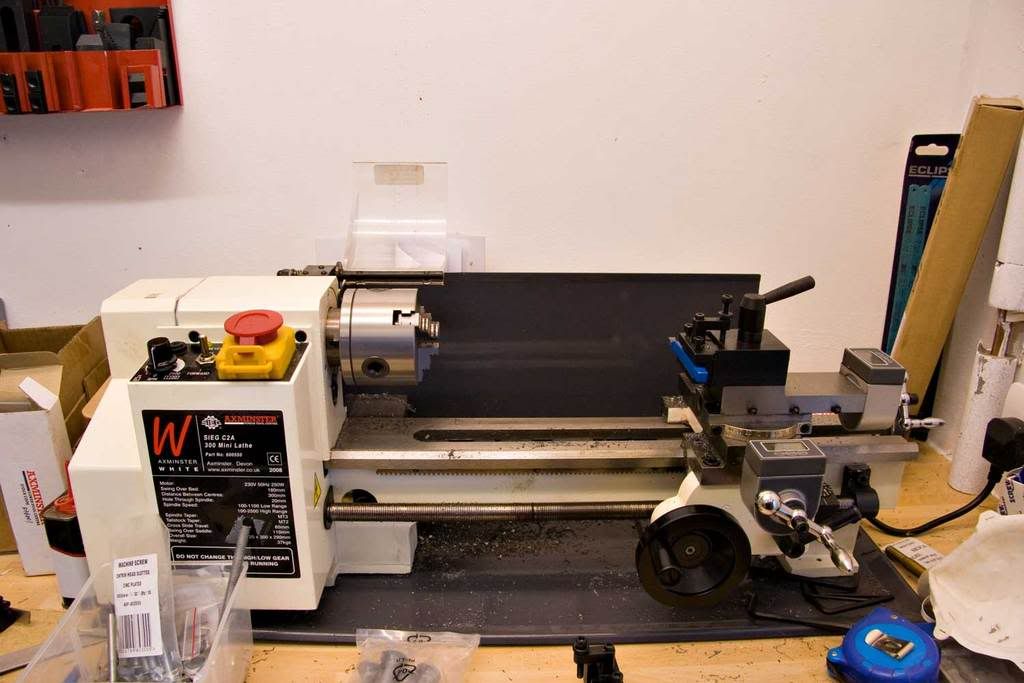
My Sieg C2a ( I think the "A" stands for "Eh!! I thought it looked bigger in the catalogue!!" )
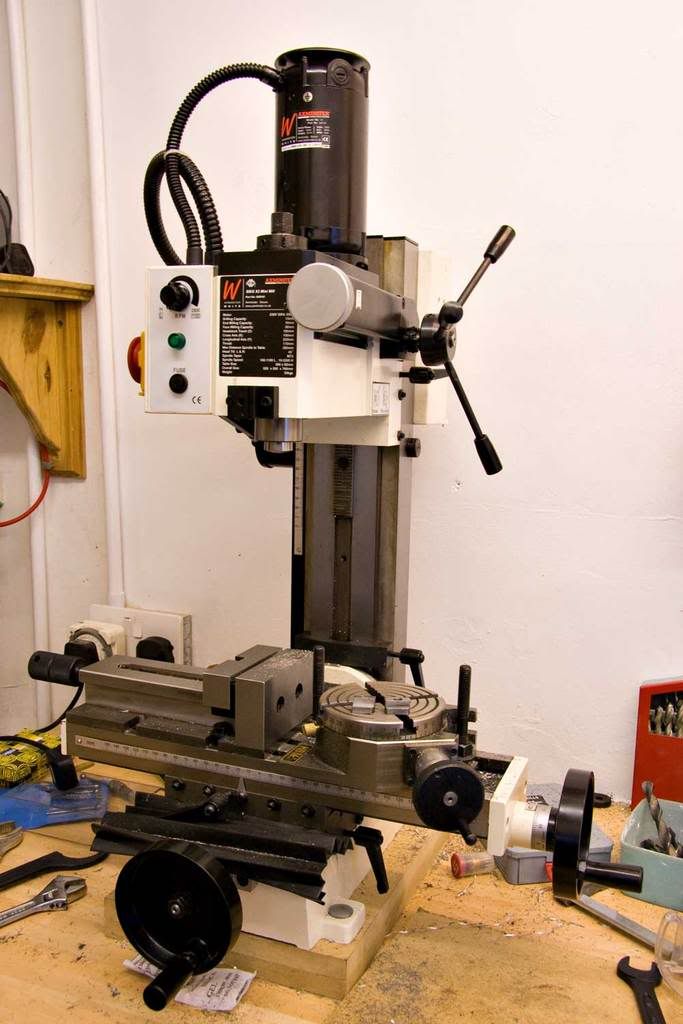
_MG_5657-lathe.jpg


My X2 mini-mill
_MG_5658-mill.jpg


Close up of my very 1st metalworking attempt, a spare chuck key.
_MG_5659-chuck-key.jpg


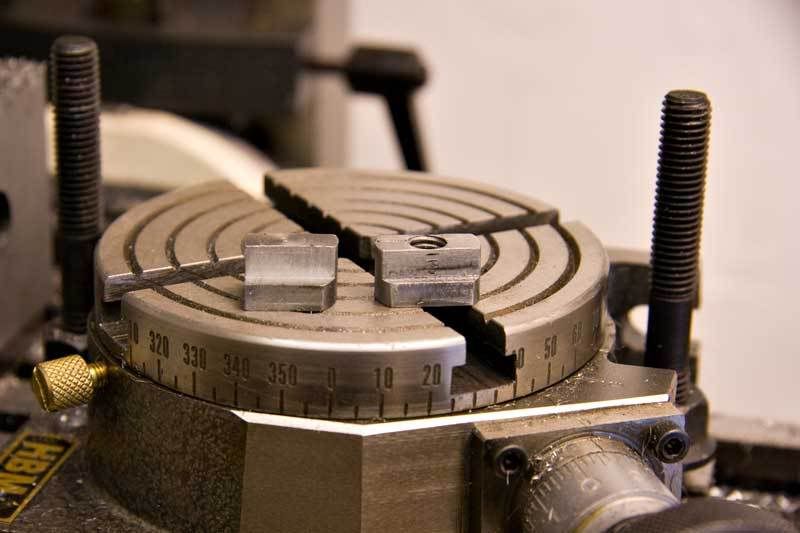
And finally (thank goodness I hear you say!!) my 1st real attempt at milling a chunk of metal to a specific size, a Tee nut for my Rotory Table. ( yea, I know I've got to make 3 more ) along with an unsucessful attempt.
_MG_5660-rotab-T-nut.jpg


So there we go, my first try into metalwork. I have to say that I have always found model engineering to be fascinating and have wanted for a long tome to get into it, and now I have, Woo Hoo!!!!

I have to agree with others who have commented that these machines ( the C2a and the X2 ) are great for the money, but that they are more of a kit than a finished machine from the perspective that they need some care and attention in setting up to get the best out of them. As a complete newbee at this I'm open and asking for all the tips and help you guys can offer as at the moment I can't part off anything denser than chocolate on the lathe!!!

The mill I find a little easier to get better results with, I've spent time Tramming it and adjusting the jibs for solidity yet with reasonably free movement. I think that I need to build some sort of a jig to eject whatever is in the MT3 taper as I really dont like whaling on the loosened drawbar with a mallet to get the chuck / collet loose. I'm thinking of something along the lines of a G-clamp that can apply pressure to the top of the drawbar, What do you guys do about releasing MT3's from your X2 ( or X2 type) mills?

My goal at the moment is to make a few jigs / tools for the lathe and mill, and then I'd like to make a wobbler or something similarly simple. I've learnt so much from lurking on here for so long, and I know that I'll learn so much more from all the collective experience of you guys.


Tim
 
and I'm very envious of the built in heating system 8) ............. now go have fun

CC
 
My workshop is about 5ft wide and about 10ft long and also houses our central heating oil-burner which also keeps the workshop warm and dry.
Looks like a nice cozy little shop with lots of head room.

Close up of my very 1st metalworking attempt, a spare chuck key.
Nice work even with a spare you will likely spend more time than you are willing to admit to looking for one.!!! LOL

What do you guys do about releasing MT3's from your X2 ( or X2 type) mills?
A small mallet. Remember you do not need exesive force to tighten a draw bar.
at the moment I can't part off anything denser than chocolate on the lathe!!
remember the basics with parting
1) sharp tool of propper clearance
2) tool square to work
3)Use a little cutting fluid
4) try inverting the tool and running the spindle in reverse

The biggest problem I have with the mill is the unreliable z axis feed this is easily overcome with a dial indicator on a magnetic holder. Just unlocking and re-locking the z axis clamp may give a 2-3 thousands down feed.
Congrats on getting the shop up and running
Tin
 
G'day Tim, we have the same gadgets 'cept mine are greenish

seems we have the same ammount of space too

yes they take some fiddlin to get set up correctly but once done they are great little machines

i wish you lots of time on them and lots of results to show here

cheers and enjoy!

jack
 
Tin Falcon said:
A small mallet. Remember you do not need exesive force to tighten a draw bar.
Ah, I think that may be my problem, my fear of a 4 flute mill chasing me has made me perhaps tighten the drawbar up too much.

remember the basics with parting
1) sharp tool of propper clearance
2) tool square to work
3)Use a little cutting fluid
4) try inverting the tool and running the spindle in reverse
I will try those hints, thank you very much.
The biggest problem I have with the mill is the unreliable z axis feed this is easily overcome with a dial indicator on a magnetic holder. Just unlocking and re-locking the z axis clamp may give a 2-3 thousands down feed.
Congrats on getting the shop up and running
Tin

Its very true about the z axis on these mills, you turn almost 180 degrees on the fine downfeed before anything can happen!!! I guess that is what you call backlash!!

CrewCab said:
and I'm very envious of the built in heating system 8) ............. now go have fun

CC
rake60 said:
Looking Good Tim!

Rick

jack404 said:
i wish you lots of time on them and lots of results to show here

Thanks for all the comments guys, I think I'm gonna have a real good time reducing larger chunks of metal to somewhat smaller chunks of metal.

Tim
 
Hi Tim

Welcome aboard. Looks to me like you have done some kitchen fitting in your time (worktop jig hanging in the background) ;D
You have found and joined the best place to be for us chip makers. As you say the seig machines are a kit of parts ( I have a CO ) but it does give you the basics with which to grow your skills, and here is the best place to share your work and your questions.
Happy metal redesigning.

Kind Regards

Malcolm
 
malcolmt said:
Looks to me like you have done some kitchen fitting in your time (worktop jig hanging in the background) ;D

Yea, I fitted out my own kitchen, the jig made it soo easy to get the worktop corners looking pro ( that and having access to a 2.5Hp router!! ).
You have found and joined the best place to be for us chip makers. As you say the seig machines are a kit of parts ( I have a CO ) but it does give you the basics with which to grow your skills, and here is the best place to share your work and your questions.
Happy metal redesigning

Thanks for the welcome Malcolm

Tim
 
Spud,

Welcome :)

Nice shop :)

A little tip for making T Nuts - Take a piece of bar long enough for the number you want.
Form one long tee.
Drill the holes for the bolts ie tapping drill size, ( T nuts are more versatile if the bolt hole is at one end rather than in the centre of the nut).
Tap the bolt holes.
Saw off into individual nuts.

Hope this helps ???

Regards
Bob
 
Twinsquirrel said:
Hey Spud... welcome

Thanks mate, this is a really great place, I have learned so much just from reading and tapping into the collective wisdom and experience here for the last few months.

I just lurked for quite a long time as I had not got my shop up and running, but now I'm producing chips / shavings / curls and occasionally a usable part !!

Tim
 
Nice. I have both of those units (in red tho!)

The X2 is nice for what it is, a few mods make it a ton better. You might want to get the belt drive conversion for it asap.

Eric

BTW: Welcome to the club! Can't wait to see what you do with it.
 
Brass_Machine said:
The X2 is nice for what it is, a few mods make it a ton better. You might want to get the belt drive conversion for it asap.

Yea, I really want to do the belt drive mod, because of reading what can happen to the plastic drive gear when making interupted cuts I have avoided buying / making a fly cutter until I make the belt drive mod.

I have the air-spring mod kit already, just got to fit it.

Thanks for the welcome Eric,

Tim
 
spuddevans said:
Yea, I really want to do the belt drive mod, because of reading what can happen to the plastic drive gear when making interupted cuts I have avoided buying / making a fly cutter until I make the belt drive mod.

I have the air-spring mod kit already, just got to fit it.

Thanks for the welcome Eric,

Tim

That's my next mod (in conjunction with CNCing the X2). The C2 lathe is in my opinion severely underated. I actually use mine as a production lathe... and I have the small version (7x10).

Adding a DRO helps a lot for the X2 as well.

Eric
 
Maryak said:
Thankyou.
Nice shop :)
Thankyou again !!
A little tip for making T Nuts - Take a piece of bar long enough for the number you want.
Form one long tee.
Drill the holes for the bolts ie tapping drill size, ( T nuts are more versatile if the bolt hole is at one end rather than in the centre of the nut).
Tap the bolt holes.
Saw off into individual nuts.

Hope this helps ???

Ahh, that would make it a lot easier to do a whole row at once, I'm currently most of the way done on T nut No.2 but I'll try doing the final 2 together.

And thanks for the tip about the bolt hole being more useful at one end, I'll do that also on the last two.

Tim
 
Brass_Machine said:
Nice. I have both of those units (in red tho!)

The X2 is nice for what it is, a few mods make it a ton better. You might want to get the belt drive conversion for it asap.

Eric

BTW: Welcome to the club! Can't wait to see what you do with it.

better yet make your belt drive parts. there are plans somewhere.
nice shop really like the built in heater.ive the plans somewhere. if you want them ill look.


(edit) ive put the plans pdf in the downloads area. ;D
 
itowbig said:
better yet make your belt drive parts. there are plans somewhere.
nice shop really like the built in heater.ive the plans somewhere. if you want them ill look.


(edit) ive put the plans pdf in the downloads area. ;D

That is fantastic mate, downloaded and saved for reference. Thank you so much. I had thought about making my own belt drive conversion, especially as the only place that I've found selling a kit is littlemachineshop and I know that I'd get stung by the postage to Northern Ireland and then stung even harder by import taxes.

Can I ask if you use both speeds on your belt-drive-converted-mill? Do you feel that it's essential to have the 2 speeds available?

Just wondering if a single speed belt drive mod be easier for a newbee like me to manufacture?

Again, a big thanks for your belt drive mod plans, very much appreciated.

Tim
 
spuddevans said:
Just wondering if a single speed belt drive mod be easier for a newbee like me to manufacture?

The only time mine has been in high speed is to see if it would work ;D ............... seriously though I doubt you would use it for milling but perhaps for drilling, particularly small holes, so if you have a separate drill press then single speed would probably be fine.

CC
 
Back
Top