My 1st engine is off the ground!

Home Model Engine Machinist Forum

Help Support Home Model Engine Machinist Forum:

This site may earn a commission from merchant affiliate links, including eBay, Amazon, and others.

Wagon173

Senior Member
Joined
Dec 4, 2012
Messages
129
Reaction score
32
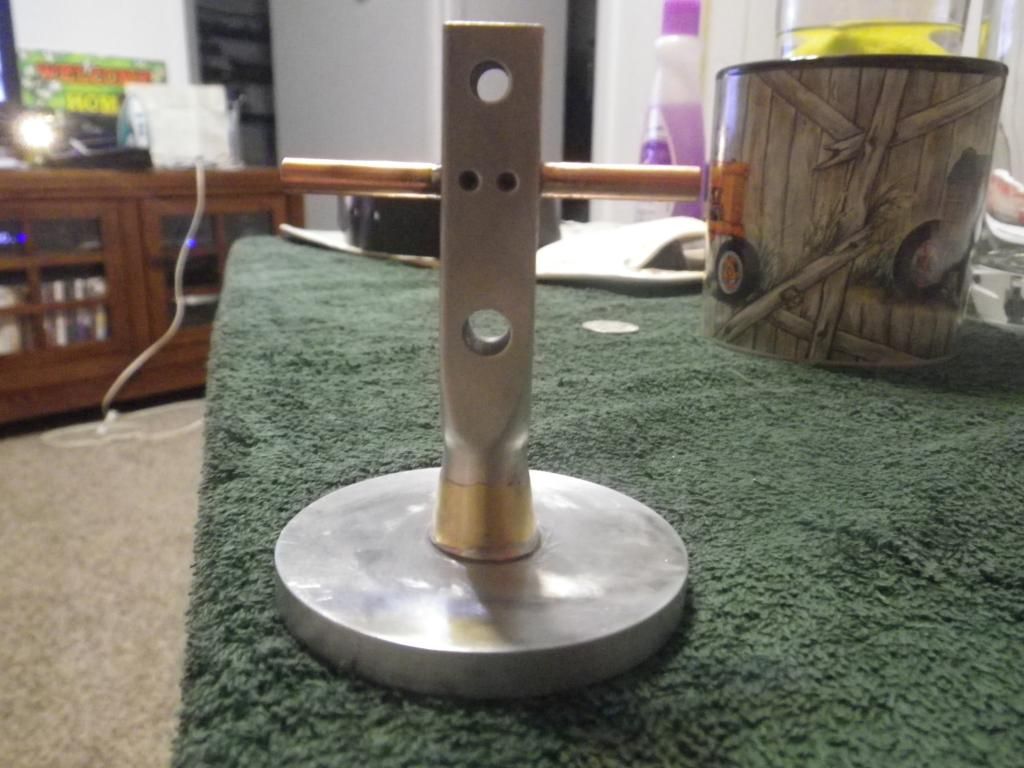
First off, I'd like to thank everybody in here for infinite patience with what, I'm sure, have been beginner questions that have been asked a thousand times before I asked them! None the less, not one negative word and a lot of encouragement and wonderful advice! You'll make a machinist out of me yet! I've only gotten to put in about 2 or 3 hours on my lathe so far, but I've had an absolute blast! The UPS guy just now dropped off my milling attachment so I'll be unstoppable now! I'm not going to explain each pic as they're pretty basic so far and they're briefly explained on photo bucket. But here is the beginning of the david wobbler! I'll update this as I get further. I'm hoping to finish the flywheel tonight.

http://s458.beta.photobucket.com/user/wagon_wagon/media/IMGP0306_zpsa4125200.jpg.html

http://s458.beta.photobucket.com/user/wagon_wagon/media/IMGP0305_zps6658ab5b.jpg.html

http://s458.beta.photobucket.com/user/wagon_wagon/media/IMGP0304_zpse990d95b.jpg.html

http://s458.beta.photobucket.com/user/wagon_wagon/media/IMGP0303_zps1c4ebd6f.jpg.html

http://s458.beta.photobucket.com/user/wagon_wagon/media/IMGP0302_zpsd03e9edd.jpg.html
 
Hey wagonator! Congrats on starting your first engine.


When you copy the link from photobucket, there are 4 links under the photo to choose from. If you select the bottom one your pics will show up in your post instead of the link to the pic.
 
Okay, awesome. Thanks steve. I'll post the updated pics all professional-like. ;D
 
Okay so I have completed the base and the stand-up. I ran into a snag when I went to solder it. Unfortunately, I learned the hard way that solder doesn't mesh well with the, "If some is good, more is better." theory. The dremel took care of the excess around the valves and I'm going to rechuck the engine by the base and reface it to get rid of the stuff on bottom. ...and all the gouges where the dremel tried to eat the base. One huge disappointment I ran into though was that the milling attachment I got from LMS only travels about half way through the spindle before the cross slide runs out of threads. I'll try to take a picture of it later to see if maybe I'm doing something wrong or in case that last sentence doesn't make any sense. I took it all apart and tried to reconfigure it but it only bolts together one way. :(

IMGP0309_zps2718eee4.jpg
 
So I have almost the whole engine done now. I forgot to grab my camera out of the shop though so I'll post more and hopefully a video if it runs. I've definitely learned a lot. Mostly that making a back cut on a small milling attachment is bad news. I've also learned that math should be done twice : s so now that I've machined three cylinders, I have one that should work. I took some polishing compound and lapped the valves last night. I'm not sure you need to go that far with a wobbler and it wasn't in the plans but I figured it couldn't hurt.
 
Well, I figured it was time to update progress. I have pictures, but I keep forgetting to take my camera out of the darn garage. I jacked up 3 aluminum cylinders. Not so common sense told me that aluminum was just too cheap. Example: If I screw it up, no harm, no foul. So I bought brass. After I jacked up the 1st brass cylinder which was about 7 bucks in brass by just not paying close enough attention to layout, I have sucessfully made a good one. Fifth time is a charm! I'm still learning new places to source material locally and online which is cool. It's an epic pain to get cylinders to any sort of tolerance with drills so I just got a set of 29 reamers and another set of 14 over/under reamers. Recent scores: I surfed craigslist long enough and found a jet 12 inch drill press with a digital tach and lazer alignment and a worklight for 150 cause it had a burr on the quill stop from the factory. I also finally got a milling machine. I opted for the microlux as I'm in the middle of transitioning out of the army so I want something that is cheap but quality. So far I can't complain. The collet chuck I got from micromark took some light machining to make okay, though. I think my wife hates your website and my new hobby, but you guys rock man! -Brandon
 
... I'm still learning new places to source material locally and online which is cool....

I am new to model making as well, and finding metal is a challenge. Seems there are some good online shops, but the shipping is more than the material. I live in the middle of nowhere, although Adrian All Metal is about twenty miles away. Think I'll make a general shopping list and build a small stash.

For my first engine and next two in the works, I purchased material kits to solve the problem. Also, with a material kit and the EXACT right amount, you work slow and double check everything. Seems to be an effective way to learn.

Anyway, post the pictures and video.
 
I've been using metal supermarkets as one of their stores is about 3 miles away. For other stuff I go to online metal as they have one in seattle so I can make a day trip and see family also. I have a project I'm looking at that calls for cast iron and I've read some advise on here that said if you place a phone order with speedy metals you can select usps priority and save a lot on shipping. Once I'm out, I'll be going back to the middle of nowhere too.
 
Back
Top