Moriya Stirling Fan - Double size

Home Model Engine Machinist Forum

Help Support Home Model Engine Machinist Forum:

This site may earn a commission from merchant affiliate links, including eBay, Amazon, and others.

David Morrow

Well-Known Member
Joined
Sep 8, 2008
Messages
227
Reaction score
60
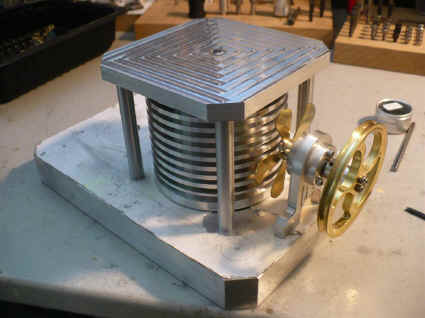
The short version of a long story is that after having built one Moriya ( a variant, really ), I wanted to repeat the experience without building the same thing. So double size it is. I'll post the pic's here and a brief description. For a bit more detail, you can have a look at the build page here :
http://www.ldrider.ca/cnc/moriya-double/moriya-double-1.htm

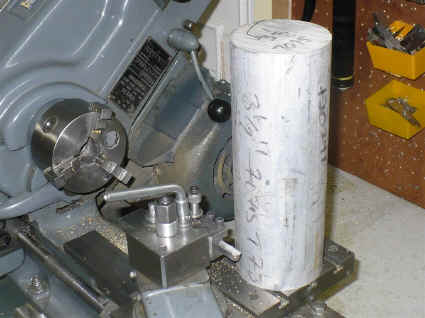
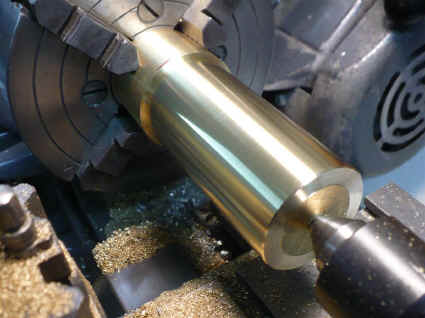
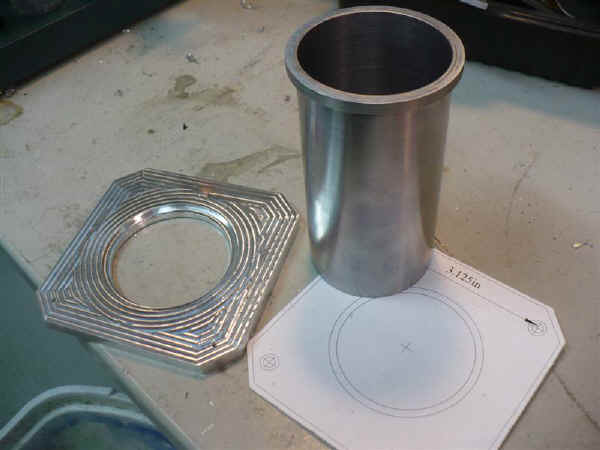
The material for this thing, at least the material for the base and the displacer cylinder are awfully big for my little Sherline CNC mill and Myford S7 lathe.

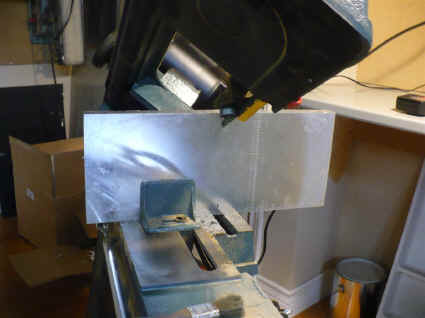
I cut the 1" thick slab of aluminum down to size first on the band saw.

moriya-double-01.JPG


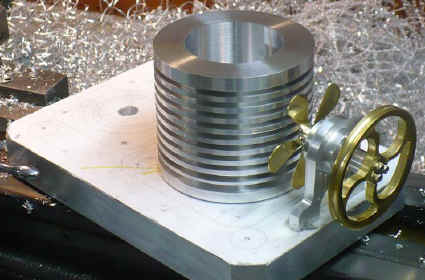
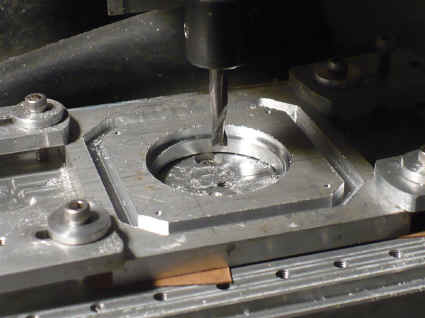
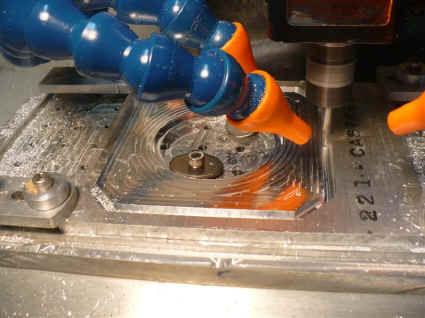
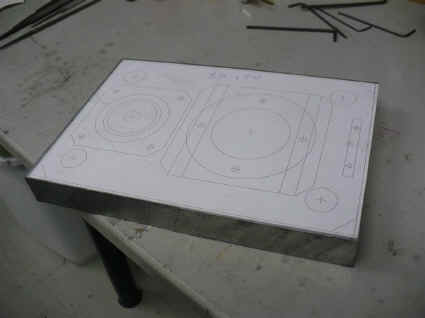
Next, I printed and glued the cad drawing to the work piece. For more complex jobs this really helps ensure everything gets done and in the right order.

moriya-double-02.JPG


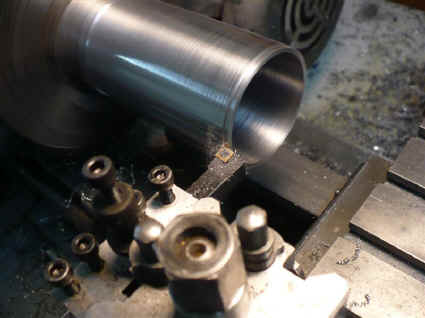
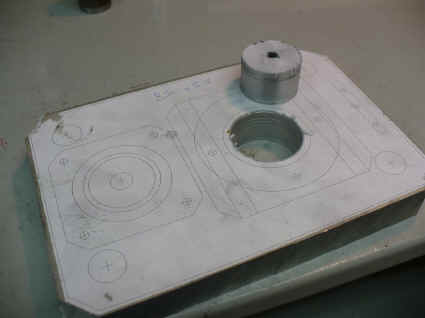
The bulk of the displacer hole gets cut out with a hole saw. This takes all of 2-3 minutes on the drill press and means much easy job for the light mill.

moriya-double-03.JPG


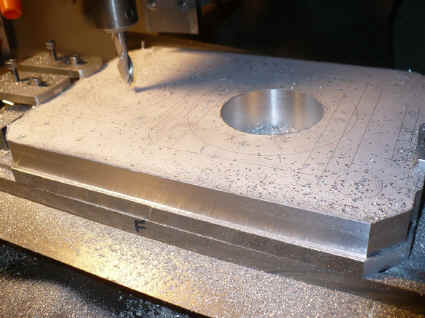
Being so thick, I don't like to commit to milling down 1 inch as part of a single operation. So, I break it up into smaller jobs of about .250" - .350" at a time.

moriya-double-04.JPG


moriya-double-05.JPG


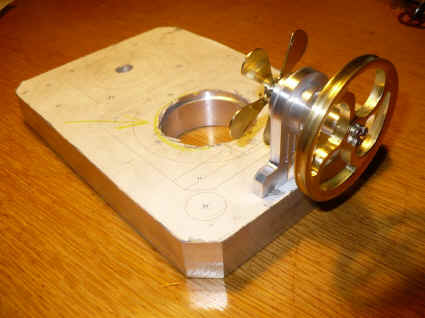
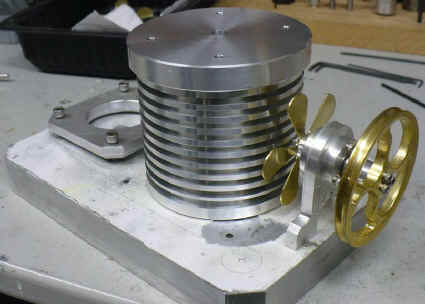
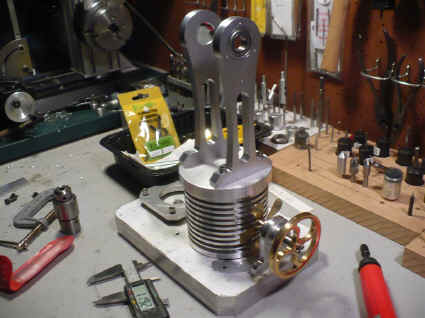
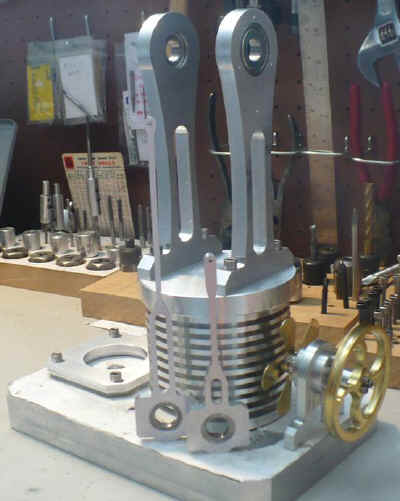
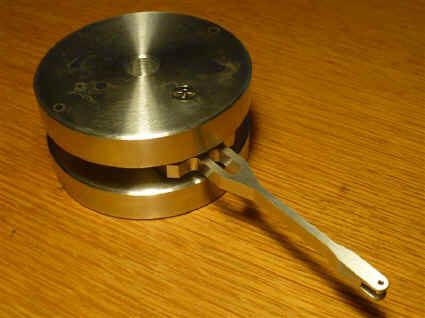
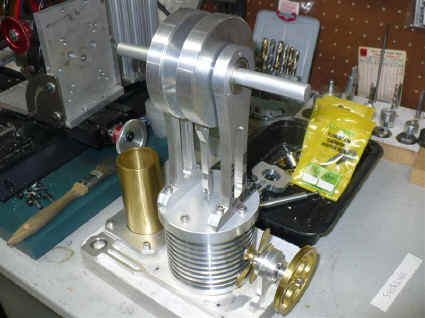
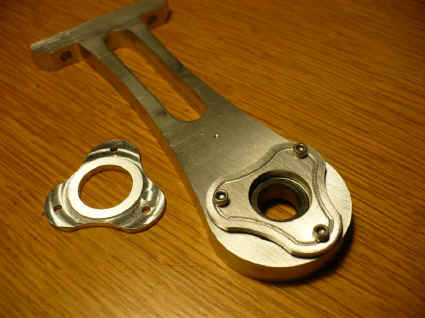
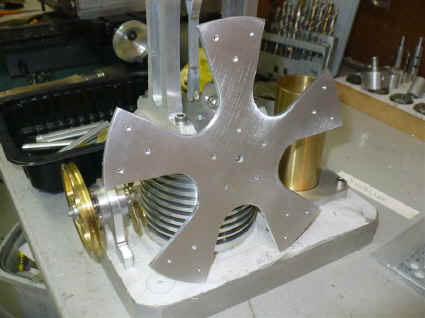
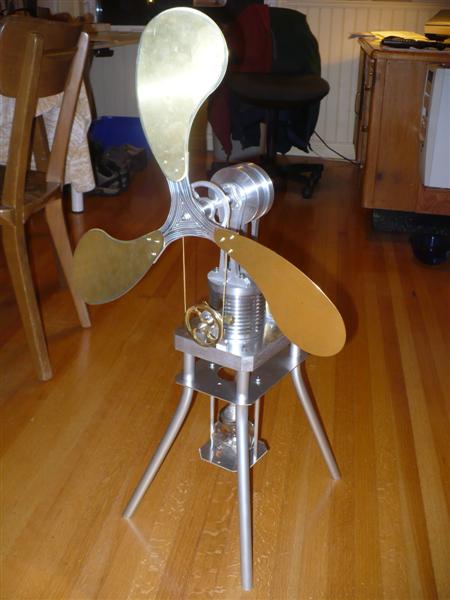
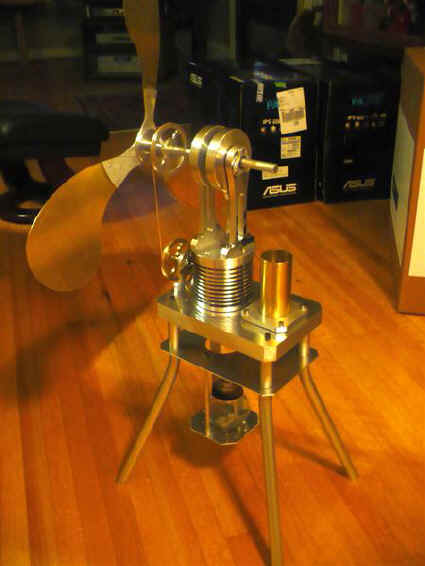
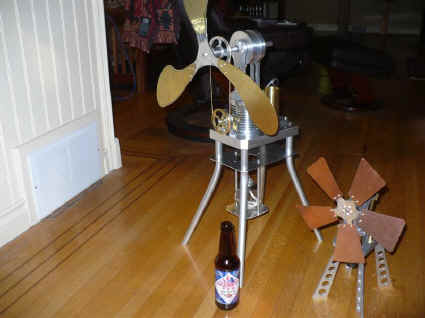
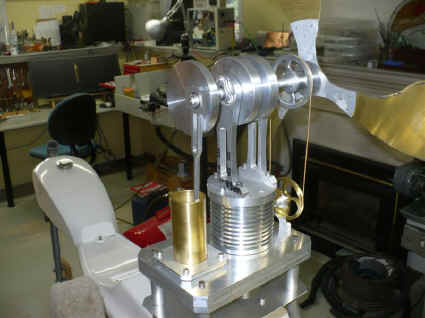
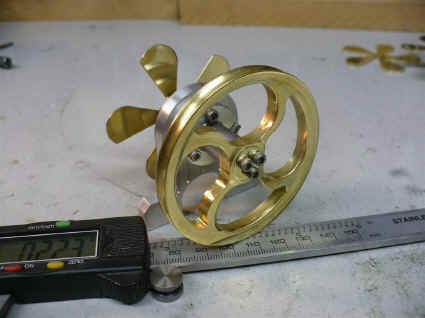
I got a bit ahead of myself in the beginning. A sneak preview... but it's a secret so do tell and don't ask.

moriya-double-06.JPG


Base is cut out and partially drilled. First sub-assembly mounted.

moriya-double-08.JPG
 
Looks good David.
Moriya is one of my favorite engines.
Gail in NM
 
A bit of progress over the past couple of days.

One big lump of aluminum reduced to a smaller lump of aluminum.

moriya-double-09.JPG


moriya-double-11.JPG


That was exhausting...
 
For a variety of reasons, I made the cold end cap square but I don't know if I like it yet. I can rework it so that it's round but I'll wait until the rest of the fan is mostly finished to see how it all fits in esthetically.

moriya-double-13.JPG


Power cylinder is now started. It'll be about 2" O.D. x 4" long

moriya-double-14.JPG


That looks great David!

Will be an excellent Stirling fan once completed!!
Nice and big and purposeful!!! ;D

Andrew
 

Very nice work!

I have the Moriya book too. One day...

Thanks for the inspiration.
 
Due to the large diameter of the brass needed to properly scale up the power cylinder, I minimized it and made a retainer to secure it to the base instead.

moriya-double-15.JPG


moriya-double-16.JPG


I decided that the square cap on the cold end just didn't quite work esthetically so I turned it down on the lathe.

moriya-double-17.JPG
 
Crank brackets cut but with a bit of finishing work remaining. My eyes continue to have difficulty trying to get a handle on the relative proportion of some of the parts but I have no doubt that they are correct.


moriya-double-19.JPG
 
After a whole lot of time making the displacer connecting rod, I decided that it was going to be too heavy. I made another one but this one is not only much lighter, but it's a better visual match to the power piston connecting rod.


moriya-double-23.JPG
 
Hi David

I really like this one, it’s nice and solid, it will be a treat to watch when it’s running. I will be following along. By the way I love the fan flywheel, really smooth and curvy.

Regards Les
 
  • Like
Reactions: xjs
Well, it's Fall again and the bike is in the garage for the Winter so it's back to the basement.

Here are the crankshaft lobes. I'm afraid that they may be a bit heavy so I may have to reduce the diameter, mill some lightening holes or mill something decorative in them to get rid of some weight. That will have to wait until the job is otherwise complete to see how it runs.

moriya-double-26.JPG


moriya-double-27.JPG


moriya-double-28.JPG
 
I made the fan blade web last night ( blades and hub to follow ).

moriya-double-30.JPG


One quirky little element that I added was a mini fan to help keep the displacer cylinder cool. I don't know if it will work or not but it should add some visual and mechanical interest to the project. Here is the drive pulley up close and a full frontal shot of the project to date.

moriya-double-31.JPG


moriya-double-32.JPG
 
The blade assembly felt like it was a little heavy with just three blades attached and I was a bit concerned about adding two more. So, I redesigned the web for three blades ( which also made the web lighter. )

moriya-double-33.JPG


moriya-double-34.JPG
 
One part of this project that I was a bit unsure of was making the legs. As it turned out, it was easier that I figured. I made a jig from plywood and MDF, made some careful measurements, and put my shoulder into it. So, now we have legs. I also made a platform that will help to secure the legs but also serve to ( hopefully ) deflect some of the heat away from the cold end as well as serve as a place for yet another platform below that to place the alcohol lamp.

moriya-double-37.JPG


moriya-double-38.JPG
 
Here's an idea of size; this new fan compared to a regular sized Moriya ( variant ) on the right. And a bottle of IPA for those who prefer that sort of comparison ( my preference ).

moriya-double-39.JPG
 
Power cylinder crank arm and connecting rod now complete and installed.

moriya-double-40.JPG

 
The hot cap is now mostly made; I used a piece of steel tubing which was fortunately ready made with an I.D. just a few thou' sort of what my finished dimension was going to be - a huge bonus in lathe time. And the O.D. was just over .250" over the finished dimension. The next step will be to silver solder the end plate on. I will likely use a piece of very thin copper or brass for its very high thermal conductivity.

And, I milled the retainer to hold the cylinder to the base.

moriya-double-41.JPG


moriya-double-42.JPG


moriya-double-43.JPG

 
Back
Top