Mill Tramming Tool.

Home Model Engine Machinist Forum

Help Support Home Model Engine Machinist Forum:

This site may earn a commission from merchant affiliate links, including eBay, Amazon, and others.
Don't feel bad I had to think about mine again my t-slot is in the middle of the table. I'd thought about making mine with adjustable arms to give a better read on the length of the table.

Todd

Hi Todd,

A trick that might help is to use a sheet of glass laid on the table. You need a glass from an old scrapped scanner. Don't attempt to cut it to size, it will just shatter into a million pieces.

I don't like the adjustable arms idea ! You would introduce too many variables. A single gauge and a long arm would be better.
 
Hi Guys,

Just a quick note to let you know that my dial gauges turned up this afternoon...
Well I had to unpack them and have a look. Two different gauges ! Both 1" travel by 0.001". It turns out that the mounting spindle is not 8mm. Its actually 3/8" diameter.

I'm not going to alter the drawing but it would pay to double check the mounting spindle diameter before drilling and reaming.

So I have to set everything back up drill out to 3/8" and ream the holes all over again. :wall::wall: I was hoping that I could get on fitting the spindle and truing it up. Maybe tomorrow. !


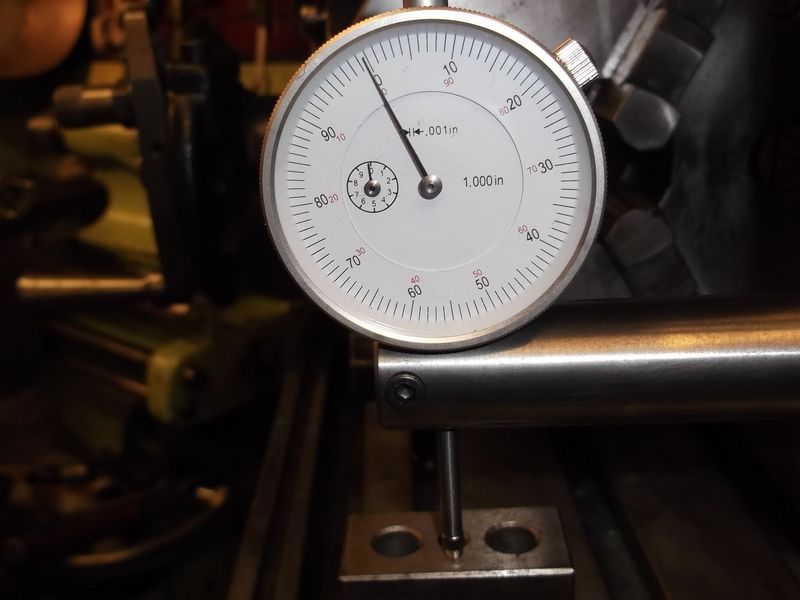
I've had about 5 indicators from past buys and mine are 3/8" I had to make a holder for my mag base I thought about using my digitals and I may try them just to see but they are slow to react that is why we stopped using them on spindle at work. I hear what all the post are saying but if I key the arms them bolt them tight it will not be a problem. Watch the video and you will see it doesn't make any difference if the arms are not the same or if the arbor is is not square and true because you set the indicators once it's in the mill that's why I like the idea. What it does is lets you move the head to "0" with out turning the spindle and I hope it gets it a little better. I guess I'll see when I get back to work in the shop to darn cold and just got a $400 bill for propane.
 
Hi Todd,
It was just annoying ! Not only was the mounting spindle size wrong but I got sent two different gauges. OK they were both the same specification. Anyway it turns out that one gauge spindle is 1/4" longer than the other. So ended up trying to physically adjust one gauge so that it is that much higher than the other to get the probes at the same level. I managed to get about a five or six thou difference in them.

Then I calibrated them for zero on the lathe with the spindle in the three jaw. So I hope that they should be pretty close. I've yet to check the mill and see how far its out.

Fine on the propane bill ! $400 ouch. I only have a frost heater in the workshop...
Touch Wood ! Its not dropped below 48F in there yet. However its very very wet and its just started to rain again.

Indecently the sluggish gauges they can be stripped and cleaned. You just need to watch what you are doing and be careful with the screws. Its often the stylus shaft that has become dirty and dirt has got into it. An ultrasonic cleaning bath works wonders.
 
It's not the gauge it's the electronics two of the same gauges B&S do the same thing we all stopped using them to true up cam bars in the CNC machines at GM.
Sorry to hear about your gauge problem hope you get it all worked out, I'll be getting back to the shop this weekend I hope was in the 40's F today so getting better hate to waste the propane if I don't need to.

Todd
 
Hi Todd,

I didn't realise that you were talking about the electronics. Anyway I got a fair bit further on. And learnt a lot about my mill in the process ! I'll come back to that later.

Photos:
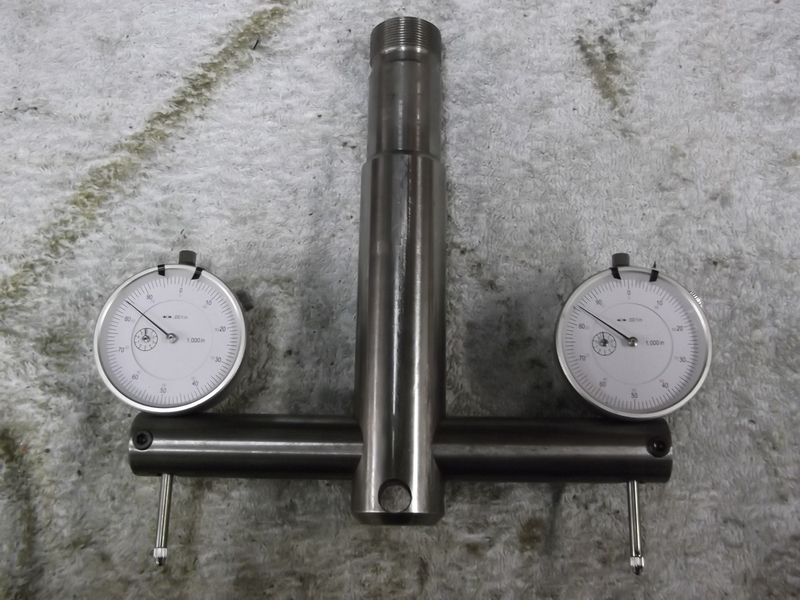
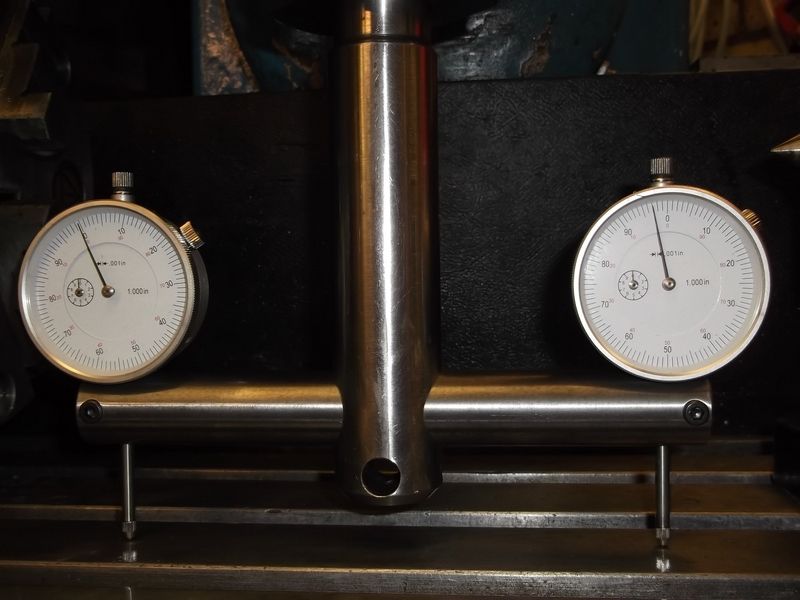
One of the nearly completed tool. One of a test after setting my mill and two of the different gauges. One on the right and one on the left.

I also discovered another use for this tool that may be of interest to lathe users. But it was accidental rather than a deliberate thought.

Tramming_tool-2.jpg


Mill_Trammed-01.jpg


RH_Clock.jpg


LH_Clock.jpg
 
As can be seen from the top picture the two gauges are at slightly different heights and the zero marks are not quite at 12 o'clock on one of them. Still getting within five or six thou by hand is not bad.

The bottom two pictures are close ups of the two gauges so that the differences between them can be seen. I think they were made by two different manufacturers although they came in identical packaging with identical instruction leaflets.

Setting up:
I set one gauge and secured it then fitted the other one and had to set its position in the bar slightly higher, about 6mm, in order for the probes to touch the work surface at the same time. I initially did this in the lathe. It seemed obvious to do it like this, since I still had the faceplate screwed onto the lathe spindle. I put the tramming tool into the tailstock chuck and using the tailstock feed moved the tool so that both probes touched the faceplate. Then I zeroed both gauges.

It was whilst doing this I realised that if the lathe bed wasn't true then the gauges would be out. So I rotated the whole thing 180 degrees. Yep ! Using a mirror I could see that the zeros had moved. Not far but enough that you could see the change. So I zeroed the gauges again and turned the whole thing back round.

It was at this point that it hit me !:D I could adjust the lathe bed with this tool. Though I hadn't realised that I was turning tapered. So I used the setting method shown in the video. Got both gauges reading the same and setting the tramming tool parallel to the lathe bed adjusted the lathe to be true. A test bar 3/4" diameter was put in the chuck and a skim taken. Half a thou over about 10" inches from one end to the other. :eek::eek::eek:

So back to the mill. I'll go into that later.
 
Hi Folks,

I built a tramm from some other usable parts plus 2 new gauges, luckily both came as ordered and exactly the same (thank you Arc).

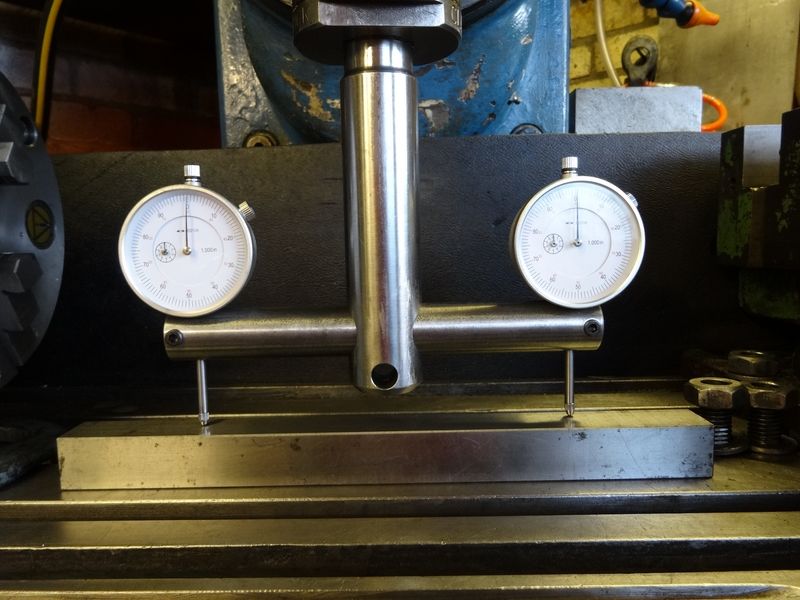
Setting up is done by adjusting each dial to a single reference point on the table, then trying the setup in either direction on the table using a ground parallel to span the 'T' slots.


The column is a long reach boring bar made up to fit a Clarkson Autolock chuck @ 1.25" diameter.
Cross bar is just bit of 25mm En24t, drilled, split and threaded 1/4" BSW for clamp screws.


This is the original finding, 0.003" over 8"


As can be seen I was able to true up the head on my Universal miller, to aid a more exacting machining operation.

I see you managed to get two identical gauges ! Jammy ;)
 
Hi Guys,

Well I got the mill trammed up with some difficulty !

I found that simply tightening the gib locks on the column changed the readings several thou so I set the tram with the column locked. I also locked the spindle whilst tramming as well.

I found that it was very difficult to tighten the securing nuts on the mill headstock without the head moving. Eventually I found that if I nipped both nuts and used a rubber mallet to tap the head and nipped the nuts some more I could get it almost perfect. Certainly within a needles thickness.

Loosing the column locks did cause the tram to alter but it returned to tram when they were tightened again. But you would tighten the column gibs anyway when milling.

The photos show my mill and the gauges.

Mill-1.jpg


Mill_Trammed-01.jpg


Tramming_tool-1.jpg


LH_Clock.jpg


RH_Clock.jpg
 
So a touch over 0.001 out. Do you adjust that, or is that good over that span? And how accurate is the tram? Don't have a mill and have never used one.


Sent from my iPad using Model Engines
 
So a touch over 0.001 out. Do you adjust that, or is that good over that span? And how accurate is the tram? Don't have a mill and have never used one.


Sent from my iPad using Model Engines

Hi Rick,
There is little point in trying to get better than the thickness of the needle since tightening or loosening the column gib locks will shift it a couple of thou. So I set the tram with them tightened up. You wouldn't mill with the gibs left loose anyway.

One thing I have noticed having made this tool and used it to set up the mill, just how sensitive it is and how poor the rigidity of the square mill column is. Also the mill head nodds forward about 2 - 2.5 thou. So I suspect that when milling the cutting forces will tend to push the head up a fraction.

Many years ago a had a "Denford" mill. Basically a mini version of the famous "Bridgeport". A really superb machine. Unfortunately I had to let it go. I had nowhere to put it when I moved. Even if I had I didn't have access to a three phase supply.
 
I think the tram is 8"? If so that would be less than 0.0003 over two inches. I want to say that's really good, and trying to get closer to than that falls into the error caused by other issues; A dulling tool, tool deflection, runout on the machine. Is that a safe assumption?


Sent from my iPad using Model Engines
 
Do you actually need the gauges! If the bottom of the horizontal part is square to the shaft perhaps just ensuring it's flat on the table would be good enough?
 
I think the tram is 8"? If so that would be less than 0.0003 over two inches. I want to say that's really good, and trying to get closer to than that falls into the error caused by other issues; A dulling tool, tool deflection, runout on the machine. Is that a safe assumption?


Sent from my iPad using Model Engines

Hi Rick,
Yes you are right ! Particularly on a small machine like mine, I have to accept that there will always be some error. The machine is just not rigid enough to say otherwise.
 
Do you actually need the gauges! If the bottom of the horizontal part is square to the shaft perhaps just ensuring it's flat on the table would be good enough?

Hi Omnimill,
There is at least one device on sale that is just that. A shaft with an accurately turned disc that is placed in the machine chuck and the loosened head brought down until the disc lays flat on the table, then the head tightened up.
 
I think the tram is 8"? If so that would be less than 0.0003 over two inches. I want to say that's really good, and trying to get closer to than that falls into the error caused by other issues; A dulling tool, tool deflection, runout on the machine. Is that a safe assumption?


Sent from my iPad using Model Engines

Hi Rick,
I'm happy with the tram on my machine now. (photo)

You are right about other issues. I've just been through skimming the machine vice jaws top. Horror ! I got a couple of thou difference from one edge to the other. OK I used a fly cutter that wasn't up to the job. Did the same skim with a good face mill and that two thou disappeared. The picture shows the surface finish from a 1 mm cut across 2" BMS. The photo makes it look worse than it really is. :)

Surface_Finish.jpg
 
Last edited:
Hi Rick,
I'm happy with the tram on my machine now. (photo)

You are right about other issues. I've just been through skimming the machine vice jaws top. Horror ! I got a couple of thou difference from one edge to the other. OK I used a fly cutter that wasn't up to the job. Did the same skim with a good face mill and that two thou disappeared. The picture shows the surface finish from a 1 mm cut across 2" BMS. The photo makes it look worse than it really is. :)

Depending on the Vise jaws are they hard, are they junk steel, I've got hardened jaw in some of my vises and I've soft jaw in the cheap ones. So depending on the jaw it could be your problem I've found myself grinding the jaws for a better finish.

Todd
 
I've used a lapping plate and various grits of AlO2 wet/dry sandpaper to take milling marks out. As long as the surface is flat, it laps nicely.


Sent from my iPad using Model Engines
 
Depending on the Vise jaws are they hard, are they junk steel, I've got hardened jaw in some of my vises and I've soft jaw in the cheap ones. So depending on the jaw it could be your problem I've found myself grinding the jaws for a better finish.

Todd

Hi Todd,
The vice is all cast iron, its a "Record 414" from around the 70s. Its been machined two or three times in its life. But I agree there must be one end that is harder because it deflected the fly cutter leaving one end 2 thou proud.
 
Back
Top