Making a 10cc Whippet pattern

Home Model Engine Machinist Forum

Help Support Home Model Engine Machinist Forum:

This site may earn a commission from merchant affiliate links, including eBay, Amazon, and others.

bmac2

Well-Known Member
Project of the Month Winner
Joined
Aug 16, 2013
Messages
1,033
Reaction score
764
* * * WARNING! * * *
If you are looking for a fast paced, exciting thread that ends with a great model engine making that iconic first run . . . this isn’t going to be it. This is going to be about trying to make the pattern and about as fast paced as watching paint dry. But it may have molten metal, sand, clay, smoke and fire!

I’ve been messing around with casting for a few months now and for the last while I’ve been concentrating on pattern making. I got inspired by fourstroke’s (Dougie’s) Side Valve Engine build (http://www.homemodelenginemachinist.com/showthread.php?t=24250) and thought it was time to to try casting some engine parts. Reading Dougie’s thread (a few times) has provided me with answered to some of the problems I was having getting my head around the patterns and the cores.

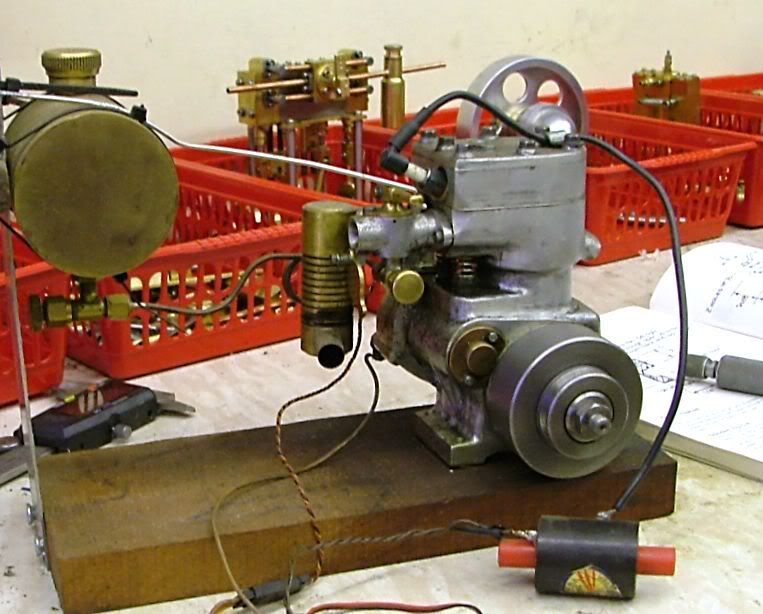
I started working on a set of patterns for the 10cc Whippet. I’d seen copies of the plans on the internet and liked the engine but most seemed to be missing something. I guess this all started when I realised I had the original articles in Model Engineer No. 3221 to No. 3228. I have seen Whippets built from bar stock but these are inevitably people with CNC equipment and that is just never going to happen in my little shop without a Lottery win. This left either ordering the castings kit, £118.50 to £189.00 ($227.00 to $362.00 Can.) or making my own castings. I’ve read more than one build article where they mention the castings where not great having soft or gummy spots. I thought I can probably make my own bad castings so homemade it is. The added benefit is that if/when I mess one up I can toss it back into the pot and just make a new one.

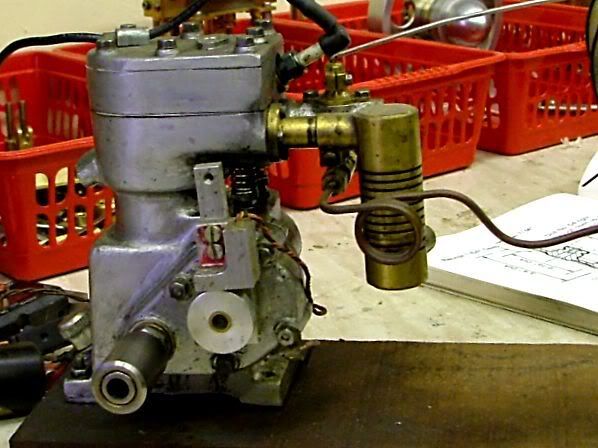
One of the first challenges I ran up against was that the drawings and construction notes assume you are working from there casting set so a lot of the external dimensions are not given. The only way I could think of to get around this was to model everything that had dimensions in CAD, so basically all the working parts.

Whippet Basics 001.jpg


Whippet Basics 002.jpg
 
Turn that into a solid lump and subtract it from a solid block. Assuming a wall thickness of 3/16” I then carved out the areas where the drawings didn’t give any measurement. There is probably a way more efficient way of going about this but hey it’s a hobby and it’s not like theirs much on TV.

Casting 01.jpg
 
Damn those electrons are free machining. A couple weeks of fit, fiddle and adjusting and I finally ended up with this.

Built up Pattern Side.jpg
 
You are quite right in making the castings yourself.

I built one from the original casting sets, and after reading what trouble people had with the new ones from Hemingway, nothing had changed at all besides them saying that it had been remastered. Exactly the same problems were found with both old and new.
The engine looks filthy in these pics, but it had just had an hours running in and hadn't been cleaned off.

engine1.jpg


engine2.jpg


If I can help you in any way with your build (not the casting process), then ask away and I will see if I can remember anything about it.

One of the major failings with the castings was with the head area, if you drilled down using the dimples provide on the castings, the holes ended up going into the cast iron sleeve, plus on mine, I had to deepen the heart shaped squish area by a fair amount, otherwise the valve heads hit the inside of the head. I used a bit of blutak on the valve heads to make sure I got the correct clearance after machining.
As you are making these yourself, double check the drawings and strokes, just in case.


John
 
Last edited:
Hi Paul. It might get dusty but welcome aboard . . . get it . . . It’s a marine engine . . . sorry.

Thank you John. I think it’s going to be a while before I start building anything. Your Whippet looks great and don’t apologise for an engine with some dirt and oil on it. If we all wanted pretty, clean, and shiny engines to sit on a shelf plastic model kits would be easier and cheaper. I feel that it a great shame that the Whippet engine seems to have a bad reputation for poor quality castings. In the videos I’ve seen of the Whippet it looks like a good, solid running little engine. The Model Engineer magazines I reading are from 1963 and when I think about the size of the RC equipment available at the time it probably would have been a great choice for a lot of boats. Back then people had real skills and hobbies. Being water cooled It could have been a real contender. Of course now kids just download the app.

” Yo Kidz! That app isn’t going to do you any good after the zombie apocalypse, you’re going to need real skills!” *knuppel2*
 
My first crack, Pattern 1.0 was an attempt at making it using MDF. The idea was to sandwich two pieces together and just carve it out. This was a total failure and I feel it’s best for all if we don’t speak of it again. :mad:

IMG_0340 (Medium).jpg


IMG_0346 (Medium).jpg
 
Pattern 2.0 was done the same way as the first attempt but this time using pine. The pine was better but still just wasn’t going to work. The grain in the pine is just too coarse. For a different type of casting this would be great but for this engine the concept is just wrong.

IMG_0352 (Medium).jpg


IMG_0353 (Medium).jpg
 
So this past weekend I got going on attempt No 3. Went back over Dougie’s build and looked at the pictures of his patterns. Also went back and looked at the thread “Making a set of Wallaby castings” by jasonh (http://www.homemodelenginemachinist.com/showthread.php?t=23701). I saw both are built up more like a layer cake. I’ve never made a layer cake, but I have eaten one. Spend some quality time with my CAD slicing it up and I now had a plan I think will work.

Built Up Parts.jpg


IMG_0354.jpg
 
As it turns out I only need three thicknesses of wood so after selecting some clear(ish) pine I planed it down to what I needed. The Blue Beast won’t do a thou but it can do 1/64”. The Ear guards? Oh ya, this thing is my revenge on my neighbour’s 72dB air conditioner. :cool:

IMG_0357.jpg
 
I ripped the stock down the middle and glued them back together with a strip of newspaper. Treating this more like a scroll saw project I glued the patterns to the wood using the dark line of the newspaper to line up on the center line of the patterns. Then I just roughed them out on the bandsaw.

IMG_0359.jpg
 
I drilled a ¾” hole using a forstner bit at the center point of each of the four top pieces to help with alignment then I took them down to the pattern line on the belt sander. I might have to redo the part (middle right) that will be where the timing cover mounts. It’s a “loose piece” or “ram-up core” and I have to be able to remove it after molding.
I haven’t tried this but I read about it once in a book. Thm:

IMG_0368.jpg
 
I’m pretty happy with this one. Stacked up loose it looks like it just might work.

Thanks for looking in.

IMG_0363.jpg


IMG_0364.jpg
 
Before going any further, I would suggest you read up on this site. There are corrections for dimensions for faults in the engine that you might already be incorporating without knowing it.

Go to this page

http://modelenginenews.org/index.html

On the LHS about half way down, you will see a search button, click it and then enter 'Whippet' in the opened box.

On the generated results, about half way down, click on #19. This will take you to the start of the build. Go to the top of that page and on the LHS you will see 'whippet index' , click on that and you can then access all about it.

I just don't know how to get a link to take you straight to that page, maybe someone else can show a way.

John
 
John thanks for the link I'll check it out.
Man I hate typing on this I-pod
 
Thanks Dougie
Picked up a can of the Scratch Filler Primer (same stuff) at good old Canadian Tire the other day and tried it out on some different wood scraps. I’ve got to say I’m impressed. I’ve only used regular oxide primers before and can think of a couple of other places this would come in handy. Thm:
 
I got time to make up a split dowel to replace the solid one I was using for alignment. Attempts to rip a dowel on the band saw using “V” blocks and a couple of jigs I saw on the internet just weren’t giving me what I wanted. Also the guy at the plant in China that made the ¾” forstner bit I used must have a deal with a guy down the block making digital calipers because it’s a bit oversized.
In the end I ripped two 1” strips from the wood I’d planed down to ½” and glued them together. The newspaper creates a dark line at the glue joint so it’s easy to center it on the lathe. Turned it down oversized then used a sanding block to take it to + ¾” I wanted. This turned out to be way faster and a lot more accurate than trying to rip a solid dowel.

What a riveting thread . . . I’ve made a stick! :eek:

IMG_0384 (Medium).jpg


IMG_0385 (Medium).jpg
 

Latest posts

Back
Top