


deere_x475guy
Well-Known Member
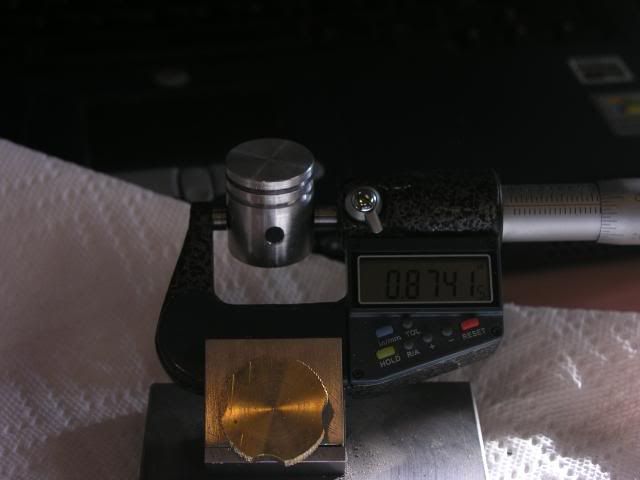
I have been putting off making the piston until I purchased a brake cylinder hone. Today I visited the local auto parts store in hopes to find one small enough. The bore is .875 and although they had a 3 stone hone that said it went to .844 it wouldn't fit, so it was a good thing I took my cylinder with me. They did have a 2 stone hone that fit and it worked just fine.
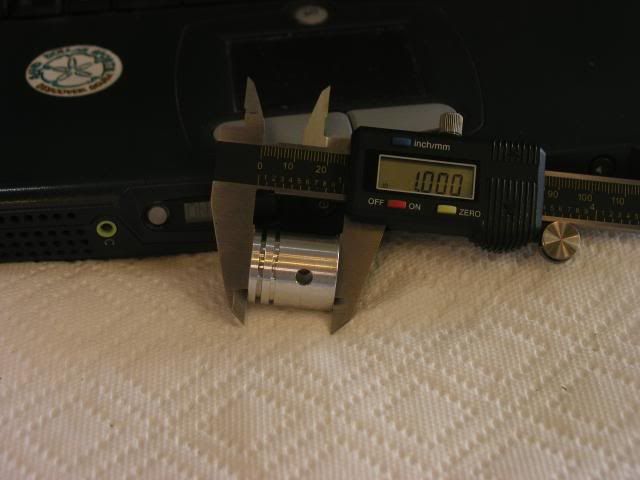
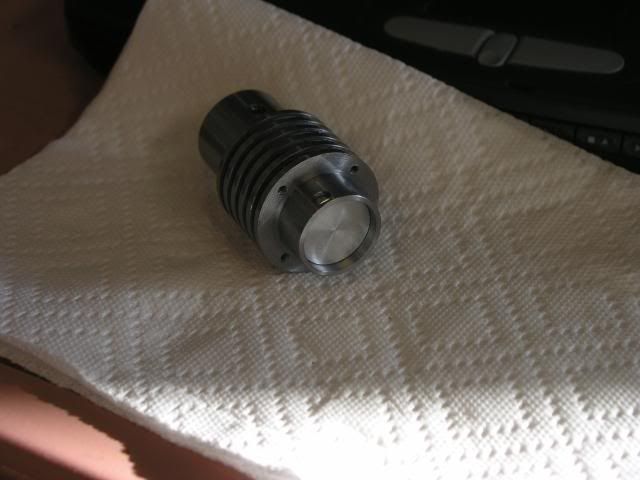
After honing the cylinder it was time to make the piston. I started with a piece of 1 6061 rod held in a collet. Final diameter was targeted to be .874. The very last picture will show I ended up .00015 over. Next I cut my ring groves .59 wide to a diameter of .771. The plans called for .094 wide rings but after talking with Otto Engine Works he advised to go with a narrower ring to reduce friction. The plans also talk about doing this. He changes $5.00 each to grind the rings down but also said if I had a surface grinder it would be easy to do myself, so that's the plan. Once the ring groves were machined I center drilled the end, drilled .5 deep by .375 diam. This gave me a start to bore .250 deep by .075diam at the piston skirt.
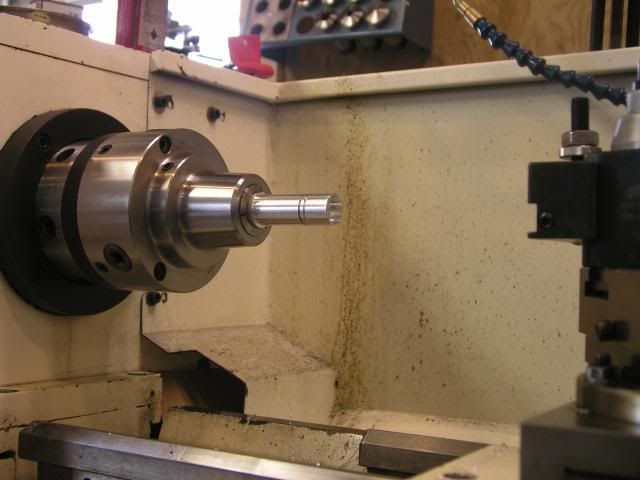
Now it's off to the mill to ream the piston pin hole and mill a slot for the piston rod. Here I am using my wiggler to find the center of the cylinder. I touched off both sides and divided the results in half (well actually the DRO did the math).
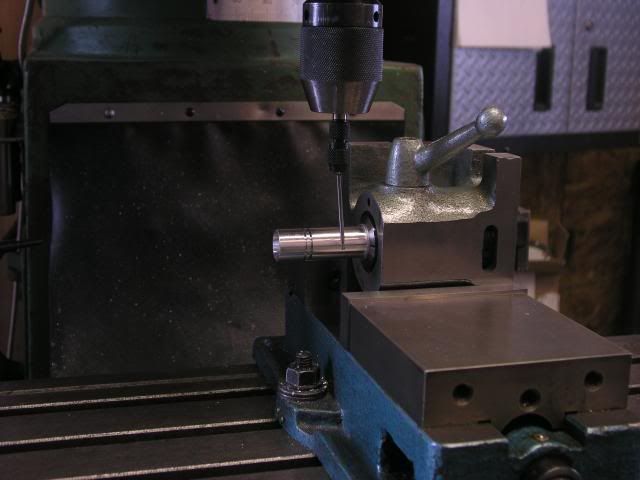
I also had to find the end so that I could drill and bore the piston pin in the correct place. The end of the wiggler is .100 so I have to remember to move the table another .050 before I zero the DRO.
Here you can just make out the reamed .1875 hole.
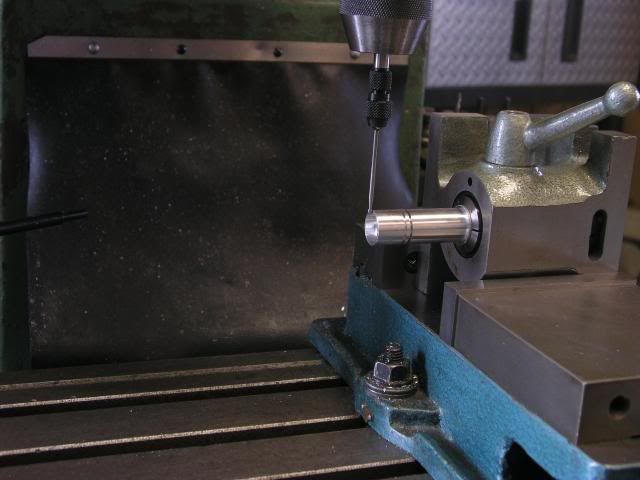
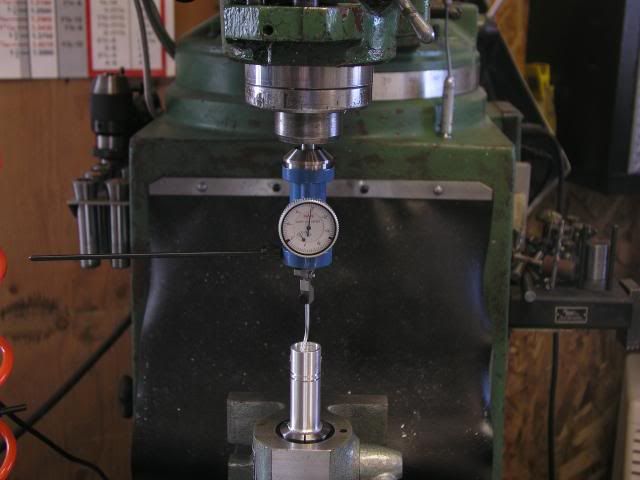
Next was to mill the .375 slot to make room for the piston rod. I used this style indicator to quickly find the center of the piston. It works really great. You start out by getting the part close to center (turn the spindle by hand holding onto the indicator, move the table axis until you have very little movement in the needle). Once I am with in a couple of thou I turn the mill on, (rpm=120) hold the black rod you see sticking out to the left then move the x-y axis until I no longer see movement or very little. I quit fiddling with it when I was below. 0005.
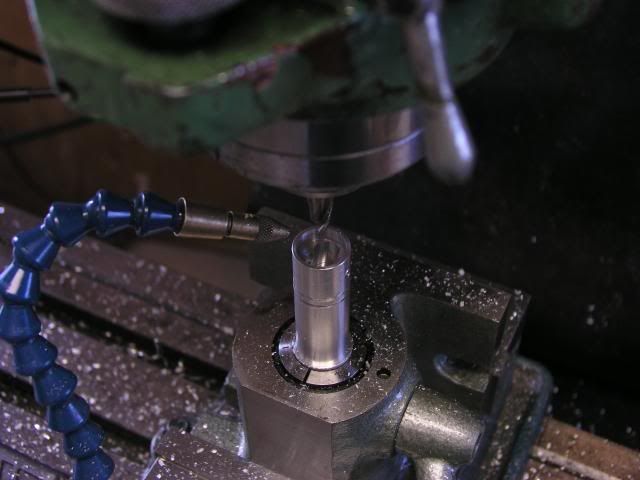
The plans call for the slot to be .750 deep, so I touched the end mill off the edge of the skirt to find 0. Then I moved to the center of the piston and plunged down to .750 with a .375 end mill (remember that I had already bored a hole on the lathe .5 deep so I was really only plunging .25). Now to finish the slot to length (.688) I needed to move my y axis .1565 to both sides of zero and the slot was done (slot length .688 -.375 =.313. 313/2=.1565). I didn't use any coolant but did run air in the slot to clear the chips since I was removing so much material in one step.
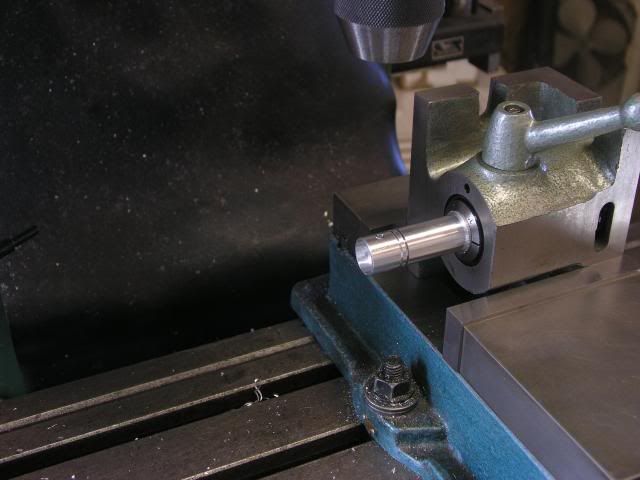
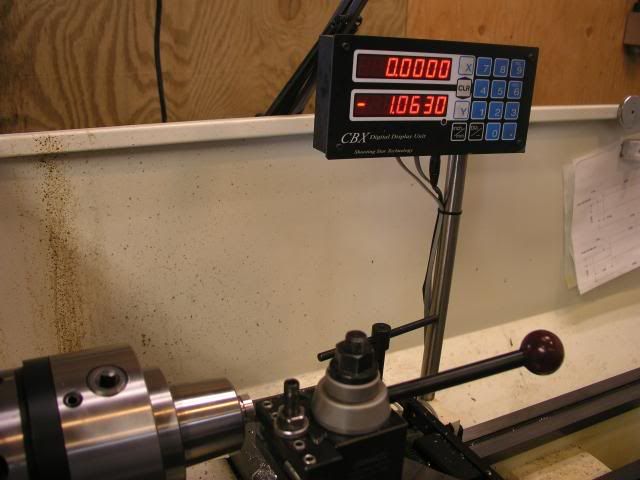
After cutting the piston off with the band saw I placed the piston back on the lathe and took a face cut. Then removed the piston and measured to see how much more needed to be removed for a final length of 1.0. Here you can see that I need to take .141 off.
Once the piston is back on the lathe I touch the tool off the end and zero the DRO.
Cutting to length this way takes and extra step but the results are worth it.
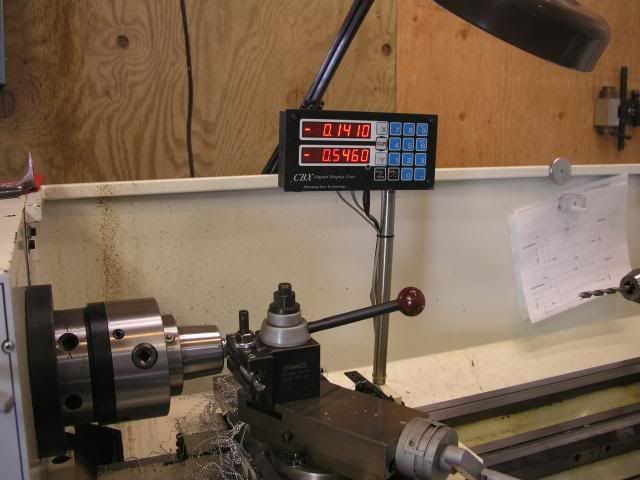
Awh a perfect 1.0
Right now I have a nice sliding fit. With everything together if I hold my finger over the spark plug hole the piston takes 12 seconds to move 1.5 inches. This is measured dry! Not sure how long it would take if I have a slight film of oil on the cylinder. It may just not be enough clearance. I guess I will find out when I run it.
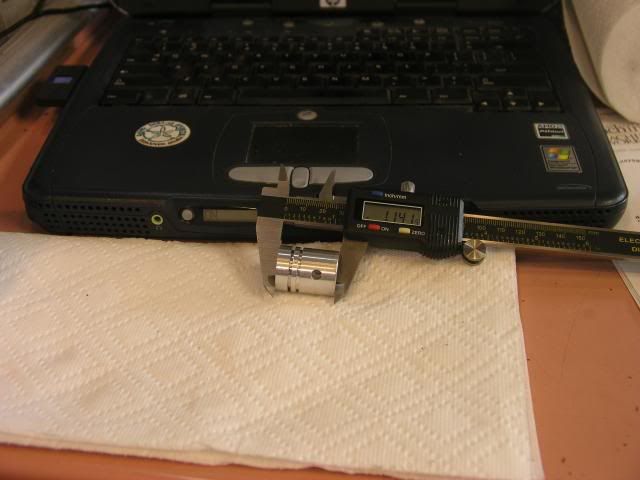
Here is what the piston measured.
I hope I didn't ramble on to much and that everything made sense. If I lost anybody along the way just shout and I will try to clear things up.
Cya gang....next up is the piston rod.
