Mach 3 spindle encoder?

Home Model Engine Machinist Forum

Help Support Home Model Engine Machinist Forum:

This site may earn a commission from merchant affiliate links, including eBay, Amazon, and others.

rustyknife

Well-Known Member
Joined
Mar 5, 2011
Messages
107
Reaction score
1
Is there any "spindle encoder for dummies" articles out there that can help me put one of these on a lathe. I'm really unsure as to what I'm doing, all help is greatly appreciated. I'm using mach 3 and a gecko setup.

Regards,
Eric
 
Hi Eric,

I used Arturo's C3 card http://www.cnc4pc.com/Store/osc/product_info.php?cPath=25&products_id=129 It's cheap & works great!

Right now, I can only read spindle speed in MAch but later when I get a few spare hobby bucks I'm going to get his spindle speed controller so that the speed pulse can actually control the spindle speed. Your Gecko may have that?? I'm not sure, I have a KBIC DC control running a treadmill motor.

Good luck!
Milton
 
Ah yes, you are correct, I'm looking only for index pulse for threading and such, not an encoder really. Boy I wish I would have caught your post sooner...I'm 17 hours deep in building one from scratch and recycled parts, and I think it might actually work in a few more hours haha. I did tons of research and can tell you not how to make it four ways. 5th will be a charm.

I'll let you guys know how it works ;D

Eric
 
Wow, I'm awed by you guys that can make electronic widgets from scratch! I get positive & negative battery connections right....50% of the time. :big:

The spindle speed sensor/Mach project was a rewarding project for me. A testament to how good Arturo's instruction manual is. I got it working pretty easily with only a temporary period of inoperability until I found out how to change a "debounce" spec thanks to the Mach forum.

I was also surprised to see how slow 150 rpm really is. I just knew something was wrong with my setup until I adjusted the speed down to 60 rpm and checked it with a stopwatch by counting LED pulses. Bang on 60 pulses in 60 seconds. I would have bet money it was way off.

ps: From what I've read, Mach may not be really solid yet with threading. EMC is supposedly better. I'll never know though, Linux/EMC is way over my head.
 
ps: From what I've read, Mach may not be really solid yet with threading. EMC is supposedly better. I'll never know though, Linux/EMC is way over my head.

Mach does lathe threading just fine, with either the parallel port or the smoothstepper. There were some improvements made a few months ago, which caused a flurry of messages and comments, but it all got sorted out and now runs well.
 
We have success! Turns out it was the 7th try to get it going. Sure feels good when persistence pays off.

Mach appears to thread fine as long as I edit out and delete the 2nd line of g-code. For some reason It tries to drive the tool right up the middle of the work piece for about 10 inches if you do not delete that line. Maybe its a setting i'm over looking, I only tried it a couple times so far.

thank you gentlemen.

Regards
Eric
 
How are you generating the thread code? Can you post the code here, at least the thread line and the next one.
 
RonGinger said:
it all got sorted out and now runs well.
Great, that's good to hear!

Wow Eric, I'm impressed! From building your own electronics to cutting threads in such a short time. I need to get some tutor-time from you dude!
 
RonGinger said:
How are you generating the thread code? Can you post the code here, at least the thread line and the next one.

I'm just used the thread wizard so far, I haven't played with it much yet. It must be a setting on my desktop machine because I did some simulations on my laptop a bit ago and it didn't show the same concern.
 
DICKEYBIRD said:
Great, that's good to hear!

Wow Eric, I'm impressed! From building your own electronics to cutting threads in such a short time. I need to get some tutor-time from you dude!

Haha, I'm no expert, its actually my first electronics experiment that ever worked haha. More trial and error, then theory and calculation. But I did research quite a while before doing anything.

I took some pictures along the way, if anyones interested in such a thing, I could show a buildup. My next one(if ever needed) will be much better, I already know how I would improve.

Regards
Eric
 
rustyknife said:
I took some pictures along the way, if anyones interested in such a thing, I could show a buildup.
Absolutely! A picture speaks a thousand words. ;D
 
This might take me several hours to get everything up, so bear with me. Like I stated earlier, I am not an electronics expert by any means, but I have a pretty good understanding of computer circuits and dc voltage from working on cars. I guess the most important thing to post first is the circuit to run this thing and explain how it operates as I understand it. I did a bunch of searching and found the easiest way to measure a shafts speed is to use something called a photo interrupter.

This is the final working circuit I ended up with
sapindlesensorschem.jpg


Ok, so first, what is a photo interrupter? Well it looks like this. Note on the left side, printed on the board is the diode symbol.

DSCF0229%252520-%252520Copy.JPG


If you look at the underside, its really pretty easy to determine how it is wired. In our schematic, its drawn with two ground wires. In real life its a three wire device. The led has an infeed, the transistor has an in feed and the two grounds are tied together and leave on just one wire.

DSCF0230.JPG


Heres how it works, if its all wired correctly and has power and ground, the LED emits an invisible(to humans) light, if it reaches the other side, ground is provided and Resistor 2 becomes the load in the circuit and we get zero volts (you never actually get zero, but close to it) on the signal line. All the voltage is used up in the resistor and there is nothing left to detect.

voltmeter%252520normal.jpg


When the beam gets blocked the resistor 2 is no longer a load, and just a wire. This will cause 5 volts to be put on the signal wire.

blocked.jpg


Ok, so thats neat. Here's the deal. The parallel port uses what is call Transistor Transistor Logic, OR TTL, it accepts a digital input, on or off. 5v or 0v. Sounds complicated to me. The easier way for me to think about how computers work circuits like this is to pretend the computer has a voltmeter, its holding its black lead on ground and holding its red lead on the pin leading to the parallel port. If it sees 0v it performs an output based on this low voltage, if it sees 5 volts, it performs an opposite output based on this high voltage. The actual threshholds for a low input according to mach3 turn instruction manual, is 0 to .8 volts DC is a low signal and 2.4 volts to 5 volts DC is a high signal.

So in theory if we make this circuit and attached a piece to our spindle that will interrupt the beam of light, the rate at which this signal switches from low to high or vise versa can be used to tell how fast the spindle is traveling and its position.

To be continued with actual building things...


So where does a feller get these photo interrupter thingys? Well I googled that too, you can obviously order them, but apparently they are used in printers. My roomate works at a computer recycling place so they are always getting printers, I had him bring home two HP laser jets for my inspection.

Upon gut wadding them, I found several.

If you look closely you can see one mounted still in the printer above the one I am holding.

DSCF0179.JPG


Two printers ended up giving me a whole fistful, including some double enders.

DSCF0182.JPG


I had a piece of circuit board left over from my last failed electrical project, so using that, and stealing resistors off of the circuit board from the printer, I made the circuit.
DSCF0185.JPG


DSCF0187.JPG


This is my first attempt, I had found two different wiring diagrams on the internet the first used Resistor 1 at 330 ohms and resistor 2 and 2.2k ohms. This did not work for me, and must be due to internal resistance in the interrupters transistor. I assume they are not all the same. I used a diagram that had R1 as 1000 ohms and R2 as 10000 ohms, this did not work either. There may be quite a variation and you may have to experiment what will work or not, I will go more in depth in a bit as to how to tell.
 
Well at this point I had a circuit, but nothing to hook it to. I needed 5 volts DC for one connection to my board, another wire was needed for my ground. And lastly I needed my signal wire. Lets start talking about where to get 5 volts DC from. Machs instruction say some people get this 5 v DC from gaming ports and usb ports and such. All of this sounded too hard to me, I'm pretty lazy.....ok I'm REALLY lazy. I googled "what is 5v DC in a computer" and came up with a nifty little wiring diagram telling me that purpose of the computers power supply turns 110v ac into various DC voltages and distributes them all over the computer. Of the 3 I remember, it said yellow was 12v, red was 5v and black was ground. From my recollection, there was always a bunch of extra plug-ins leading off of power supplies to feed extra disc drives and such.

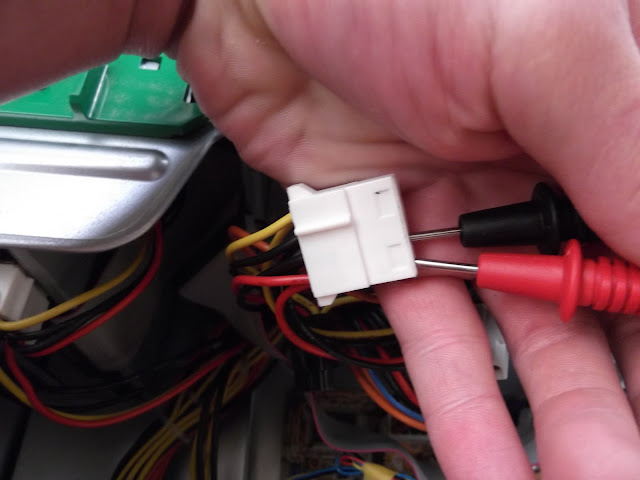
I had an extra computer handy so I got it out and opened it and found that indeed that was correct, and would actually be a really handy and easy place for me to take 5 volts and a ground from without having to cut any wires or anything. (I hate cutting wires, it seems so permanent)

DSCF0189.JPG


DSCF0188.JPG


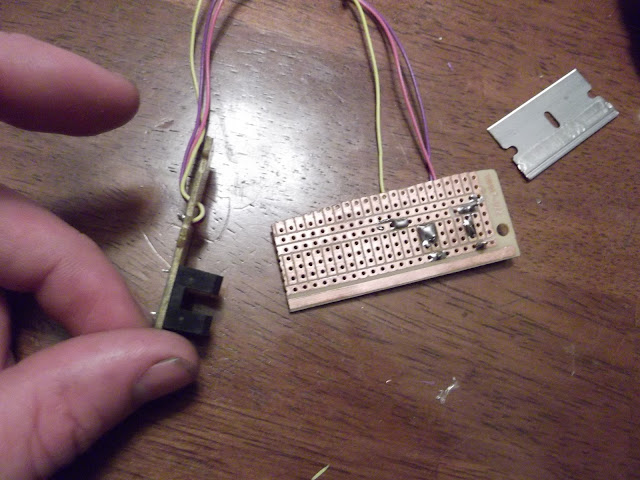
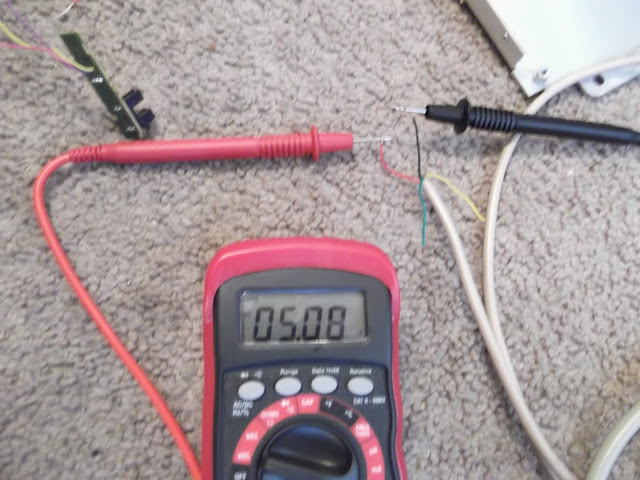
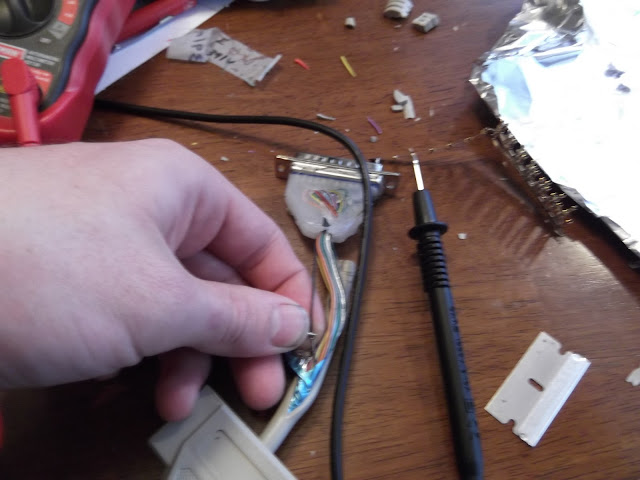
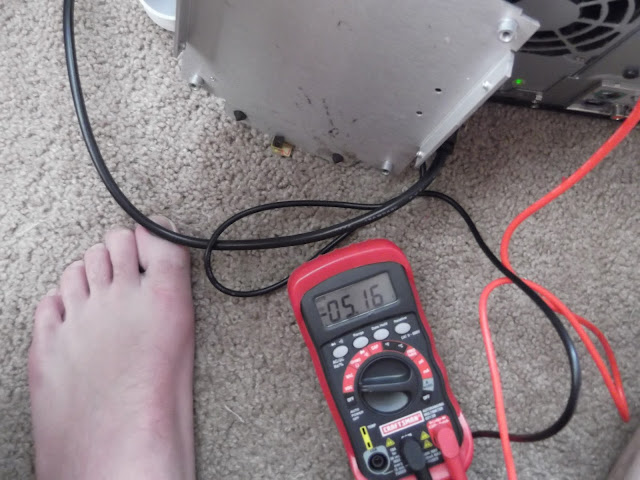
I went ahead and hooked up my circuit to the 5v power and ground, I left the signal wire off, and hooked my red voltmeter lead to it, black was on ground. Remember this was my first circuit with R1 at 330 ohms and R2 at 2.2K ohms.

DSCF0190.JPG


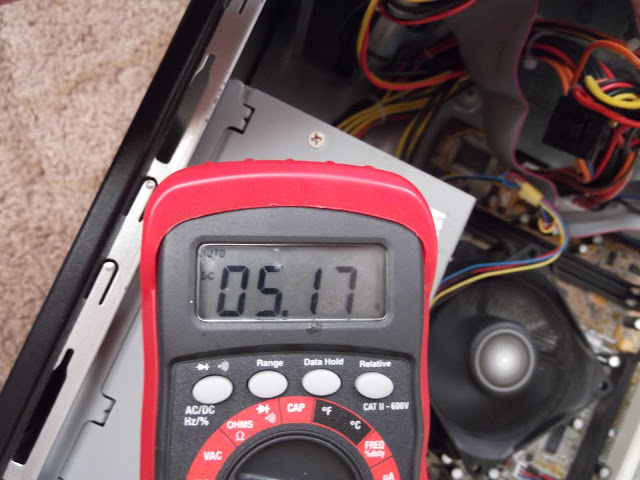
With no interruption in the beam of light I had a voltage of 3.73 dc (it reads negative because I never pay attention to what lead is in my hand and ignore polarity symbols)

DSCF0192.JPG


With the beam interrupted I had my 5V DC

DSCF0193.JPG


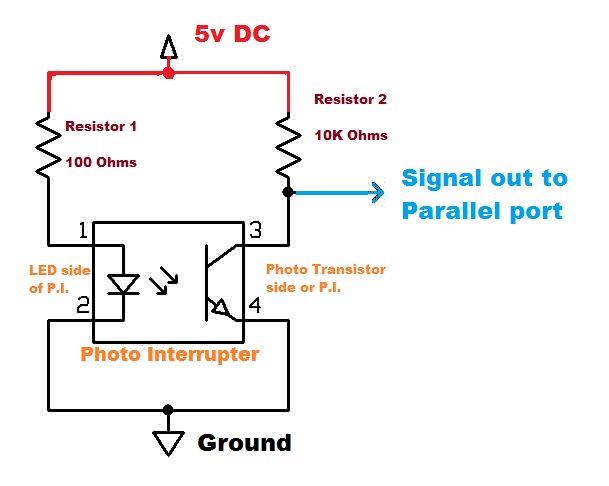
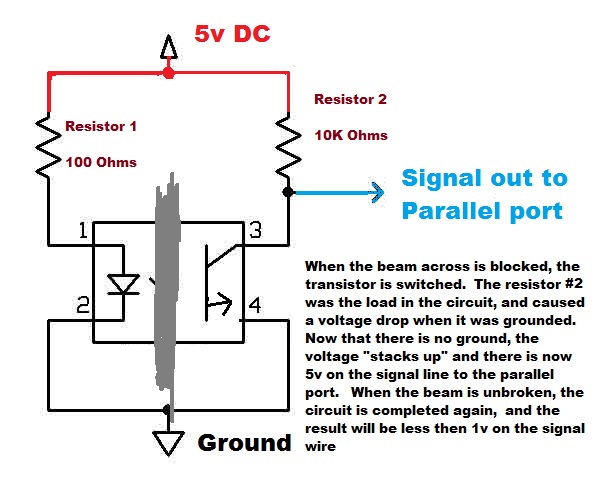
This will NOT work....why? As we stated earlier, mach tells us that for the computer to recognize a low input, it must pull the voltage down below .8 of a volt, were at 3.73. The computer cannot tell the difference between a 3.73 signal and a 5 volt signal, as they are both over the 2.4v High signal threshhold. Why is this happening? Well, if I understand correctly, If the original resistor was 2.2K and could only take away 1.3v there is a resistance in that circuit that is quite larger then that and its taking most of the voltage....like 2 lightbulbs in a series circuit. I assume the resistance must be internal to the photo transistor side of the photo interrupter. Its possible to voltage drop the circuit, I reckon, you couldnt ohm it, because the circuit must be powered to work and you cannot ohm check live circuits. Never the less, I attempted several combinations and ended up settling on R1 at 100 ohms and R2 and 10k ohms. For note, I found that I had to change R1 to the 100 when I had hooked up the signal wire to the circuit. The port actually had about 2 volts on it and was backfeeding I reckon. I'll get to that later.

Now I have unblock 200 mV or .2 Vdc. This will trigger a low signal

DSCF0195.JPG


And blocked we get our 5v back for a high signal.

DSCF0196.JPG


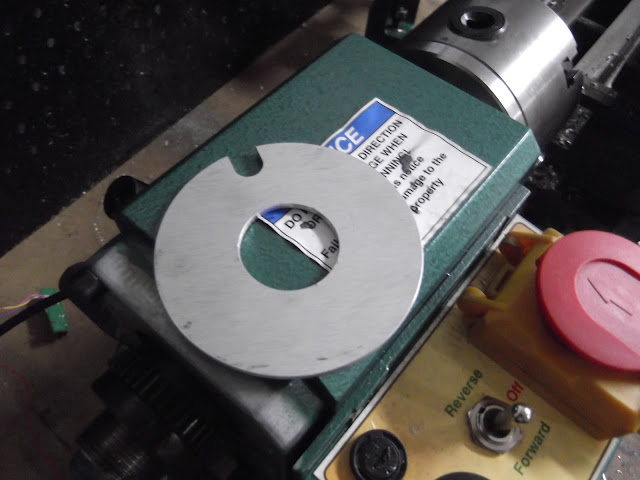
Got out my computer that actually runs my lathe, double checked its voltage of internal connectors. 5v as well.

DSCF0199.JPG


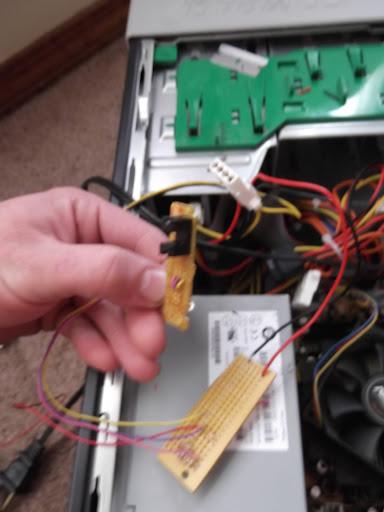
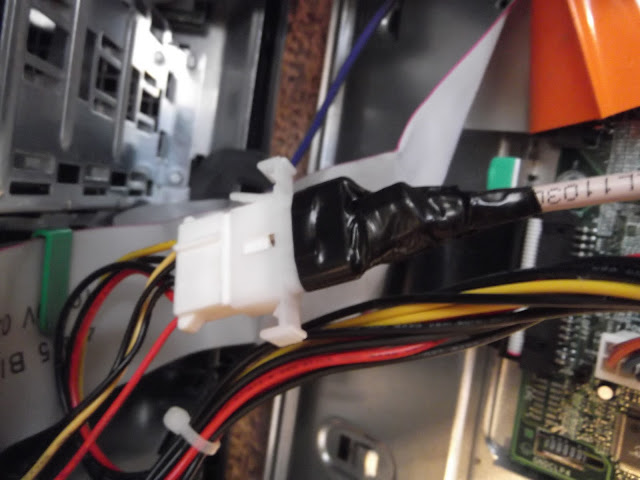
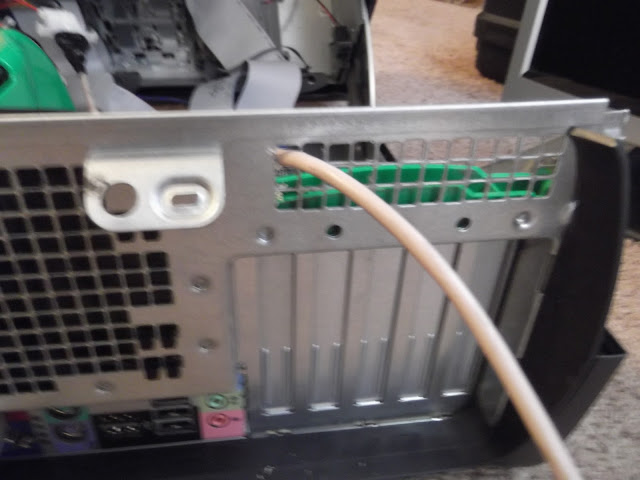
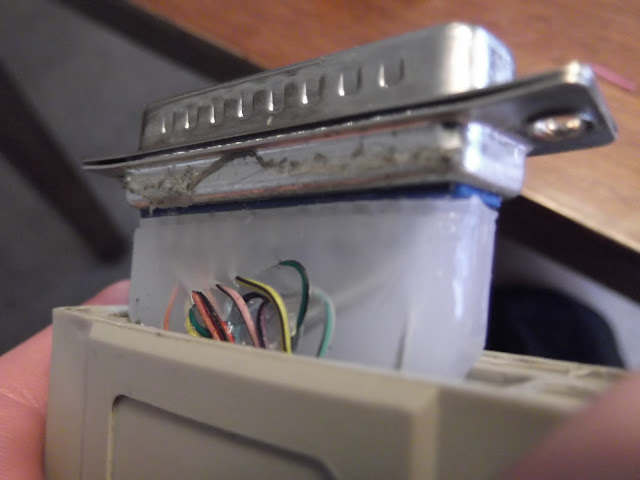
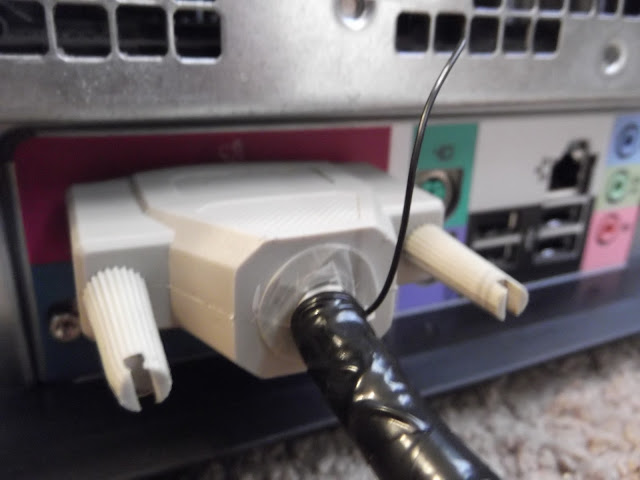
The wire I'm actually using is telephone wire, I came up with a huge spool of this for free years ago, have been trying to give it away and no one will take it. I'll never use it all lol. I went to radio shack and bought a connector to plug into the power supply outlets. Double checked my polarity.....got it wrong anyways, and had to pull the pins and try again. Solder all wire connections, insert pin and plug and play. The wire merely leads out of the case and gives me a place to get 5v dc from and a known good SEPERATE ground

DSCF0212.JPG


DSCF0213.JPG


DSCF0214.JPG


DSCF0215.JPG


That probly freaks out modern technie gurus, I can see the look on their faces now. haha
 
Ok so now we have 2 of our wires for our board figured out, power and ground. We need the signal wire next and it must go to the parallel port in the computer. Through a little more research about parallel ports and reading MACH3 turns "ports and pins" config, it appears on the parallel port only 5 wires can be used as inputs these are pins 10-13 and 15. You want to choose a pin that is not being used, go through the ports and pins config to figure it out, you may have to disable something your not even using but was pre programed for by mach and interferes with you pin

After you choose your pin you need to decide how your going to connect to that pin. Every where I have read says to connect to a parallel port break out box. There are multiple good reasons for this. If you have an experimental circuit and don't quite know what you are doing you can EASILY damage the parallel port on the computer, most of which are integral to the mother board, so in other words, YOU CAN EASILY RUIN YOUR MOTHERBOARD. By hooking to a parallel breakout board your offered some protection against careless mistakes.

I'll be blunt, my whole computer cost 60 dollars with a keyboard mouse and flat screen monitor with a fresh copy of XP off of craigslist, the db25 parallel port cord was 7 dollars........I'm sorry, I would rather fry my motherboard then ruin my 300 dollar gecko drive, with an experimental circuit. I musta pondered for about 3 hours how I was going to tie into the thing. Then I chose to take apart the cord as the least intrusive approach.

I chose pin 13 as its right in the corner and easiest to get to. Took a razor blade to separate the metal from the outer rubber. Sliced the back to ease in pulling the wire out.

DSCF0202.JPG


DSCF0203.JPG


The hard plastic made it difficult to determine pin 13's wire color. I used my soldering iron to melt away a portion of the plastic till I could tell it was the black wire. Verified with an ohm meter and cut and took it out of the harness.

DSCF0205.JPG


Reassembled with a take out to pin 13

DSCF0208.JPG


At this point, I attached the signal wire, and played with the circuit a little measuring the voltages, this was the point when I had to change R1 to 100 ohms. Once you've got your 5v high and .8 or under low signal, load Mach 3 and enter your config ports and pins. Go to inputs and assign your port and pin designation. In my case it was port 1 pin 13. Double check nothing else is assigned to this pin.

Then go back to the main load screen and enter "diags" on the inputs section. At the bottom there is one labeled index, and it should change to green if you put an object in the light path of photo interrupter.

If so, congrats, it's going to work beautifully.

But we need to attach it to the lathe and make an interrupter disc to mount on the lathe.
 
Before I got any further I must point out, that in order for mach 3 to read spindle speed, you must click the spindle button. But your spindle button may not work if you do not go into config/ports and pins/spindle setup, and make sure "disable spindle relays" is unchecked. It doesn't matter if there are relays in there or not, but it will not let you click that button on without lying.

Tone Wheel:

Well I decided for my mini lathe I could mount this on the back side of the spindle pretty easily with little to no effort on my part.

This took me some trial and error, Mach 3 only wants to use 1 pulse per revolution. I tried a few different ones.

the first, which was this, DID NOT WORK.

DSCF0221.JPG


I simply hot glued my circuit to the lathe for now.

DSCF0222.JPG


At this point I turned on the lathe clicked the spindle button and it started counting up to about 600 rpms, then it started back at 300, it couldn't clearly define the signal at high speeds. It was however accurate with the speeds it does catch. At this point I should have realized that my slot just needed to be elongated and it most likely would have worked fine, but no, I took the hard route.

I made the disc opposite of what I originally had.

DSCF0223.JPG


DSCF0224.JPG


This one worked great up to the lathes max rpms, 2650ish. I wish I would have left it alone, but I thought(without trying) that the tab needed to be as small as possible so that threading could be accurate. Whittled the tab down smaller and it worked to about 800. That was when I realized the tab really needs to be kinda wider and not smaller. I made a new disc with a 7/8 wide tab and its good to 1400, this is the one still currently installed that I have been threading with.
It sure is alot uglier then my aluminum one, but it functions fine

DSCF0226.JPG


My stepper motors are not nearly fast enough to thread at that speed so its more then adequate. In the future I will have to make another disc probly around 1 1/8 wide tab to be able to read my spindle speed at all speeds.

But that is as far as I have gotten, its seems to thread remarkably well. I did a 1.25 metric pitch on some 3/4 rod, did really shallow cuts and took like 30 passes, all lined up perfect, every time. Seems to be timed just great.

I hope this helps someone, I searched and searched and had a very hard time finding any information on index pulses for lathes.

Regards,
Rusty
 
Thanks Eric, a very informative yet easy to understand post. ;D No telling how many of those sensors I threw away taking old printers apart for the gears & shafts inside.

So you don't have any feedback/control of the lathe's speed controller? I thought the changing loads of the threading cuts & subsequent speed variations would require feedback to produce accurate threads. I guess the light cuts keep the variations to a minimum.

Thanks again!
 
I do not have control of the lathes speed controller....YET haha, it seems there is no ends to upgrades and options you can do....

It appears not needed for thread cutting, I took some very deep hogging cuts the first time(on accident) which caused the lathe to stall on about half way through the 3rd pass. It senses the spindles deceleration and slows down the stepper motors accordingly. It was all lining up perfect and NOT wiping out the previous thread.I have variable speed, so I also tried speeding up the spindle during a pass and it seemed to adjust for that as well. I did not increase it much however, only 100 rpm. Because if I increased the spindles speed to much it will of course be over the maximum feedrate of the stepper motors, depending on the thread pitch used, and they would not be able to keep up.

I'll do some more cutting today

 
Well I'll be darned; I didn't know it could keep things synched up so well without some kind of feedback. That's awesome!
 
Your one tab wheel scares me- that tab will suck chips right out of the air, and if you get a hand near it it would make a real mess. Find a way to cover or shield it.

I also did a one tab, but on my 8x14 lathe the headstock is hollow, with an aluminum plate on the front of it. I removed that plate and put the tab and sensor inside the headstock. I thought I had a photo on my web site, but I just looked and its not there. Ill try to add one later.

My lathe build is at http://plsntcov.8m.com/CNClathe/CNClathe1.html

Mach does fine without speed control because the speed variation from one rev to the next is small, and mach re-syncs every rev. Note the tab width does not effect this- it just needs to be wide enough for Mach to reliably see- it triggers off the leading edge,so the tab length doesn't matter.
 
Back
Top