LTD stirling engine

Home Model Engine Machinist Forum

Help Support Home Model Engine Machinist Forum:

This site may earn a commission from merchant affiliate links, including eBay, Amazon, and others.

Twinsquirrel

Well-Known Member
Joined
Jun 8, 2008
Messages
227
Reaction score
0
OK, this is the story so far on my first project on my lathe and my first proper engine, I'm not using plans just using the "ugly" LTD as a basis.

LTD001160608.jpg


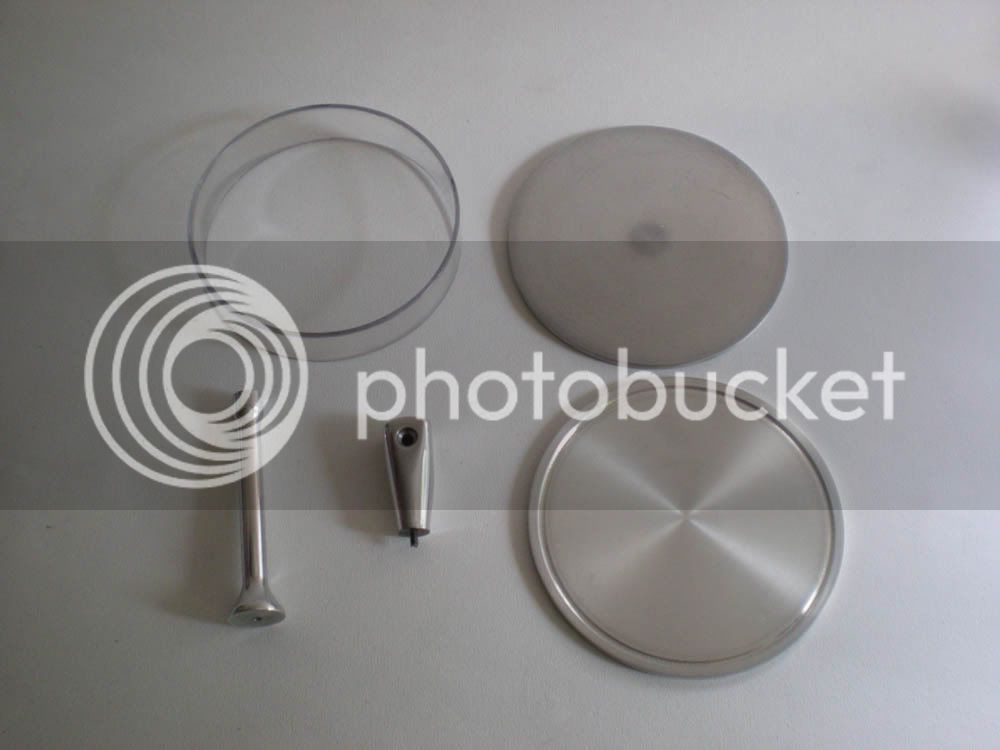
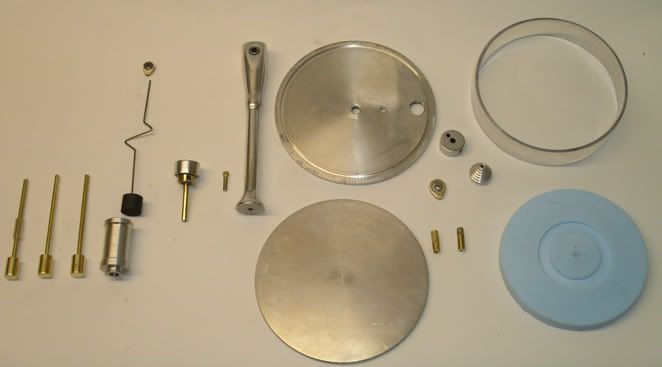
I have the top and bottom plates for the displacer cylinder done, I'm not that happy with the grooves or seats for the cylinder itself, not sure wether it was the tool I ground or the backlash in my cross-slide (now fixed) but I couldn't seem to make any cut without A LOT of chatter.

The displacer cylinder itself is cut from a spaghetti jar, it wasn't until I had marked out and cut the grooves in the top and bottom plates that I realised it had a slight taper....doh!!

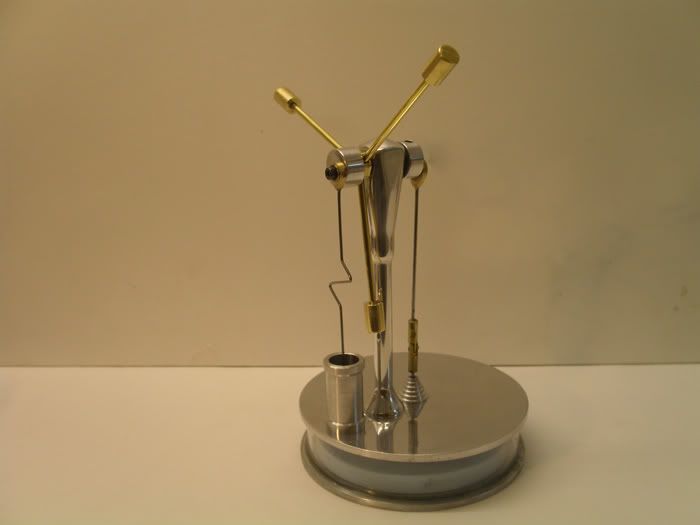
Still I'm relatively pleased with the progress so far.

David
 
Thanks Eric,

Ground my first boring bar yesterday which looks a bit funny but seems to work OK so I will probably tackle the power cylinder tonight. I am planning to use a ferrite from an old PC power supply as the power piston, any thoughts?

David
 
David,

The chatter is normal when using a wide faced cutter, you only have to be a few thou out on cutter height or bit out on rotational speed. So you are not alone on that score.
It all depends on how you are going to seal the cylinder at the top and bottom. If you are going for silicone sealant, the chatter marks won't make any difference, I wouldn't worry about it.

I have yet to make a large Stirling, but your idea of using a ferrite rod sounds ok. If it doesn't work, I can always send you a lump of pure graphite to hack up.

John
 
One of the reasons for using graphite is its self-lubricating properties. I'm not familiar with ferrite in this application but you may want to investigate that. Remember that LTDs have miniscule specific power - so little in fact that they are run dry because the viscosity of any lubricant can sap too much power.
 
Well the ferrite idea is a non-starter unfortunately, I tried to turn a small piece down to the correct diameter earlier and the ferrite seems to be made up from iron fillings (should have guessed from the name) compressed together with some sort of binder, probably epoxy. The material doesn't machine well at all and just crumbles/chips when cut.

I guess graphite is the way to go as you both say, I'd love to take you up on your offer John or if you could point me in the direction of a supplier that would be great too...

David
 
PM or email me with your name and address, and I will get a lump into the post for you on friday.

What size piston are you making? So I can send you the right sized lump.


John
 
Spent most of the day in the workshop today but don't have a lot to show for it I'm afraid. My 3 week old cheap nasty Chinese lathe decided it didn't like me touching the forward/reverse switch and refused to start :mad:
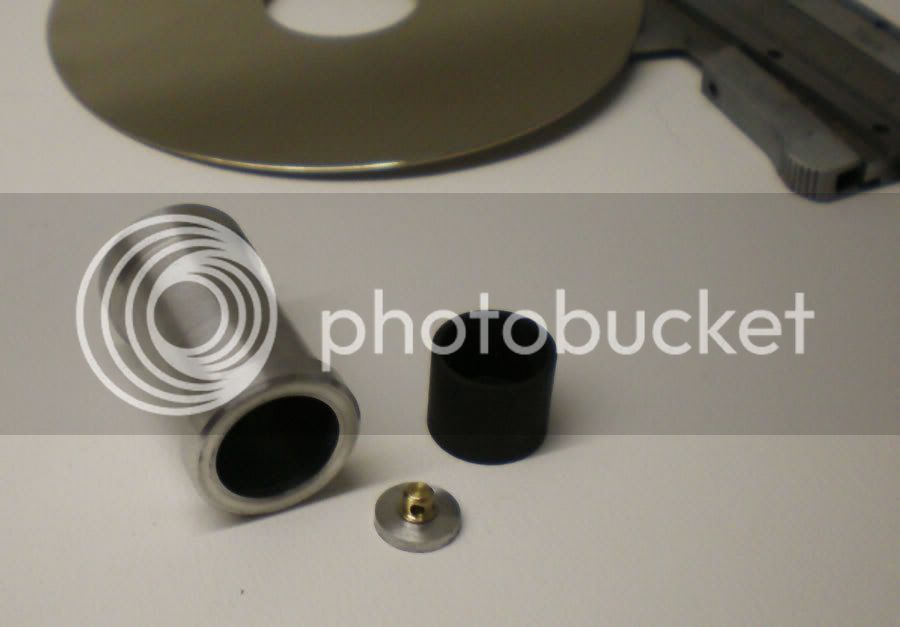
, I did manage to get a few bits done to the power piston/cylinder after bypassing the switch.

ppistoncylinder.jpg


Thanks to John for letting me have some graphite for the piston (the man is a saint). The aluminium insert is a light interference fit inside the piston but I will probably use a drop of cyano to hold it in place.

David
 
Twinsquirrel said:
Spent most of the day in the workshop today but don't have a lot to show for it I'm afraid.

Tell me about it ??? ....... my ball turner is probably worth about £20 in a commercial environment, in terms of man hours spent in the shop it should be worth about £600 :eek: ;D :D

Anyway David, what you've produced looks pretty well finished to me, just for reference mind, if you could you stick a coin or something in the photo it would be useful, I'm having trouble judging scale ::) ........ is the cylinder Aluminium or steel btw

nice work mate 8) ........... including working around the switch

CC
 
Hi CC,

Yep, sorry I should have put something in the pic for scale, will do next time. Just to give you an idea the bore of the power cylinder is 13.5mm or just over 1/2" in old money. I'm doing pretty much everything in Aluminium for the moment just to get a feel for things as I'm really completely clueless.

David
 
Had a reasonably productive day in the workshop today.
PICT0015.jpg


I managed to get most of the parts finished and ready for lapping, balancing and polishing tomorrow.

Sorry, I forgot to put anything in for size reference again :-[ ::)

David
 
Well they all look nicely finished already David ............ good luck, looking forward to seeing it running 8)

CC
 
Looking good David, I think I am really going to have to work my way up to building one of these!

LTD's are really my favourite model engine... I'm just waiting for my accuracy to catch up with my ambitions!! ;D


I'm sure we are all awaiting the Final pic's and the Near obligatory video ;) ;D


Ralph.
 
Thanks for the kind comments all,

All assembled now, just waiting for the adhesive/sealant on the top and bottom plates to go off then I will try to give it a run!

LTD-finished.jpg


Ralph

I probably shouldn't have attempted an LTD as my first project but I just needed to get this one out of my system, now I have a big list of things I need to make/buy and a whole world of things I need to work on as far as technique goes. Having said that with the help of this board and using Bogs' "looks right, feels right" mantra it wasn't too difficult...... Then again it hasn't run yet :-\ :-X ::)

doh!! just realised I STILL didn't put anything in for scale :-\

David
 
Twinsquirrel said:
doh!! just realised I STILL didn't put anything in for scale :-\

Well .......... just stick your thumb in front of the lens next time ;D

So ..... Looking Good ........ what's the curing time for the adhesive ;)

CC
 
For "does it run?" purposes, you can "seal" the displacer chamber with Vaseline. Remember, the air pressure developed inside one of these is only minutely above atmospheric. In fact, my LTD is still running on the "temporary" Vaseline I used to test it.
 
For "does it run?" purposes, you can "seal" the displacer chamber with Vaseline.
Argh, wish I had known that before Marv!

Anyway, the epoxy has gone off now and I can confirm IT LIVES!!! After a little tweaking of the timing I'm getting 200-250rpm from a cup of near boiling water.

Big Grins

David
 
Congratulations David!!! That reminds me, I need to mess with mine again.

Great job!, Wes
 
Back
Top