Little CNC lathe

Home Model Engine Machinist Forum

Help Support Home Model Engine Machinist Forum:

This site may earn a commission from merchant affiliate links, including eBay, Amazon, and others.

Tin Falcon

Well-Known Member
Joined
Jul 9, 2007
Messages
7,207
Reaction score
787
Well I guess I need to join the fray here. Vernon is setting up his Sherline.
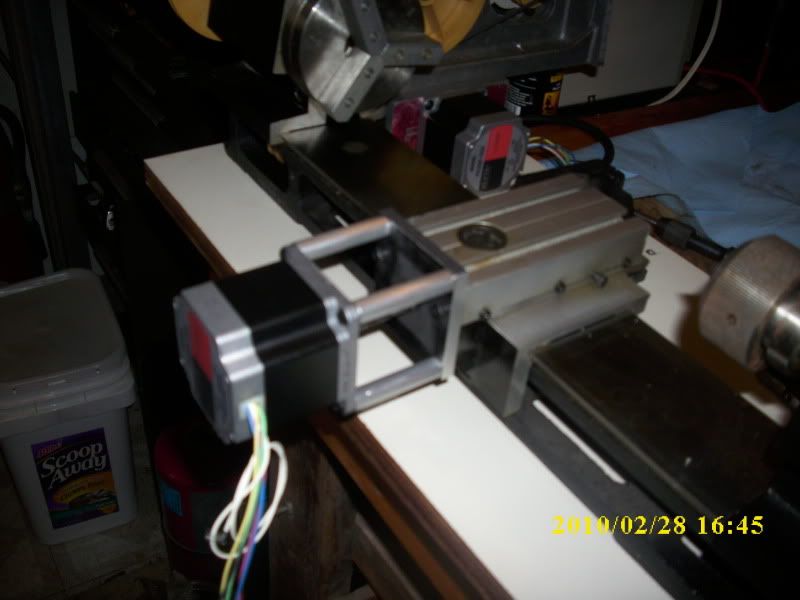
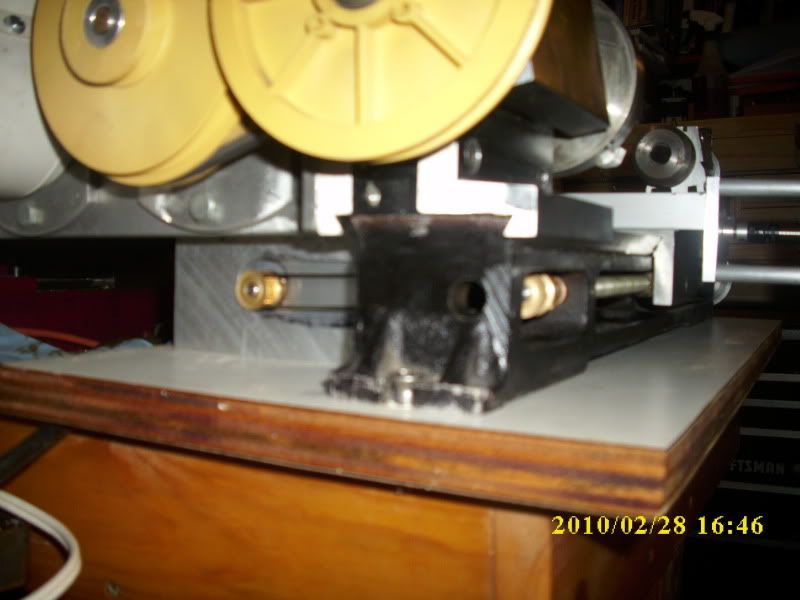
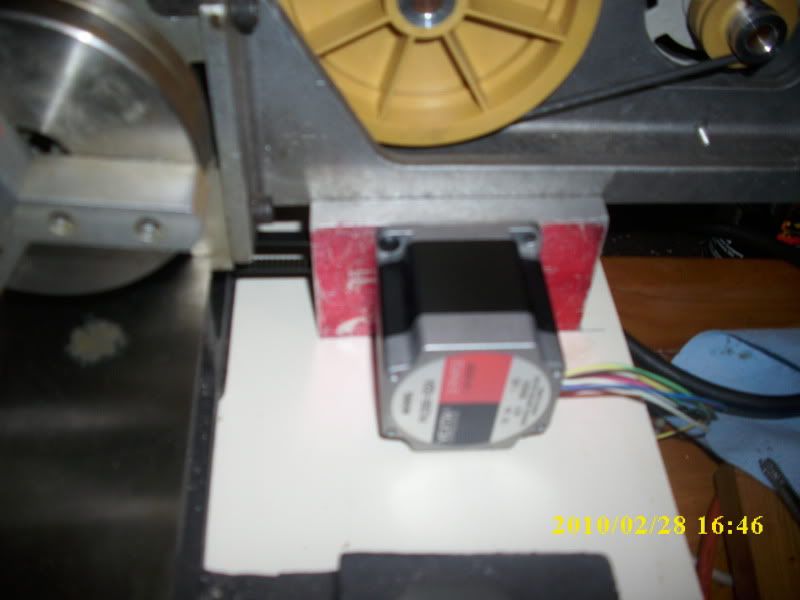
As you may know I picked up a Machinex 5 a while back and pondered the Idea of turning it to CNC. Well the pondering has gotten a bit pricey. well not too bad I guess. I picked up some stepper motors on e-bay for $25 each these are Japanese motors that are said to retail for $75 each . Then I ordered some electronic stuff connectors etc and micro switches. Today placed and order with mcMaster Carr for timing pulleys and oldham couplings ,collars and a couple of studs to make a new cross slide screw.
I plan on useing all the controls that I have for the x-2 mill just plug in the new motors and configure a new profile for mach 3. I am hoping this will go together quickly.
Tin
 
oriental motor vextapx266-02A IIRc 160 oz in nema 23
Tin
 
well the McMaster Carr Order came yesterday.
Today I Got the cross slide set up for CNC I still need to wire it but machined the new cross slide screw, drilled the mounting plate 'made standoffs' mounted the plate 'attached the collars and couplings' and mounted the motor.
I then removed the lead/longitudinal feed screw machined the end to fit a timing pulley and then re installed it. I now need to mount the lathe to a board make a stepper motor mount and then attach things. then wire the two motors.
I already tested the motors the other day so no worries there.
Yes I need to get pictures.
Tin
 
Ok i promised photos here is the cross feed set up similar to the steele plans I did not use plans here just built as I went based on experience building the mill. Used the existing plate and the tor as a template for the adapter plate attached a couple of collars and a oldham coupling then measured for standoffs.

DSCI0075.jpg

This is from the tail stock end I made a mounting block for the motor bolted to the base board I turned the lead screw to 1/4 inch to accommodate a pulley.

DSCI0076.jpg

Here is the other side of the longitudinal axis motor.
DSCI0077.jpg

I made good progress this weekend.
Tin
 
Tin ;

I really like your cross feed mount. I may try to copy that for my mill X an Y axis. The plans I have, I would have to buy $85 worth of blocks and basically machine the whole centers out. I think I have everything here to make ones like yours. I think maybe I could get a double shafted stepper motor for the Y axis so I could still operate the mill in manual mode with an attached hand wheel.


Thanks for sharing, Thm:
Matt
 
On the mill I ran wires though plastic tubing the tubing is just wire tied to the motor. On this one I am thinking of getting a couple of small radio shack project boxes. Then hook up my db-9 conectors to the side of the bock then attach to the G 540 with standard db 9 extension cords the other option is to put strain reliefs on the side of the box and then make my conection inside the box and make a cable I like idea #1.
Tin
 
Tin Falcon said:
On the mill I ran wires though plastic tubing the tubing is just wire tied to the motor. On this one I am thinking of getting a couple of small radio shack project boxes. Then hook up my db-9 connectors to the side of the bock then attach to the G 540 with standard db 9 extension cords the other option is to put strain reliefs on the side of the box and then make my connection inside the box and make a cable I like idea #1.
Tin

So this will be the same G 540 that will run your mill? Then you'll just unplug the motors and then switch between both machines, using the same computer and driver?

Just trying to figure what I'll do when I get to converting the 9x19 later on.

Matt
 
So this will be the same G 540 that will run your mill? Then you'll just unplug the motors and then switch between both machines, using the same computer and driver?
Yes that is the plan I will need to st up a lathe profile for mach 3.
Tin
 
Tin;

Where do you get the db-9 connectors? And the wire?

Matt
 
the G 540 comes with all the needed DB 9 connectors. Radio shack is another possible source for DB 9 connectors and hoods. I ordered a batch from Allied and piggy backed an order with an order from work. Wire I salvage from work .
Tin
 
I didn't realize the G540 had the both the male and female ends included.

Thanks
 
It just comes with males, to plug into the drives. The other end of each cable is hardwired to a motor.
 
My plan, hopefully this weekend is to put potting boxes on the motors then wire db 9 males to the boxes and put the cs resisters inside the box. If I ever get to the point of taking the lathe on the road for demos i do not have to worry about tripping over or puling out the cable from the box just unplug before moving .
BTW 1hand mach three comes with the g code to cut the profiles for db-9 and dB 25 connectors. Hndy Huh
Tin
 
Jeffery Birt at

www.soigeneris.com is a good source for cables, G540s, motors, and he will even make up cables.

He also builds and sells a turnkey control that contains a G540.

I have no interest other than as a satisfied customer, but wanted to pass Jeff along as a source.

Please keep us posted on the lathe and mill conversions.

Regards,

Chuck Kuhn
 
Well some more progress today . I got the potting boxes wired up . I grabbed a couple extra ferrite cores from work to loop the wires through. I cut the db 9 conector holes by hand. the program has side slots I wanted to go with holes. soldered up the connectors and
attached the boxes to the motors with silicone latex caulk . In retrospect I should have roughed up the back of the box. I tested the motors before putting the lids on the box. I then hooked up the one motor with the one good db9 cable that I had. then I went to hook up the second and realized that I do not have a f/f gender changer and the other DB-9 cable on hand is M/M. so I made up a cable from scratch with a used female plug and a new male. *Just wired pins 6-9 for the motor wires. Scratched my head for a while trying to figure out why the g 540 would not come out of default mode. Ah back to the book I had not set the output pin for the charge pump. Duh. Oh well things look good so far now need to make some t-Nuts and a little tooling plate to mount the tool post to. I will borrow the A2Z qctp from the 7x for now. and make up a couple as I have time . Many moons ago I started to make a set of four. One for each of the craftsman 109s and was not sure where the other two were going . now they have a home when finished. the blocks have the dovetails cut that is about it, a ways to go.

Ok awake now I think. I realized while taking my shower, last night very late, that the wiring just pins 6-9 effectively eliminates the current set resitor that I built into the male db-9 connector attached to the project box. SOOO make a new cable is first order of business before going forward. I did notice that the z axis motor did not seem to be running as smooth as the x. Well no magic smoke released. another duh.
Tin
 
Tin Falcon said:
Ok awake now I think. I realized while taking my shower, last night very late, that the wiring just pins 6-9 effectively eliminates the current set resitor that I built into the male db-9 connector attached to the project box. SOOO make a new cable is first order of business before going forward. I did notice that the z axis motor did not seem to be running as smooth as the x. Well no magic smoke released.

The documentation for my Gecko 251's (4 of those in your G540) say they'll drive the stepper at 3.5 amps with no idle current reduction, if no resistor is in place. Not a terrible result...
 
well the new cable made and tested. Hit the books a bit . I think some of the stuff is coming back I ran a cnc lathe a few years ago just need to get the programming down ,and finish tooling.
Tin
 

Latest posts

Back
Top