Lapping the compound on my mini lathe

Home Model Engine Machinist Forum

Help Support Home Model Engine Machinist Forum:

This site may earn a commission from merchant affiliate links, including eBay, Amazon, and others.

vigsgb

Well-Known Member
Joined
Jul 15, 2012
Messages
45
Reaction score
4
If you have not lapped your cross slide or compound slide I 110% recommend that you do this. It is easy takes a few hours and makes a night and day difference in the performance.

Prior to performing the lapping job my slides would not move smoothly and had a jerky action during various parts of the travel. Every time I would adjust the slide gibs to remove the movement in the slides it was too difficult to turn the cross slides so I had to loosen them to get a decent movement but then the play was back in various places within the travel.

After I performed the lapping job and assembled the slides and set the gibs I went to move the slide and it moved so smoothly and with ease I thought I lapped to far or had the slide gibs to loose. I put a dial indicator on each slide and tried to move them and nothing no movement and yet I could easily move the slides with just my fingers (I have the feed screws out as one was bent and I am waiting for the new feed screw) it was such a nice change.

I will post some pictures of the steps.

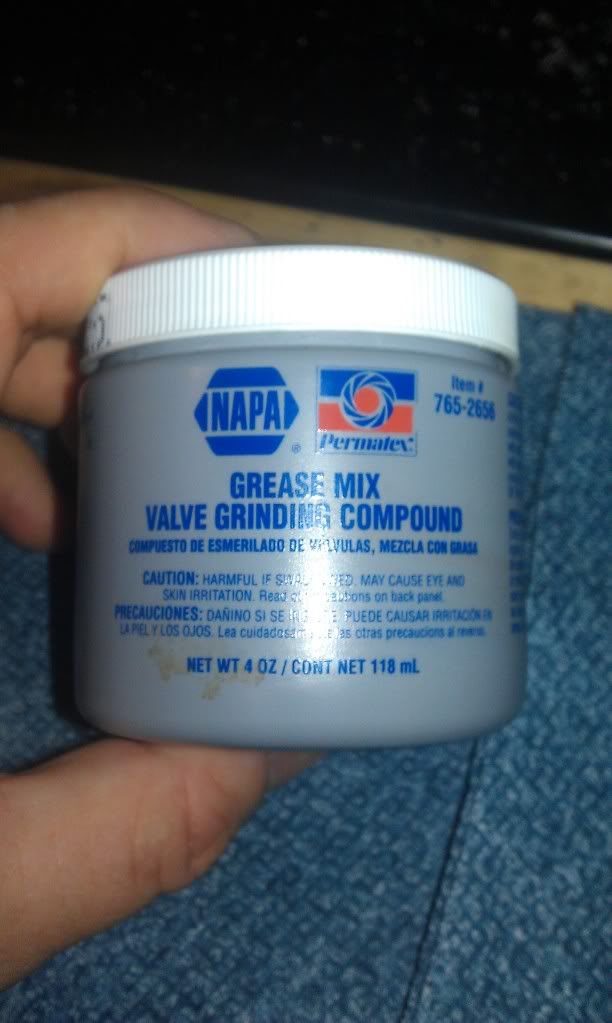
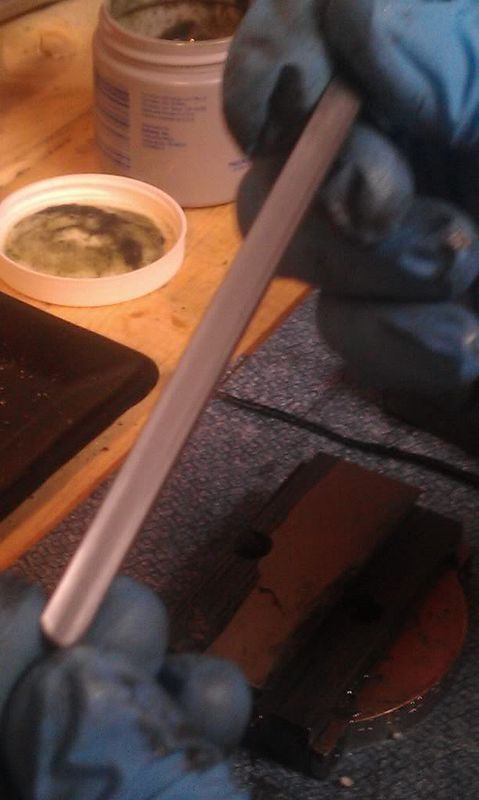
Just to note: I read that most people use metal polish to perform this task but after several hours of lapping last night I gave up.

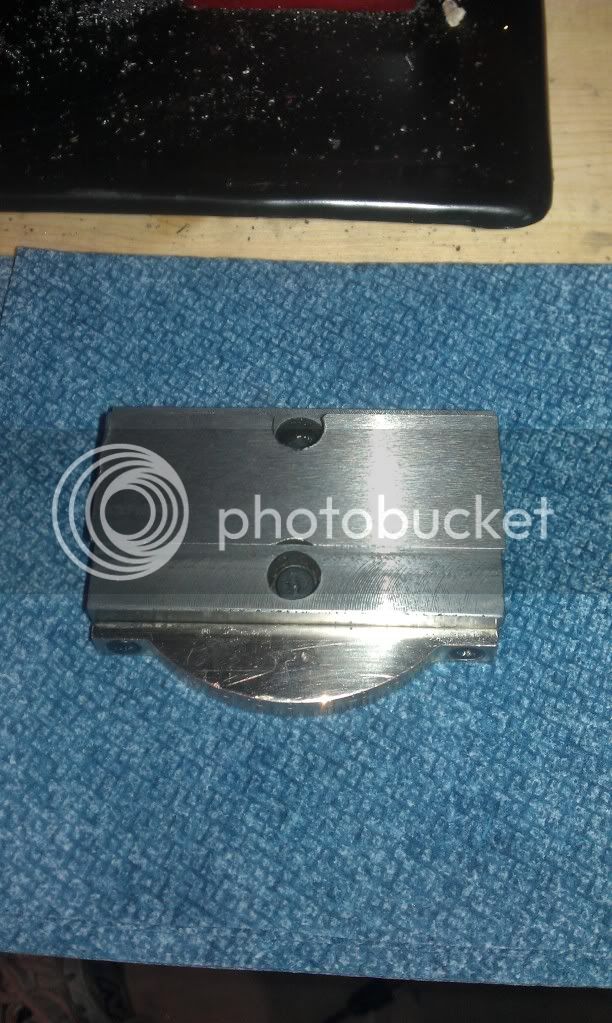
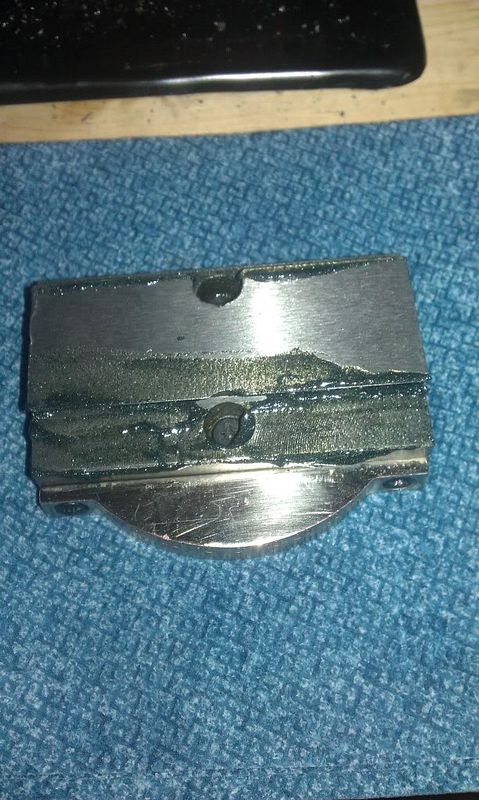
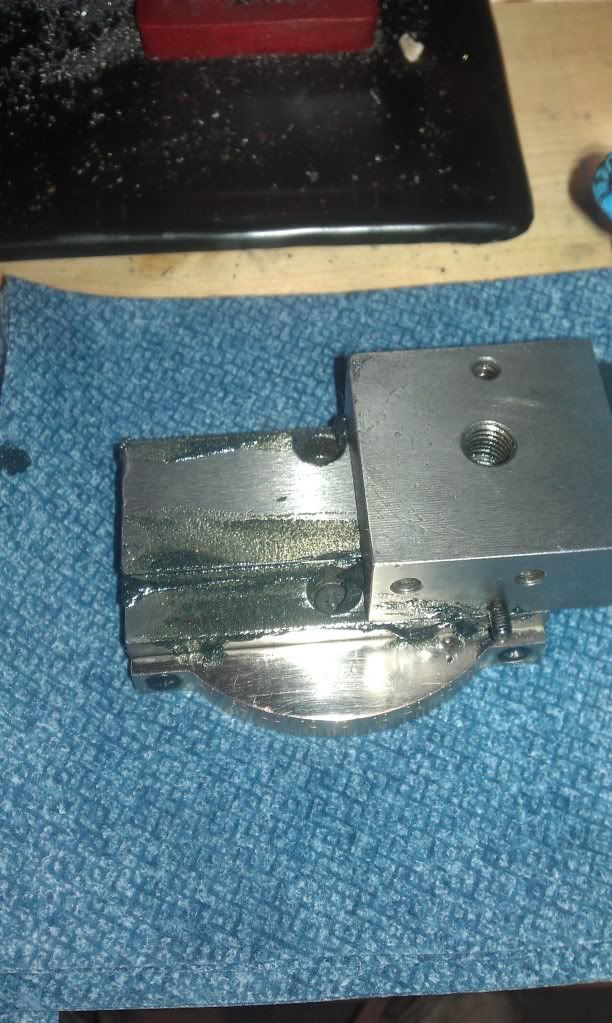
In my case the gib was so far off and the the actual compound top and bottom had high and low spots that not only did the gib catch during travel of moment but the compound top and bottom would rub.

I found out about the compound top and bottom rubbing by putting sharpie marker on one face assembling and moving the feed and sure enough there were high and low spots which the lapping took care of.

I opted for a bit of muscle to help me and choose the value grinding compound and the results I have are excellent.

If your compound is just a little jerky or not too bad than I would go with the less abrasive metal polish.
 
Last edited:
I decided that I did not want any of the lapping compound on anything other than what I was lapping and wanted to keep the mess and cleanup to a minimum.

In this picture I first put down a shop rag folded several times and then used two wood screws to hold down the compound slide to my work bench.

6c8b4758.jpg


I then got a few pairs of gloves

8d594470.jpg


I used the following lapping compund

45b3df34.jpg


And smeared the lapping compound on the slide

9dd0bd43.jpg


I then placed the gib in place very loosely at first and then used normal procedures for adjusting the gibs. Which for me is tighten all set screws snug and back out an 1/8" of a turn. I then started working the slide back and forth. After about 3 of 4 minutes I would pull the slide off wipe things down and look at the wear on the gib.

f683acc0.jpg


Here is a picture of the wear on the gib. Note how the gib is getting shiny with the middle dull. This means the middle is still not in contact with the face of the dovetail.

bf2b27dc.jpg


I continued to perform the lapping process until the surface of the gib appeared the same down the entire surface. The light is a bit bad and the picture as I noticed after I took the last few pictures that the lens got some of the horrible black mess that this process creates.

be25362c.jpg


Here is the picture of the bottom of the compound after lapping notice the line down the center that is wear nothing was lapped and the other color around that line is the same color and appearance and is lapped. I thought it would be shiny but it was gray.

a855d401.jpg


I then took the parts and washed them in hot soapy water followed by a drying and complete soak in oil. I then wiped down each part blew out the holes and applied a coat of REM Oil as I have several cans for using on firearms after hunting in which I spray them down.

fdfba842.jpg


After I cleaned I reassembled and used some light oil to lubricate and assemble the slide.

547c76e5.jpg


95562eb7.jpg


Job Complete...

This is a very simple job well worth doing it took me about five hours to lap compound and cross slides. :)
 
Thanks for posting the details vigsgb. I was going to ask what kind of lathe you have to see how I might apply this to mine. But, I see that you have a very similar model to my Micromark (sieg) 7x14. I shall be looking at doing this to mine also. I've also noticed that it is difficult to get the gibbs adjust to work smoothly over the whole range.

Todd
 
Just another thought I had while I worked on this project...

As I asked questions in my various threads I posted I learned a great deal about the importance of things being tight.... With that said I put a dial indicator on my tip of my hss bit and started wiggling and wow lots of movement all over the place in each direction. No wonder why I could not get smooth cuts and sometimes the cuts felt like they had small steps in them..

I took off the compound then found the cross feed slide had movement then I took off the cross feed slide and found the saddle had movement.... everything was loose not fitting well.

I was only able to get the saddle adjusted across the ways without any lapping it just had a bunch of loose gib adjustment bolts. The slides where a different story and the lapping took care of that.

I wonder if all cheap mini lathes are like this or if I just got a really bad one.
 
Last edited:
Most 7 X lathes and Mini Mills along with some other Chinese machinery should be regarded as unfinished kits to be completed by the user to their satisfaction.

Ron
 
I wonder if all cheap mini lathes are like this or if I just got a really bad one.

The story I have heard is that HF/ Central Machine machine tools are what is left after the other vendors have selected out the better ones.
I have grizzly and micro mark brand ones. I think they all need some TLC and finishing. HF/ Central machine may need more. but can not confirm or deny this story.
Tin
 
I did the same to my cross slide on the 10x22 a few weeks ago. Also noted that the gib strip had a slight bend. Very light tapping on the surface plate to flatten it. Snapped in half. I made a new strip from brass. Very smooth movement. I used Timesaver compound. Worked great.
Compound slide is next. I'm seriously considering making a brass gib for that also.
 
To speed up the gib flatening process, just put some 320 then 600 then 2000 grit wet/dry sand paper on something that is known to be flat and squirt some wd-40 on the paper and take your gib faces to it until you get the same look you have in the picture, then clean it up and install, done... A lot faster, same effect and less mess. I've done this for my 7x16 and SX2, I also took all surfaces possible to this process to smooth and square everything, my machines are a joy now. Also making gibs from Delrin works great to.
 
To speed up the gib flatening process, just put some 320 then 600 then 2000 grit wet/dry sand paper on something that is known to be flat and squirt some wd-40 on the paper and take your gib faces to it until you get the same look you have in the picture, then clean it up and install, done... A lot faster, same effect and less mess. I've done this for my 7x16 and SX2, I also took all surfaces possible to this process to smooth and square everything, my machines are a joy now. Also making gibs from Delrin works great to.

I will give that a try next time sounds like that would have saved me a lot of time.
 
The story I have heard is that HF/ Central Machine machine tools are what is left after the other vendors have selected out the better ones.
I have grizzly and micro mark brand ones. I think they all need some TLC and finishing. HF/ Central machine may need more. but can not confirm or deny this story.
Tin

That is what I have a left over from central machines.... lol ;D
 
I did the same to my cross slide on the 10x22 a few weeks ago. Also noted that the gib strip had a slight bend. Very light tapping on the surface plate to flatten it. Snapped in half. I made a new strip from brass. Very smooth movement. I used Timesaver compound. Worked great.
Compound slide is next. I'm seriously considering making a brass gib for that also.

I might just go ahead and make a brass gib and give it a shot and see what the difference is. I need to find a reason to try out my mini mill anyhow.
 
My saddle was also very loose. In fact it seems to require regular checks and adjustment to keep it tight.

Todd
 
my taig advised me to do this when I first bought it, I to found a night and day difference!
 
What is described here is not lapping, it is wearing the twp surfaces to remove high spots and lumps. It does make the motion smother, but in the same way that an old worn out machine is smooth to turn.

Proper lapping requires a tool that is truly flat, or round if you are lapping cylinders. Then the part is shaped to a true surface.

This no doubt makes the machine feel smoother, it just doesnt make it run true. Your compund may now smoothly run downnill, or it may slope off to one side, you just dont know what its doing.

This is actually a lapping operation described here for fit of two pieces and like you say does not result in a truly flat surface but it is a lapping operation by definition.

Lapping is a machining operation, in which two surfaces are rubbed together with an abrasive between them, by hand movement or by way of a machine.

Two-piece lapping

Where the mating of the two surfaces is more important than the flatness, the two pieces can be lapped together. The principle is that the protrusions on one surface will both abrade and be abraded by the protrusions on the other, resulting in two surfaces evolving towards some common shape (not necessarily perfectly flat), separated by a distance determined by the average size of the abrasive particles, with a surface roughness determined by the variation in the abrasive size. This yields closeness-of-fit results comparable to that of two accurately-flat pieces, without quite the same degree of testing required for the latter.

The real question then is was the machine better prior to performing this operation or did performing this operation create an illusion of a better working cross slide and compound slide?

What would be the correct way to perform this operation?
 
Now I wonder after the prior post if lapping the two surfaces to each other made the machine worse and like mentioned in the prior post now I have a smooth operating cross feed and compound feed but they are no longer square through out the travel of the feeds.

Does one need to use a surface plate bluing dye and scrape the surfaces??


Any thoughts on this subject? :wall:
 
the traditional proper way to true machine ways is with srcaping.
The biggest problem with the chines machines and the ways is they leave burs on the edges and corners. this is an easy fix. also the gibs are poorly fitted. the gib adjusting hardware is junk. so debur make a new gib and get some good screws.
fix the simple stuff first.
Tin
 
You'll be fine, I can't see you having removed enough material to make a significant change in the as manufactured "squareness" of the slide. The question was - is it better than it was before? The answer is yes because now you have smooth even, controlled travel where as before you did not.

The argument that your compound may now run down hill or off to one side may be true but by how much? If you can't detect it does it matter? Even if you can does it matter? Try and do some test cuts or measure the height of the tool tip at different extensions of the cross and compound slide if your worried. AS you didn't measure any of these before don't be too alarmed if you get some interesting results - if the lathes are anything like the mills squareness is an option that wasn't paid for during manufacture of these machines...

If you were aiming for 1 micron accuracy then you wouldn't have bought a mini lathe in the first place...;)

Mike
 
Now I wonder after the prior post if lapping the two surfaces to each other made the machine worse and like mentioned in the prior post now I have a smooth operating cross feed and compound feed but they are no longer square through out the travel of the feeds.

Does one need to use a surface plate bluing dye and scrape the surfaces??


Any thoughts on this subject? :wall:

As Mr. Ninefinger said it's unlikely that you removed enough to change the alignment, it's more likely that you can simply see the misalignment now.

A friend once asked me if I could help him with chatter on his import 9x20 and he brought it over for some work. The cross slide male and female angles were badly cut and had different angles, we cleaned them up on the mill as best we could and made a new gib to fit, that helped a lot. I cleaned up the mating surfaces between the compound and cross slide, that helped some more. Cleaned up the compound surfaces and refit the gib by making it new and scraping (steel scrapes but it's funny if you're used to CI) it to the slide. Still chattered, and we'd put 6 hours into the damn thing, not making it "right" but aiming for "better".

Finally I took the saddle off, blued the bed and set the saddle down and found only end contact. Tried it in a couple of places with the same result, only minor end contact. Put a straight edge on the bed and found a dip of .005" in the middle.. If I'd had a planer or large bed grinder we might have tried something but really it was past redemption at that point.

We cleaned it up and put it back together and he ended up selling it and buying a rebuilt South Bend.

You can scrape in what you're dealing with, but I'd start with some very light truing cuts. If you're working the compound make sure that the base is flat by bluing and scraping it flat. Check the ways on the base by indicating on a surface plate, make sure that they're parallel to the base and then parallel to each other (measure across the ways with dowel pins in the dovetails), then scrape them flat (and maintain or correct the parallelism). If they're not parallel to the plate consider correcting by machining the bottom. Looking things over before doing a lot of work lets you plan the shortest path.

One the base is done scrape the top slide to the base. You might verify parallelism of the top ways against the top but indicating on a surface plate and machining if too far for scraping. Once it's parallel scrape against the base for fit, finishing by scraping the gib in.

Likely you'll have to make sure that the compound screw is fit for use - checking that the tension doesn't change in turning (off center thread in screw and/or nut) and that the nut and screw are parallel to the travel axis in both directions (a change in tension during travel will tell you if it isn't).

At that point you'll likely have 8-12 hours in the compound, and will have to repeat things on the cross slide and saddle to get it truly square. When you rework the saddle shoot for a .0005" convex face on the cross feed, it's better convex than concave.

Generally, lapping requires that one of the surfaces serves as a 'master' that is lapped against. Lapping 2 uneven surfaces will kind of average out the inequalities between them but it'll take 3 different surfaces lapped with different rotations to average out all the inequalities to make 3 flat surfaces. I would think that if you had 2 different compounds you could mix-n-match the tops and bottoms and make them all flat over time. But really it's faster to indicate them against a known flat and take them there directly by scraping.
 

Latest posts

Back
Top