wirralcnc
Well-Known Member
- Joined
- Jul 24, 2010
- Messages
- 92
- Reaction score
- 23
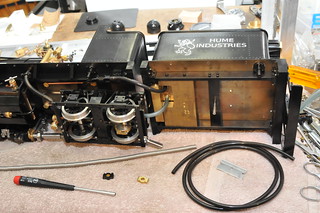
After following cruebys amazing build of kozo's new shay, I have decided to make a start on my own. I received the book for xmas.
This will be a very slow build as full time job and family commitments get in the way.
Here are the first few parts.
Truss rod parts require silver solder
View attachment 1430741862266.jpg
View attachment 1430741879418.jpg
This will be a very slow build as full time job and family commitments get in the way.
Here are the first few parts.
Truss rod parts require silver solder
View attachment 1430741862266.jpg
View attachment 1430741879418.jpg