I may design an I.C. engine---

Home Model Engine Machinist Forum

Help Support Home Model Engine Machinist Forum:

This site may earn a commission from merchant affiliate links, including eBay, Amazon, and others.
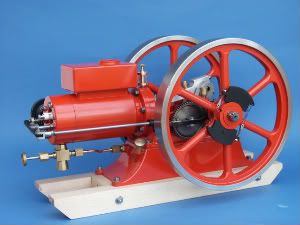
Chuck--I'm trying to keep this simple to machine. I understand what you are saying, however I do think the water needs to go completely around the cylinder----at least that is the way the full grown hit and miss engines were, and its the way this one will be.---Brian.
 
This just keeps on evolving. Last night while laying in bed thinking about it, I decided I didn't want to have to turn so much material off the outside diameter of the cylinder to leave the large ring that the bolts pass thru. Then I realized that the bolts don't actually have to pass thru that ring on the cylinder. They can go thru the cylinder head and be tapped into the water jacket, clamping a much smaller "ring" of material on the outside of the cylinder between the cylinder head and the water jacket, with the o-ring on one side, and the head gasket (not shown) on the other side.--Very similar to the Kerzel set up.
 
And just to be really weird and different---A crankshaft which incorporates the flywheels as part of it.----And it comes apart in the center to slip the con rod big end into place. This of course means that the con rod doesn't require a bolted on end cap.
 
Will your machine handle that size of stock?---Brian

Sorry for the late reply - I missed your question.

I have a 7X, so in theory I guess it can swing a 7 inch diameter, but with the 3.5 inch wheels I had to locate the tool in the toolpost parallel with the OD of the stock to turn the OD. I'm assuming 4 inch would still be possible though. I'll measure it tomorrow and let you know for sure.

Luckily, I'm getting a larger lathe in the next few weeks, so it won't be a problem for me any more. :)

The plans are looking very intriguing so far, I plan on building one very soon.
 
Careful, Cogsy---I don't want to lead you down the garden path!!! I will be building this as soon as all the design is finished. I find that when I do that, I discover my own screw-ups and can correct the drawings if required (And its generally always required, in the wonderful world of prototypes). I REALLY hope some other folks will build this, but wait until I have discovered any potential mistakes/oversights/disasters before you get into it.---Brian
 
Have you gentlemen seen the attached? It's another option, a Frenchie similar to the Webster.

I'm looking forward to seeing what you come up with Brian. Your design and build skill brings my attention to everything you post.

View attachment ar bihan.pdf
 
Brian- If I understand how that cylinder to head connection works, the cylinder is bolted to the head through the compression of an o-ring. I wonder if that is going to be solid enough. I wonder if the o-ring is necessary- would a copper gasket provide sealing, as it does in automotive engines? Also, I wonder if you need 12 bolts to hold the cylinder to the head. I don't know anything about these water cooled farm engines, but on the Webster and others like it, there are 4 bolts.
 
I like what you're doing here, Brian. I've been noodling around with a non-compression engine design, similar to Rudy Kouhoupt's Pioneer and I like your overall design.

One thing I don't like about the Webster engine (and the Odds n Ends) is having the intake and exhaust share the same port. The exhaust tends to make the intake assembly get really hot which makes urethane or rubber fuel line impractical. I think the heat may also play funny games with intake fuel mixture.

Chuck
 
Hi Brian,
Your 'Reservoir Seal Ring' at the crank end of the cylinder may not be needed. If you can find an o-ring that is a nice sealing fit on the outside diameter of the cylinder, you may only need to machine a groove in the reservior for the o-ring to sit in which is slightly smaller than the outside diameter of the o-ring.
When it comes to assembly, place the o-ring in the groove and slide the cylinder thru the o-ring which will be compressed between the cylinder and reservoir.

This method is used on both ends of water cooling jackets used on model boat motors, I have never had one of these leak.

First pic shows o-ring in groove, second shows similar sleeve (your reservoir) with motor pushed thru(your cylinder)

28_jacket.jpg


25091.jpg
 
Brian- If I understand how that cylinder to head connection works, the cylinder is bolted to the head through the compression of an o-ring. I wonder if that is going to be solid enough. I wonder if the o-ring is necessary- would a copper gasket provide sealing, as it does in automotive engines? Also, I wonder if you need 12 bolts to hold the cylinder to the head. I don't know anything about these water cooled farm engines, but on the Webster and others like it, there are 4 bolts.
Paul--It doesn't show up really well, but what happens is that the o-ring compresses a certain amount, then the cylinder bottoms out on a register turned in the water jacket and the cyl head is separated from the end of the cylinder by a gasket. (see detail B on post #23) As far as the bolts are concerned, you are right, 12 is too many. In the initial stages of my design, 6 bolts at 60 degrees connected the cylinder to the water jacket and 6 different bolts also at 60 degrees connected the cylinder head to the cylinder, thus a total of 12 bolts. The design morphed into something else, but the bolt count stayed the same. Only 4 bolts are needed on the Webster, but they aren't doing double duty of sealing compression and also sealing the water jacket joint to prevent water leaks. Also, due to the stacked sizes to incorporate a water jacket, I have had to use smaller bolts, specifically #4-40, so they can't be torqued quite as tightly. As soon as I have posted this, I am going to change things to 8 bolts per end.
 
Last edited:
I like what you're doing here, Brian. I've been noodling around with a non-compression engine design, similar to Rudy Kouhoupt's Pioneer and I like your overall design.

One thing I don't like about the Webster engine (and the Odds n Ends) is having the intake and exhaust share the same port. The exhaust tends to make the intake assembly get really hot which makes urethane or rubber fuel line impractical. I think the heat may also play funny games with intake fuel mixture.

Chuck
Chuck--Although I did get both the Webster and the Odds and Ends engines to run well, I am not a real fan of having both exhaust and intake ported thru the same hole into the cylinder. You will see in this design that the sparkplug hole is offset towards the top of the cylinder. That is to allow sufficient for two valves thru the cylinder head, an atmospheric intake valve and a rocker arm activated exhaust valve. I will also be incorporating valve cages, because I seldom (if ever) get the valves to seal on the first "go-round" and its a lot less work to remake a valve cage than to remake a cylinder head.
 
Simon--Thank you for the information. I will probably still use the "reservoir seal ring", because although its a little more work I will feel better about it. I also wear a belt AND suspenders.---That's more a reflection on my own personal quirks than any good sound reasoning.---Brian
 
I used a couple of O rings to seal either end of the liner on this engine, I'll see if I still have my drawings.

07-10-1-1.jpg
 
You know, what I really would like to do is arrange the stempost of the governor to set vertically, like the one on this steam engine I built a few years ago. It would be much easier to have the flyball governor run directly off the end of the crankshaft, using one end of the crankshaft as the stempost, I just think it looks a lot niftier with it vertical like the one in the picture. Due to the "impulses" of a hit and miss engine, I don't think it could be driven by a belt or o-ring drive. However, a set of bevel gears would get the job done. I don't have the faintest idea yet how I would arrange the exhaust valve lockout arm, but I will think on it. The governor would be a 3 ball unit instead of the two ball in the picture. I think one of Bob Shores "Angel" series engines had the governor set up the way I would like to do. I'll have to do some research------
 
At this stage of development, I can see that it would be possible to run 3/8" ball bearings everywhere but at the wrist pin. I will price out some "open" single race bearings tomorrow. As someone pointed out "friction is not your friend" when it comes to hit and miss engines. If buying 3 ball bearings doesn't break the bank, now would be the time, before I go much farther with the design.
 
After some detective work, I found it was Bob Shores' "Silver Angel" that had the governor aligned somewhat as I wanted. I have watched a couple of youtube videos but there is too much happening too fast to zero in on his governor arrangement. Can anyone direct me to some good still pictures that show the governor area on the Silver Angel please. I know the pictures are somewhere on the web----I remember studying them a few years ago when I built my very first flyball governor.---Brian
 
Back
Top