Horizontal Milling Attachment

Home Model Engine Machinist Forum

Help Support Home Model Engine Machinist Forum:

This site may earn a commission from merchant affiliate links, including eBay, Amazon, and others.

cfellows

Well-Known Member
Project of the Month Winner
Joined
Aug 25, 2007
Messages
3,890
Reaction score
715
Waiting on parts before I can continue on my outstanding projects, so what do I do??? I ordered some more parts for yet another project!

http://www.ebay.com/itm/321195442688?ssPageName=STRK:MEWNX:IT&_trksid=p3984.m1439.l2649

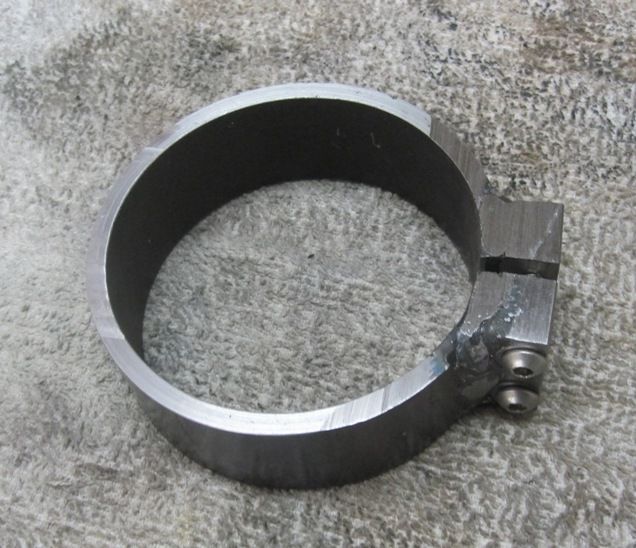
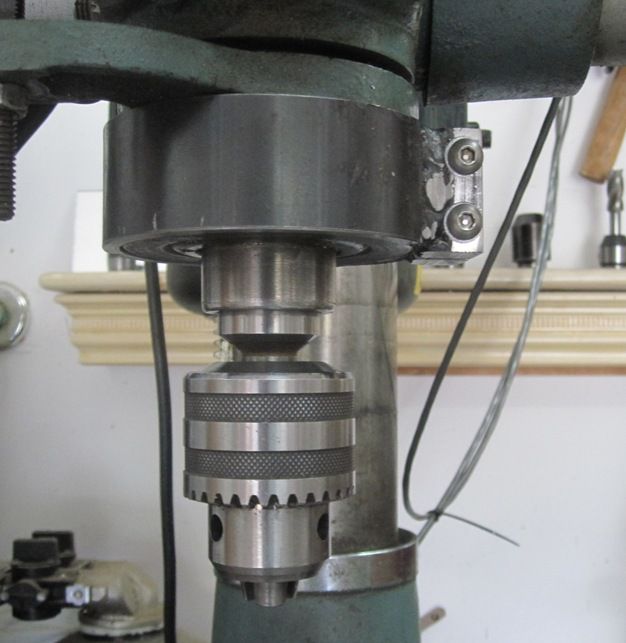
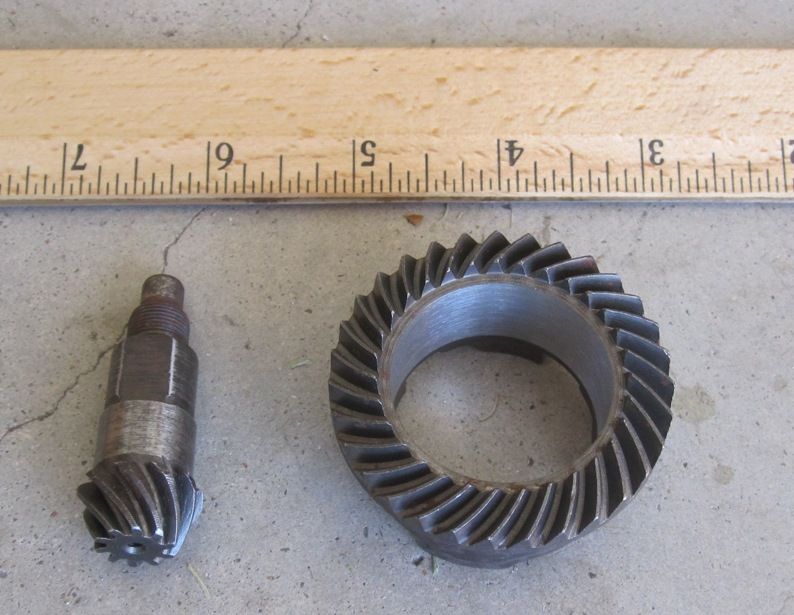
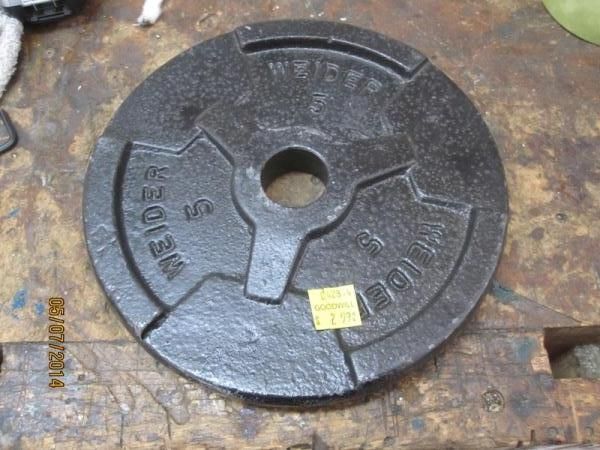
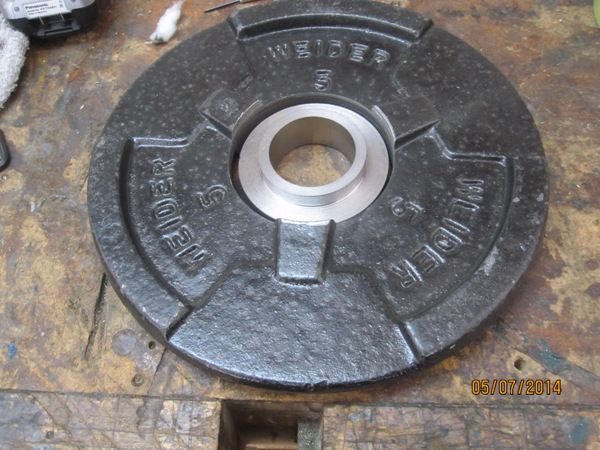
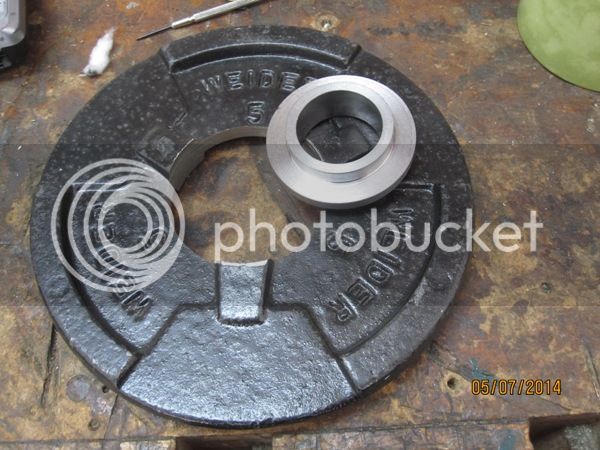
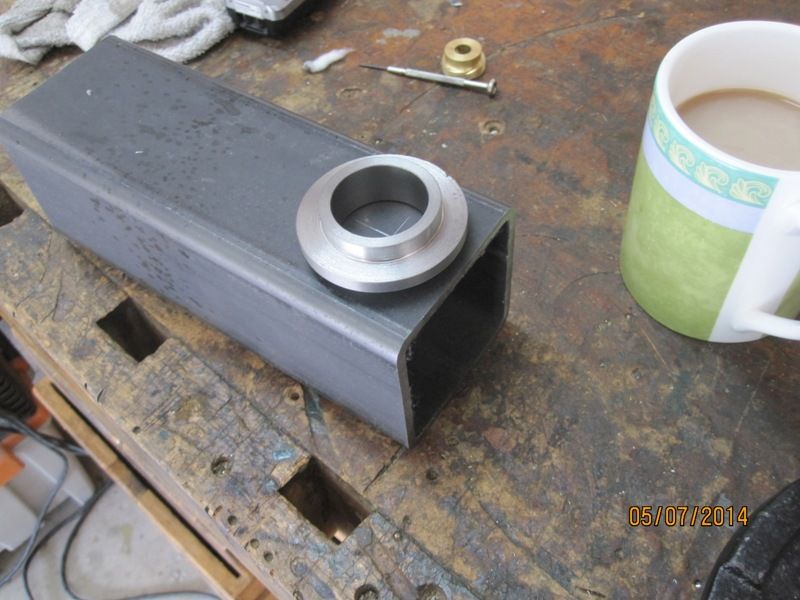
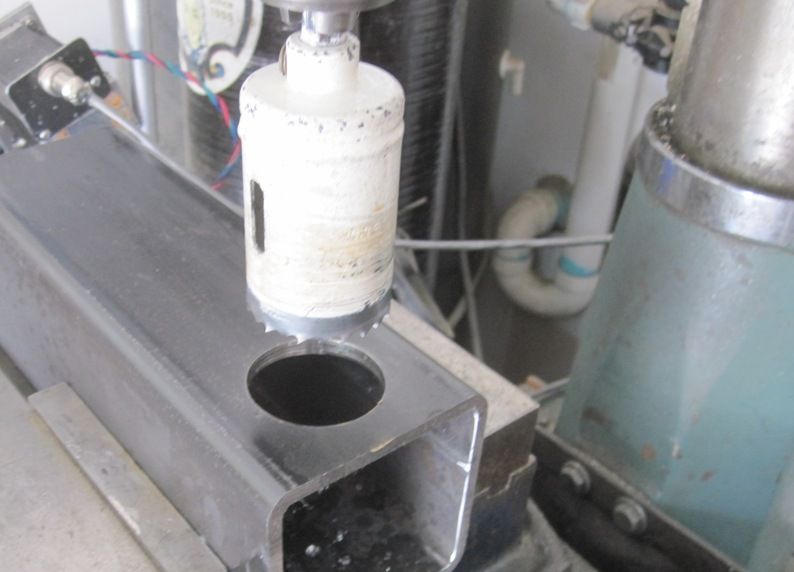
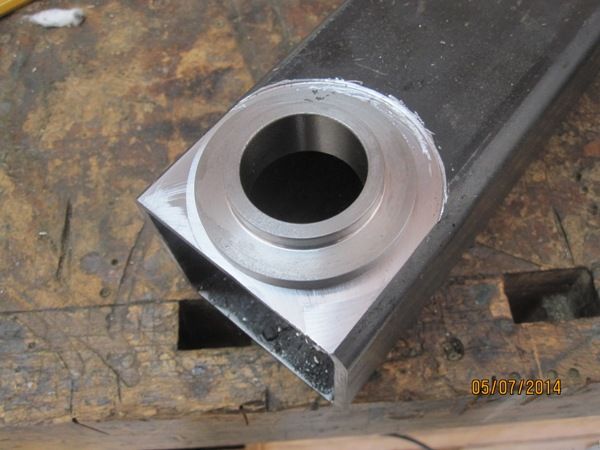
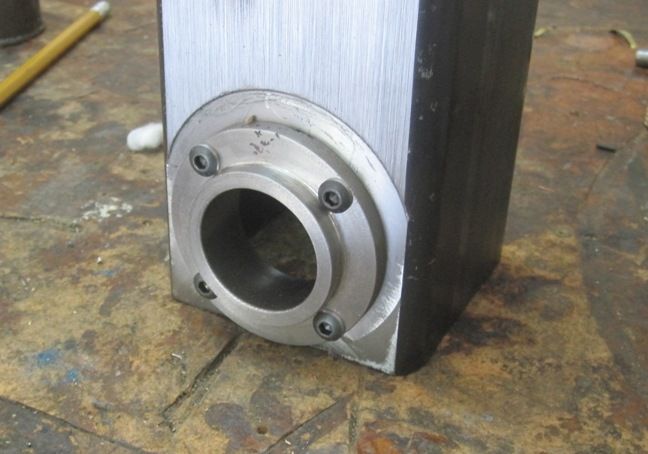
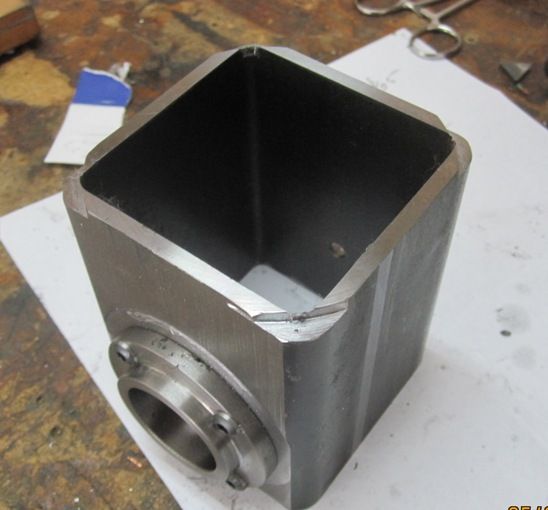
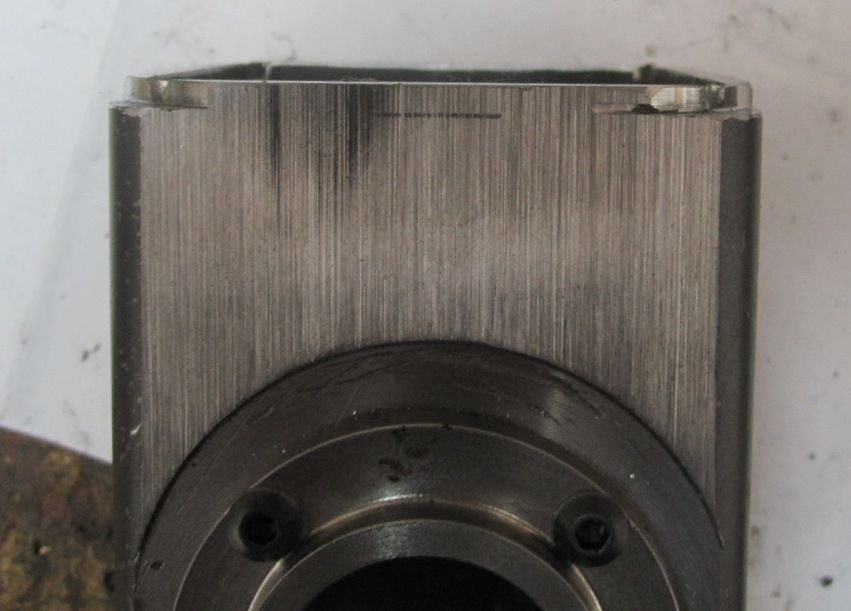
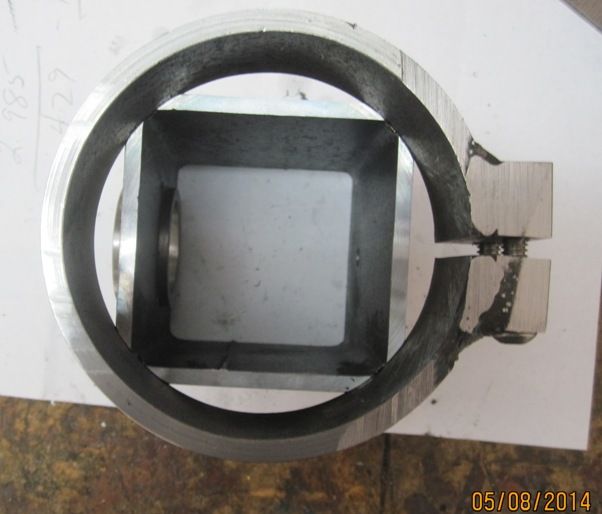
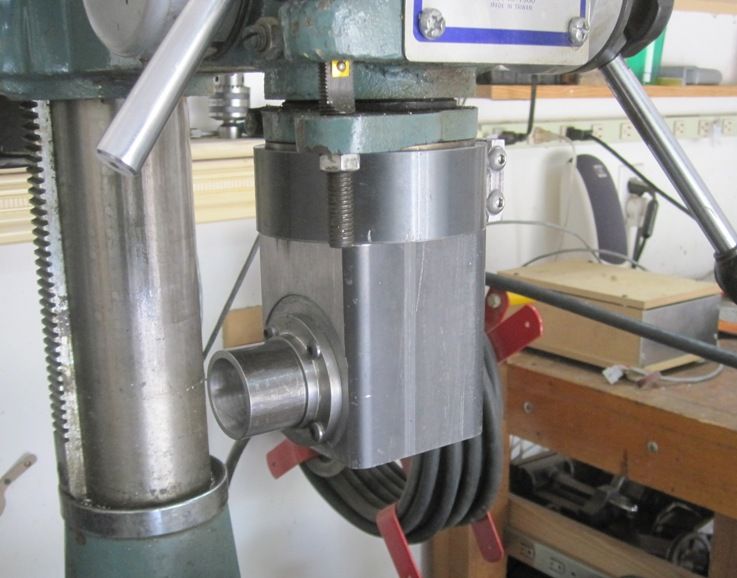
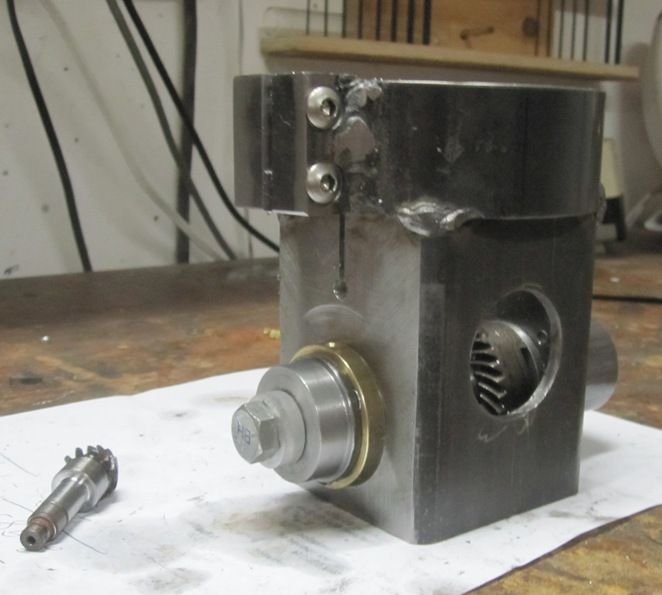
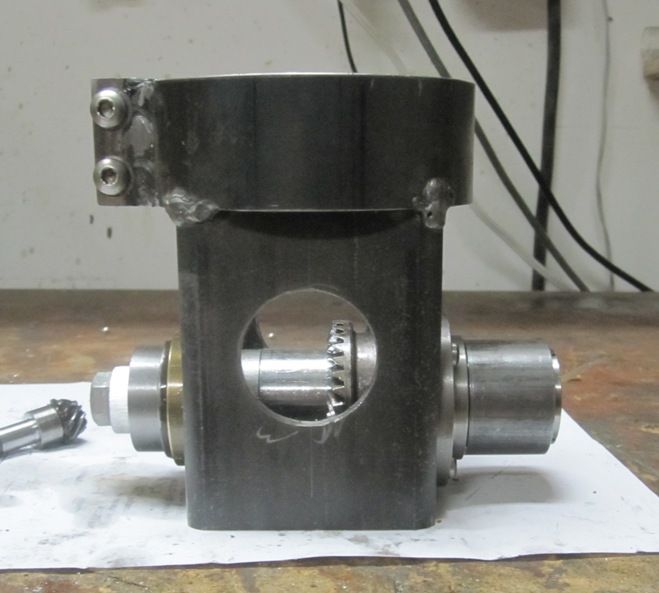
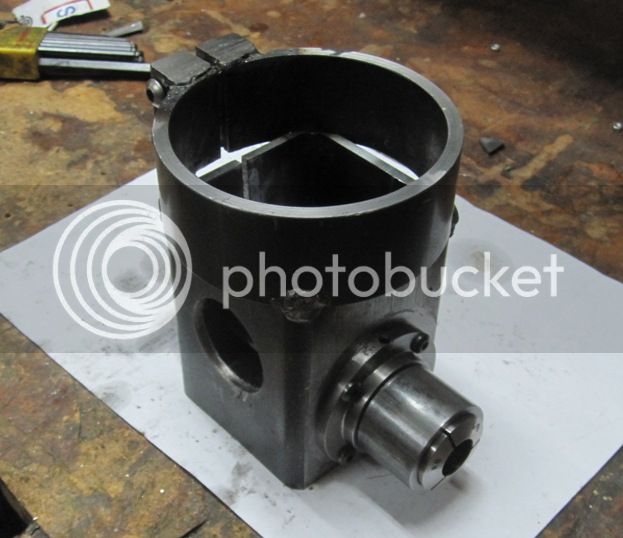
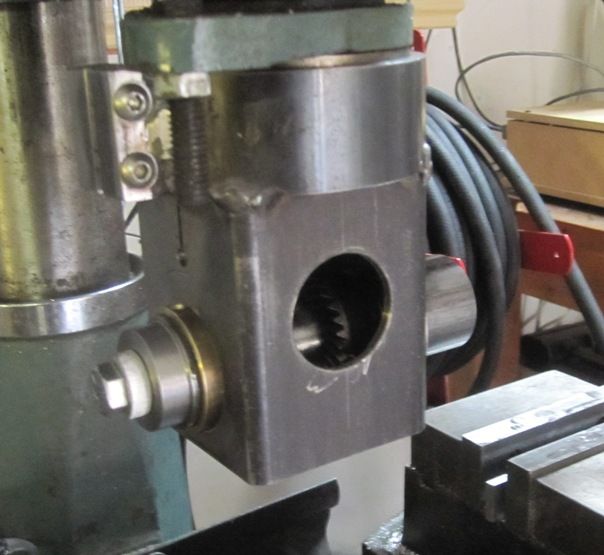
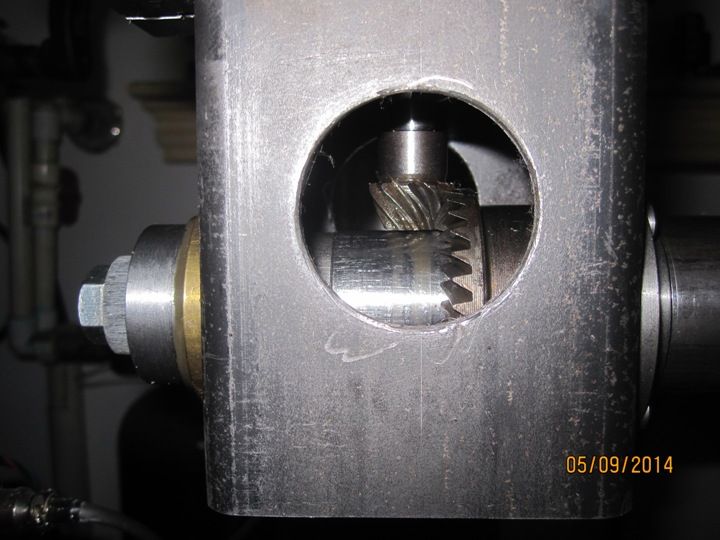
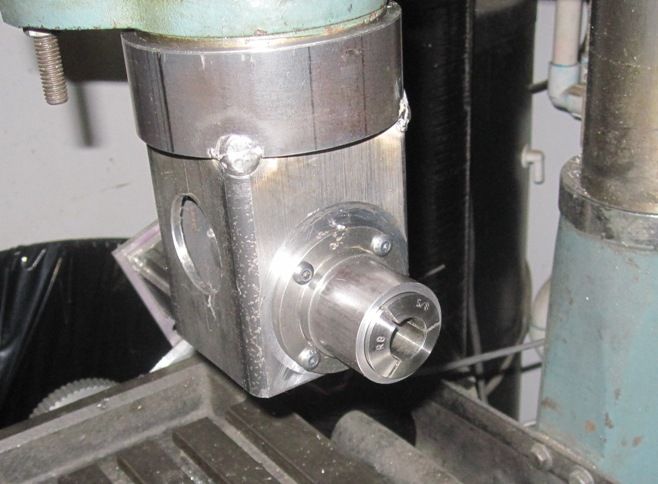
In their March 1995 issue, Home Shop Machinist featured a 2-part article by Frank McClean on building a horizontal milling attachment for his mill / drill. Using bevel gears like those in the article would be pretty expensive, probably topping $60 or more if ordered from some place like Stock Drive Products. However, there are a myriad of bevel gear sets available on Ebay in many different sizes and shapes as replacements for angle grinders and hammer drills. So, if everything pans out, I'm going to give it a shot. I doubt it will handle heavy duty milling, but it should drive slitting saws and involute gear cutters with no problem.

Stay tuned...

Chuck
 
Chuck that sounds like a worthwhile project. I have an RA head for my BP, and use it on occasion I've opened it up and found the gears about an eyeball 18DP. A possible source of cheap gears is the gearbox that drives the blades of a commercial lawn mower, the splines and shafts of those fail before the bearings and gears. At least with the units mt SIL uses.

Just an idea.
 
Hi i'm considering going the other way i'm restoring a 18.. bristol No2 horizontal miller there's a guy where I work pulls apart cars so i have got a couple of diff insides with the intention of using the spider gears in a right angle drive

Thanks
Paul
 
Chuck, funny you mentioned the angle grinder bevel gears as I was just looking at the on ebay today for a project. only $10-15 delivered! Rough gearing is 2.4:1 on one I looked at. Look round, you could probably buy a cheap angle grinder for $20 or so new and strip the gearbox out of it.
 
Still waiting on the gears to arrive. I found this link to some pictures of the horizontal attachment another fellow made from the same plans.

http://bbs.homeshopmachinist.net/threads/60843-Horizontal-Milling-Attachment

Chuck
modify_inline.gif


http://www.modelenginemaker.com/index.php?action=reporttm;topic=3561.12;msg=64176
 
I decided to get started on the right angle attachment, even though I don't have the gears yet. Today I worked on the clamping ring.

IMG_3599_zps575cd143.jpg


And here it is attached to the nose of the spindle housing...

IMG_3598_zps96cbbed3.jpg


I'm going to make the main body from 3" square steel tubing. It will be welded to the clamping ring later.

Chuck
 
My gears arrived today. Pretty fast shipping from China, I bought them on April 23 which was only 10 days ago. Tracking was pretty timely also.

IMG_3607_zps674bbdcb.jpg


IMG_3608_zps8f5628bf.jpg


The OD on the big gear is just under 2" and the ID is a little over 1.25". I plan to make the attachment accept R8 collets and will use a piece of DOM tubing 1.5" OD by 1" ID for the spindle. I'm going to first try using a flanged, plain cast iron bushing for the working side. I didn't have a large enough piece of cast iron on hand so I checked with Speedy Metals for a 2" diameter, 12" long piece. After choking on their price of $19 + $18 shipping, I searched around on the internet and found a 5 pound dumbell weight at Academy Sports for $3.99 + tax. They have a store less than 5 miles away, so this morning I drove over and picked one up.

IMG_3603_zps0053249d.jpg


It's almost 6" diameter and 11/16" thick and already has a 1" hole in the center. I'll use a 2 3/8" hole saw to cut out the center, then finish it up in the lathe.

Chuck
 
The cast iron weight turned out to be something other than cast iron. My hole saw made it through the paint and that was it. I thought it might just be hardened from the casting process, but after cutting more than .1" deep with a carbide end mill, it's still hard and shiny. On to plan B, after I decide what plan B is...

Chuck
 
This is very interesting Chuck. Although I can't imagine ever needing such a thing, I will follow along to see what the result is.---Brian
 
This is very interesting Chuck. Although I can't imagine ever needing such a thing, I will follow along to see what the result is.---Brian

Thanks, Brian. My immediate interest in this device is to use with my 4th axis to make helical gears. By cutting the gear teeth from the top with a standard involute cutter, I can adjust the angle of the cutter relative to the blank. I can also use it to cut gear racks of appreciable lengths and do thread milling.

But, mostly it's just out of interest in tooling and mechanical novelties...

Chuck
 
Chuck--I am trying hard not to start any other projects. the "Rupnow hit and Miss" from last summer and the "Different Opposed Piston Engine" this winter have left me in engine burn out mode. I did make another ball turner the other day, more out of boredom than any real need for a ball turner. I am anxiously waiting for some warm weather to show up so I can get my hot-rod out and spend the summer indulging in my other hobby. It has been a terribly cold and backwards spring here this year, and the daytime temperatures still haven't broken 70 degrees F so it is still to cool to go riding around in a Ford roadster. Yesterday I caught myself measuring all the plastic handles on my BusyBee lathe so I could machine some brass replacements, but then realized that I don't have any brass stock, so I am spending my time re-reading "Red Storm Rising" for about the third time.--When the world lost Tom Clancy, it lost an excellent author.---Brian
 
At my age of 70, it is apparent I am vulnerable to burnt-out. Good reason why I stayed away from a particular project for a while and went on to DIY the 4'' RT and the ToolMaker's Chest just to digress for a while to recover. Short holidays help.

About to pick up bar stocks to make the Nemett-Lynx Engine in June. This time ,will try not to bring difficult machining processes to bed. Plan the machining process ahead and get machining done right rather than mess up and break my head to salvage.

The Nemett-Lynx engine will have two HMEM members working on it. Will be fun watching each other's post. This the first time I work on OHCams.
 
I just turned 70 last December and, having retired 5 years ago, have a lot of time to do just about anything I want. I have more than a couple of projects on indefinite hold and some I'll never finish. In addition to my metal working, I do things with my Arduino micro controllers and also play my electronic keyboard, play being the operative word... I expect it frustrates some forum members that I flit around from one project to the next, but I am having fun!

I am going to convert my Bessemer 2-stroke engine to 4-stroke with a helical gear driven side shaft operating the cam. That's part of the reason I want this right angle milling attachment.

Chuck
 
Last edited:
I just turned 70 last December and, having retired 5 years ago, have a lot of time to do just about anything I want. I have more than a couple of projects on indefinite hold and some I'll never finish. In addition to my metal working, I do things with my Arduino micro controllers and also play my electronic keyboard, play being the operative word... I expect it frustrates some forum members that I flit around from one project to the next, but I am having fun!

I am going to convert my Bessemer 2-stroke engine to 4-stroke with a helical gear driven side shaft operating the cam. That's part of the reason I want this right angle milling attachment.

Chuck

Agree with your quote--------" So many projects to do and so little time ''.Best to keep body and mind occupied with our never ending projects.

Watching this thread. Down loaded print for future use. My vertical mill when
used for slitting is limited and slitting long bars impossible. Your attachment will stretch vertical mill capabilities. Please post video when done.
Trust weather has turned warm in your area. Over here its 33----35C. RH 85---90.
 
The cast iron weight turned out to be something other than cast iron. My hole saw made it through the paint and that was it. I thought it might just be hardened from the casting process, but after cutting more than .1" deep with a carbide end mill, it's still hard and shiny. On to plan B, after I decide what plan B is...

Chuck

I had a chuckle Chuck! I have seen a few people suggest a barbell weight for a flywheel. A friend tried your trick and had exectly the same problem you did. I have not tried it myself but over here I made a mental note of a cast iron specialist supplier who will cut you a slice of iron to order in many different sizes. I think it might end up costing $20 not $5 but that is reasonable I think. I was costing out a 7" piece 1" thick at the time.
 
I've been noodling around with this for a few days. I almost convinced myself to go with tapered roller bearings, but a couple of days ago, while at the local Goodwill store, I found a couple of these for $3 apiece...

IMG_3609_zps7af02c29.jpg


I don't think this attachment will get a lot of use and I mostly want to keep it simple, so I'm sticking with cast iron plain bearings for now. I was able to easily cut a chunk out of the middle with a 2.5" hole saw.

IMG_3610_zps97429bfc.jpg


IMG_3611_zpsed283945.jpg


The finished piece is 2.3" major diameter with a 1.625" shoulder on either side. The ID is 1.275, same as the ID on the bevel gear.

IMG_3612_zps254c7d98.jpg


I will bore a 1.625" hole through one side of the square tubing and secure the bearing to it with 4 bolts in a circular pattern though the flange. The other side will have a smaller cast iron plain bearing, similar in shape but with 3/4" ID, and secured in the same manner.

Chuck
 
So here's some more pictures. I first used a 1.5" hole saw to cut an opening for the shoulder part of the bushing.

IMG_3613_zps3839166c.jpg


Then I used a boring bar to open the hole up to 1.625". Here's the bushing sitting in the freshly bored hole. I used a flycutter to flatten the area the bushing sits on.

IMG_3614_zpsde7a06d9.jpg


And here I've drilled and tapped holes in the housing to secure the bushing with 10-32 button head screws.

IMG_3615_zpsa6a62c19.jpg


Before I bore he bottom hole I'll start on the spindle.

Chuck
 
Here's some more pictures of today's work. I cut the 3" square tubing body to length, then mounted it in my 4 jaw chuck in the lathe and squared up the top end. I also turned down a 1/8" long shoulder on the end to fit inside the clamping ring to which it will be welded. This will make sure the square tubing is centered and square in clamping ring.

IMG_3620_zps7151b52a.jpg


IMG_3621_zps534f7181.jpg


And here's the ring fitted over the top of the square tubing body. I haven't welded in place yet.

IMG_3622_zps58b25663.jpg


IMG_3623_zps94be4308.jpg


And clamped to the spindle nose of the mill / drill...

IMG_3624_zpsc22e96c7.jpg


And here's a video of a test run...

[ame]https://www.youtube.com/watch?v=QQlybFXMUWE[/ame]

Bear in mind, I haven't yet welded the square body to the clamping ring nor have I completed the outboard end of the horizontal spindle. That's all coming up next.

Chuck
 
Well, it's finished...

IMG_3633_zps60e61106.jpg


IMG_3632_zps0a1b895b.jpg


IMG_3631_zps0a01f05a.jpg


And ready to go to work...

IMG_3629_zpsd7d3c9b7.jpg


IMG_3630_zps99ad5d34.jpg


IMG_3628_zpseb7e3ee5.jpg


The welding is a little gnarly, but it's functional. Its first project will be a 10 degree helical gear for the sideshaft on my Bessemer conversion to 4 stroke.

Chuck
 
Back
Top