Hoglet started (and running!)

Home Model Engine Machinist Forum

Help Support Home Model Engine Machinist Forum:

This site may earn a commission from merchant affiliate links, including eBay, Amazon, and others.
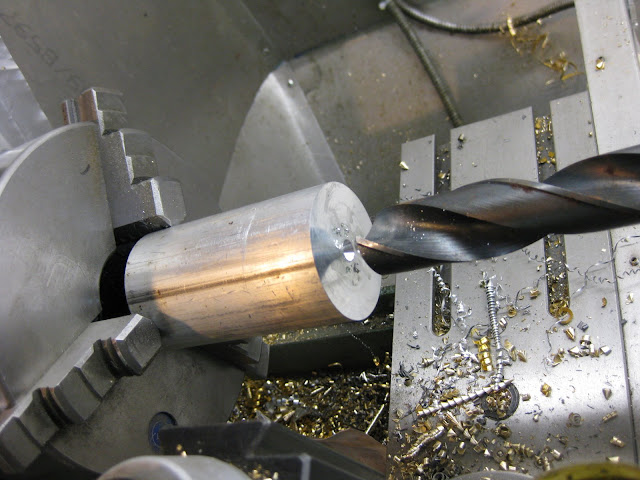
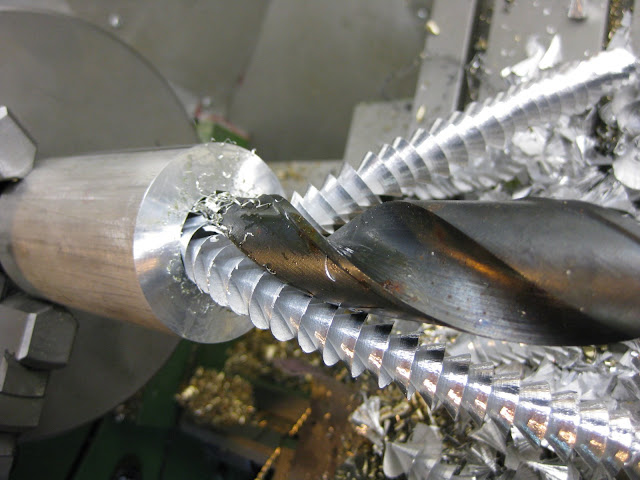
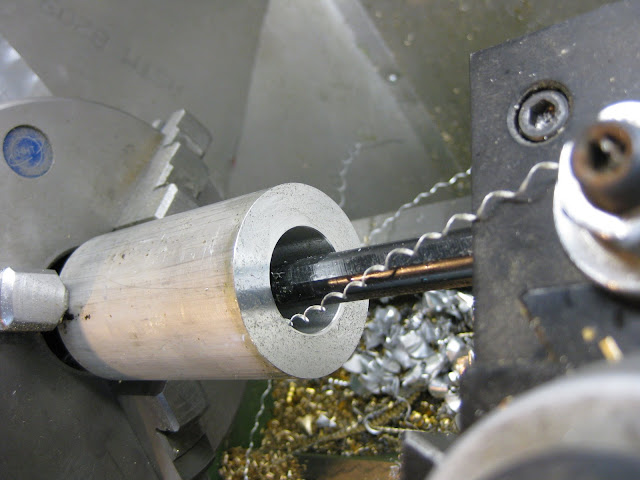
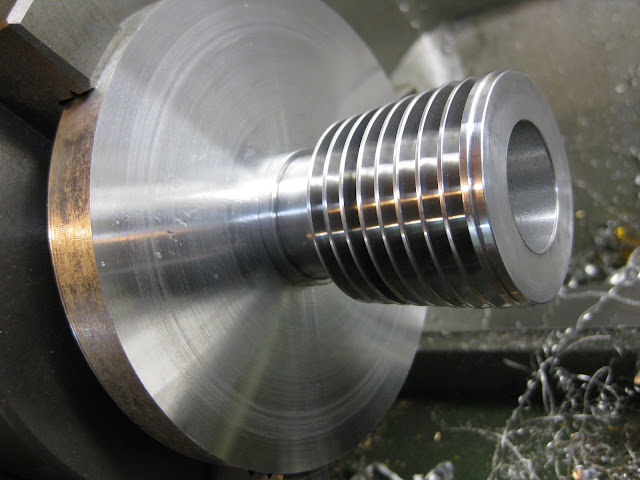
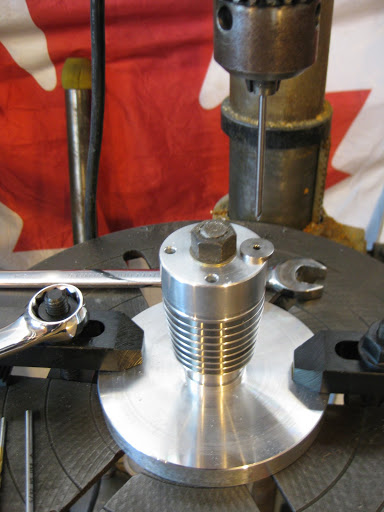
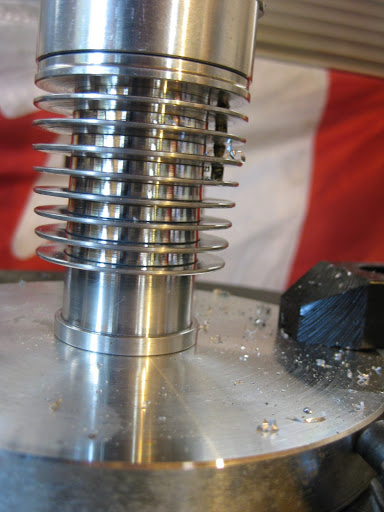
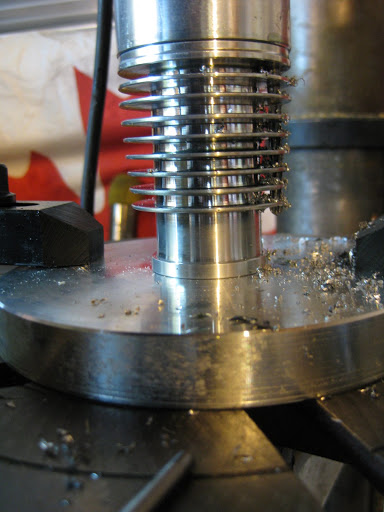
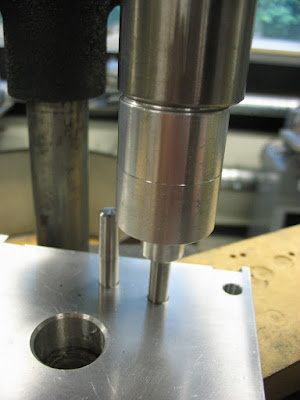
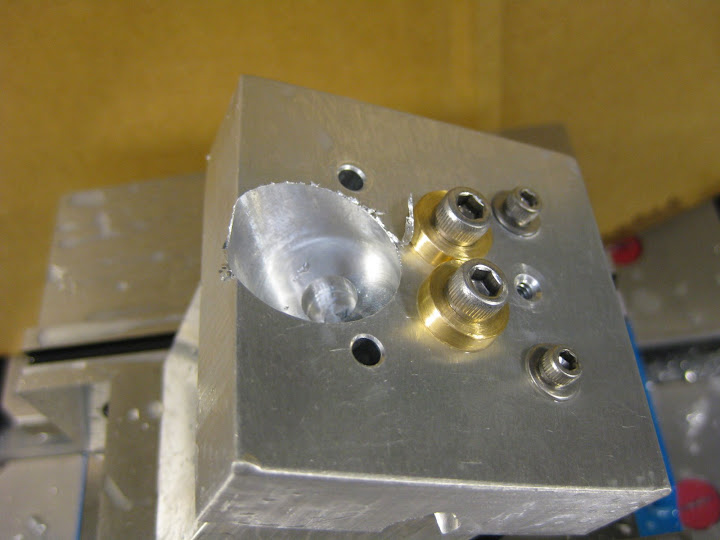
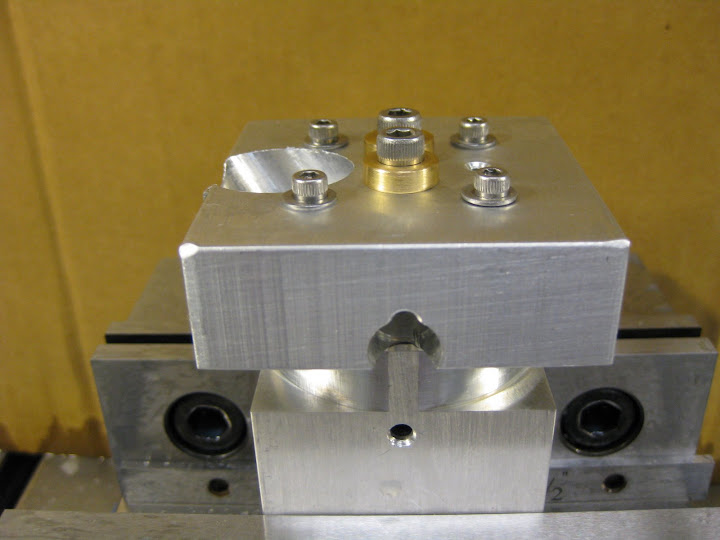
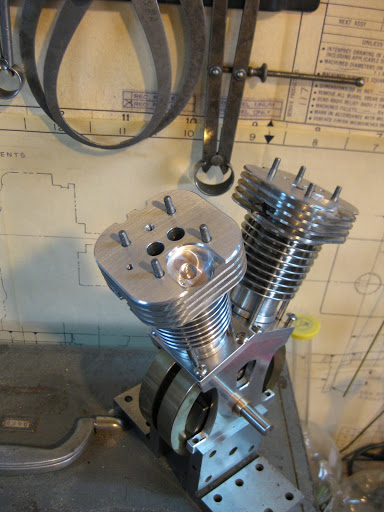
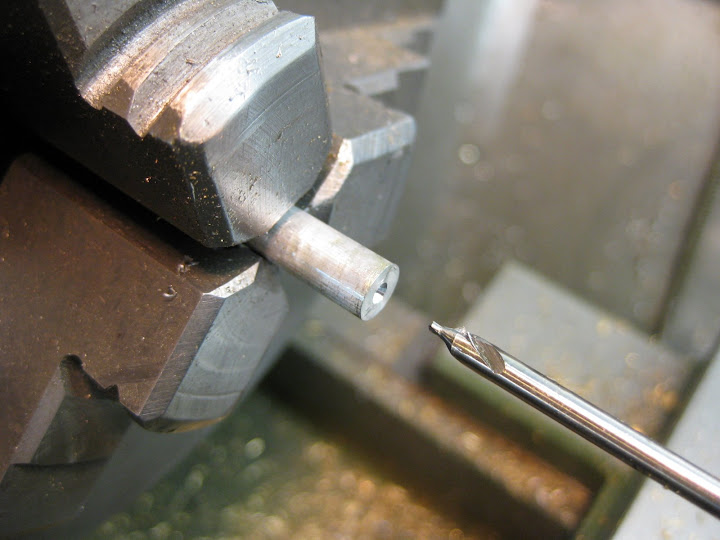
I opted to drill the holes before cutting the fins. There was a small amount of wander in a couple of the holes, I mostly solved this buy enlarging the holes by 0.5mm in all but the top fin so the heads would still be corectly located. One of the holes also needed a lick with a file just to pull it over a bit more.

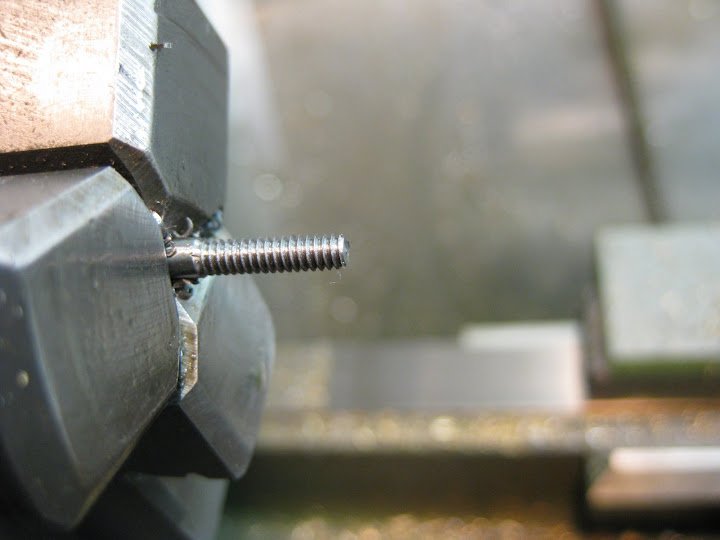
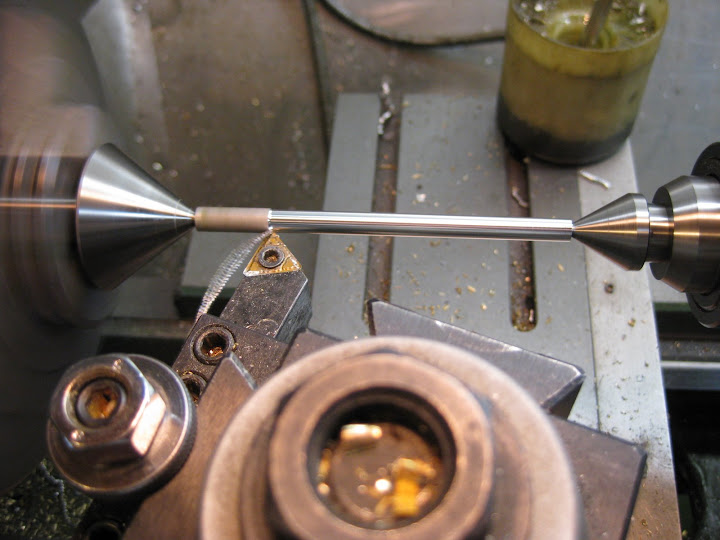
If I were doing it again I would start with a stub drill after the Ctr drill or cut the fins first and drill all the way with a 1/8" centre drill changing part way for a long series one, then open up to 4mm (I used M4 threads on 5/32 rod)

Jason
 

Thanks Phil, Chuck and Jason.

I've got some hollow cast bronze for my flywheels so just need to skim them inside & out

I was looking for that, I had some but wrong size, Shame to waste all that brass in the centre.

how difficult was it to drill the long, deep holes

I haven't drilled them yet. Thought about drilling before the fins like Jason suggested but I was in a turning mood.
So now I might centre drill and drill each fin. Also my parting tool deflected a bit leaving the fins slightly tapered, which complicate the drilling further. :p

Stock centre drilled;

hoglet%20178.jpg


Drilling;

hoglet%20180.jpg


boring; (I bored .090 oversize to allow for a .045 wall cast iron sleeve)

hoglet%20182.jpg


Dialing the QCTP back in after setting the compound over 5 deg;

hoglet%20183.jpg


fins ready to cut;

hoglet%20189.jpg


fins cut;

hoglet%20197.jpg


Tapered;

hoglet%20198.jpg


Polished ready for parting;

hoglet%20199.jpg


polishing a few tenths off the spigot end;

hoglet%20201.jpg


And now its starting to look like something! I should change the title to "hoglet half way"!

hoglet%20203.jpg
 

The drawing for this engine calls for a carb purchased from OS engines.

Does anyone have a suitable design they could share?

It would be a shame to slap on a factory made component.

Thank you very much.
 
I have a suitable OS card laying around so will us ethat to start with. May decide to build one which was in Model Engineer Mag a few months back, there is a picture of it fiotted to one of the designers engines half way down this page

Also worth a look at his latest design the "Bobcat" there is a video of the first run on the home page.

Jason
 

Thanks Jason,

That carb would be perfect! I also have an OS carb I thought about using just to get up and running but I have come this far...

I think between that nice photo and Maryak's step by steps, I should be able to come up with something.

What are you doing for your ignition? Electronic like the RcExcel?

It is very compact and I think it will run off a single Lipo cell.

Kevin.
 
kustomkb,

Very nice, :bow:

Glad my ramblings are of use to others.

Best Regards
Bob
 

Thanks Bob,

It's a real help, none of us were born with these skills so it's good to share. Methinks.

Started on a drill jig I think will keep my centre drill/ drill straight and stiff.

The plan is to c'drill and drill each fin 1/8 in my drill press before opening to a 5/32 slide fit. (wishful thinking)

bore out a large dia. bottom plate to hope for squarness;

hoglet%20205.jpg


Fit bottom spigot;

hoglet%20207.jpg


And tap 1/2-13;

hoglet%20208.jpg


then machine top end that will hold drill bushing;

hoglet%20209.jpg


And ensure fit;

hoglet%20210.jpg


Drill jig without reamed holes for bushing;

hoglet%20211.jpg


have fun!
 
Drilled the cylinders yesterday.

I clamped the jig to the drill press table, then aligned the bushing with a dowel pin then switched to a long centre drill.
I choked up on the drill for the first few fins and then went to full length. The fins were thin enough so that I was able to pilot drill with the centre drill the whole way;

hoglet%20213.jpg


Then switched to a .146 drill;

hoglet%20215.jpg


And finally reaming size for size to 5/32";

hoglet%20217.jpg


The holes came out very straight thanks to the long drill bushing. And were a snug sliding fit on the studs.

I often end up fighting myself because I make things unnecesarilly close fitting. After trying them out to check for alignment I will need to open them up to ensure the faces of the heads and cylinders are pulled square to one another for a good seal.

hoglet%20223.jpg


Looks good, Kevin. Nice technique. By the way, where did you get that long center drill?

Chuck
 

Thanks Chuck.

The centre drill has been in my box for years. I also have a 6 inch. Most tooling shops should have them.

Looks like I spoke too soon. One of the holes wandered and will need to be pulled over slightly at the bottom.

It was probably the first hole which I switched to a 1/8 drill after centre drilling only the first fin. :-\
 

I made the brass valve guides today.

Started by setting a "form" tool to 14 deg. to plunge cut the taper where the intake and exhaust blows by;

hoglet%20226.jpg


and the plunge cut;

hoglet%20228.jpg


Then turned the OD for a 0.0015" press fit;

hoglet%20230.jpg


After drilling and plunging out the back end for 0.010" spring ID clearance it was ready for parting off;

hoglet%20232.jpg


Final reaming will be done after instalation.

hoglet%20235.jpg


Next up, finish the heads.

 
hey can i get some of that talent so i can make prety parts like these. i really could use some.
thats coming along real nice. thank you im in school everyday.
 

Thanks alot Sid.

can i get some of that talent

"If you build it, they will come"

A little more today.

Drilled the intake and exhaust holes;

hoglet%20241.jpg


Then drilled and reamed for 1/4 dowels to set the fixture over 21deg.

I reamed a scrap of AL. to ensure the pins pressed in square;

hoglet%20238.jpg


Then replaced the soft jaw and clamped the fixture in place, ready to mill the angled ports;

hoglet%20243.jpg


Ciao for now!
 
Kevin,

Nice work. :bow: :bow: ETF ???

Best Regards
Bob
 
Thanks again Bob.


??? ???

Heads set to 21 deg. for intake;

hoglet%20251.jpg


Intake bored;

hoglet%20252.jpg


Set over for spark plug bore;

hoglet%20255.jpg


Bore complete;

hoglet%20257.jpg


ready for outside contour;

hoglet%20259.jpg


Roughed;

hoglet%20260.jpg


finished;

hoglet%20261.jpg


cooling fins cut;

hoglet%20262.jpg


Test fit of heads;

hoglet%20276.jpg


Also radiussed the tips of the push rods;

hoglet%20245.jpg


And used a crappy tire die nut ::) to threads 4-40

hoglet%20246.jpg


which cut okay :eek:

hoglet%20249.jpg


Then faced to length and centre drilled the push rods;

hoglet%20267.jpg


And turned down between centres, (had no 3/16 AL)

hoglet%20271.jpg


Have a good day!

 
Hi Kevin,

Wow that's look'n real good...keep up the great :bow: work :bow:

Can't weit to hear it run and that's no th_bs

Have a great long week end.

Regards

Philly
 
Kevin,

Beautiful job. :bow: :bow:

Best Regards
Bob
 

Thanks alot fella's.

This weekend I hope to get the valves and lifters finished and rough out the cam.

Looks like we'll have nice weather for the long weekend finally, eh Phil?

KB
 
Yea nice for the long weekend and a :-* HONEY :-* DO LIST a yard long. :shrug: Maybe I'll have to go on an building materials run and pop by.

Regards

Philly
 
Back
Top