Hit me - Miss me?

Home Model Engine Machinist Forum

Help Support Home Model Engine Machinist Forum:

This site may earn a commission from merchant affiliate links, including eBay, Amazon, and others.
Jeff and Philly,

Hand filing is an art, I had 2 problems, our instructor was a complete and utter arthole and I'm no artist.

The Engineer,

Thanks for your support and inside info on this engine. :bow:

Today's progress report.

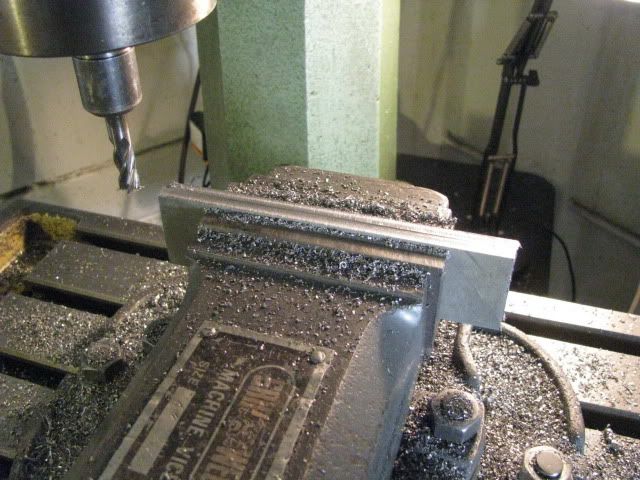
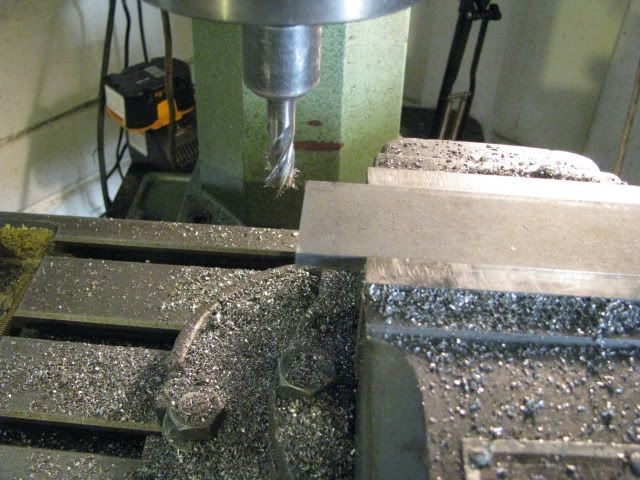
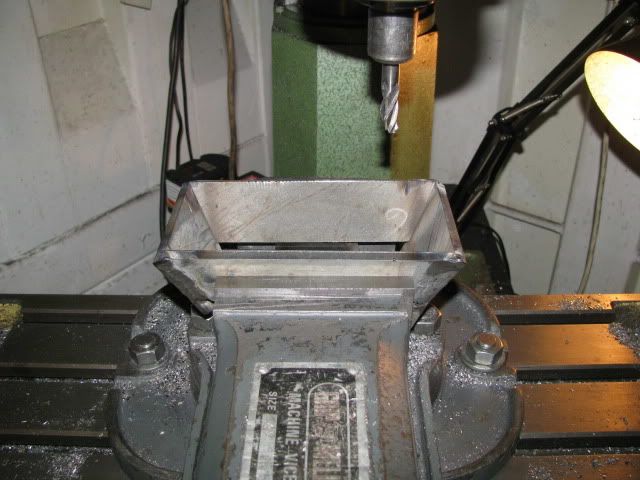
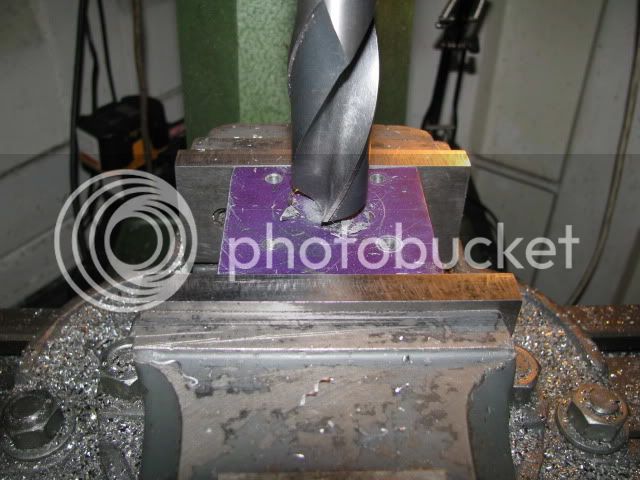
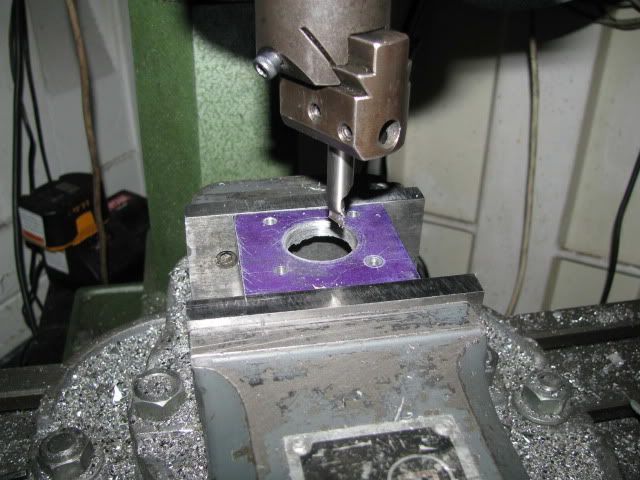
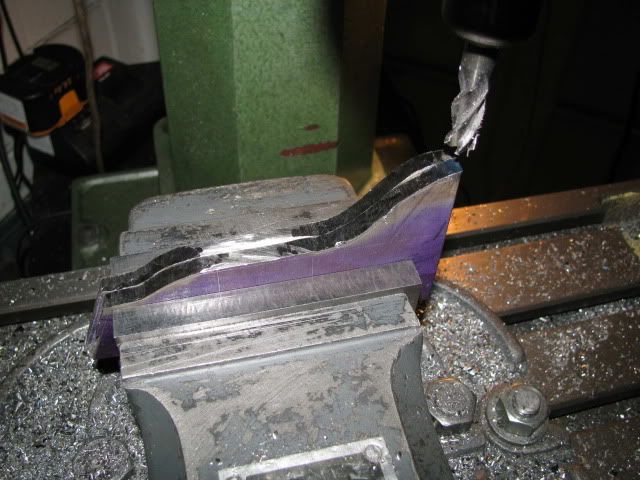
Setup to mill the relevant flat bits.

IMG_0591.jpg


IMG_0592.jpg


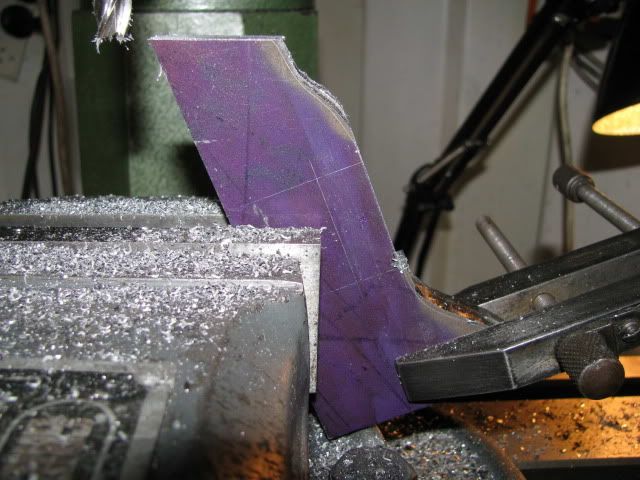
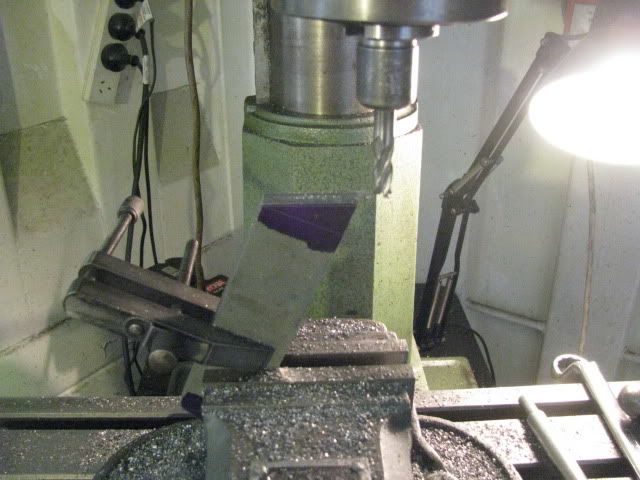
Filing the 1st compound curve - for those who are new to filing - a good finish is achieved by using a smooth file, with the teeth filled with blackboard chalk. Usually the smaller the file the smaller the teeth. In my files I go from 10" to 4" in 3 cuts, bastard, second cut and smooth. In this case the finish was with a 6" half round smooth file. The file must be free of any metal trapped in the teeth, (remove them with an old scriber point), It must also be cleaned regularly using a file card, ( a flat say, 1 1/2" x 4" wire brush with the bristles finely spaced, about 1/4" high). Lastly the final filing is done using draw filing, i.e. the file is held parallel to the body with a hand on each side and drawn back and forth on the work.

IMG_0593.jpg


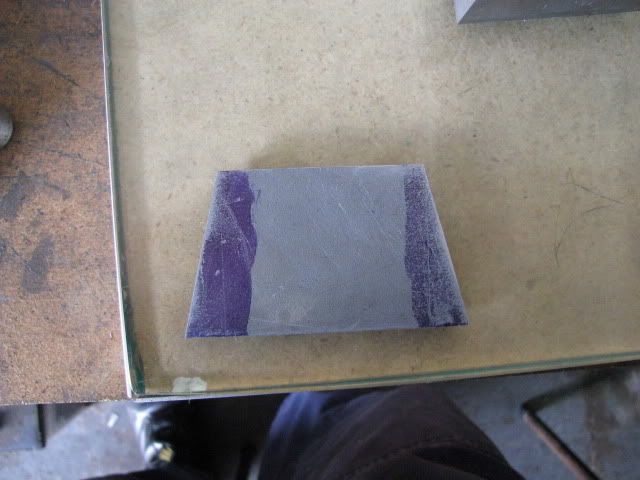
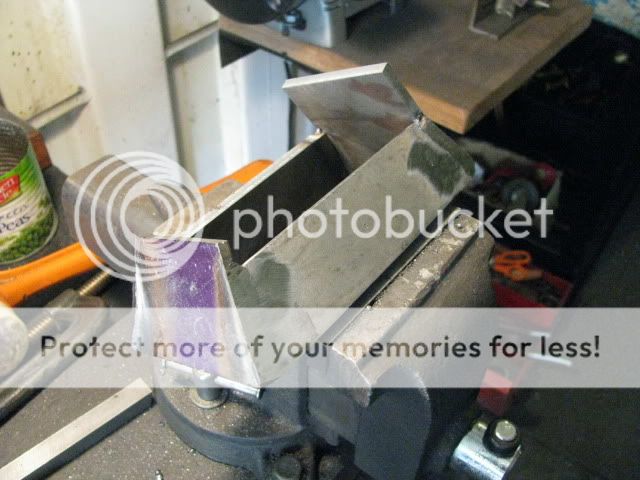
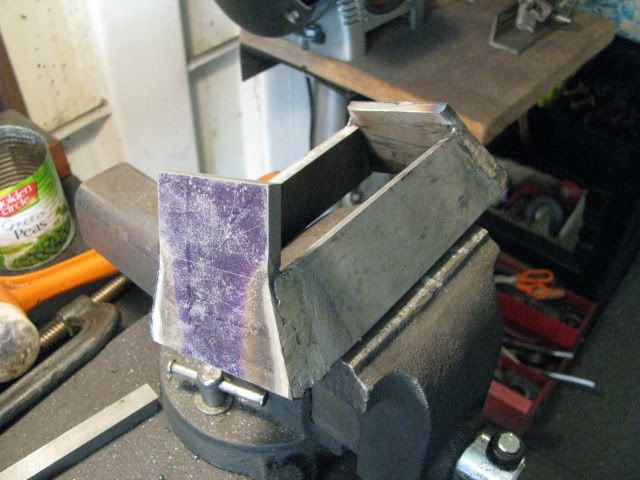
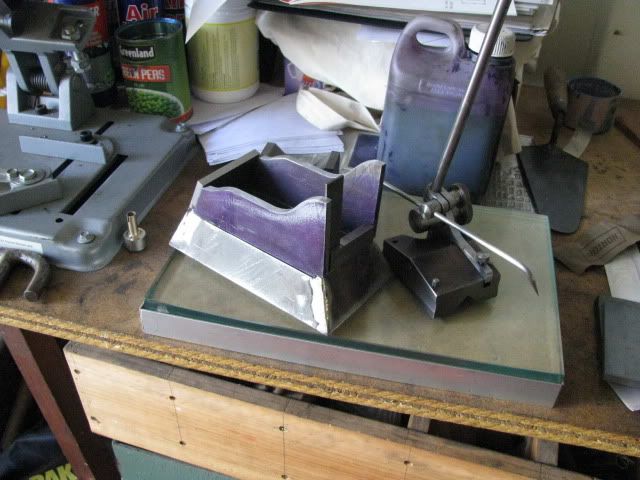
The 1st compound curve completed.

IMG_0594.jpg


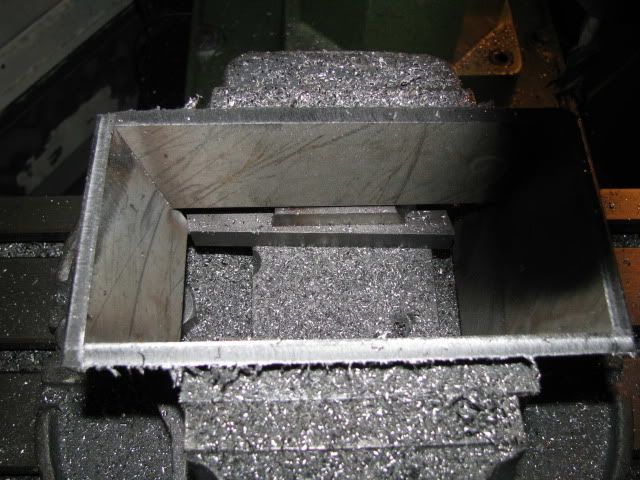
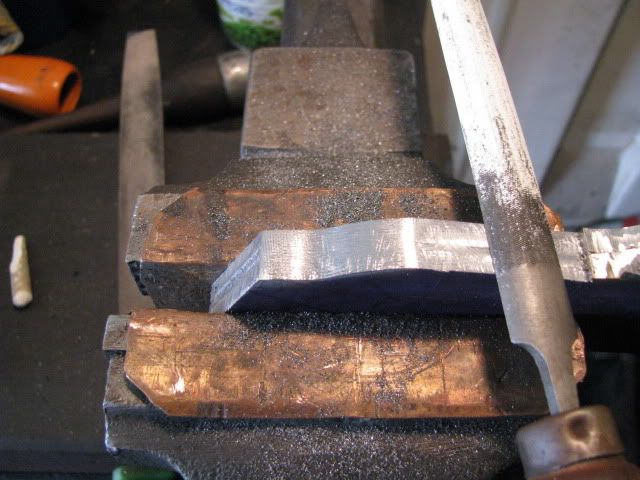
The 2nd compound curve completed.

IMG_0595.jpg


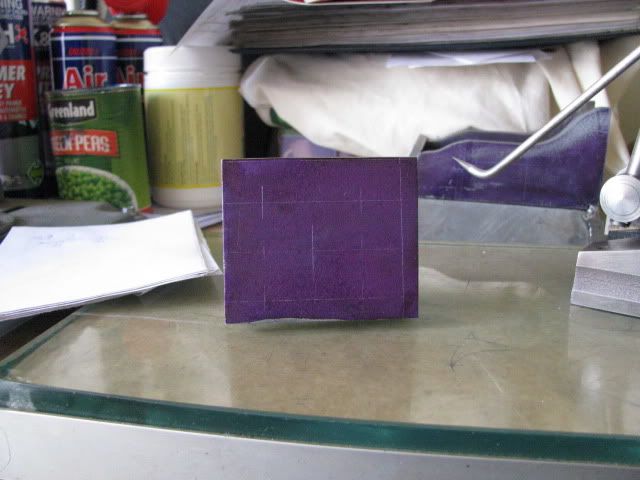
Base piece 2 - 2off.

IMG_0597.jpg


Have a great day.

Best Regards
bob

 
Bob,

I always learn something from you. I did not know about the chalk trick. :bow: :bow:

Bob
 
Instead of a file card and scriber to remove "pins" from the file, take a (spent) rifle cartridge or length of brass tubing, pound the end flat and use that to scrape in a direction parallel to the file teeth. The brass will quickly form "teeth" that match the pitch of the file teeth and sweep out any pins without dulling the file.
 
Rob and Bob,

Thanks for the kind words and support.

Marv,

Thanks for the tip about de-pinning a file. Gun control makes cartridge cases scarce in Oz, but brass tubing is easy. On the subject of brass and files, when you get a new file it is a good idea to beak it in by filing a lump of brass before tackling steel.

Managed a couple more pieces today.

Squaring up Base Piece 3 - 2 off.

IMG_0598.jpg


IMG_0599.jpg


Cutting off the corners by offsetting the hacksaw.

IMG_0600.jpg


Milling the corners - light cuts were the order of the day due to the huge overhang from the vice.

IMG_0601.jpg


Completed Base Piece 3 - 2 off

IMG_0602.jpg


Completed Base Piece 5.

IMG_0603.jpg


Yes, I can count :eek: :eek: Base Piece 4 is 3 round buttons welded on the bottom. I'm not sure I like them and I think I want a better hold down system. Could be a while as I must think about it. ::) ::)

Next comes welding these pieces together which will be interesting to say the least. Stay tuned and stand by for heaps of sympathy and moral boosting.

Best Regards
Bob
 
Hi,

Well, I'm p#$$ed and amazed. :eek: :eek: :eek:

The basis of the base is welded.
wow.gif


IMG_0630.jpg


IMG_0631.jpg


Whats even more amazing is its pretty square. ;D ;D

Best Regards
Bob
 
Hello Maryak: Your build series is very good and interesting to me to see how other people get things done.
I built this model over 20 years ago and made a few mistakes that if you don't look too close are not very noticeable, especially if you do not have the plans to compare the engine to. It was a slow build for me, as every one is, but I felt the plans were very good and I just made " one piece at a time' and at the end of construction it was time for vacation. I did not have it running yet but my Dad collected old farm engines and rebuilt them, so I took the model with us and he and I had a good time playing with it until we got the timing correct and had it running.
[ame]http://www.youtube.com/watch?v=FSCMQyLOpiQ[/ame]
This engine is a good runner and I just showed it to a couple of homeschooled kids and got it started fairly easily (first run in over 10 years) in front of everyone much to my surprise. All in all a fun build.
Good Luck with your build.
don
 
That's coming along nicely Bob :)

Nice job on the filing on the bases Thm: - I do NOT envy you that job!!!

Sorry for the silly question - that's an awkward piece to clamp for welding - how did you do it ? ???

Also, at the risk of sounding completely daft :-[ - would the inside corners of the base be visible when the engine is finished ? - if not, would inside welds be an option ?

I just love checking in on your updates - truly inspirational ! :bow:

Regards, Arnold
 
dparker said:
Good Luck with your build.
don

Thanks Don, for you inspiration and support - that's a lovely engine and I hope mine looks and runs at least a little like yours. :bow: :bow:

arnoldb said:
Sorry for the silly question - that's an awkward piece to clamp for welding - how did you do it ? ???

Also, at the risk of sounding completely daft :-[ - would the inside corners of the base be visible when the engine is finished ? - if not, would inside welds be an option ?

Arnold,

You got that right is was difficult to hold. I used angle iron with a solid block clamped inside and tacked the 2 side pieces to the larger end piece using this jig. Several judicious taps with a hammer and a square, plus checks along the sides with a ruler for parallel. Next I added the other end piece and got it sitting together on top of the vice. Grabbed one of the truck drivers, (halfway through his coffee), and got him to steady it whilst I did a couple of vertical down tacks on the loose end. Checked for square again and welded it up by holding the long over hang end in the vice adjusting for the easiest weld position.

I thought about inside welds but decided that they would be visible and if I made a mess of them, clean up would be difficult.

Thanks for your kind words and support. :bow: :bow:

Best Regards
Bob
 
Well, I'm p#$$ed and amazed.

I'm am amazed you are p#$$ed. ??? ??? ???
It looks great to me. After following your builds, I have no doubts this one will turn out great.
 
Looking great to me Bob!

Wish I could weld.......ah yes another item on the list.

....and I owe you a photo! hehehehehe.


Dave
 
Alright Bob, enough teasing already.
I want to see this puppy running!

Seriously,
I'm loving every update of this build!
Keep them coming!

Rick
 
putputman said:
I'm am amazed you are p#$$ed. ??? ??? ???
It looks great to me. After following your builds, I have no doubts this one will turn out great.

Thanks Arv, :bow:

Oz humour has me in trouble again.
wow.gif


It means I wet myself with happiness over a job that turned out good.

Dave,

Thanks. :bow: What photo ??? ???

Buy a cheap stick welder, go to the scrap yard and start electrically glueing bits together. It's not rocket science but it's a knack that only practice, practice and more practice will give you a good result. (Never buy a steel boat welded by an amateur, only half of it will be soundly welded, the other half was learning to weld.
wow.gif
)

Thanks Rick, :bow: :bow:

Love the humour, keep it coming. ;) ;D ;) ;D

Best Regards
Bob
 
End of the week and only a little done today :eek: :eek:

Set up to machine the underside of the base.

IMG_0632.jpg


The base is on parallel strips. You can pay a lot of money for these, or you can buy square HSS in various sizes and lengths, it is accurately ground and relatively cheap.

The underside completed.

IMG_0633.jpg


Hope you have a good weekend

Best Regards
Bob
 
A full size hit and miss engine that is very similar to your model

6" bore x 10" stroke....about 3600 lbs

It was my Dad's.....It entertains my kids now.
 
Bob,

How did you hold that base upside down like that? It looks like you are clamped on the sloping sides and I'd think that it wouldn't hold. Is there a clamping trick here that is just not visible in the photos?

Alan
 
AlanHaisley said:
Bob,

How did you hold that base upside down like that? It looks like you are clamped on the sloping sides and I'd think that it wouldn't hold. Is there a clamping trick here that is just not visible in the photos?

Alan

Thats got me wondering too. scratch.gif scratch.gif scratch.gif

Ron
 
Alan and Ron,

No tricks just very light cuts. I was nervous but I could not move it by hand before starting machining.

Best Regards
Bob
 
Hi Again,

Another week slips into the history books and on the home front the honey dos are piling up as we get ready to put our unit on the market.

Managed a little do for me this morning and the rain has beaten me on half of the honey do this arvo, (Phew).

Test fit of the side pieces to the base after machining everything square

IMG_0634.jpg


Marking our base piece 6 which contains the cylinder and water jacket locators.

IMG_0635.jpg


Drilling the cylinder location hole.

IMG_0636.jpg


Boring out the cylinder hole to final size.

IMG_0637.jpg


See yu-all tomorrow.

Best Regards
Bob
 
Bob that base is coming along great ,going to be a cool looking engine :bow:
 
Back
Top