Help Please. Troubleshooting a New Webster

Home Model Engine Machinist Forum

Help Support Home Model Engine Machinist Forum:

This site may earn a commission from merchant affiliate links, including eBay, Amazon, and others.
Joined
Nov 1, 2016
Messages
24
Reaction score
16
I would appreciate any help you guys can give me troubleshooting my Webster IC engine. I have been at it for a while and am growing frustrated.

This is my first IC engine build. Before starting, I read all the posts on HMEM, studied everyone's Webster build logs, watched all the runners on YouTube then got the courage to get going. I finished the engine 2 weeks ago and have been trying to get it to go ever since.

No matter what I do, I cannot get the thing to fire. I am convinced there is something fundamentally wrong.

What I have:
  1. The engine was built exactly to the plans, except: 1) I used a Viton o-ring with grooves sized per Brian's build instead of cast rings, 2) I used 0.006" paper gaskets on the fuel block where none were specified, and 3) I used 1/64" paper/fiber gasket material for a head gasket
  2. The peripheries are also per plan - points, condenser, coil, and car battery
  3. Carburetor is Traxxas Pro-0.15, at factory settings
  4. Fuel is Coleman Camp Fuel
  5. The ignition timing is set to have the points begin to open at TDC and are gapped at 0.020"
  6. The exhaust timing is set such that the exhaust valve begins to open at 15 deg BDC
What it does:
  1. Draws fuel through the fuel line when I turn the flywheel and block the carb inlet on the intake stroke, and rejects fuel on the exhaust stroke
  2. Draws fuel into the combustion chamber
  3. Generates a spark at the points and also at the spark plug when points open and again when they first close
  4. Has compression, but I am not sure if it is acceptable. 1) When I rotate the flywheel with the drill, the intake valve moves, but not a lot, and 2) when I wet the head gasket with fuel and move the piston on the compression stroke, I see small bubbles escaping uniformly around the head gasket
Troubleshooting - What I have tried:
  1. Tried a 0.015" copper head gasket and a 0.006" paper gasket. About the same compression. Torqued the head bolts as tight as I can get them
  2. Resurfaced the cylinder "block" and the head trying for a better fit. Bubble escape rate is about the same
  3. Tried a fresh o-ring
  4. Re-lapped the valves to their seats, then tested the seal by removing the valve block and blowing through the exhaust pipe and through the intake port. No leaks
  5. Shot starting fluid into the carb, while holding the intake valve open. Still no firing when cranking the flywheel
  6. Double checked wiring, switched out the points and coil, and measured the battery voltage at 14.8v
  7. Tried advanced and retarded ignition timing
I am hoping my problem is something that a rookie would overlook or do wrong. Any and all help is appreciated!

Thanks, Bill
upload_2019-3-3_13-16-42.png

upload_2019-3-3_13-17-22.png
 
Are you turning the engine the right way when trying to start it? Is your engine "free" enough that when you flip the flywheel by hand the piston bounces back from top dead center because of compression? I had a terrible time getting the valves to seal properly in my first go round with the Webster. You should be getting no bubbles at all at any of the gasketed surfaces. Dribble some liquid dish soap around all the gasketed joints, then turn the engine over rapidly with your electric drill and watch for bubbles.
 
Thanks for the quick response. I appreciate that.

I have set the timing while turning the flywheel counterclockwise when looking from the gas tank side, so I think that's right.

The engine turns fairly freely with the spark plug out. With it in, there is force required to push the piston on the compression stroke, but it does not bounce back after TDC. So I guess that means there is a leak somewhere.

I do not have visible leakage in or around the valve block, and I have leak-tested the valves and they passed. And there is no leak at the spark plug. So I guess that leaves the ring and/or the head gasket.

With all the bubbling around the head gasket, I will continue working on that, and would appreciate thoughts on what is wrong there. I have already lapped the head flat, taken a second finishing facing cut on the cylinder mating surface, and torqued the bolts as tight as I can get them - with no improvement noted. What's going on?

The only thing I can think of is that when turning the cylinder "sleeve" to fit the bore in the head, I went over by 0.001", so rather than having a "snug sliding fit" it's really rather sloppy. Could that be a cause of not getting a good head gasket seal?

Thanks again!
 
Last edited:
Put a head gasket made of .030" thick standard waterpump gasket in place---or even cut one from a cardboard cereal box, coated with grease on both sides. These engines don't get hot enough to burn away a head gasket like a larger engine will. Don't worry about that "sliding fit" business--it isn't critical. Put a gasket between the flanged surface of the cylinder and the cylinder head itself.
 
I used 0.4mm Jointing gasket material. The gasket is between the head and the shoulder on the cylinder where the bolts are.

I found the compression quite high and used an electric drill to start it.

Cheers,
IMG_8254.JPG

Andrew in Melbourne
 
Thanks, Andrew.

I cut a new head gasket, smeared it with grease then installed it. Compression improved dramatically. With the valve block removed, I plugged the cylinder port and both pressure and vacuum held. Great news!

Then I installed the valve block with new gaskets all around, and turned the flywheel with the electric drill. The intake valve cycled open and closed as did the exhaust valve. But no start. I shot starting fluid into the carburetor but still no fire.

Something else appears to be fundamentally wrong.:(
 
Try setting the ignition before TDC about 5 degrees (or a little more )

minh-thanh:

Thanks for your help. The plans call for first starting the engine with the timing set at 15 degrees before TDC, which is where I had it set. I backed off to 10, then 5 degrees before TDC. Still no firing.

I had previously leak-tested the intake valve with pressure but decided to double-check it with vacuum using the set-up below. I stoppered the carburetor adapter then sucked on the valve guide with the valve in place. The Mighty-Vac got up to 22.5 inches of vacuum as shown, and after 2 minutes it had dropped to 10. That sure seems like a tight seal to me, but maybe not. Anyone have input on that?

I am running out of ideas fast.

upload_2019-3-5_13-26-32.png
 
When you crank your engine over to start it, and it doesn't start, pull the sparkplug immediately and see if the plug is dry or wet. What are you using for fuel? When you made the gasket which fits between the valve body and cylinder head, did you remember to cut a hole in it for the fuel vapour to pass through? The fact that your engine is not firing at all is very unusual.
 
When you crank your engine over to start it, and it doesn't start, pull the sparkplug immediately and see if the plug is dry or wet. What are you using for fuel? When you made the gasket which fits between the valve body and cylinder head, did you remember to cut a hole in it for the fuel vapour to pass through? The fact that your engine is not firing at all is very unusual.
Brian:

Thanks much!

I cranked the engine with the drill, then pulled the plug. I found condensed fuel in the combustion chamber.

For fuel, I am using something called "Coleman Camp Fuel" which I assume is naphtha, or "white gas" of old. Straight, without oil.

I did cut the holes in the gasket which fits between the valve body and cylinder head - 2 for the screws and one for the vapour port.

I agree something is fundamentally wrong - IOW there must be a rookie's Bozo mistake somewhere. But I can't figure it out.

I attached a photo of the valve guide and the valve. Maybe that's messed up somehow?

Thanks again, Bill
upload_2019-3-5_17-31-1.png

upload_2019-3-5_17-31-28.png
 
I'm with Brian - it sounds like a fuel issue to me, either way too much or none at all. As a test I'd shut the fuel off to the carb and slosh a few drops of fuel into the plug hole, then quickly install the plug and spin the engine over with an electric drill. If compression and spark is good it will fire that fuel or even run for a few seconds and should determine if you're having a fuel issue.
 
Your last post came through as I was typing - obviously you're getting fuel through but I think my test is still valid. Shut off the fuel to the carb so it's not possible for it to be flooding and try my procedure. If it doesn't fire then, try with different fuel in case yours is bad. If it still won't fire, then it's not a fuel problem and the next likely thing is ignition.
 
I found that the fuel mixture has to be spot on to work. I use a vapour carburetor of Jan Ridders design worked well.

Timing was not my biggest concern as i used a CDI system. It pays to check for spark regardless which ignition system you use. Aslo check plug gap. The local mechanics say they are set at the factory. That is total BS.

Cheers,
Andrew in Melbourne
 
Thanks for your help, guys. It keeps me from getting too discouraged.:(

Your last post came through as I was typing - obviously you're getting fuel through but I think my test is still valid. Shut off the fuel to the carb so it's not possible for it to be flooding and try my procedure. If it doesn't fire then, try with different fuel in case yours is bad. If it still won't fire, then it's not a fuel problem and the next likely thing is ignition.

Thanks, I will give this a go. I was concerned about flooding after finding all the liquid in the combustion chamber. Also makes me wonder about the carburetor. I checked the Traxxas website and found that it is set to factory specs - but maybe I need to lean out the mix.

I found that the fuel mixture has to be spot on to work. I use a vapour carburetor of Jan Ridders design worked well.

Timing was not my biggest concern as i used a CDI system. It pays to check for spark regardless which ignition system you use. Aslo check plug gap. The local mechanics say they are set at the factory. That is total BS.

Cheers,
Andrew in Melbourne

Thanks, Andrew. I think carburetor settings will be a next step. Also, I am using a Traxxas carburetor - will look into Jan Ridders design.

As far as the ignition goes, I have double checked the wiring and found continuity and also the coil wiring resistance is as expected. I pulled the plug and checked the gap at 0.016" and also noted that the plug sparked when expected, although that plug spark looked puny to me. I measured primary and secondary coil resistance and that checked out OK also.

One thing came to mind and would be interested in thoughts:
Brian suggested checking for leaks while cranking with the electric drill. I haven't done that yet because it takes both hands to use my starting method, which is a neoprene wheel on an arbor that I press against the flywheel -- as opposed to a direct-drive mechanism.

Here's what happens when I try to start the engine: The drill will spin the flywheel, then slip, then turn, then slip and on and on. Could it be that those "slips" are the engine trying to fire? Maybe that is the rookie mistake of epic proportion. Thoughts??

upload_2019-3-6_4-11-0.png
 
Last edited:
Check your compression with a rubber tip blow off nozzle into the sparkplug hole @ very low PSI. Find out where that exhaust valve opens/ closes. Have your batteries charged up for the ignition. Spark your engine TDC or after.
 
Check your compression with a rubber tip blow off nozzle into the sparkplug hole @ very low PSI. Find out where that exhaust valve opens/ closes. Have your batteries charged up for the ignition. Spark your engine TDC or after.
Hi Johwen here. Check the colour of the spark, Is it a blue spark or yellow? It should be blue. It would appear to me you should be getting pops and bangs if you have ignition even if if won't continue to run because of timing, even gasket leaks and carburation. If you have any evidence of fuel in the combustion chamber then it can only be ignition. These are my thoughts. John
 
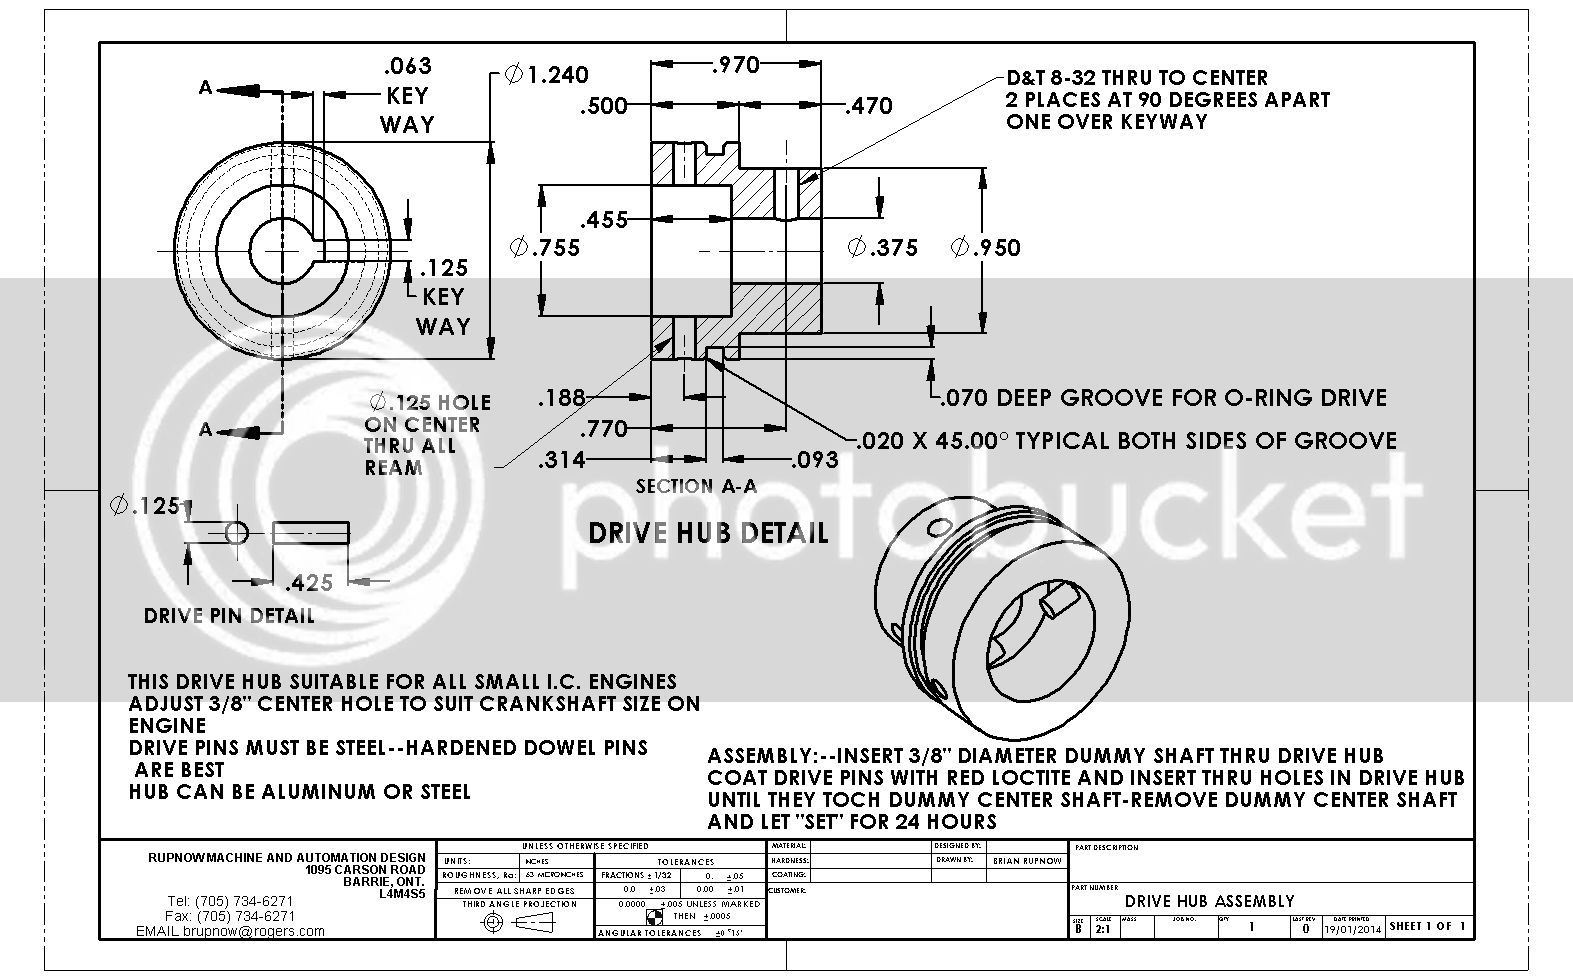
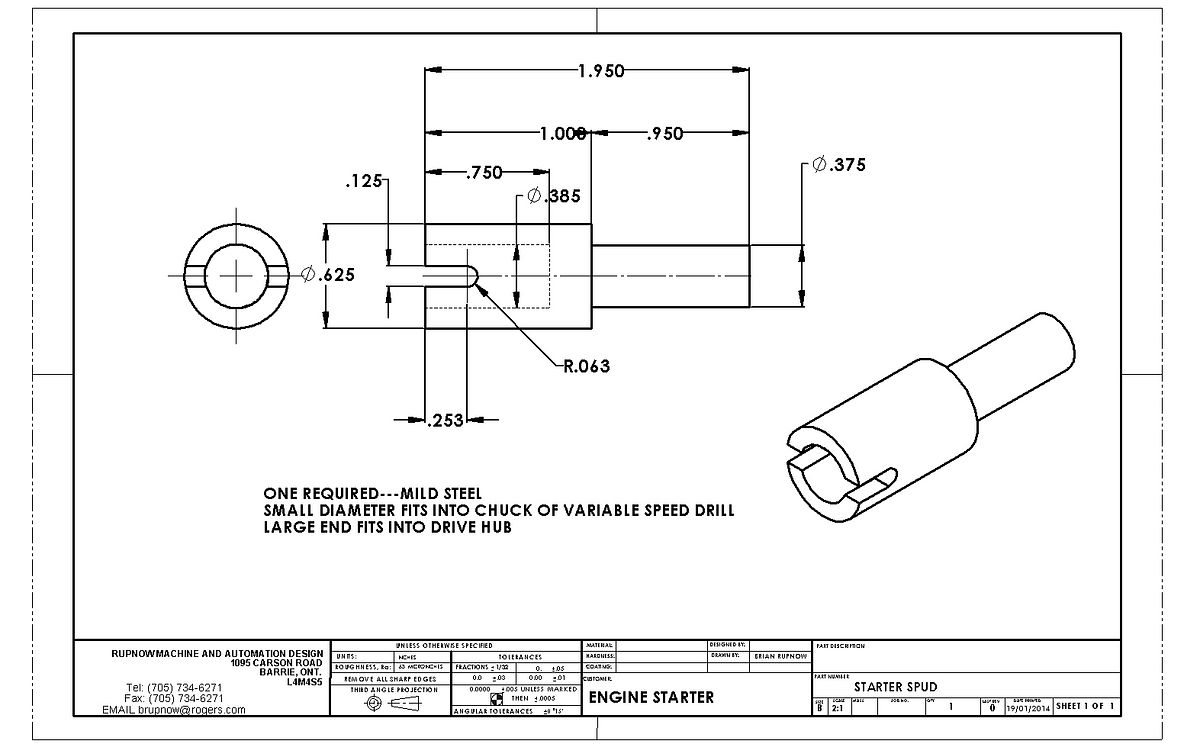
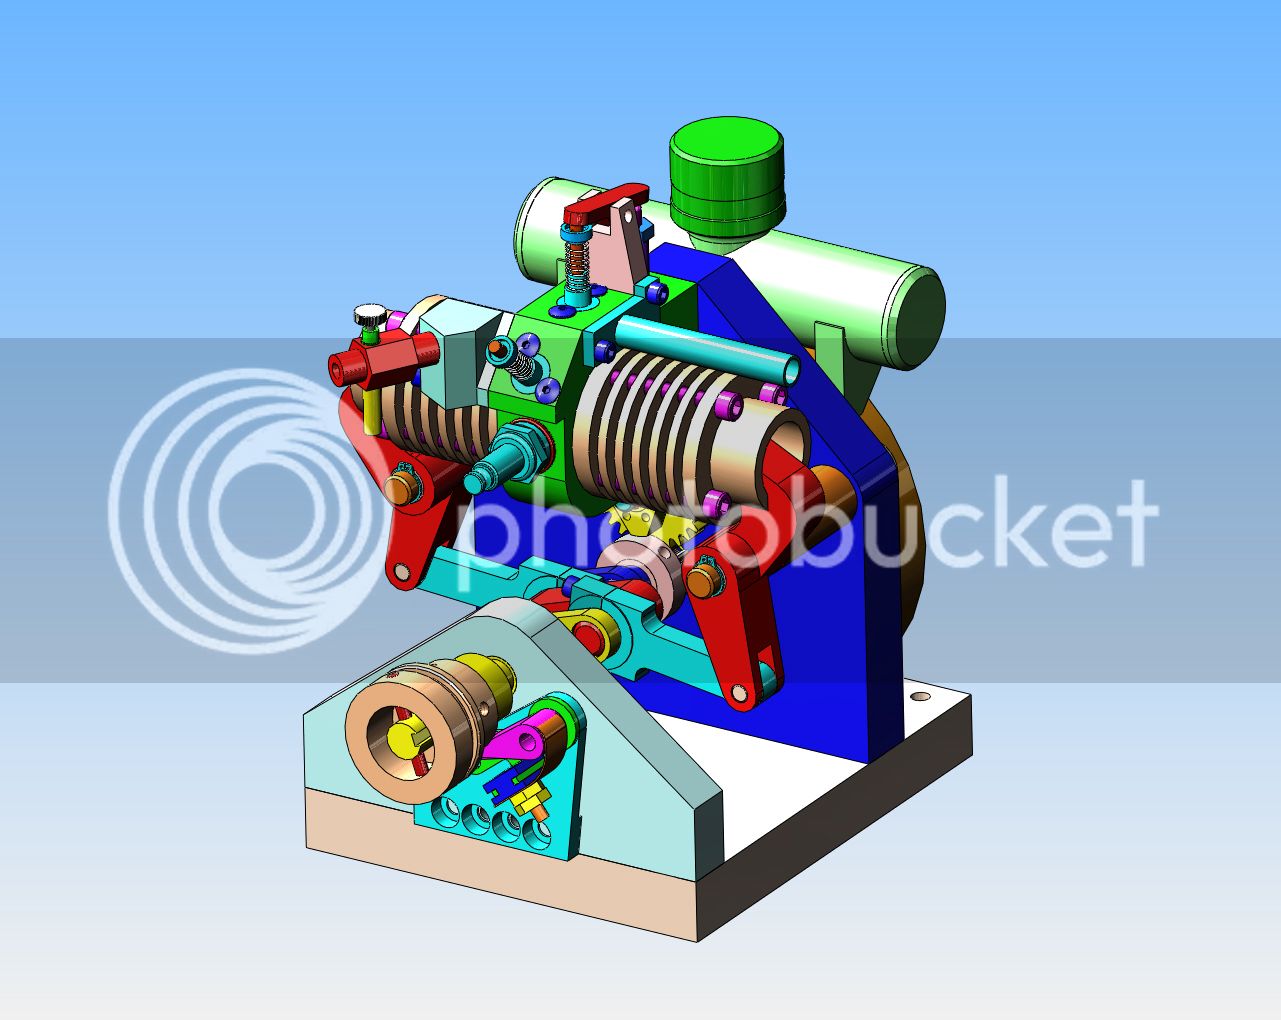
During the years I have been involved with model engine building, I have seen many different ways that people go about starting their model internal combustion engines. I have seen cranks, pull cords, dog clutches, one way bearings, drive belts from electric motors--the list goes on and on. We are engine builders, right!! Consequently we all must have a lathe and a mill. I am going to outline a small engine starter that works extremely well, will work for both clockwise and counter-clockwise engines, and best of all, costs nothing except a couple of hours of your labour and tools that you already have on hand. The drive hub I am showing here today is the drive hub I have just built for my opposed piston engine, which has a 3/8" diameter crankshaft, but this drive hub is "generic"--you can adjust the 3/8" center hole to fit whatever size the crankshaft on your engine is. This drive hub is also set up to use a 0.100 diameter rubber o-ring as a drive belt, because as you all know, I like to drive things with my engines. this system uses your variable speed electric drill as a starter motor, it engages and disengages very freely and smoothly, and an added benefit is that you can use the electric drills variable speed function to turn the engine over very slowly to visually check timing, etcetera. This works best with the engine base bolted down to a workbench or something solid like a table. I have never had it try to twist the drill out of my hands nor even apply any torque to my wrist, and when the engine starts to fire and run on its own it disengages very smoothly by just pulling the electric drill away from the engine. One further point which I haven't covered, but is relatively important is that the crankshaft on your engine must extend out past its bearing support to extend out almost flush with the outside of the drive hub. That way, the started spud is centered on the end of the crankshaft before sliding in to engage the two drive dowels which are Loctited into the starter hub. That is shown on the model of my opposed piston engine.


Back
Top