Hardinge HLV-H Restoring

Home Model Engine Machinist Forum

Help Support Home Model Engine Machinist Forum:

This site may earn a commission from merchant affiliate links, including eBay, Amazon, and others.

[email protected]

Engine Man
Joined
Feb 7, 2011
Messages
143
Reaction score
36
Hello, firs I want to apologies to every one reading this post, for eventual mistakes in my english, as it is not my native language.
I am about to start Hardinge HLV-H restoring. I decided to post my progress for few reasons. First Hardinge is probably the best lathe to bay as second hand machine, second these lathes are becoming more and more available to model engineers. Unfortunately machines that apear on second hand market are 20-30 year old. Some of them are in great tolerance holding condition but cosmetically look very bad. My harding is produced around 1980 and holds near factory cutting tolerances. Here is the machine in all it`s glory.


#77136 Hardinge.JPG


Hardinge 1.JPG


IMG_6931.JPG
 
Welcome to the forum Yankov. You are lucky to have such a nice lathe to restore. I had the pleasure of running a
brand new HLV-H about 20 years ago. They are sweet and I will follow this rebuild with much interest.
Don't worry about your english as my knowledge of any other language is non existent.
 
First to go under the knife is the tail stock. As it can be seen from pictures it is in a bad shape, at some places paint is missing to the point where bare metal shows. This condition is probably because of a very aggressive cutting fluid.

DSC01920.jpg


DSC01929.jpg
 
HI I served my time with them lathes screw cutting on them was a dream can't Waite to see it back OT all its Glory
 
Plan for the tail stock is as follows:
1. Strip the paint to the point where only filler and primer are left. It is possible to strip also the filler to bare metal but this is not really necessary as filler is very firmly attached to the metal. Stripping is done with ABT paint remover, expensive stuff, but it dose the job perfectly. I made some experiments, to figure out how long striper should stay applied to dissolve only the paint, 2-3 minutes is the answer. After this I jut wipe it with a clean towel and wash it with water. I did not take any pictures of this process as I forgot the camera. My bad.
2. Fill all the nik`s and dings whit polyester filler. This stuff is used on car body repair. It sands very easy with 120-200 sand paper.

IMG1.jpg


IMG2.jpg


IMG3.jpg


IMG4.jpg
 
BTDT :) Mine's 50 years old this year.

(http://www.mycncuk.com/forums/showthread.php/566-Renovating-a-Hardinge-HLV-H)

They are a fabulous lathe both in looks and performance; well worth all the work.

One warning: careful with the paint stripper: in can soak into the cast iron and then leach out later, ruining the new paint. Clean it off carefully after use.

Looking forward to seeing the work progress so keep posting the photos.

Regards,

Bill
 
Thank you for the advice. Paint stripper that i am using is water base
So i just washed it. So far no problem whit it.
 
I worked for Hardinge many years ago. Nice to see these old beasts restored.
 
Thank you all for your support. I don't know how long this project is going to take but I am determined to finish it.
BillTodd you did outstanding job with your machine. I hope you will provide me with some advice on difficult points during this rebuild.
Now third thing that I managed to do on the tail stock: I sprayed on some epoxy filler made by the company named SELEMIX. Here are the pictures. One picture worth a thousand words!

IMG_0446.JPG


IMG_0447.JPG


IMG_0448.JPG


IMG_0449.JPG
 
I have to wait 6-8 hours for the epoxy filler to set. So I hope tomorrow to spray on some epoxy primer on top. This two coats will give the desire strength that is needed for such a job. I will post some more pictures after I am done.
 
Beautiful job on the restoration and finish, Engine Man. You will get a lot of good service out of that machine. Enjoy it!

Nelson
***************.com
 
That is going to look like it just came from the factory Engine man. Nice job so far!!!

Bill
 
That is going to look like it just came from the factory Engine man. Nice job so far!!!

My wager is it will look better than new!

Nice machine. I'll be following this thread.
 
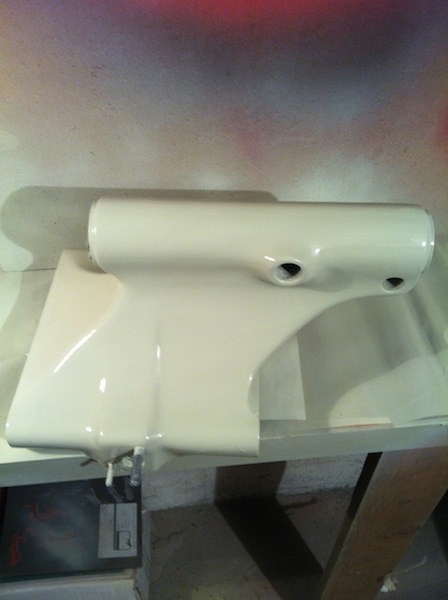
Tomorrow I will spray paint some samples. Unfortunately I can not get the original Hardinge Gray 7B color. After much research around the internet the closest color match that I figure out is BS4800 18B25 Dark Admiralty Grey, another possibility is BS4800 18B21 Squirrel Grey which is not as dark as the first one. If any one reading this post can sugest some RAL equivalent to Hardinge Gray 7B please post it.
 
Long time no post, my bad. I took very long to determine the color that matches closely the original one.
Finally with a little help of friend of mine I figure out the color is some where between 18B25 and 18B21. If some one is interested with exact recipe I can provide it. Paint is Selemix two component for industrial machinery, gloss grade, oil and mar resistant.

Sorry for the lousy photos took them with phone camera.


IMG_0485.JPG


IMG_0486.JPG
 
Your finish is excellent- looks factory new to me. Great work.

Nelson
***************.com
 
Back
Top