


Some rebuild work to share, for those interested in that kind of stuff.
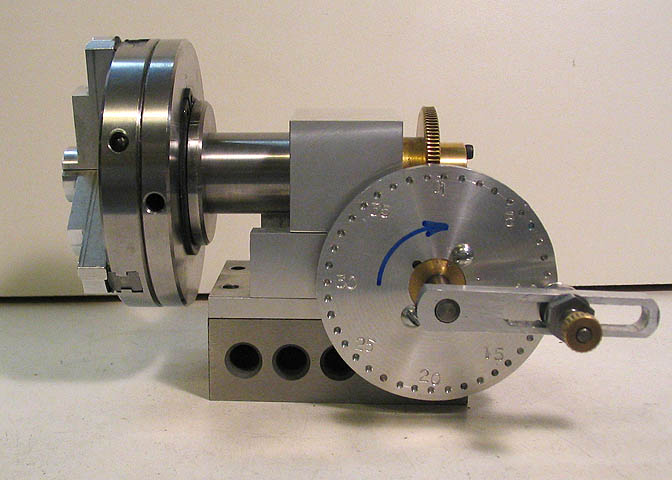
I have this little dividing head that I made a some years ago for the Taig lathe.
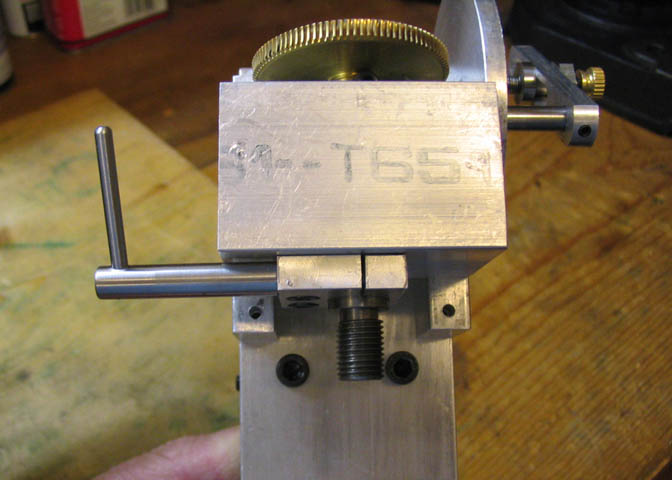
It's done me a good job, and has helped me in making a small gob of gears...
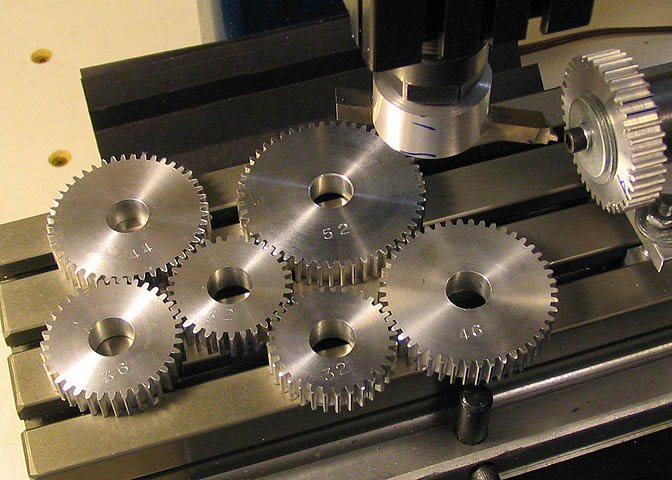
including these, for a Craftsman 109 lathe,
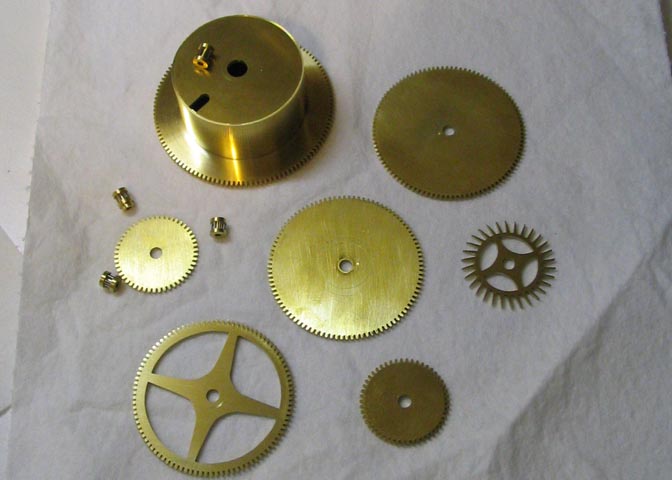
and these clock wheels and escapement, plus, probably about 60-70 other gears.
It's been a good tool, but is somewhat limited because of the builder. At the time, I had just sold my
Sherline milling macihne, and had planned on a Taig mill in the near future to replace it. Things didn't
work out exactly to plan, but a Taig mill did eventually end up in my shop.
For a while, between a couple of different shop set ups, (about two years time, I think), the only
machine I had was the Taig lathe, and whatever tooling I could make on it. When I realized it would be
some time before I got another new milling machine, I started making tools to be able to do all the
milling projects I needed, using the little lathe. The dividing head was one of the earlier ones, and I
made it with a small 3/8"-24 spindle so I could use it with a good drill chuck. It was fine for using on
the lathe, and was really the only sensible choice, since I didn't have a way to cut larger threads, like
3/4"-16 for the Taig chucks. Larger threads are just not something that can be done with good
accuracy when using a die if you don't have a good way to hold them.
Things change, and I do want to be able to mount a Taig chuck to the dividing head. It will make
accurate setups for things like gears much easier. In the past, I put an arbor in the drill chuck on the
dividing head, and fooled with it, repositioning the arbor in the drill chuck until I got rid of the runout.
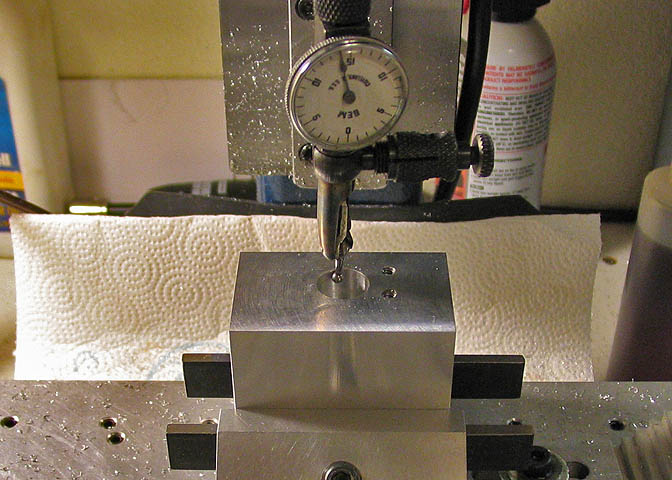
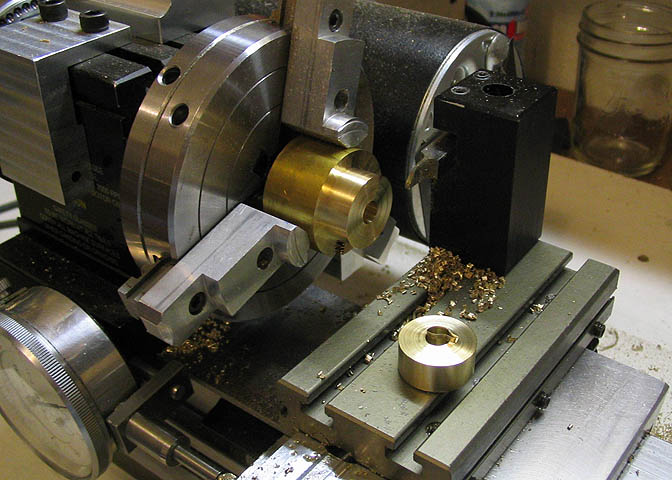
I started by taking the little dividing head to bits, putting the spindle block in the mill, and getting the
spindle bore dialed in.
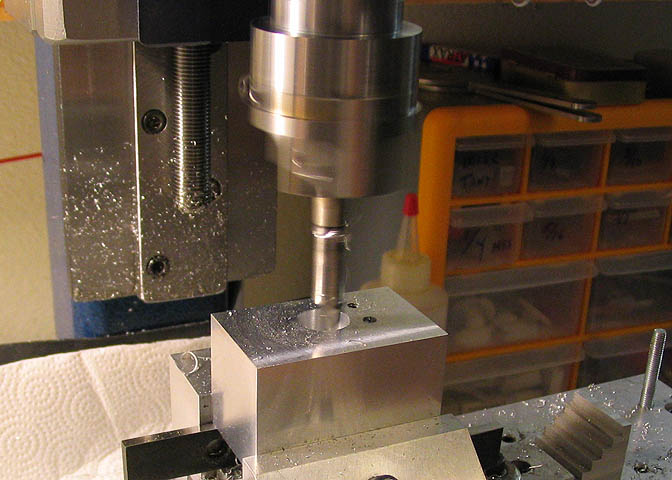
Then bored it out to .625" with the boring head. That's about the largest it can go and still have
enough meat to be sturdy. It's quite a bit larger than the original bore and spindle, which were .470".
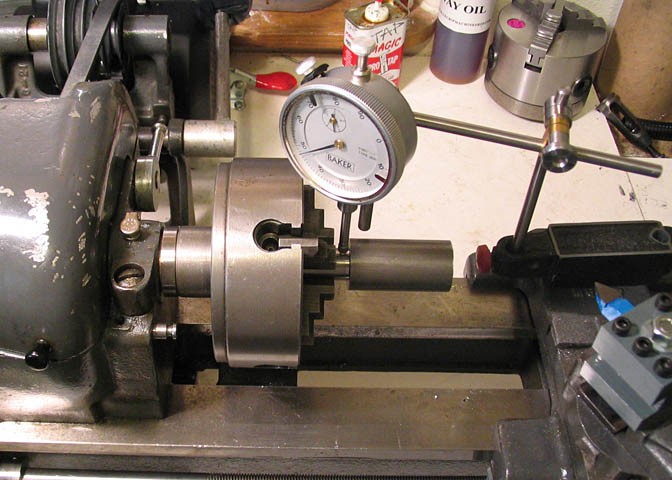
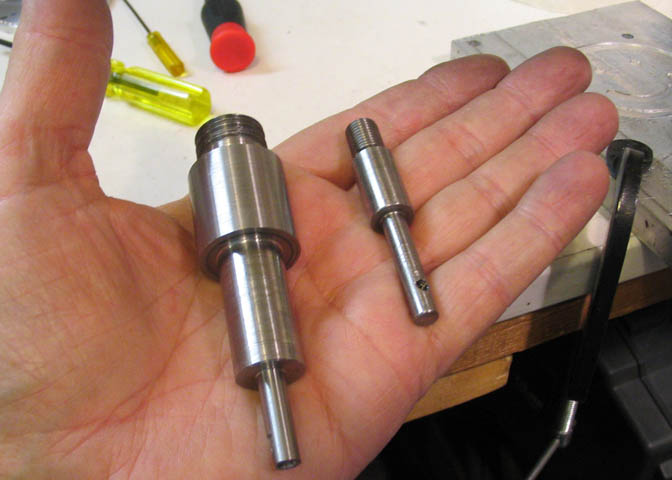
Now a piece of 1" stock is chucked up in the "big" lathe, (the 6" Atlas), and a spigot is turned down to
about .600" on one end. This spigot is for work holding at the moment, but will be turned down to
.250" after the bulk of the material has been removed for the spindle running surface. Behind that
diameter, a length is turned just short of the depth of the bore in the spindle block, and to .6245" dia.
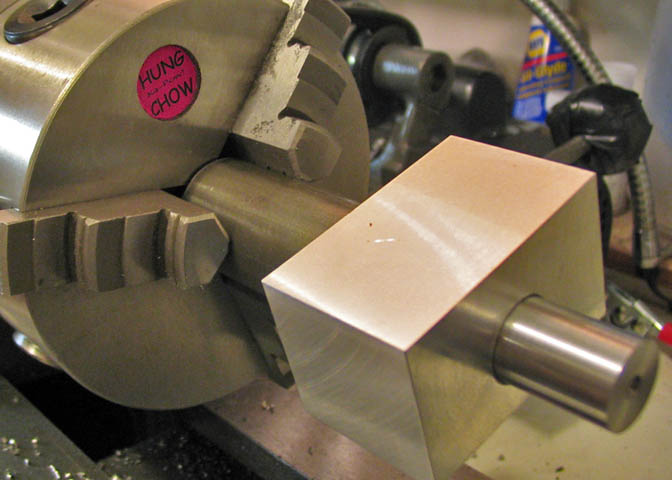
Then the spindle block is tried for fit. Got lucky and hit it right on the first try. The fit is nice and close,
and it almost wants to squeak as it goes on.
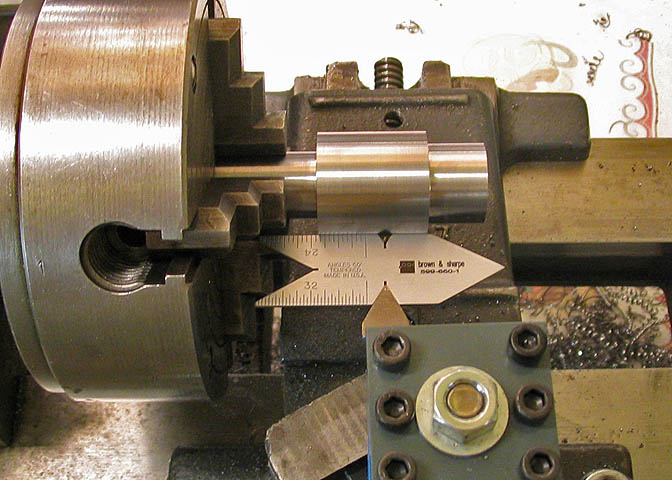
This part of the spindle is slightly shorter than the block that it runs in, so the spindle can be adjusted
some for end play.
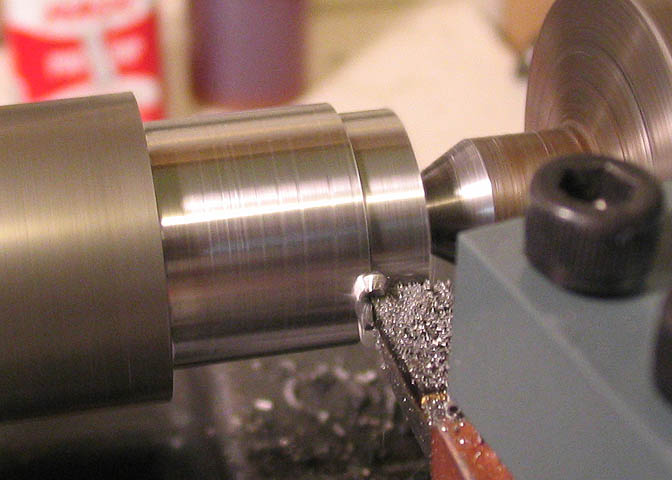
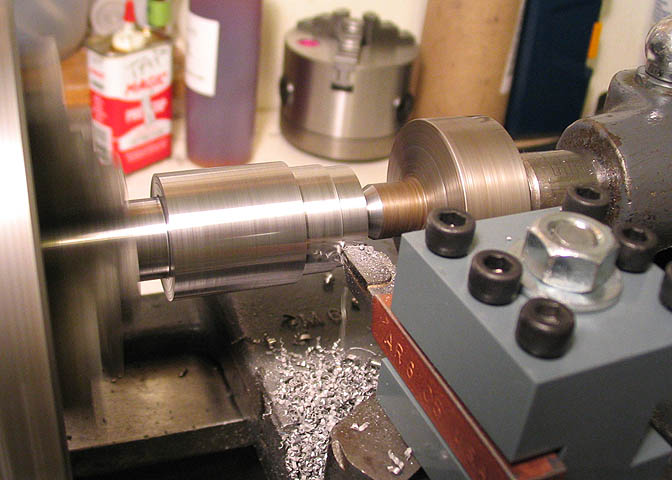
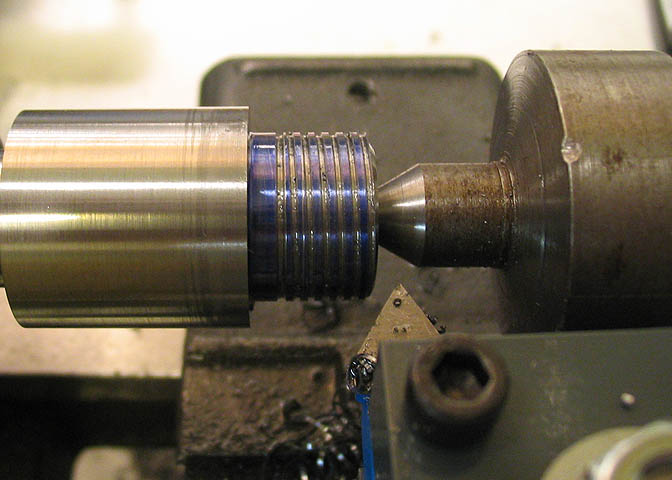
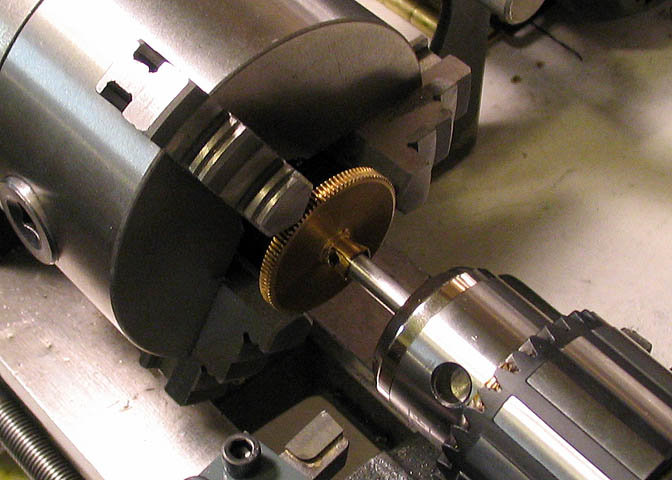
Once all the hard turning is done in the middle of the shaft, the spigot is turned down to .250, which is
the bore of the worm gear. You can see in this picture that it isn't very substantial once it's been turned
down, and that's the reason for leaving it big while taking the heavier cuts in the middle of the shaft.
I used a threading tool to get in close to the live center, and canted it sideways a bit so it could cut to
the corner, and then back it out with the cross slide to face off. What is needed here is a half-dead
center, but all my centers for this machine are either live, or all the way dead.
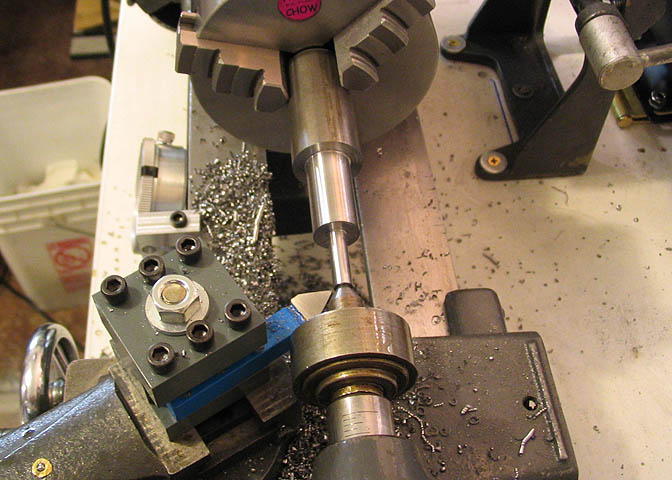
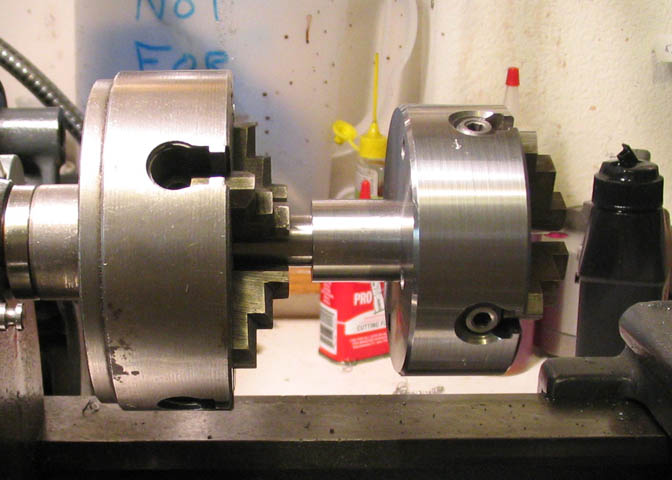
Now the three jaw is replaced with the four, and the piece is dialed in nice and close for work on the
other end.
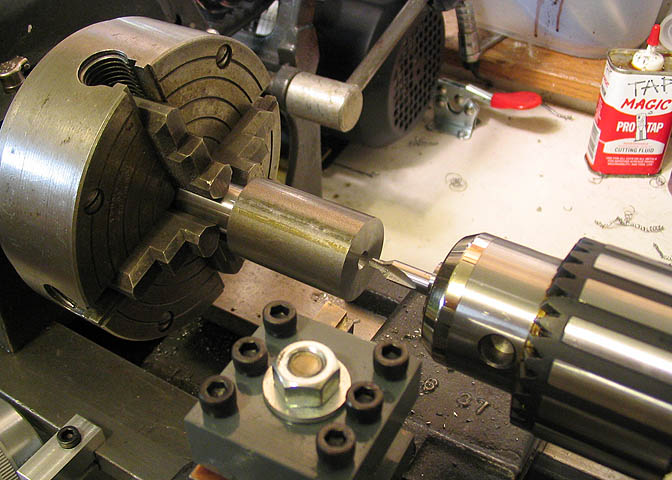
The end is faced off to bring the unfinished bit to length, then center drilled for the live center.
It's not very long at this point, but still, I use a live or dead center whenever I can. There's nothing like
having both ends supported if it will fit in with your plans.
More to come after my supper. Just an hour or two.
Dean
I have this little dividing head that I made a some years ago for the Taig lathe.
It's done me a good job, and has helped me in making a small gob of gears...
including these, for a Craftsman 109 lathe,
and these clock wheels and escapement, plus, probably about 60-70 other gears.
It's been a good tool, but is somewhat limited because of the builder. At the time, I had just sold my
Sherline milling macihne, and had planned on a Taig mill in the near future to replace it. Things didn't
work out exactly to plan, but a Taig mill did eventually end up in my shop.
For a while, between a couple of different shop set ups, (about two years time, I think), the only
machine I had was the Taig lathe, and whatever tooling I could make on it. When I realized it would be
some time before I got another new milling machine, I started making tools to be able to do all the
milling projects I needed, using the little lathe. The dividing head was one of the earlier ones, and I
made it with a small 3/8"-24 spindle so I could use it with a good drill chuck. It was fine for using on
the lathe, and was really the only sensible choice, since I didn't have a way to cut larger threads, like
3/4"-16 for the Taig chucks. Larger threads are just not something that can be done with good
accuracy when using a die if you don't have a good way to hold them.
Things change, and I do want to be able to mount a Taig chuck to the dividing head. It will make
accurate setups for things like gears much easier. In the past, I put an arbor in the drill chuck on the
dividing head, and fooled with it, repositioning the arbor in the drill chuck until I got rid of the runout.
I started by taking the little dividing head to bits, putting the spindle block in the mill, and getting the
spindle bore dialed in.
Then bored it out to .625" with the boring head. That's about the largest it can go and still have
enough meat to be sturdy. It's quite a bit larger than the original bore and spindle, which were .470".
Now a piece of 1" stock is chucked up in the "big" lathe, (the 6" Atlas), and a spigot is turned down to
about .600" on one end. This spigot is for work holding at the moment, but will be turned down to
.250" after the bulk of the material has been removed for the spindle running surface. Behind that
diameter, a length is turned just short of the depth of the bore in the spindle block, and to .6245" dia.
Then the spindle block is tried for fit. Got lucky and hit it right on the first try. The fit is nice and close,
and it almost wants to squeak as it goes on.
This part of the spindle is slightly shorter than the block that it runs in, so the spindle can be adjusted
some for end play.
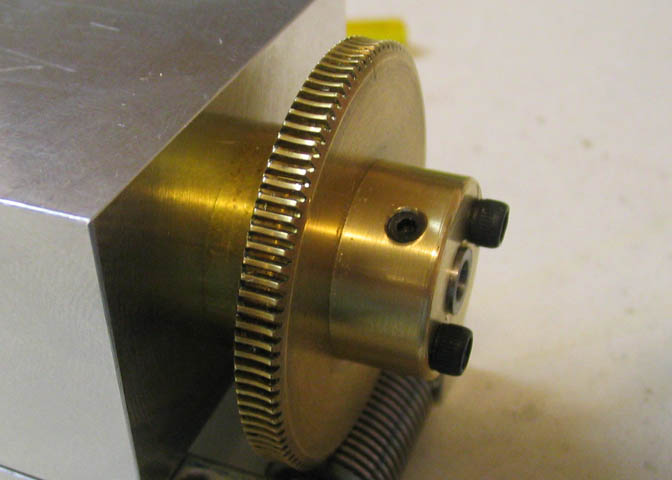
Once all the hard turning is done in the middle of the shaft, the spigot is turned down to .250, which is
the bore of the worm gear. You can see in this picture that it isn't very substantial once it's been turned
down, and that's the reason for leaving it big while taking the heavier cuts in the middle of the shaft.
I used a threading tool to get in close to the live center, and canted it sideways a bit so it could cut to
the corner, and then back it out with the cross slide to face off. What is needed here is a half-dead
center, but all my centers for this machine are either live, or all the way dead.
Now the three jaw is replaced with the four, and the piece is dialed in nice and close for work on the
other end.
The end is faced off to bring the unfinished bit to length, then center drilled for the live center.
It's not very long at this point, but still, I use a live or dead center whenever I can. There's nothing like
having both ends supported if it will fit in with your plans.
More to come after my supper. Just an hour or two.
Dean

 . After we were talking to Joe D about his dividing head I started gathering the materials for a build - with the thought in mind of changing the spindle to mount the Taig chuck as you've just done. Now I have a cookbook - thank you!