Elmer's Mill Engine

Home Model Engine Machinist Forum

Help Support Home Model Engine Machinist Forum:

This site may earn a commission from merchant affiliate links, including eBay, Amazon, and others.

dave e

Active Member
Joined
Feb 5, 2008
Messages
26
Reaction score
0
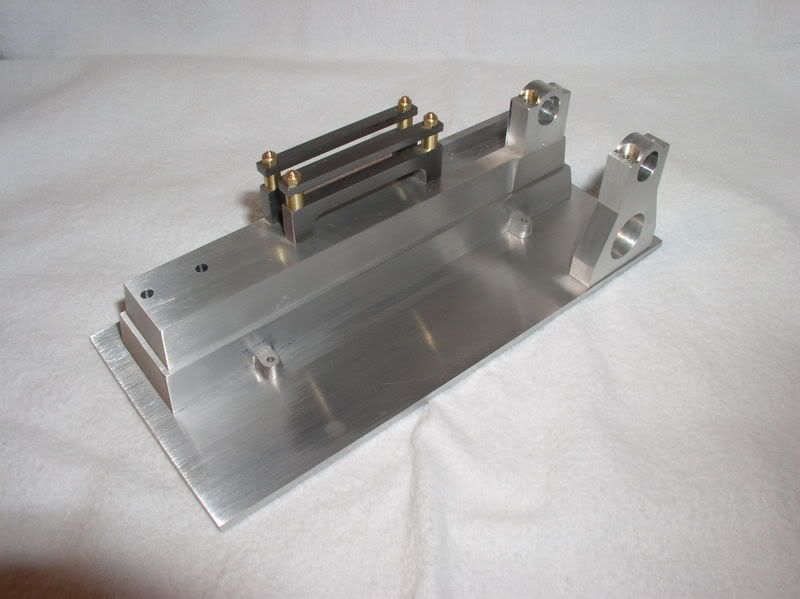
I've finally gotten far enough along that it's looking like it might be an engine someday.

Also, I have a question... after I get it running, I want to try the sandblasting trick on the base to get that cast look. How fine should I get the finish before sandblasting? I don't want any tool marks to show.

P1010008.jpg


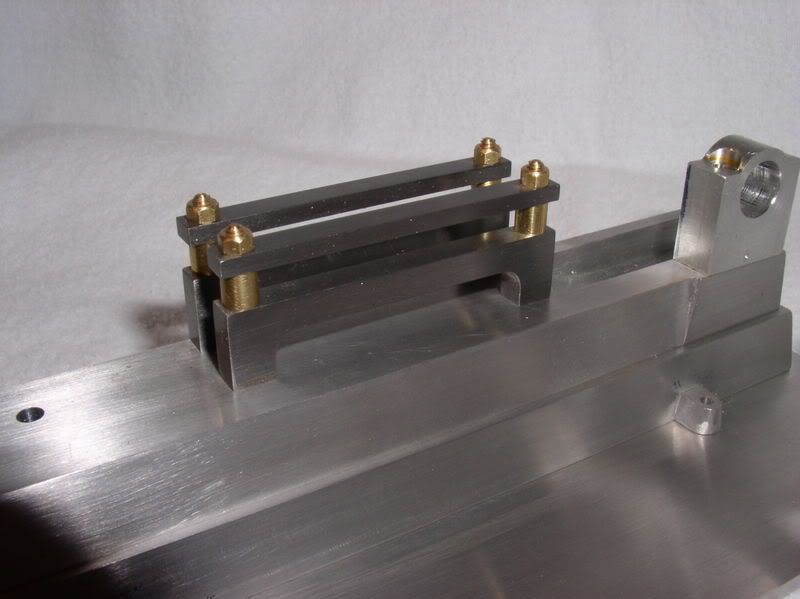
Details of the crosshead guides:

P1010011.jpg


I'm currently working on the cylinder. I've got 12 holes to drill and tap for the heads, plus hogging out the middle where the lagging goes. All the porting is finished.

P1010025.jpg


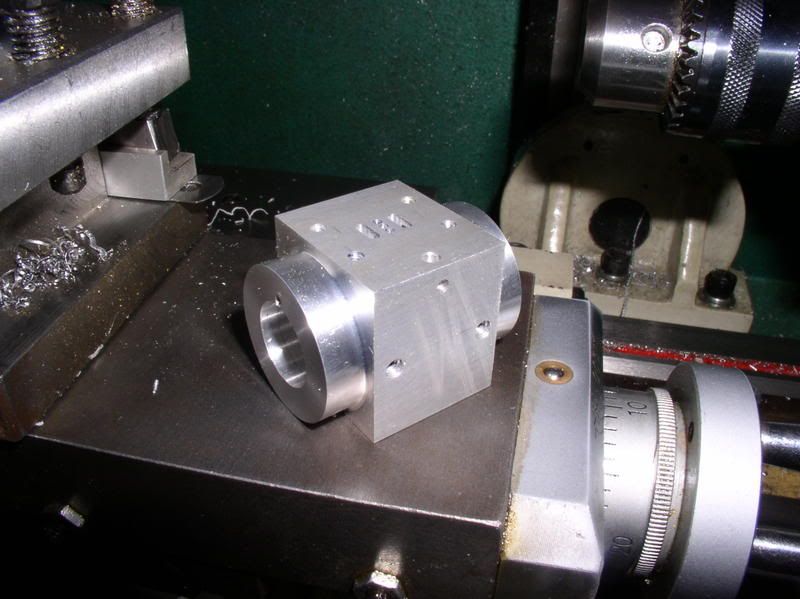
At the rate I work, it will probably be next summer before I'm finished. I'll try to do a better job of posting progess pictures from here on out.


Dave
 
Your little engine looks great Dave. I can't answer your sandblasting question, I've never tried that type of finish. By the way it looks like you have a Grizzly G0516 just like mine. I have separated the mill from the lathe and it works a lot better now. I did a google on the Elmer's Mill engine and it looks like a great project. I'll bet you have it completed long before next summer.
Mel
 
Hello Dave. That's a nice start to your engine... I'm not sure what it should look like but it looks good to me ;D

The sand blasting thing I have a bit of a clue about, I used to use several sizes of industrial ones about 10 years ago! (time flies and all that!) Any thing from a stand in front of cabinet up to fully suited (like those guys from ET) and holding a big blasting pipe!

Depending on the size/pressure of the blaster you intend to use and the type of grit,(I've never used the larger beads for blasting) your base would be of a good enough finish now I would think...
I have bored through a 1" solid steel bar with a cabinet blaster (some things you do just to know! ;) ) If you hold it still for too long it will remove quite a lot of material.
That being the case, if you go evenly and constantly across the base it should be easy to get an even finish you are happy with. (I used to use brake cleaner/degrease to clean the parts and see the 'real finish' quickly. Because it evaporates you can blast again almost immediately if required.)

Try not to pause near any holes it will enlarge them easily.... Again this is me talking from using industrial equipment, I do not know the power of your intended machine? If you are using a mini one it could be very different?

After the time and effort put in to making the parts and the need for a specific finish, I would suggest a test piece with different levels of finishing be used first and before and after photo's taken for reference.

I hope this is of some use to you? ;D


Ralph.
 
Just a little note here.

A few months ago I tried to use a sand blast feature on some ali flywheels for my finger engines and came really unstuck. It blasts up lovely, but keeping it looking that way is a PITA, as soon as any dirt of fingerprints gets to it, the surface looks real grotty. I think the only way to protect the blasted surface on ali would be to lacquer it, then the effect I think would be gone. Look at the first two pics on my post here, that shows the effect. Then if you need to, read on and it will explain the problem a little.

http://www.homemodelenginemachinist.com/index.php?topic=1884.0

John
 
Dave

That's a lovely looking version of Elmers Mill engine - I was impressed to see you have successfully incorporated the fixing lugs into the engine base, a nice touch and from my own experience not easy to achieve with all those conflicting angles - I must confess I gave up on mine and omitted them from my final build ! That apart I think it's a great design and am sure you will be more than happy with its performance. Out of the handful of engines I have built it is the one that's given me the most pleasure.

Can't wait to see your final choice of finish - keep us posted !

John S


Ralph
Sand blasting, as you know is tough, dirty work. A number of years ago, I bought a group of old flat bed type semi trailers, all of which were in pretty rough condition. I knew going in that I'd need to do repairs to them before I could resell them. I hired a sand blaster to come in and clean them up before we begin working on them. The young fellow showed up on schedule and with him as a rather strikingly attractive young lady. I didn't think much about it at the time, until my shop foreman asked me to walk down to the shop.

He was standing there looking out toward where the pair were working, shaking his head with a pained look on his face. The young lady, all 120 pounds of her, was carrying 70 pound bags of sand about 60 ft and stacking them. We were both pretty amazed at her stamina, but that was nothing compared to what we saw next.

She walked over to the sand blasting nozzle, picked it up, put the hood on her head and began blasting away..... in close quarters. We both cringed as we noticed this lovely lass was working braless, with just a tee shirt between her quite adequate best assets and the flying sand. She took her turn blasting like that for 6 days and had every man in the shop cringing the whole time. That had to be the toughest woman I've ever encountered in my 53 years.... bar none.

Steve
 
Wow Steve :eek: That sounds like a woman I would like to have met ;D

I remember well the pain caused by the grit hitting any exposed parts! The dust does get just about everywhere too!! :eek: :big: That must have been an interesting week?!


Just a question about the engine in this post... Has anyone got a picture of a version of this engine? I just want to see what it should look a bit like :)


Ralph.
 
Ralph

Heres my version of Elmer's Mill Engine - a major triumph for me as it actually ran (and still does !)


How do you like the superlight flywheel ? - I have forgotten how it finished up like that but I know there was a verygood reason at the time, I suspect it may have been a clearance problem but I guess you know all about that. Anyway it runs a treat and comes highly recommended for your 002.

John S
 
Thank you John, I now have the full visual ;D (erm yes... clearance problems ;D ::) ;D )

Nice runner by the way ;)

Dave, Now I know what you are building I can definitely say it is looking good ;D


Ralph.
 
I started that engine about 9 months ago.

All I have so far are a few rough parts:
MillEngineParts.jpg


I HAVE to make more time for the shop!

Dave Your's is looking Great!


Rick
 
Thanks everyone, for both the kind words and the advise.

Bogs, I feel silly that I didn't remember your issue with beadblasting your flywheels. I followed that post pretty carefully but I'd forgotten about your keeping-it-clean remarks. I was thinking that I would paint the base after blasting it, but you may be right that the effect is lost. Perhaps over the long weekend I'll try a few test pieces to see what I can come up with.

Also thanks to John S and Rick for sharing theirs. It's very motivating.

And Mel, yep it's a Grizzly 0516. I've been thinking about separating the milling head also. It's a bit of a pain switching between lathe and mill. I've got to find some room in my shop before I can separate them though.

Dave
 
Dave,

I have been looking at ways to recreate a casting effect on soft metals. Unless you go for very large beads, the surface just ends up as a matt finish.

Very soon I will have a full pneumatic tooling setup in my shop, and I am going to experiment with one of these to see if it will do the job, see pic. Maybe just grind a lot of the pins down to make them shorter, and leave three or four to do the dastardly deed.

John

descaler.jpg
 
John,
I've used a couple descalers and the pins all had square ends. Do you think rounding them would create a better effect? Also, has anyone tried mixing sand in paint for a casting look?
 
Bogstandard said:
Dave,

I have been looking at ways to recreate a casting effect on soft metals. Unless you go for very large beads, the surface just ends up as a matt finish.

Very soon I will have a full pneumatic tooling setup in my shop, and I am going to experiment with one of these to see if it will do the job, see pic. Maybe just grind a lot of the pins down to make them shorter, and leave three or four to do the dastardly deed.

John
John I have used one of these at work and recently to take the paint off my new/used bridgeport. I worked wonders, I highly recommend owning one. It does a lot better job if the paint is an enamel . But anyways, when I first used it I was supprised how much the part come out looking like cast. I think with some work to the pins and playing with air pressure could give great results.
Tim
 
Thats it then, I will get one on order and have a good play about.

Thanks lads

John
 
putting sand in the paint works great, thats what my dad uses on all the parts he makes for the full size gas engines.
with abit of experimenting it makes the new fabricated parts look like an old casting.

chuck
 
I nearly suggested the sand in the paint technique Chuck but realised that Dave probably wants to keep a bare metal finish. Sand in the paint was a method we used when building model slot car race tracks to provide extra grip. I would strongly recommend a few test runs before comitting it to finished engine parts though !

John S
 

Latest posts

Back
Top