Elmer's #6 -- Slider, a slide valve engine

Home Model Engine Machinist Forum

Help Support Home Model Engine Machinist Forum:

This site may earn a commission from merchant affiliate links, including eBay, Amazon, and others.

ksouers

Well-Known Member
Joined
May 24, 2008
Messages
1,347
Reaction score
8
With all the nice builds going on I thought I'd jump into the fray.

I thought I'd make Elmer's #6, Slider. It's a slide valve engine, basically the same that Zee made but without reversing gear. I'll be working with the 3 basic food groups: brass, steel and aluminum.

The nice thing about Elmer's engines is many are basically the same cylinder and valve layout. If you've made one you can make all of them, it will be very familiar territory.

Don't expect this to move fast, I get very little shop time.

Enough already. Let's get started:

Short version: I cut some brass and poked holes in it.

Long version:

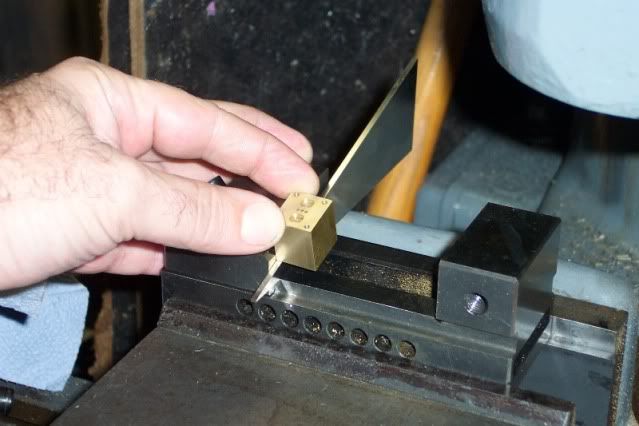
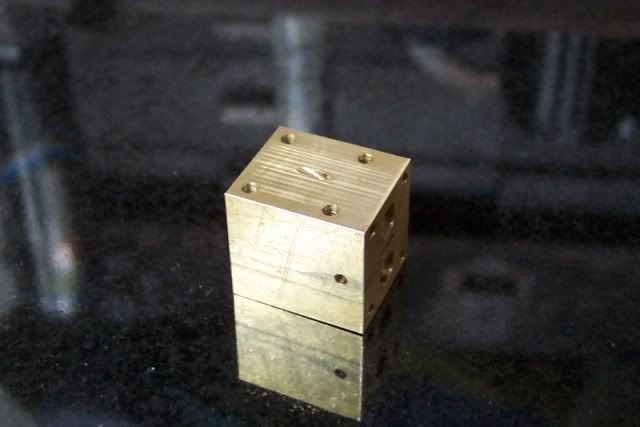
I'm starting with the cylinder block, 360 brass. Basic operations, cut it then square it up and bring it to size. By the way, there won't be any secrets let out here or fancy tricks to be learned. I'm a hacker. I just whittle at metal until it resembles what I want.

tn_e6_cyl_1.jpg


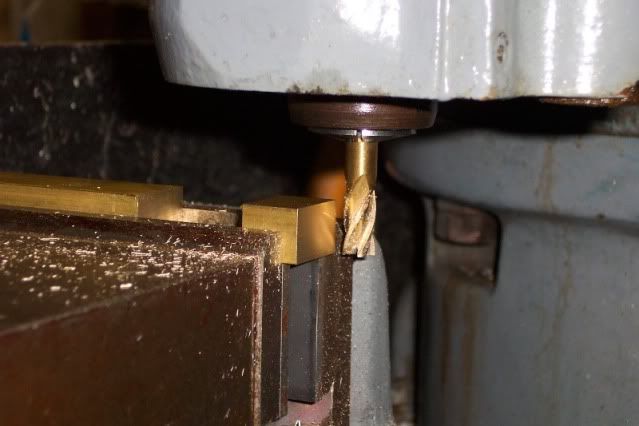
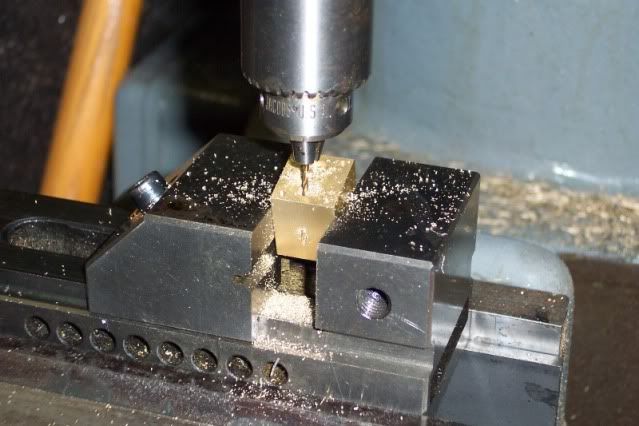
Once I got it to size it was time to put some holes in it. I just worked on one face today, starting with the valve. This thing is tiny. I probably should do this on the X2 instead of the Powermatic.


tn_e6_cyl_2.jpg


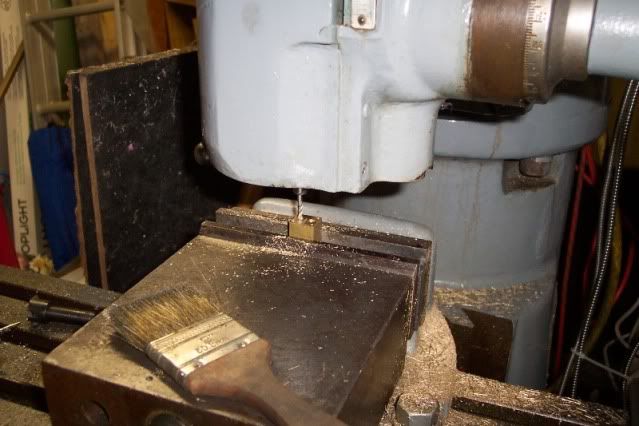
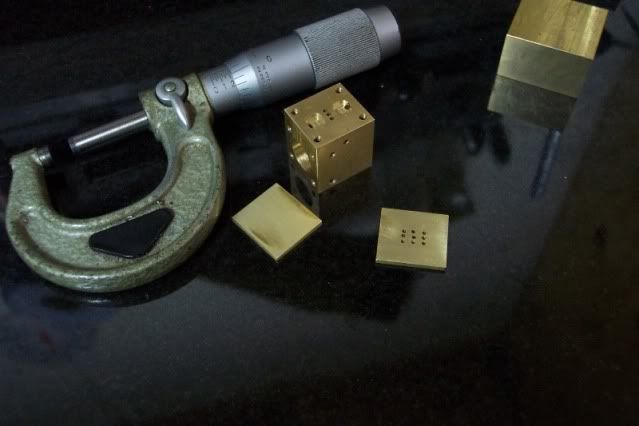
This is actually the second one I started. I ruined the first one, tapping the third hole I ripped out the threads. Dumb, I didn't feel the tap tighten up at the bottom of the hole and cranked it just a little too much.

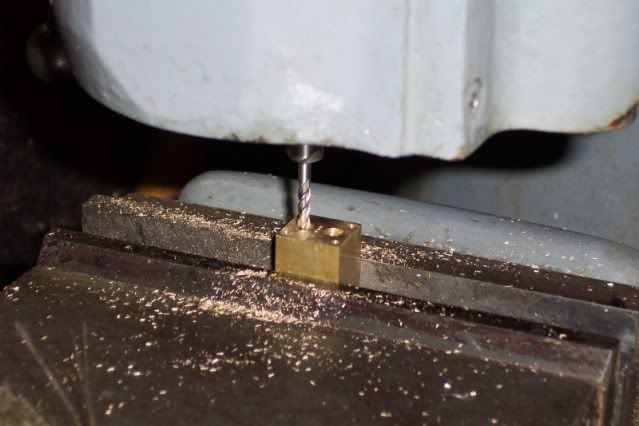
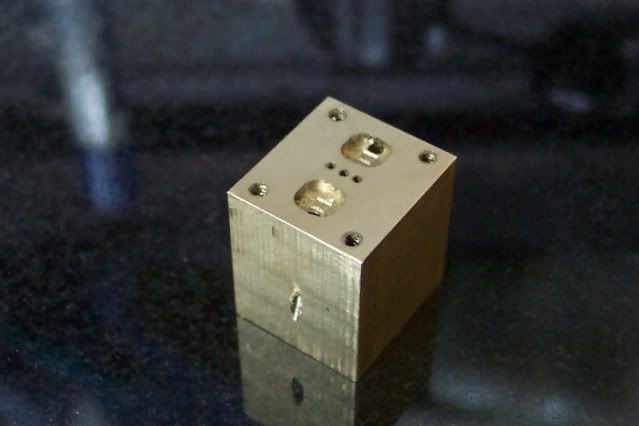
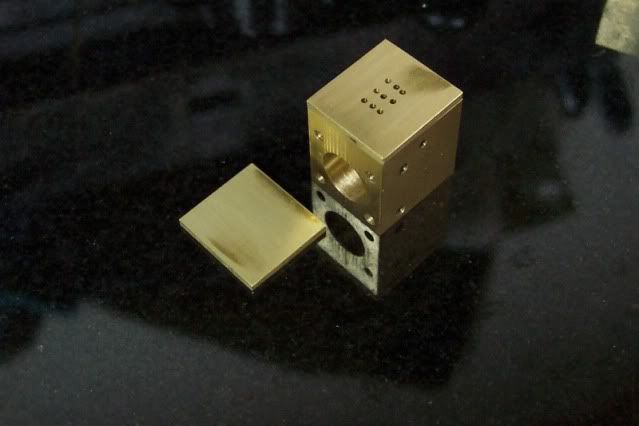
The holes have been successfully tapped and the exhaust holes have been drilled. Still need to drill the exhaust out the side. The pockets were milled out with a 1/8 inch end mill. Funny, the end mill looks huge next to the cylinder.

tn_e6_cyl_3.jpg


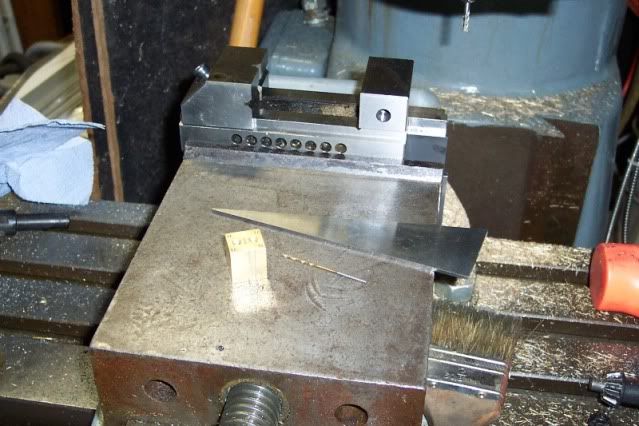
This face is almost complete. Next is to drill the angled holes to the cylinder ends but that will have to wait for another day.

tn_e6_cyl_4.jpg

 
Ah...excellent.

Two things stand out for me...one is in the first shot...the face of the part looks absolutely smooth! I get wavey things at best.

The second is the last shot...the pockets look nice!

Stay with the long version...it's more interesting. ;D
 
Your build is looking mighty fine! I just love Elmer's designs!

If your having trouble with the tiny dimension and parts, you won't be the first one.

I swore I would never build another of Elmer's designs with out scaling it up 100%.

But, when your build is finished, you'll revel in the accomplishment.

Hack away! :big:

-MB
 
Thanks for the support, guys.

Zee, that has the wavy finish, too. The smooth look is just a trick of the camera. I guess the light was at the wrong angle to show it much. Though the finish from the Powermatic is less wavy than the X2. But then the Powermatic is a much larger machine.

MB, thanks. This is the second Elmer's engine I've built, so I knew what I was getting myself into ;D They are great little engines. He gives you the basics and you get to dress them up from there.
 
I managed to sneak a few minutes in the shop tonight. Didn’t get as much done as I’d like, but some is better than none. Got set up to drill the angled holes, these are the passages that lead from the pockets in the valve body to the ends of the cylinders. I also wanted to get the exhaust hole drilled but bed time came a-calling.

These are the tools used tonight, a #54 drill, a 16 degree angle plate and I set up the tool makers vise on parallels in the big Bridgeport vise. Since the BP vise is already square, the small vise is as well. The plans call out a #55 drill, but I didn’t have one so #54 was used instead.

tn_e6_angle.jpg


I picked up a set of these shop-made angles at an estate sale. The set is complete from 1 degree through 45 degrees in 1 degree increments. Each one is hardened tool steel and precision ground. Somebody went to a lot of work to make them, I couldn’t just leave them behind.

tn_e6_box_angles.jpg


The plans call out for the hole to be drilled at a 16 degree angle. The angle is held flat against the jaw face with one hand while holding the work firmly to the angle, pressing it down to the vise ways with the other. Then with your third hand tighten up the vise. The angle is then removed. It’s a mildly fiddly job but easier than trying to do it with a protractor.

tn_e6_angle_setup.jpg


The hole is drilled completely though. If I did it right the hole should break out about 1/32 inch from the end of the cylinder. We’ll find out after I bore the cylinder.

tn_e6_cyl_angle.jpg


Zee, this one is for you. It shows the wavy pattern a little better.

tn_e6_cyl_5_wavy.jpg


I danced around a few times too, with the magic-jumping angle plates.

If I may, I would suggest wiping the fixed jaw and the angle plate with lighter fluid, and then applying only one strip of double stick scotch tape between them. It holds so well that a few choice words may come forth when you try to retrieve the angle plate. :big:

-MB
 
That cylinder is looking nice, Kevin. I agree with Zee, the pockets look good.
It's nice to see a fellows fingers in the shot once in a while. Everyone knows how big a finger is, and gives a good sense of scale. This is smaller than I thought.

I'm so glad you could rescue those angle plates. They represent a bit of someone's life in the craft/hobby. I hate to think that they may have ended up at the recycling center because no one knew what they were!

Hope you get more shop time soon.

Dean
 
MB, thanks for the tip. I hadn't thought of that, I'll have to try it next time.

Dean, thanks for looking in. Yeah, it is really tiny. But that's part of the fun, and the challenge. The estate sale I got the angles from really sticks out in my mind. The guy had a LOT of stuff, only about half of it was store-bought. The stuff he'd made was really top quality, all tool steel and hardened. Too bad I couldn't buy everything, but I did get the angles and a couple v-blocks. I try to buy the handmade stuff at estate sales whenever I can. I like to keep the maker's legacy alive.

Thanks, everyone, for looking in.
 
ksouers said:
Zee, this one is for you. It shows the wavy pattern a little better.

Yeah...well...compared to mine it looks smooth as glass. ;D

Is there a particular advantage in using the 2nd vise? Why not just use the angle plate in the lower vise?
 
Zee,

Thanks for checking in.

The simple answer is I wanted to use the smaller vise, but didn't want to go through the hassle of indicating it in.

The small vise isn't as deep as the BP vise, so it was a little easier to use the angle plate. The plate is not as tall as the big vise is deep, so it would have been lost below the top of the jaws. Much of the part also would have been below the tops of the jaws and not easily visible to me.

Basically, it just helped to bring the work out where I could see it. It didn't seem so lost in the larger vise.

These reasons alone are not worth going to the expense of purchasing a second vise if you didn't already have one. However, if you have an opportunity to obtain a smaller second vise at advantageous cost, I'd jump on it. A small tool makers vise like this (aka screwless vise) can be quite handy and are a nice compliment to a heavy vise.

I think it was Dean who showed a similar vise set up except he had the screwless vise set at an angle. This allowed him to do repeated operations without completely going through the set-up process each time.
 
Kevin, yes it was me who had the regular vise in a larger one. It was for drilling the angled set screw holes in the flywheels on my current build.

I plan to make a 1" vise to use in my regular mill vise, which is already pretty small. Being able to setup tiny pieces on odd angles in the small vise while it is out from under the spindle, then putting it in the larger vise will make some things easier.

Dean
 
Jim, thanks for dropping by.

Dean, ah yes, I remember now. Been trying to catch up on the builds, everything is a blur. Thanks.
 
I know what you mean, Kevin. I try to read all new WIP threads and a few of the other sections everyday, but still can't keep up even with those. There's a lot of good activity on this forum. Lot of good folks.

Dean
 
Not much done today. Drilled and tapped some 2-56 holes for the head and crosshead. Also got the exhaust drilled. Should have time this weekend to finish the cylinder and start on some other parts.

tn_e6_cyl_6.jpg

 
Got to spend a goodly portion of the day in the shop, but it was just too dang cold to get much done. It seems I spent more time trying to get warm than actually doing something. My shop is in the garage and I have a small corner partitioned off, that’s where the lathes and the X2 are. Also I keep the drill press, tool boxes, surface plate, table and a small stool in there. That part is mildly heated. The rest of the garage is not. The big mill is out there and that’s where I was working. And it was COLD! +4F, briefly getting into the low teens by mid afternoon.

I also wasted a goodly amount of time making some thin parallels so I could drill out the cylinder bore, only to find out after I was done that they would slip into a gap between the fixed jaw and the ways of my screwless vise, the new parallel was too thin span it. Ah, well. So I cleaned up the old sacrificial aluminum ones and got the cylinder drilled and reamed. I got a little chatter just as the ream entered the cylinder but not bad at all, it’s right at the edge.

I also cut some 1/16 inch brass for the valve and cover plates. Got the valve plate drilled and polished everything up with some wet/dry. Still need to drill the clearance holes for the studs.

tn_e6_cyl_7.jpg


Another shot, just because.

tn_e6_cyl_8.jpg

 
You're a dedicated man, Kevin! I'd be wearing a parka in the shop if it were 4 degrees, and still wouldn't be able to get anything done.

The parts are looking good!

Dean
 
Deanofid said:
You're a dedicated man, Kevin! I'd be wearing a parka in the shop if it were 4 degrees, and still wouldn't be able to get anything done.

The parts are looking good!

Dean
I messed up the valve grid a little, the drill wandered on a couple holes, not enough to make it over though. Everything still lines up OK.

It was a little warmer than 4 in the garage, but not much, the shop was 60 ;D

I was well dressed, believe me. But I could only hold onto the handles for so long then off to the shop to warm up. The routine was something like: change collets, put in edge finder, go warm up, find edge zero DRO, find other edge zero DRO, go warm up, change collets for drill chuck and drill, go warm up. You get the picture. Not a lot of time in front of the machine.
 

Latest posts

Back
Top