Crusader .60s (x2)

Home Model Engine Machinist Forum

Help Support Home Model Engine Machinist Forum:

This site may earn a commission from merchant affiliate links, including eBay, Amazon, and others.
The weekend here has been just about perfect weather wise. Rather than stay indoors, we made the best of the weather and did outdoor activities this weekend. Sorry for those that are suffering with the snow and cold! Our good weather is behind us again and we are facing temps in the teens by mid week (for us in TX, that is brutal).

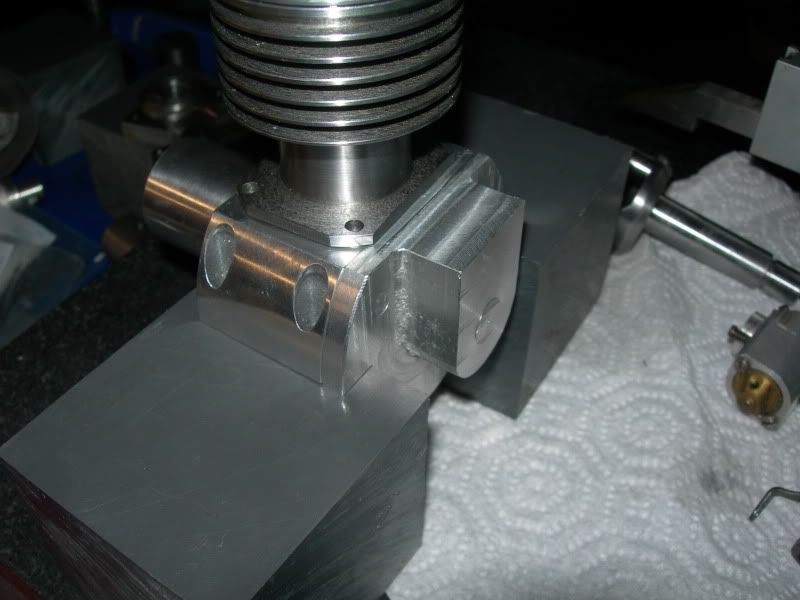
Even though a "vacation" was taken, some shop time was squeezed into the schedule. Not a lot of progress was made, but some details were knocked out. The cylinder was drilled and tapped for the head bolts (screws). No broken taps! Why is it that always happens on the last hole? The head was also drilled, and the relief was cut in the combustion chamber to allow clearance for the piston's deflector/fin.

The head and cylinder were mated, and a quick and dirty compression test was made. The results were better than expected, so hopefully this one will be a decent runner.

To complete the head, I need to tap the glow plug hole to 1/4"x32 to accept the glow plug. In the search for the tap, none of my usual local sources had any in town. So, I let my mouse do some walking and easily enough found a source for the tap. It was just under $10, so I figured I would just order it and get it coming. Until... I saw the cost for shipping. Instant pissed! I understand that companies need to cover costs, and having a shipping department does take capital to operate. However, I absolutely refuse to pay $12 to ship a tap. I will contact their sales department tomorrow, and see if they can be a little more realistic on the shipping charges.

Finally, a few progress pics...

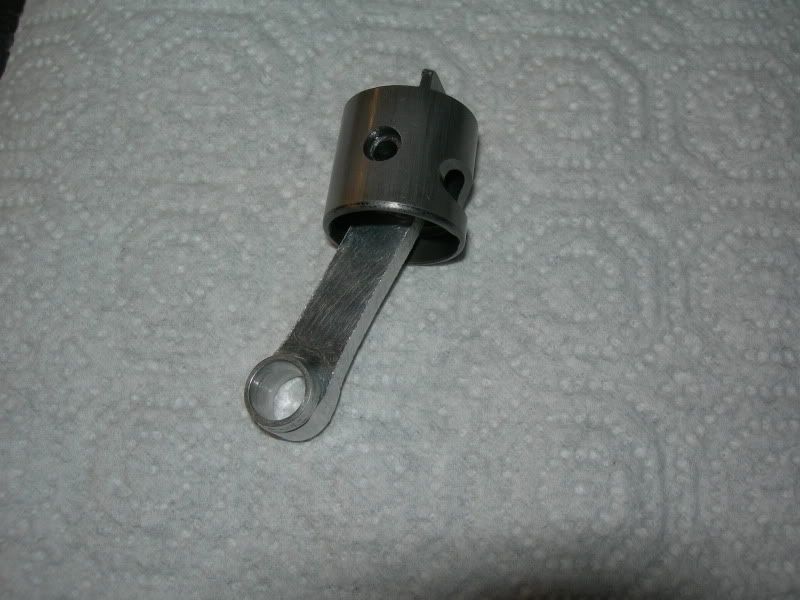
The piston, wrist pin and gnawed on c-rod:
DSCN4101.jpg


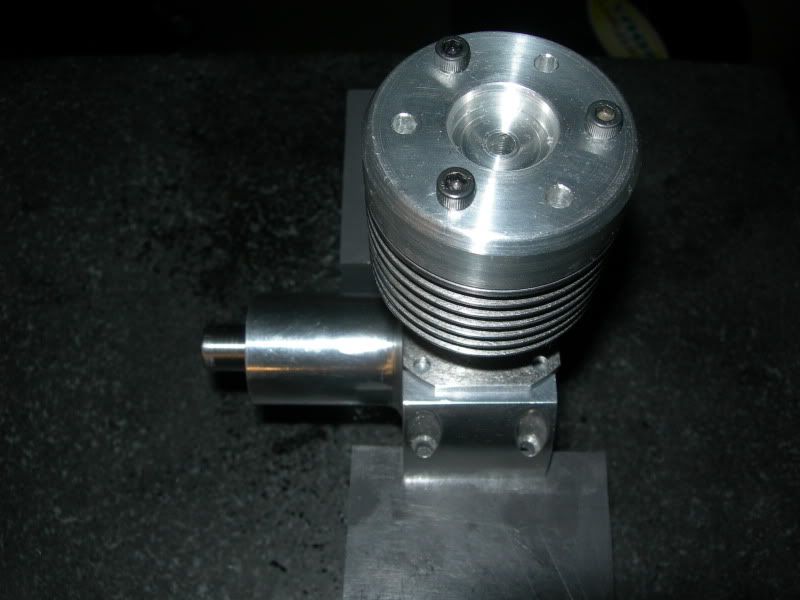
The head mounted on the cylinder for a quick compression check:
DSCN4098.jpg


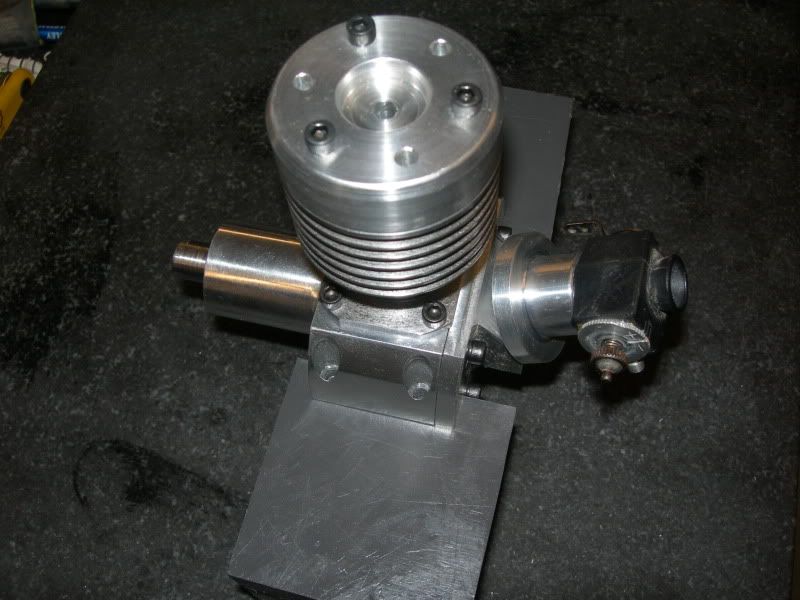
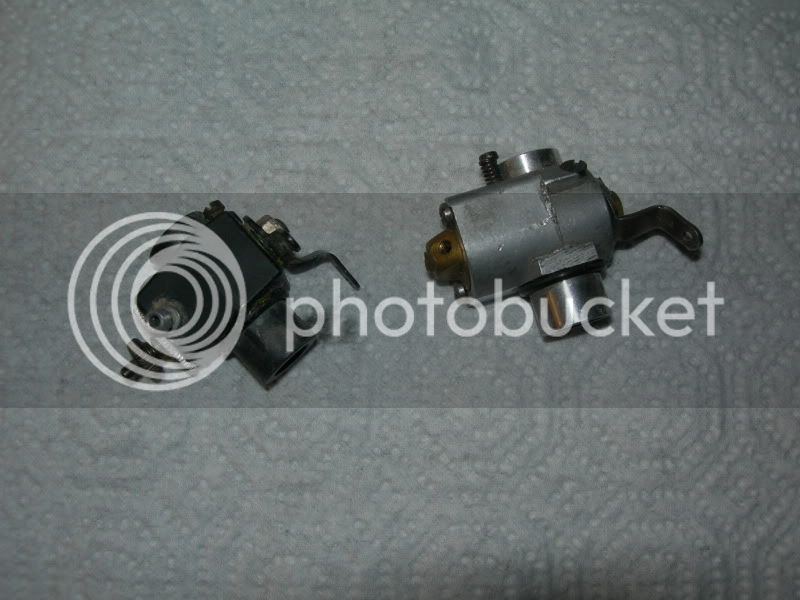
And the carburetors that have been donated to the cause:
DSCN4102.jpg


More to come later this week...
 
G'day Guys
I just found your posts on the Crusader 60, the photo's look great.
I finished a crusader last year and was very pleased with both the look of the engine as well as the performance.
I changed a few things like the shape of the crankcase as I wanted to lighten it as much as possible to improve the flying performance. I'm hoping to put it into a control line stunter, if I ever get enough time to build the model.
Here are some photo's if my engine.
Rob.

Crusader .60 Ready To Run (16).JPG


Crusader .60 Ready To Run (16).JPG


Crusader .60 Ready To Run (11).JPG


Crusader .60 Ready To Run (7).JPG
 
Rob, welcome to HMEM! When you get a chance, please drop a post in the Welcome area so that we can give you a proper welcome.

Nice looking engine! Thanks for sharing the pics! Have you had any trouble with the head not being finned as designed? I am going back and forth whether to cut the fins in the head or not. My copy will never see an airplane, so long runs are probably not going to be common.

 
G'day Guys
First where is the welcome area?
I made a head with fins and one fine was slightly thicker than the others and looked terrible, so I made a new head and was about to re-cut the fins when I remembered that I had made a Sparey 5cc diesel and didn't cut the fins on top and it looked great. As well as a friend who is a stunt flier said that with one particular motor (I think it was a super tiger) the first thing that fliers do is to cut the fins off the head. So I ran it with both heads and it made no difference at all. Quite apart from that I like the look of the polished head.
This motor starts very easily and runs very smoothly.
 
Rob, here is the main forum index that will show you all of the different boards. Beware, you might lose a few hours, days, weeks, months, years digging through everything on HMEM!

The Welcome Area can be found here. At the upper right of the topic index, click on the New Topic button, and it will take you to the screen for starting a new thread. From there, it is basically the same as answering a post.


Regarding the fins on the head, I am really going back and forth. I'd like the challenge of sutting the fins, but don't care for the looks of the engine with them. I guess I could cut another head and have one with and one without. Decisions... :-\

For a quick progress update; I started removing the material from the back plate yesterday. I snapped an end mill (inadvertantly bumped the handle on the table) and decided to call it a night. I'll get back on it a bit later today.

We are snowed & iced in here (I really can't say that without shame... those in the north would laugh at this!), so I am sure I will get some quality time on the machinery this afternoon and tomorrow.
 
Thanks to the blizzard ::) I have indeed made some headway on the project. I hogged the rear cover to shape today. The intake passage needs to be drilled, and the holes drilled to mate with the crankcase. A little rubbing for some bling action will be in order as well.

DSCN4107.jpg


To mate the carb up to the rear plate, I had decide to make a bolt on adapter that will accept the donated carb. This will give me some future flexibility it I decide to do something different (or if these carbs don't work out).

I have started thinking about a display stand. A simple flat piece of wood is easy enough to make and would suffice for a mount. However, it would be great to have something a little nicer for the engine to sit on, but I haven't had the "vision" yet.

I finally feel like I am over the hump with this project, but also realize I am getting closer to the hardest part; the last 10%. I am anxious to hear it run, and am looking forward to the next one.


On a side note, the Pinewood Derby car is just about finished. That has been a fun time with the kiddo. I think he has done an amazing job on it as well. Aside from the cut out and rough shaping, finishing up the final sanding work (a 7 year old doesn't get the concept of completing the sanding before painting), and coaching him on how to use spray paint, he has done it himself.

When we started this project, he was all about a black paint job with yellow flames. That is, until he saw the blue paint with metal flakes in it. He said it would be more shiny with the blue paint, and that shiny things go real fast. LOL!

DSCN4104.jpg


DSCN4103.jpg


It was entertaining watching him paint the car. There are places where the paint is probably a 1/4 thick, and others where is it a micron or two. The graphics were the store bought rub off decals, and a couple of clears coats have been applied. His axles and wheels are ready, just a matter of letting the paint and clear finish curing.

The race is Saturday (unless we are weathered out), so we'll see how we do.
 
"and that shiny things go real fast"

About 15 years ago a middle school girl placed quite well in a science fair with the premise that "red cars go faster". She set up camp on a pedestrian over pass on the Interstate highway with clip board and stop watch and timed cars of various colors and proved her premise. Report was well written and documented in the scientific method. Shows how you can prove most anything if you eliminate enough other factors that might be affecting the outcome.

Gail in NM
who still lovingly drives a very red Mercedes sports car
 
GailInNM said:
Shows how you can prove most anything if you eliminate enough other factors that might be affecting the outcome.

So true! Folks do it everyday to push their agendas along!


Slow progress has been made over the past couple of days. I am down to making just a few more pieces, then it is wrapping up the small stufff and final assembly. Lacking off the top of my head are the bypass cover, the exhaust manifold, the rear bushing, and the rotary valve. A couple of other pieces need some final machining steps to be made, but we are getting close. I can almost smell the nitro! ;D

DSCN4115.jpg


Wareagle,

Looking good :bow:

Is it just the angle of the photo, coz the shaft looks very short where it comes out of the front of the engine ???

Best Regards
Bob
 
Hi W/E

There was a coupe "Rat Rod" that looked just like that at last years NEMES show...with a twin turbocharged HEMI.......but of course...being a rat rod it was in primer gray...

Oh the cruisader looks good too! :big:

Dave
 
Maryak said:
Is it just the angle of the photo, coz the shaft looks very short where it comes out of the front of the engine ???

It is the camera angle. The crankshaft protrudes about .750 from the snout of the crankcase. It does look a little short in that image, though!

steamer said:
There was a coupe "Rat Rod" that looked just like that at last years NEMES show...with a twin turbocharged HEMI.......but of course...being a rat rod it was in primer gray...

Oh the cruisader looks good too! :big:

Dave

I think the primer concept is lost on kiddo. I thought that making it a rat rod would be real cool myself!

His car probably has turned out better than the Crusader, and will likely run better, too. ;D


As a side note, we were weather out of our race today. It has been rescheduled for the following weekend. The weather here has been very cold for us, and we have had ice and snow on the ground for five days now. Haven't been above freezing since Monday evening. Very odd for this region!
 

Latest posts

Back
Top