Cochran Boiler

Home Model Engine Machinist Forum

Help Support Home Model Engine Machinist Forum:

This site may earn a commission from merchant affiliate links, including eBay, Amazon, and others.

Florian

Well-Known Member
Joined
Apr 25, 2008
Messages
230
Reaction score
2
Hi Guys

Another piece of work from my shop (which is not yet completed):
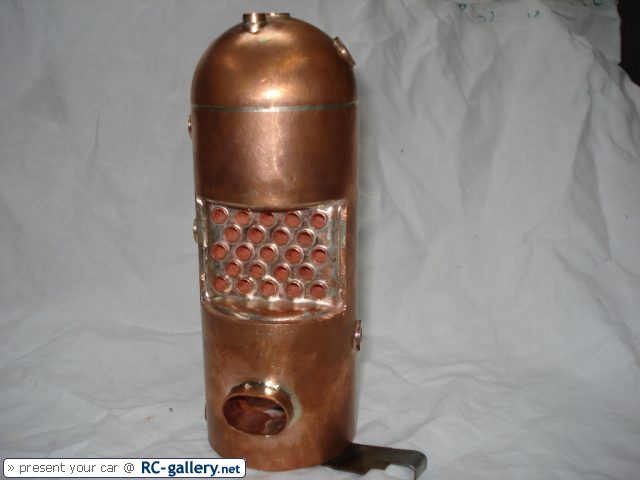
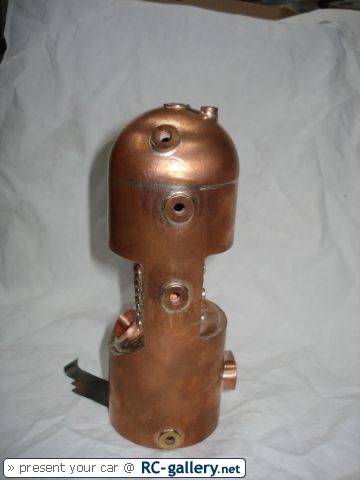
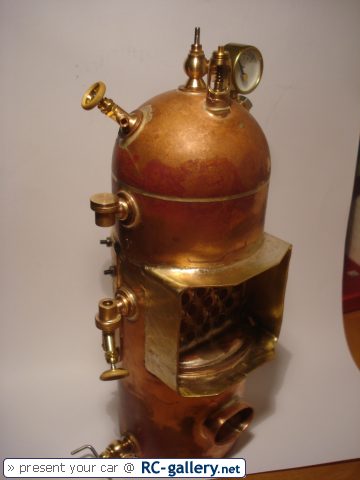
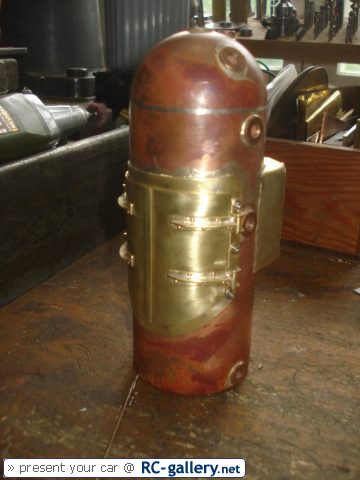
I am really fascinated by a type of boiler called "Cochran Boiler":

boiler_Cochran_1.gif


And i one day decided to build my own:

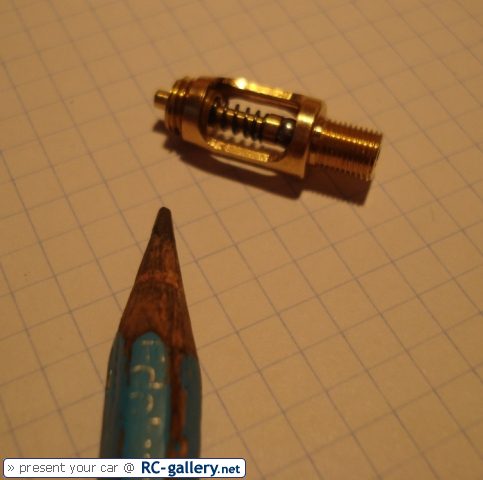
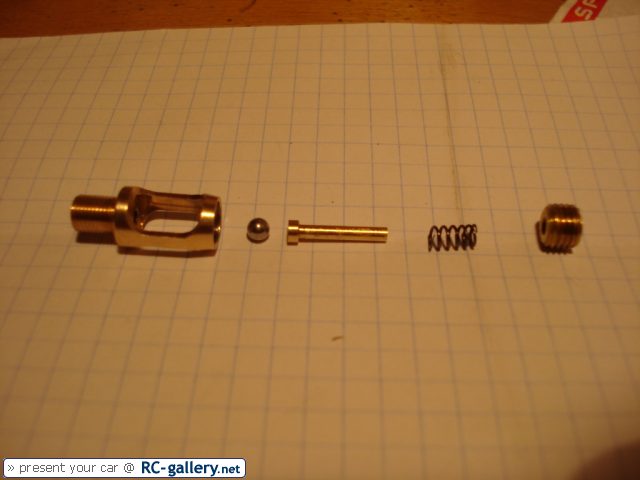
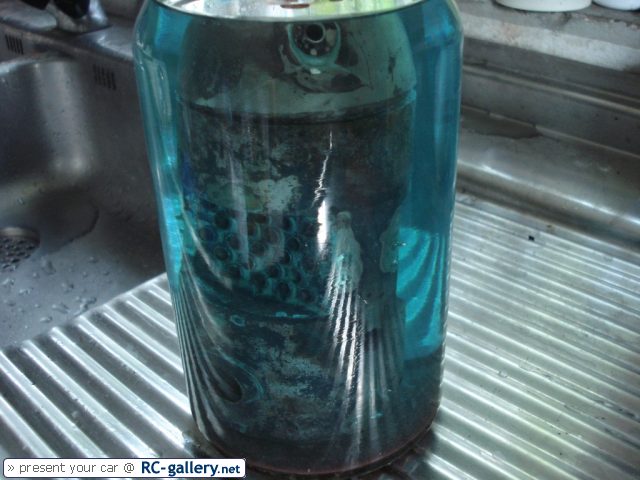
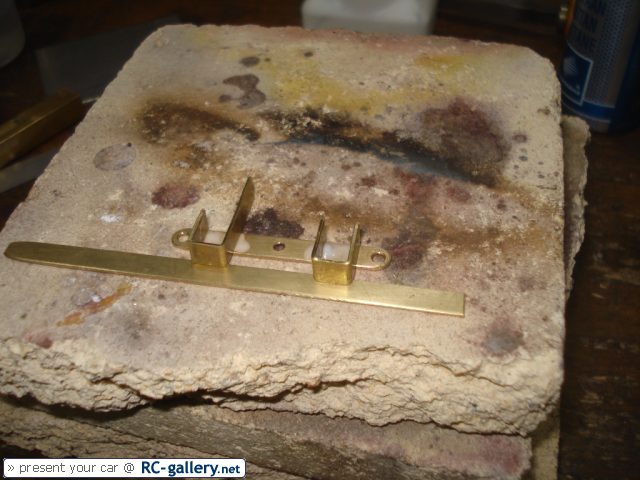
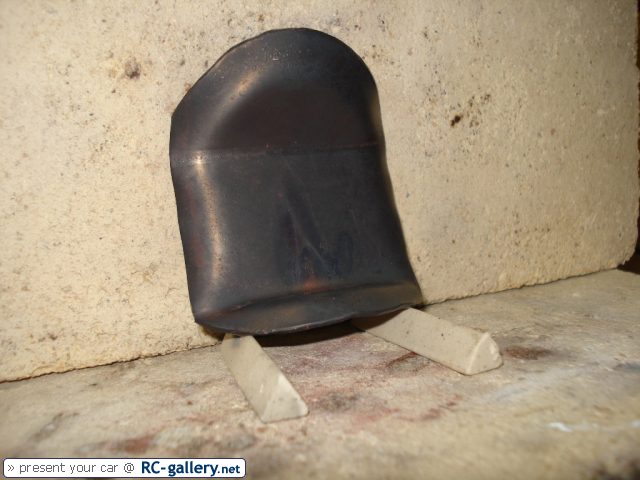
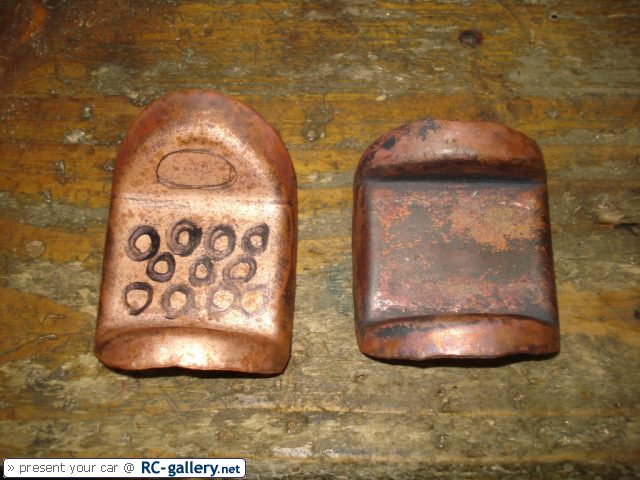
First parts are being tempered:
347_bdfe967db42f3719ee9f5970037d3b49.jpg


347_05a3fe380aa12ebc22a3d16b09b737b3.jpg


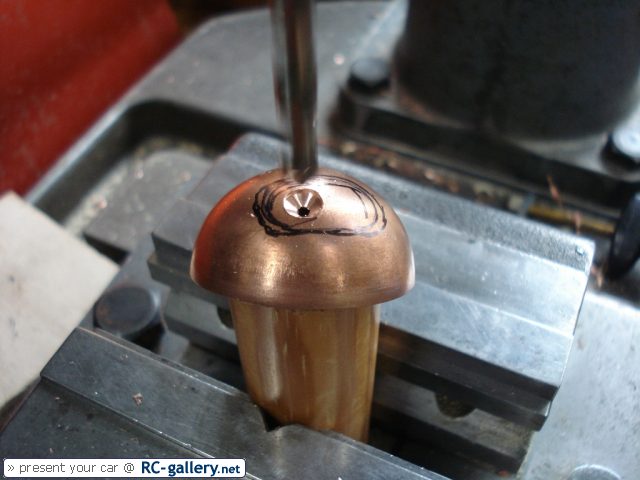
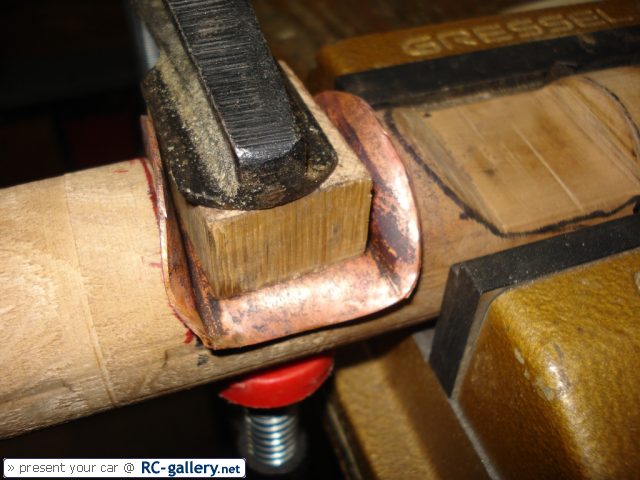
I used a round piece of pearwood to make the form for driving: (They were just felling a pear when i started my project and i took a piece of it. I then turned it down to the required diameter.)
347_6c13acd6a49b9999b2a7462ecf13d6bf.jpg


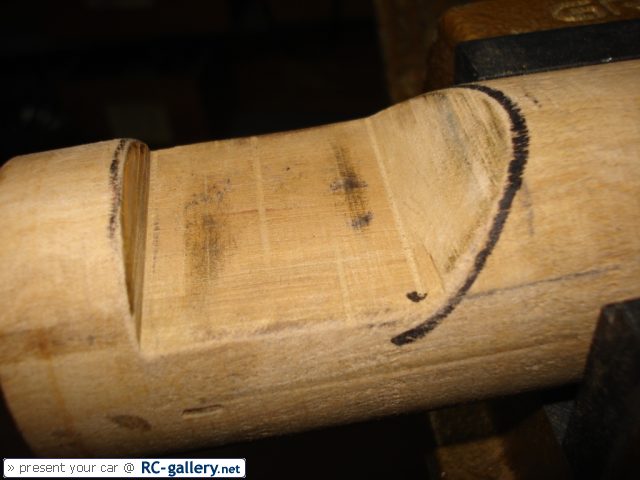
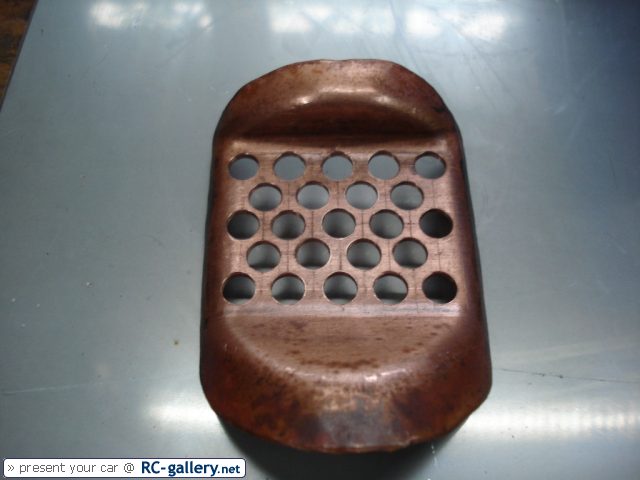
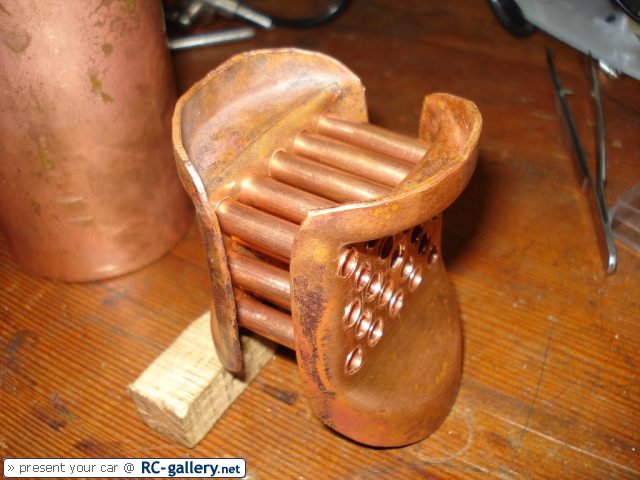
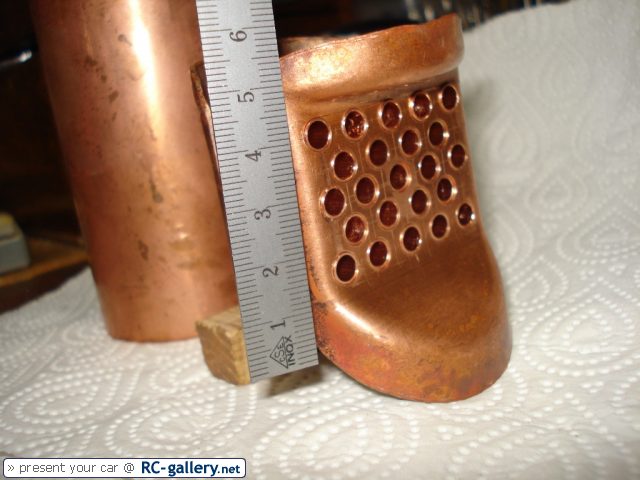
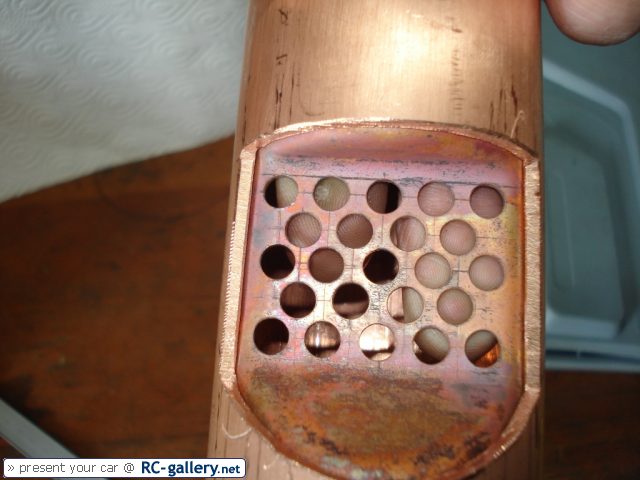
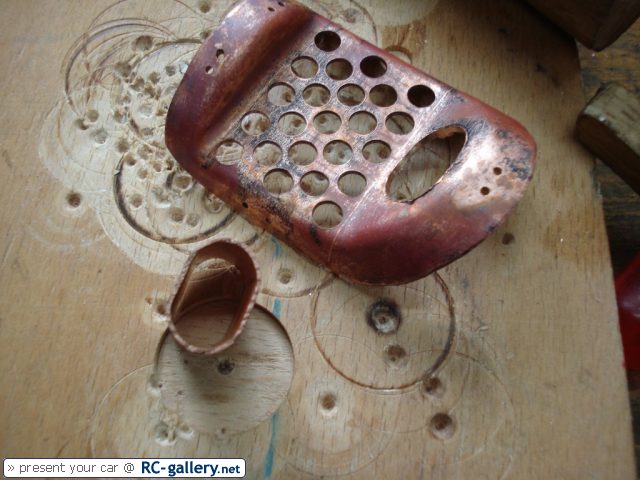
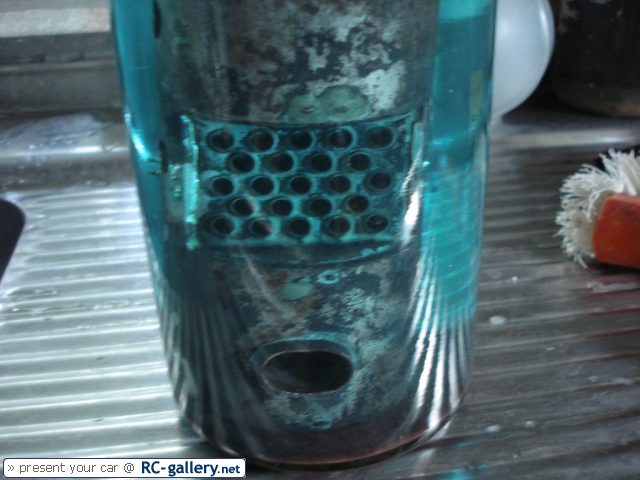
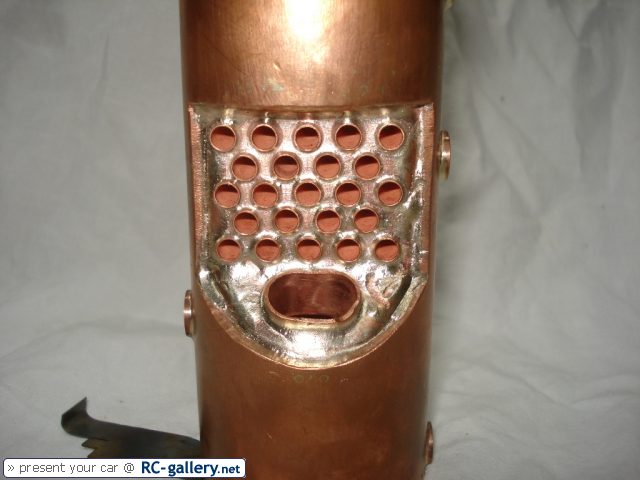
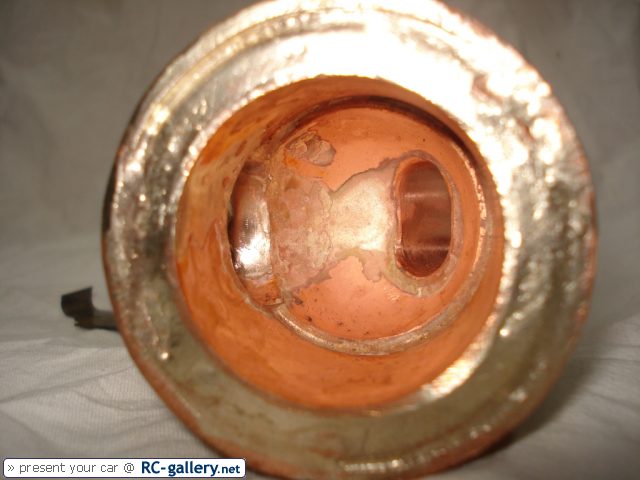
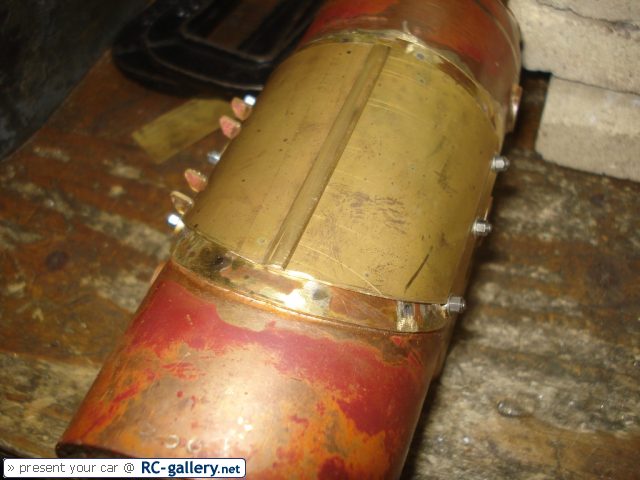
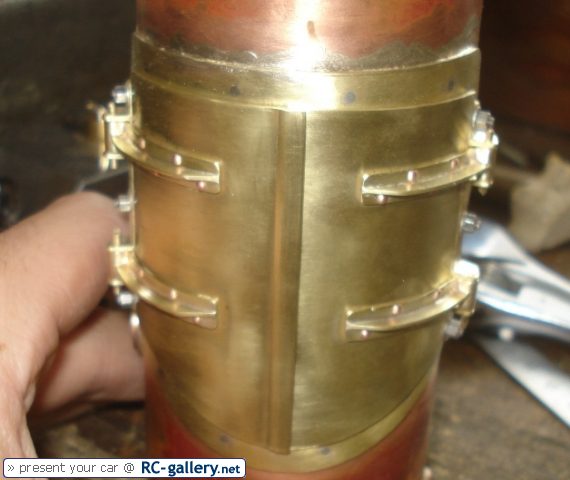
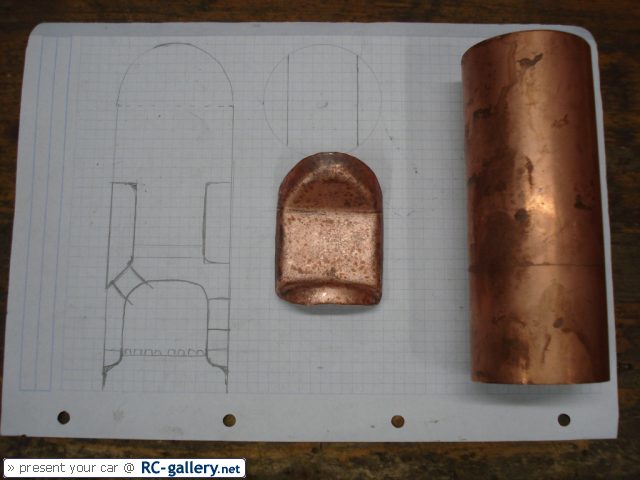
That's the tube and also the first smoketube holding shell
347_7d7c85d0d708d25a25aabcaeb9571289.jpg


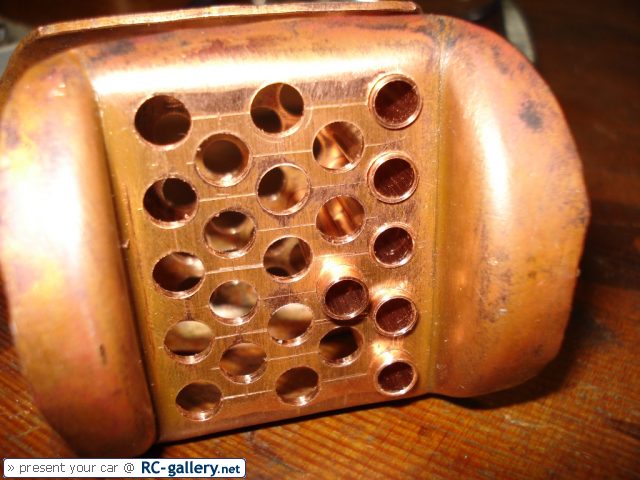
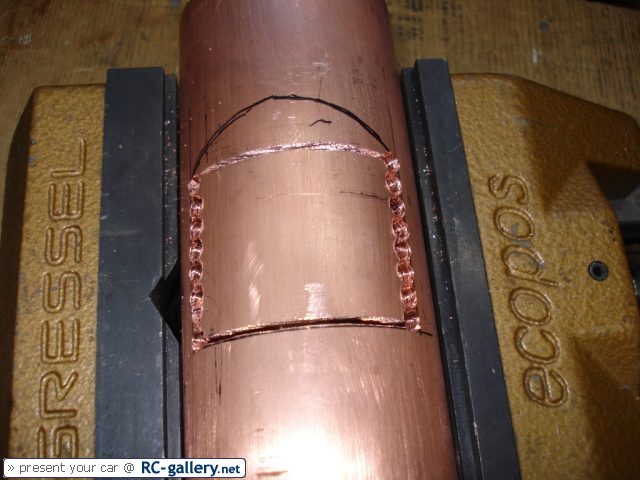
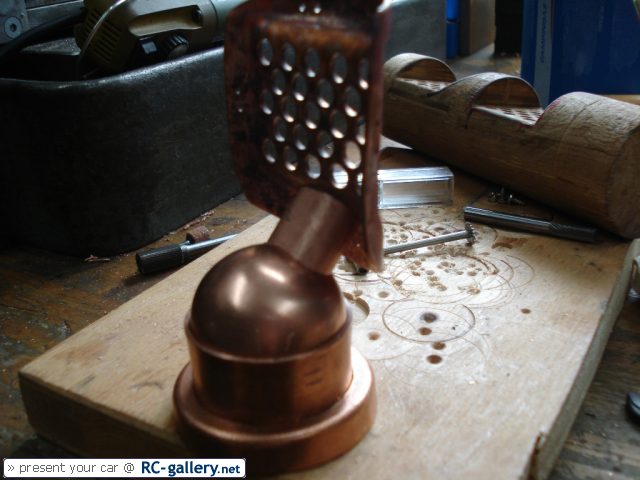
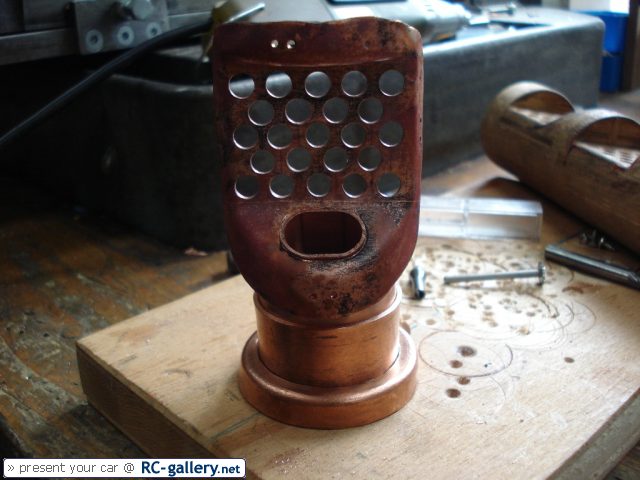
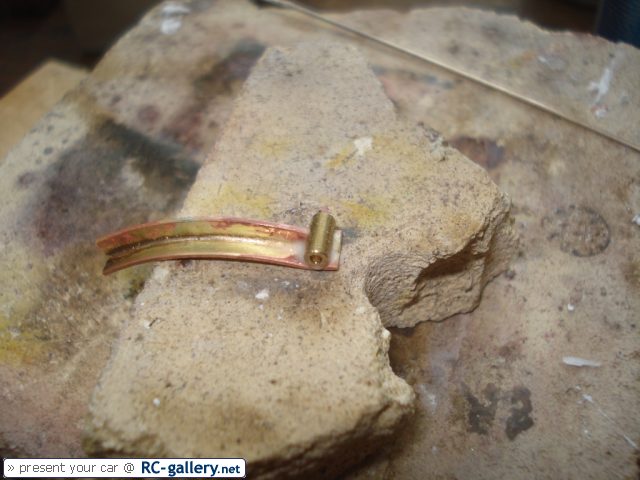
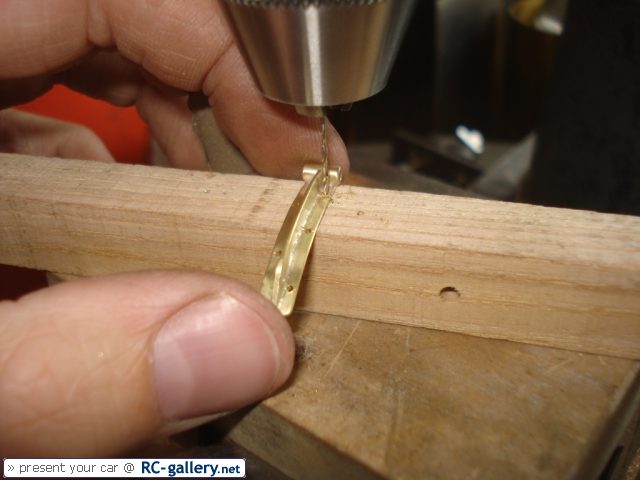
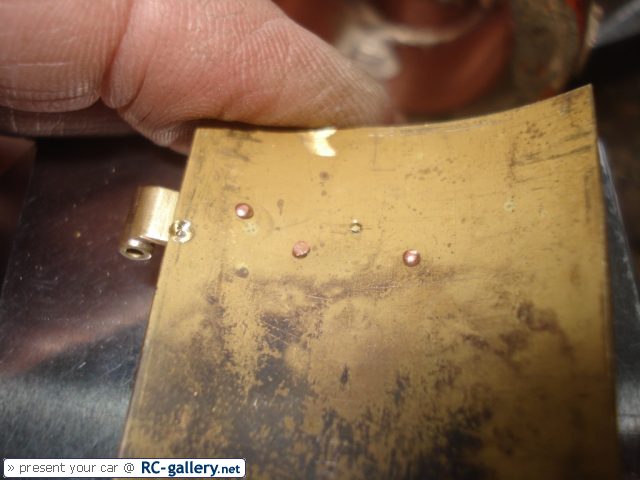
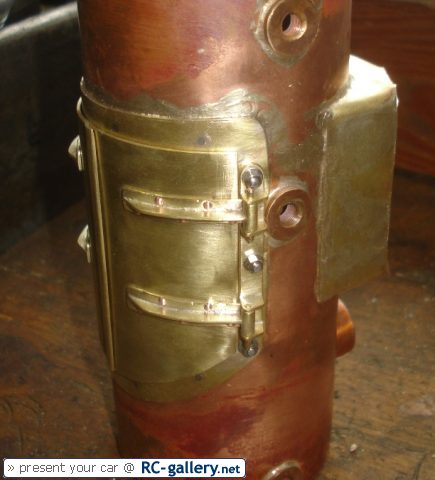
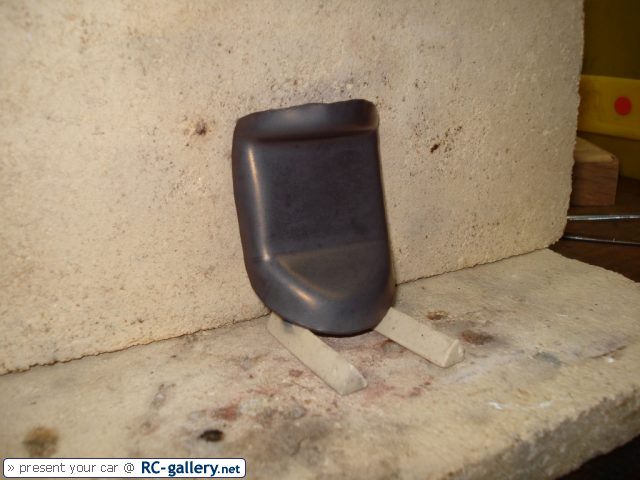
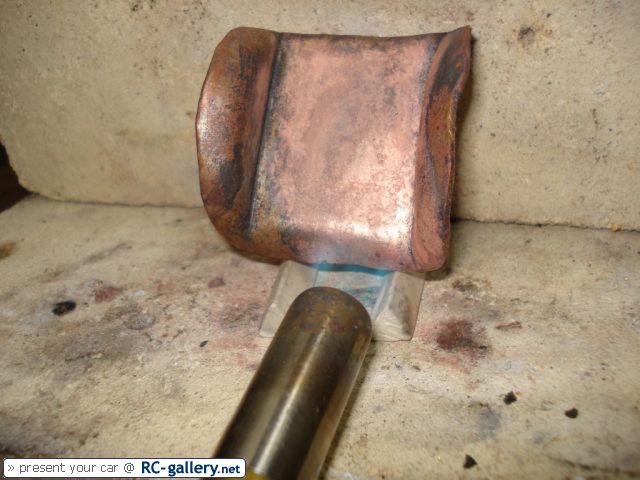
And the second shell for the side of the chimney is just being driven:
347_381e180d9913155caf9d922496a9446c.jpg


tempering it with my torch:
347_1138f3815eb0f52b5f75533850fe5ea8.jpg


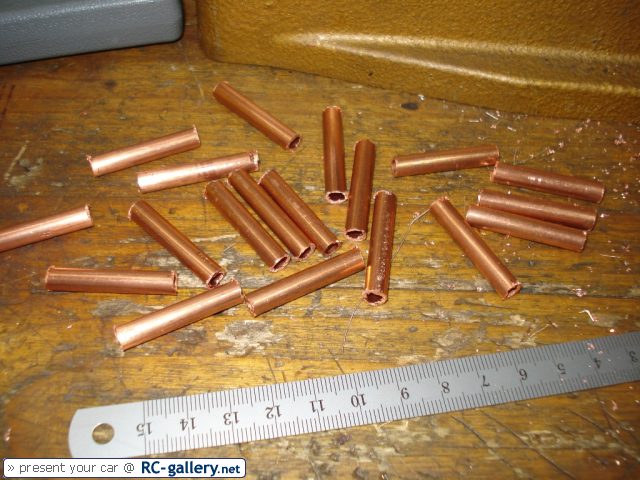
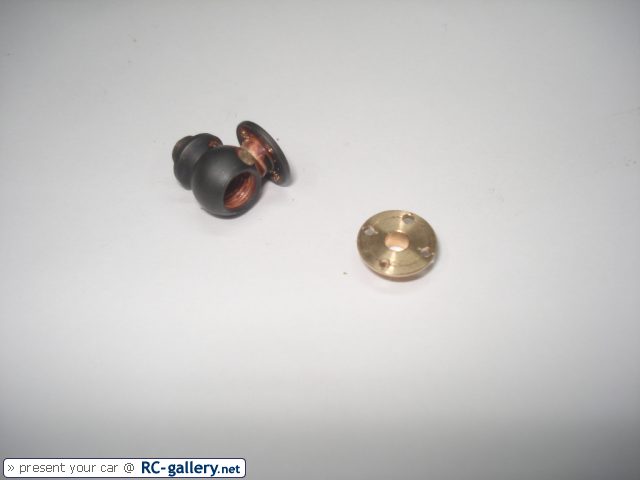
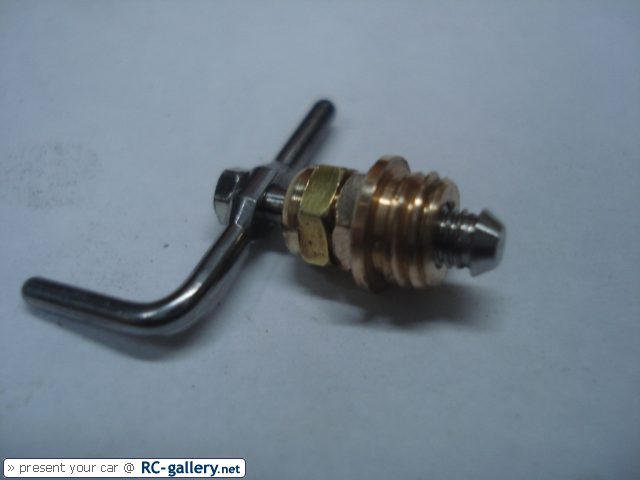
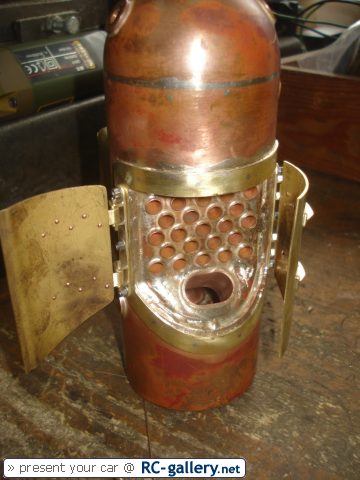
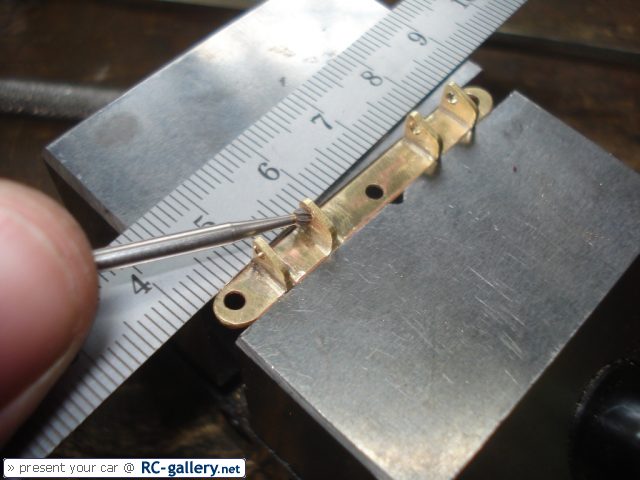
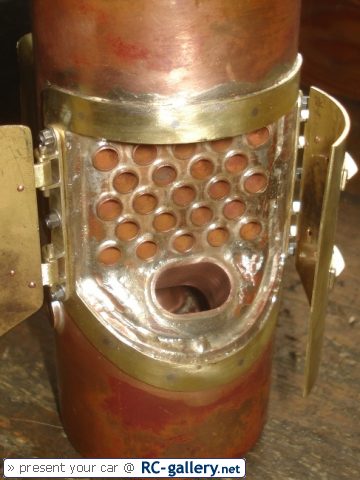
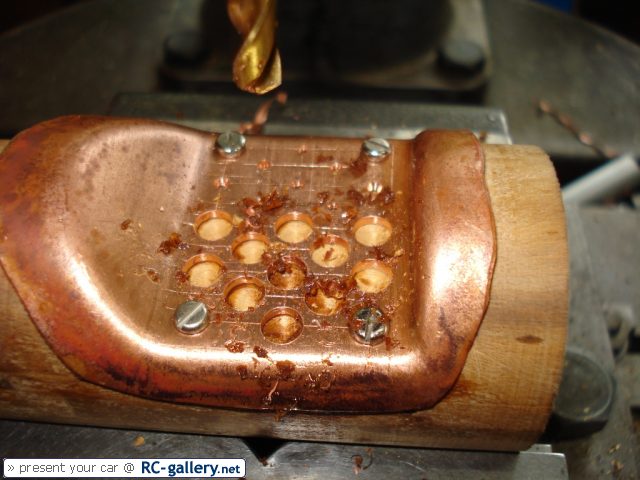
Are there enough tubes, or shall i make some more...?
347_fe6eb721a0c0c7f7d07ba5aa5ebdbd5a.jpg


[continues soon]
 
Now, there need to be holes in these shells. I decided to make 23 smoke tubes with 6mm outer diameter and 5mm inner diameter.

I first marked the center positions with a scriber, center punched and finally drilled with the center drill:
391_84c83bc660971c5b98e15ad17a986a1b.jpg


The next step was to drill the holes up to 6mm.
391_e418b798af6a940587c85289217d3a07.jpg


And now the shell's completed. Well nearly. ;)
391_ceae508adc139ead27dcf204075540e2.jpg


I wanted to know ithe boilers capacity and so i estimated it:

The boiler will have in about 200 cm^2 heating surface. This type of boiler has an approximate capacity of 5cm^3. This means it can vaporize 5 cm^3 water per 100cm^2 surface per minute. That makes 4370 cm^3 steam per minute.

I also need the tubes:
391_8f69b9cd5ff1fd2762bf30536b7bd4fa.jpg


and with some of them inserted in the shells
391_bef0dbfeb764299abd225f0ebc412345.jpg


I turned the ends of these tubes with a mandrel on my watchmakers lathe:
391_0b3ea72bf476316fd3d7b7708721b5ef.jpg


This will be the smoke tube unit:
391_0fb63f87af61ce392543008ce20bc18e.jpg


Ist small! (ruler with mm-scale)
391_6f674e78183c2ad07c5577aca6f4cc8e.jpg


Continues soon...
 
Hi sorveltaja

Well no, i bought two hemispheres. But i made all the rest. (Not the tube ;D)

While i was waiting for the hemispheres to continue the copper work, i used the time to make a safety valve:

395_9c2cd4a11069ceacdca7dc2a64038437.jpg


395_b79838e1d6fde83777605a2f35cf4585.jpg


395_a8283e0e69df4e973bc1d253b8b3ca6f.jpg


395_e6f917e46e0e1e86fe5d66a95ad8bfb7.jpg


Its body is made from gunmetal and the ball is stainless steel and has 3mm diameter.
The threads to connect it with the boiler are MF 5*0.5 ( 5mm fine metric threads with 0.5 mm pitch)

Florian
 
I then started making the big holes in the main boiler tube:

395_e20412206fca4ef6462edc3549845386.jpg


looks good, doesn't it?
395_cbbf28fd5d5961b9c20f78568efc23ab.jpg


And this will be the firebox:
395_08ddd46621e9378992ae4486b9e3fe0a.jpg


from the top: (with the smaller hemisphere)
395_8d5bc9c1b222281c112072bca11b6bc2.jpg


And with the big hemisphere on its top:
395_e1551c7612b0c0cae038fc15a4f90aaf.jpg


After trimming the tube and the big hemisphere, it loks like this:
395_8740d4d382715ae44d92327c98e7fee0.jpg


395_8740d4d382715ae44d92327c98e7fee0.jpg


with smoke tubes:
395_2f88c892457198168e416eba156bcc88.jpg


Now, i started drilling the oval hole for the connection between firebox and returning chamber:
395_c8b2a9843cd9bdb31ebd7581666f5385.jpg


and the shell with the oval hole now: (and the oval piece of tube)
395_d24368483a6410af69f1e098533cc220.jpg


somehow it looks strange...
395_df3119c2d0ab437d810a8529831594ee.jpg


395_71e6b3a7ca5645bd64ba179db5cf1e08.jpg


Well that's it for the moment. I will shurely report any advance.. ;)

Florian
 
Great Pictures and a good looking boiler :bow: - keep the info coming as when I find some copper I have a boiler to build and will be picking your brains.

Bob
 
Hi Maryak

Well, you might have to travel around half the globe to pick my brain ;D
I live in Switzerland ;)

Florian
 
Hi everyone

Although the board software reminds me to think about writing in that old topic (last post 120 days ago or more), i continue writing about an unfinished piece of work (some call it art ;) )

Well, it has been a long time and i didn't have a loto of time for my hobby but finally i managed to continue with my cochran boiler.

Sorry guys, i didn't make a video of soldering it. I just forgot after more than half a year... It wouldn't even have been so easy to do that but i guess i would have found a way to do it..

Anyway; after the first and the second soldering step i made these two pictures of the boiler being cleaned in citric acid:


403_f4c2501a672d2fe63ce5aa8f1023f33e.jpg


403_52b3ef721416aa1cc9f73aba80298997.jpg


Then i had to do some soldering again and after soldering, cleaning, brushing and removing wasted solder the bolier looks really nice:


403_dd64d93487145fec6da6469514b43b5c.jpg


403_ed31e9be6ecb1ba947eaf25db7559bee.jpg


403_4b1e55ccdda31c6fc3937501ae646dcd.jpg


403_47bb1536b6ef8385af7e61ae40838a13.jpg


I didn't brush the firebox yet but i will do that as soon as i have the adequate brush for my dremel 8)


Florian
 
Florian,

Very nice. :bow: :bow:

Best Regards
Bob
 
Florian, what a very unusual and interesting design ??? this Cochran Boiler. Being from the MidWest US, I have never seen or heard of this design. (although that does not surprise me as there are quite a few things I have never heard of, or most likely will :eek:) Could you tell us please, about the design's origins and what service applications it was intended for, and why. stickpoke Thanks for all of the great photos and that is truly some beautiful smith work you have done.

Cheers

BC1
Jim
 
Beautiful work Florian! :bow:

Rick
 
Yes very nice work

I have only seen that boiler in books before...I am interested in it's performance.

I would seem to have efficiency on it's side.

Dave
 
Garden Island Dockyard in Sydney NSW had a couple of automatic oil fired ones on skids which we would use for auxiliary steam when our own boilers were down for maintenance. They beat the hell out of Claytons steam generators which were "ORRIBLE"

Best Regards
Bob
 
Hi Everybody

It's been a very long time since my last post... But yes, i have continued my Work on the boiler!

Anyway, first of all, i "have" to answer some questions:

Jim: This boiler design comes from scotland; there was a boiler factory called "cochrane & co" and i think thats the origin of its name.

This type of boiler is capable of delievering lots of steam within very short time. Because of these caracteristics, these boilers have been used as auxiliary boilers.

I also have read that they are (now? or at least not so long ago) used with an oil Burner on one half of the smoke tubes (and also with the same firebox design) but also being connected to the engine exhaust with the other half of the smoke tubes to gain energy from the exhausted gases.

Thats in about what i know about this boiler.

Well, after it was put from one place in the shop to another, i one day began making all the little fittings.
First, the blow-down valve:
403_2fd45c19a0692b970917b72a9664761c.jpg


The spindle itself has an M3 thread on it and a 100° taper on the front.
403_38413f37714f6257bab9ad9ae57153e3.jpg


And assembled, polished and just in front of a ruler (mm scale)
403_1ec7a5b1d03ebd65897cc8a6a40d077d.jpg


Finally attached to the boiler:
403_c833c30cf39bf843b9f2dce24a262119.jpg


Then the clack with a shut-off valve (There is a square end on each side to prevend the washer and the handle from slipping)
403_a4a3a4b9c6b68e464a5a89d999449dca.jpg


This water gauge actually is a prototype. I wanted to build it very compactly so i have as much display range as possible. It did work out really good i think...
403_2fb1082f452aa168a5eb847017efb3ab.jpg


And then the blower valve and also main steam valve (but the handwheel is still missing)
403_97faba362ef6690c1d41d1d4ecde2eb7.jpg


Last Thursday, i started with the returning chamber doors and the hinge joints.
403_26209fc67f143df3a08aee7c81aef6dd.jpg


They are made from 3 pieces and should look like they were made from a t-profile.
403_3ad70d5fbab454a68ca8c63b40405e61.jpg


Then i have to drill the holes to clinch them together with the doors.
403_4d0699fba65265ce9280412aa3ec6a55.jpg


And here, the rivets have been inserted and the doors are almost finished.
403_73136ed89391ec77beb8f43ff0e4510e.jpg


Its just the locking device (Is that correct for the thing that holds the doors closed?)
403_8ae8e144a54450cb0f7abe55973659bb.jpg


See you (hopefully) soon
Florian

PS: Rick; could you please move this topic to the new boiler board? :)
 
Beautiful workmanship,Florian.The "thing" which holds the doors closed might be termed a "latch".
A good many years ago,I repainted a model of a Cochrane boiler,which had been sectioned,to show the inside structure.Painting between the tubes was a nightmare,but it got done eventually.
What are you going to steam with this boiler?
 
Lovely bit of work Florian, a credit to your perseverance.
 
tel said:
Lovely bit of work Florian, a credit to your perseverance.

I second the above. :bow: :bow:

Best Regards
Bob
 
And a Third from me. Thats quite special, I love it... :bow: :bow:
 
That is definitely a piece of art Florian. A uniques design to start with and perfectly executed on your part. Please keep the pics coming!!

Bill
 
Hey Everyone..
Thats pure motivation to me, what you are writing Thm:


I Wanted to find a way to ensure the joint flaps would stay parallel when soldering and also all of the four pairs should have the same clearance. I then took a piece of flat stock and then bent a brass stripe around two edges.
These "U-Shape" stripes wont move anymore and they also will stay parallel. ;)
771_048fa7d99be76999f38b21863cbfc70c.jpg


Did you ever have the problem not reaching a hole that needed to get deburred? No Problem, just use an engraving cutter like the one on the picture (Can anyone tell me the correct name? "Leo" only proposed "cherry" for a spherical cutter)
771_f6602baaa3a96b535ada43487d3d4107.jpg


I riveted in 3 steps:

1. insert the rivet, turn it upside down with the head on the lower riveting tool (made from a brass rod using the same ball tool as for deburring)

2. carefully forge the rivet

3. used the upper riveting tool to finish the closing head. Looks good enough for the smokebox ;D
771_ca7717ff81a435f6cf4ba1006a9cb0bc.jpg


Then a closer view of the doors with the ankle joings
771_24de347264f1913e67344948f04b3a3c.jpg


Again the doors, now opened:
771_f0dcdbe1d3d962d3f923178ff6445ebe.jpg


And a side view with closed doors:
771_2b7239122e5ac813c56bb8b6544a0acf.jpg


Finally i made a drawing that shows the principle of the water level gauge heads:
771_956b4b591d56eb29dde459a9f12b8e9f.jpg


Cheers Florian ;)

Gruss Florian
 
Florian,
A real work of art. Thanks for taking the time to post photos and methods. I learn something with every post.
Dennis
 

Latest posts

Back
Top