Cast Iron and Carbide

Home Model Engine Machinist Forum

Help Support Home Model Engine Machinist Forum:

This site may earn a commission from merchant affiliate links, including eBay, Amazon, and others.

Captain Jerry

Project of the Month Winner!!!
Project of the Month Winner
Joined
Dec 2, 2008
Messages
971
Reaction score
8


I am not going to show anyone how to work cast iron. I am going to see what I can learn about turning cast iron with my lathe, a 9 x 20 import. Mine is an older Harbor Freight version (they are all the same under the paint) that I bought used. It has two non-stock accessories that are highly recommended. The 4-bolt compound clamp and the AXA QCTP, both are bolt on/no machining req,d, from The Little Machine Shop and both improve the rigidity of the machine.

This is still a light home shop machine. It was a 72nd birthday gift to myself and when I brought it home 3 years ago, I was not able to get it out of the pick-up truck and into the shop by myself. I removed the tailstock and the tool post but I still needed help so I called my wife. She's a couple of years younger and the two of us got it off the truck, into the shop, and onto the cabinet stand. I'm not bragging but I took the heavy end. I mention this so that people who are not familiar with the machine can get a feel for the size.

I am going to use good material (3/4" diameter Durabar) and maybe OK material (new and scrapyard plumbing fittings). I have turned cast iron before and it is not difficult but I have never done any real investigation with speeds, feeds, cutting tools and finish, so that I what this is about.

The lathe has 6 speeds with belt change. The three high speeds (620, 1120, 2030 RPM) run direct to the 3/4 HP motor with a three step pulley, and the three lower speeds (120, 350, 540 RPM) run off of a three step pulley on an intermediate shaft. The great majority of my work, I use the 620 or 1120 RPM speeds. On rare occasion, I have used the low ranges for large diameter material (3" or greater).

When I first got the lathe, I worked mostly with aluminum and brass, a little bronze, and from time to time various grades of steel. I have, from time to time, favored HSS tools, Brazed carbide tools, and indexable carbide tools. The carbide tool come with a manufactured geometry and cutting edge. The cutting edge of these tools is not very sharp, but they are not meant to be. They don't work that way. They depend on their hardness and rigidity to crush the target material and plow it away.

The standard carbide tools just don't cut it. Literally. So I learned to grind HSS tools and surface finish improved greatly. I also learned about coolant and lubricant and how this could improve the surface finish. I don't have a flood or a mist system but I do use a squeeze bottle or a brush if I have to but I really don't like to use the stuff. Its messy, smelly, and the night cleanup crew has had to be laid off due to the economic conditions.

I found ( was told here on HMEM ) that honing, stoning, polishing the cutting edge could reduce the need for coolant and lube. It does. I never use it on aluminum, and only rarely on steel. A sharp, smooth, edge creates less friction and heat. A shaarper, smoooother edge does it even better. But there is a limit. A sharper edge dissipates heat less well, and dulls more quickly. Catch-22.

Not long ago, I needed to turn a piece of HSS. Carbide seems like the obvious tooling except that the part was less than 1/4" diameter and the pressure needed to start the cut with the typical blunt carbide edge caused a lot of deflection. The part would try to climb up over the tool and increased pressure would fracture the carbide.

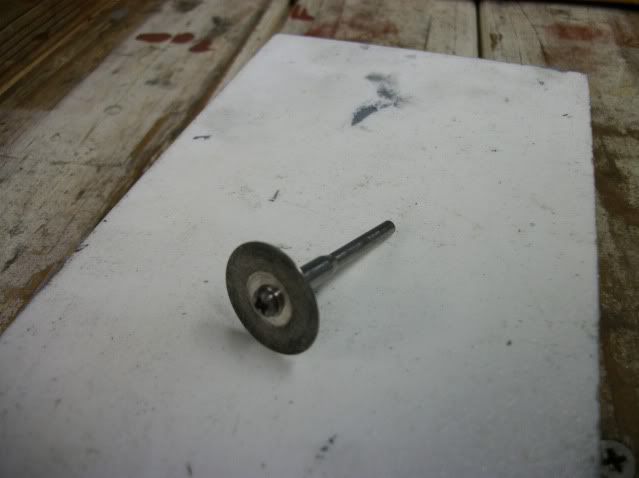
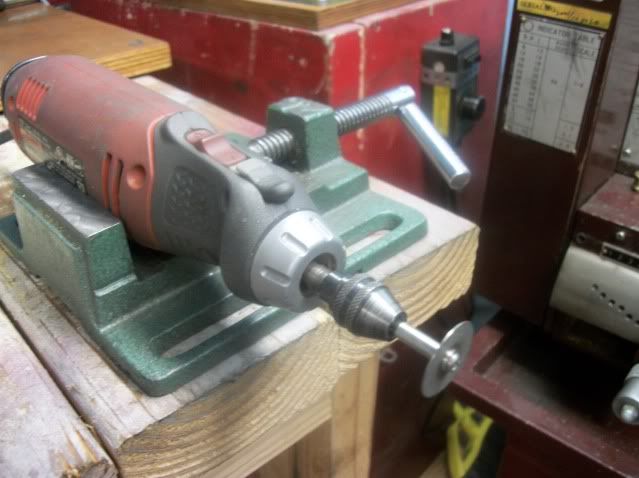
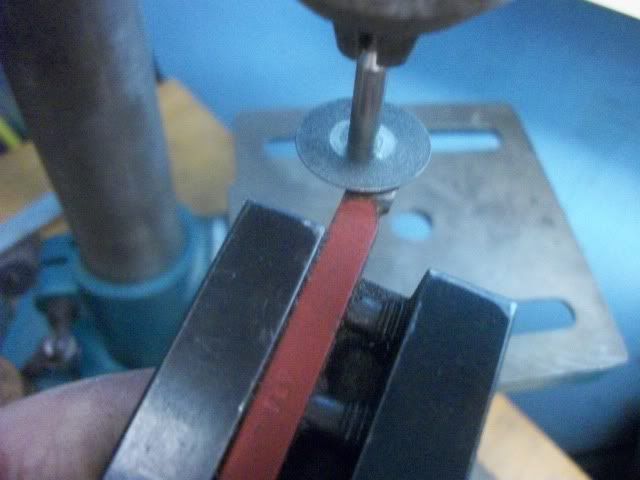
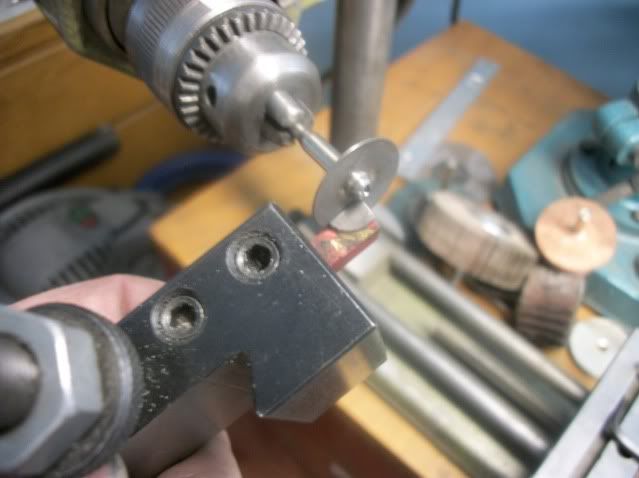
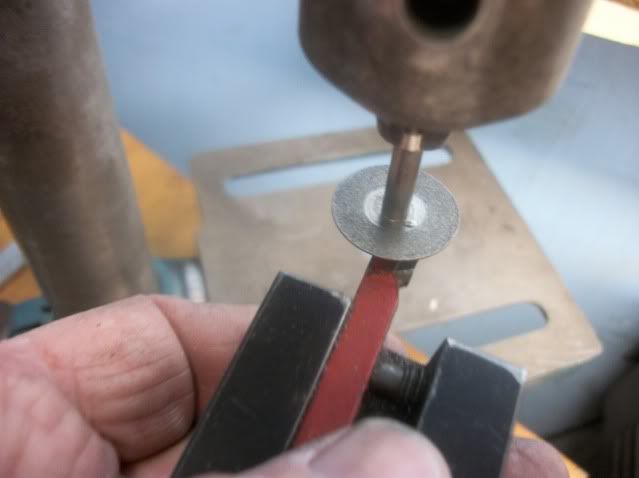
I have read that there are SHARP! carbide insets. Pricey buggers I'll bet. I hear that carbide can be shaped with silicon carbide or diamond wheels so I hurried out to HF and returned with a diamond sharpening system with 3 diamond wheels. The cost was about the same as the cost of 2 large bags of potato chips.

I had no idea that it would take this long to get this typed and it has gotten very late. I'll get back to this tomorrow and will include some findings.

Jerry

 
I continue: 102

Here is my diamond sharpening system. Arbor and 3 1" dia disk for about $6. The disks are double sided. What attracted me to these is the fine grit and close grit spacing. I saw some diamond disk with a few abrasive specs, widely spaced.

CInCarbide017.jpg


The arbor can be held many ways:

CInCarbide018.jpg


CInCarbide020.jpg


CInCarbide023.jpg


Incorrect photo removed
CInCarbide022.jpg


A Dremel in a vise, a Drill Press, or my favorite shown in the last two pics is held in my Unimat SL headstock, raised and rotated to any convenient angle. I leave the tool in the holder which helps to visualize the face angles and adds some bulk to hold onto. The brazed carbide only needs light honing to produce a keen edge, but it is possible to remove enough material to repair a chipped edge or to shape a large or small radius as needed. It can also be used to hone and shape HSS tools as well. It dissipates heat very well and I have never burned the edge of HSS tools.

More later.

Jerry
 
Last edited:
I'm sure you will be happy with it and if you have ever used the so call green carbide wheel (IMO are not worth the powder to blow them up) you will see a huge difference in sharpnes of tools and especially how long your carbide tools will stay sharp. If you were to sharpen a carbide tool with the green wheel anf then look at it uder a microscope you would see many tiny fractures along the cutting edge but with a proper diamond wheel you will see vary few if any at all thus tools stay sharp much longer.
 
chucketn said:
Capt. Jerry, where did you get your diamond wheel and arbor?

Chuck

I found it hanging on the wall in a bubble pack at Harbor Freight. I had been looking at 3" disks that have a 1/2" diamond abrasive border but I was put off by the grit size and spacing. These are cheap and effective for my needs.

Jerry
 
I use mine the same way. Great for generating chip breakers.
 
Jerry, you might already know this, but just to warn other people about when they sharpen up carbide tooling.

The tool grinding lines should always run in the direction of the cut, that is 90 degrees from the cutting edge. If you get the grind lines parallel or close to it in relation to the cutting edge, the cutting edges are very liable to chip and break.

I have done a quickie C-o-C to show what I mean


John

carbide grinding.jpg
 
Yes, John, I did know that. I'm sure it was you that told me and it should have been said. But the compromise needed to deal with the top surface had gone over my head if I ever even considered it. Thanks for the tip. Small details can make a big difference.

Jerry
 
I'm ready to post some findings but the results of my camera work are disappointing. Cheap camera, poor lighting, and bad technique combine to produce useless output. A couple of pics and a couple of videos may be interesting and I will post them at the end of this.

Here is what I determined for my circumstances. Rigid is good but sharp is better! Sharp reduces the force required at the cutting edge and makes rigid less important. If carbide tools could be made to be as sharp as HSS, there would be little difference in the results. They can.

Faster is better. If the tool is sharp, very fine finish cuts can be made with either tools at high speeds. Cuts of .005 or less on 3/4" diameter at 2000 RPM produce almost identical very good finish with either HSS or carbide.

Carbide wins for stock removal because the edge lasts longer. Cuts of .050" at 1100 RPM with no difficulty using either tool. But after a few passes with the HSS, the chips started to burn my wrist. The edge was visibly dulled. The same amount of work with carbide left the chips, the workpiece and the tool bit cool to the touch. I could take a .050" DOC with HSS at 200RPM but after about 1/4", The edge began to dull and I stopped as the color of the tool bit began to change.

Here is a pic of the surface produced on 3/4" Durabar with .001" DOC, 2000 RPM with very sharp brazed carbide.

CInCarbide026.jpg


More later when uploads finish.

Jerry

 
Looks to be a nice finish Jerry!
You do want what heat that is generated to be in the chips not the tool or part.


It does look like a nice finish Jerry!....I will experiment with it myself.
:bow:

Dave
 
doc1955 said:
Looks to be a nice finish Jerry!
You do want what heat that is generated to be in the chips not the tool or part.

Doc

The heat that was present in the chips from the HSS that was not there in the chips from the sharp carbide was an increasing symptom. More heat > duller edge...duller edge > More heat. If the edge was holding up as well as the carbide edge, I would expect the heat curve to be the same. Of course this means that with HSS, either the speed or the DOC needs to be reduced. Carbide wins.

Speaking of chips, sharp tools, either HSS or Carbide, produce tight little curly chips like this from cast iron, not dust, except for very fine finish passes.

carbidebits018.jpg


Jerry

Jerry
 
Well done Jerry

Nicely done and good research on that. I have to admit I've not thought much about carbide beyond the usual use with tough stuff....and then only to keep a tool alive long enough to get the stock off.

Clearly I need to work this myself. thanks for the sharing the tutorial!
:bow:

some Karma from me

dave
 
Just for fun, here is an interrupted cut on a cast iron pipe fitting. Notice the lack of impact and the thin chips flying around like insects. By going to full depth, the cutting pressure never drops to zero so the effect of impact is reduced. If a shallow cut were attempted here, just touching the corners with large gaps between, the cut would be pounding. By going to full depth, easy,peasy.

Jerry

VIDEO vvvvv VIDEO VVVVV


Latest posts

Back
Top