Building of TINY INLINE 4 in Brazil

Home Model Engine Machinist Forum

Help Support Home Model Engine Machinist Forum:

This site may earn a commission from merchant affiliate links, including eBay, Amazon, and others.
Hello Alexandre!
Thanks for the nice words. I`m still learning this, compared to what I have seen in this forum its very small things.
What about you? Last time we have talked you were planning to buy some equipments such as Shirline milling machine. Did you get them?

TKS,
Edi
 
Very nice work Edi!

Your brass sheet work is top notch, and a fine job with the CNC.

Keep up the good work!

Kel
 
Hello feliow.
I`m here today to share with you all my success with my Rotary Table after I installed the CNC Kit.
I machined the Water Pump gears manually. I found it being a boring operation so I decided to install the CNC kit that was laying down on the shelf of my junk gabinet.
I machined the Pump gears again on the CNC. As I still don`t know how to program the 4th axis on the Mastercam, I wrote the program manually.
I got so happy because it worked fine. As soon I download the pictures from the photograph machine, I will post them as well as small video.

Regards

Edi
 
Hi everybody!
I`m here again to post how much I was able to progress on the construction of the TI4. I`m getting used with the CNC and being able to advance faster thje before.
This time I machined the Water Pump Cover, Rocker Arms, Distributor Cap and small parts

Machining the Pump Cover.
DSCN1460.jpg

DSCN1464.jpg


Pump body.
DSCN1477_zps5a59ebd7.jpg

DSCN1478_zpsd9fd28e3.jpg

DSCN1479_zpsca7335e3.jpg


Machining the contour
DSCN1480_zps6f664c92.jpg

DSCN1482_zps52e95d11.jpg


Drilling the holes
DSCN1486_zpsee276ad5.jpg


Rocker Arms
DSCN1489_zps51136fd2.jpg

DSCN1490_zps7188de8b.jpg

DSCN1494_zps8d4aafb5.jpg


With the help of my son Thiago (he generated the G code on Mastercam) we machined the Distributor Cap. We use Nylon just as trainning, nylon is not the proper material for that. Later on we made it again using Acetal.
DSCN1497_zps167abf26.jpg

DSCN1498_zps651cd567.jpg

DSCN1499_zps8410e7a4.jpg

DSCN1506_zps2ad730da.jpg


Cutting the groove for the roller on the Rocker Arms
DSCN1510_zps58e3b74c.jpg


Machining the Distributor Cap, now with the right material (Acetal)
DSCN1511_zpsd1aec1e3.jpg

DSCN1512_zps516293fd.jpg

DSCN1513_zpse01579d0.jpg


Facing the botton to remove the extra holding material
DSCN1515_zpse6e3fe79.jpg

DSCN1516_zps3a5bad95.jpg


Milling the base isolator
DSCN1524_zpseb305ec9.jpg

DSCN1525_zpsb5de18a7.jpg


I used the Dist. Cap as a collet to turn the inside diam. of the isolator
DSCN1516_zps3a5bad95.jpg

DSCN1520_zpsa79d8c7c.jpg


Milling the Rotor slot for the contact
DSCN1526_zps273edd75.jpg

DSCN1527_zpsd2ec935d.jpg


The parts finished
DSCN1533_zps388f3b70.jpg


See you next post. All of have a great holliday. Marry Cristmas

Edi
 
That's coming along well Edi, you are lucky to have Thiago by your side

Jim
 
Wow that's a lot of progress! The parts look great. Nice job.

Is Mastercam pretty easy to learn and use?

Merry Christmas!
 
Wow that's a lot of progress! The parts look great. Nice job.

Is Mastercam pretty easy to learn and use?

Merry Christmas!

Hi Maxine!
I found the Mastercam very easy to learn and use.
I did not have any experience with CNC before and I`m very happy to be able to program the G code and see it running on the machine. First I`ve learned the basics of CNC and wrote some programs manually.
Mastercam is Straightforward you simply draw the part and then select the operation (toolpath) you want to do and select where you want to machine by selecting the line on the drawing.
You can find many tutorials and on line courses on the internet.

Merry Christmas

Edi
 
Hi all!
This is my last post of the year. Today I decided to make the bevel gears. I did it out of steel as the project calls for. I have seen some doing this same engine but they did the same gears out of brass.

Here are the pictures.

Turning the blank.
DSCN1602_zpsf9866010.jpg

DSCN1603_zpsa52541ce.jpg

DSCN1610_zps456c3b25.jpg


A small video cutting the teeth
http://youtu.be/v-w5KBLbJqs

Dividing table and head set up for the teeth cutting.
DSCN1605_zps5cdcc08f.jpg

DSCN1606_zps14d03cda.jpg


Finished gears.
DSCN1619_zps84987ee2.jpg

DSCN1620_zps103c1ace.jpg

DSCN1621_zps4a886c6a.jpg


That`s it for this year.
Have all a Marry Christmas and a very happy new year.

Edi
 
Last edited:
Hello all!
I hope 2013 year started well for everybody.

I did some more work on the litlle beast.
I decided to finish some parts that were missing some small work.

Here I`m rounding the top corners of the Rocker Tower.
I used a parallel to position the part on the vise. I wrote a small G code to that operation. It worked very well.
DSC_0004-2_zps2fea8d56.jpg

DSC_0005-1_zps6cf7f840.jpg


Here you can see the towers mounted on the head
DSC_0013-1_zps711c991b.jpg

DSC_0015_zps565c03f0.jpg


I also machined the Fly Wheel
DSC_0019-1_zps326c50f9.jpg


For a long time I was willing to finish the had, but for some reason I was postponing that, maybe because the runners appeared to be litlle complicated. Today I found courage and finished (almost). Still missing the valve seats.

Here is the set up of the angles
DSCN2196_zps05f7a212.jpg

DSCN2197_zps1e517068.jpg


Spark Plug Holes
Positioning the tip of the center drill on the reference previously done when thew head was flat on the vise for the other holes.
DSCN2200_zps8aac8958.jpg

DSCN2202_zpsfce472bc.jpg


Now with the 7 degree angle on the other side
DSCN2204_zps8bbd30f6.jpg


For these Spark Plug holes I strictly followed the Kelly instructions.
I flipped over the head and used a 3mm pin to align the hole for the top drilling.
DSCN2206_zpsc730c975.jpg


Here you can see the spot faced area for spark plug (10mm end mill). Also tapping 10-40. The plans calls for 10-32 but I try to used a stok spark plug in case the ones I will make don`t work.
DSCN2208_zpsb5d2a491.jpg

DSCN2215_zps6596808f.jpg


Here is the head with the spark plugs
DSCN2209_zpsd96c5a30.jpg

DSCN2211_zps81f448b3.jpg

DSCN2212_zps9a6e695c.jpg

DSCN2214_zpsf1502b95.jpg


Now it is time for the intake runners
DSCN2218_zpsc331b942.jpg

DSCN2219_zps009e5140.jpg


Then the exaust runners
DSCN2220_zps9ed15b29.jpg


Sopt facing with 2.5mm end mill before drilling
DSCN2222_zps0cdcb281.jpg

Now on opposite angle
DSCN2223_zpsb2de2f34.jpg


Finished head. Ready for the valve seats.
DSCN2224_zpsc23bd1d6.jpg

DSCN2225_zps19277d04.jpg

DSCN2229_zps0a2935d8.jpg

DSCN2232_zpse9893c08.jpg


Here I`m preparing the stok material for the Pushrod Cover
DSCN2228_zps8c5742a4.jpg


Well folks that is it for today. I hope you like this progressing update.

Cheers,

Edi
 
Top Job Edi
really looking the part now!
I will do my Siamese intake ports soon if I can get up enough courage :hDe:
Pete
 
That is coming along well Edi, and the photos are great - very clear and easy to see what you have done

Jim
 
Hi Pete, Jim and Vince!
Thak you very much for your very kind words about my work. I`m still new on this field. A lot to learn from you guys.
It takes long from one post to the next because I don`t have much time to work on this building. I woul like to post more frequentely and also I`m very ansious to see it running.

Cheers,

Edi
 
Hi Edi,
I'm really impressed by the distributor cap, I would have bought one. Your engine is looking very good.
Art
 
Hello Edi,

Great work on those parts! I am glad to hear you were able to follow my instructions in regards to the spark plug hole.

I was looking at the bevel gears you made, something seems a little off. The sides of the gear teeth should be parallel and the valley should be triangular, the ones in the picture show triangular shaped teeth and parallel velleys.

I started a thread awhile back on the subject of cutting bevel gears with involute gear cutters.

http://www.homemodelenginemachinist.com/f26/bevel-gear-cutting-involute-cutters-9699/

In this thread on post 14, GailInNM explains that each tooth actually requires three passes of the cutter for each tooth. Each pass the cutter at a slightly different height and the tooth advanced or retarded a certain amount. The formulas are all posted in the thread.

Keep up the great work!

Kelly
 
Hello all!
I`m here again to show you my progress on the Tiny inline 4.
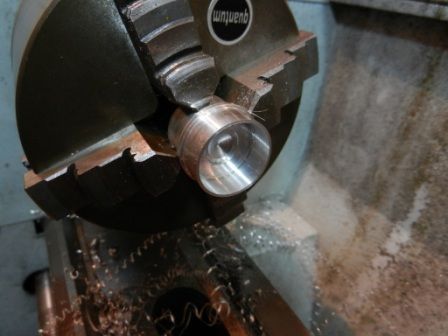
This time I dedicated my time to the distributor.

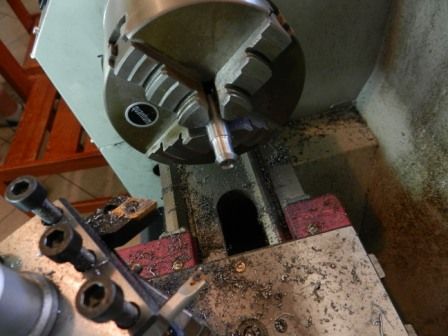
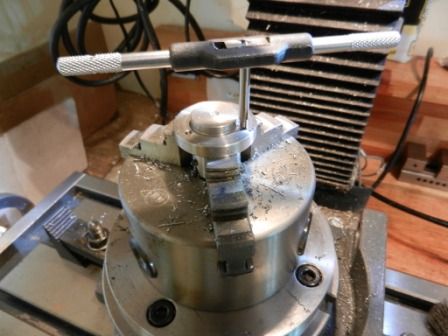
The picture bellow shows the body on the turning operation.


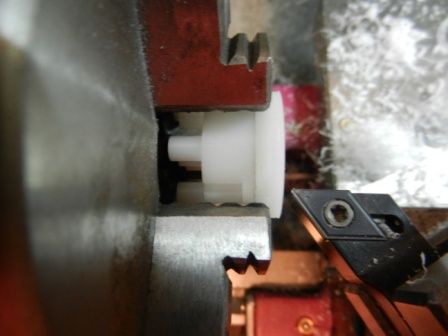
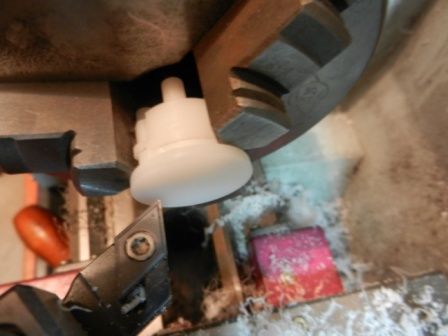
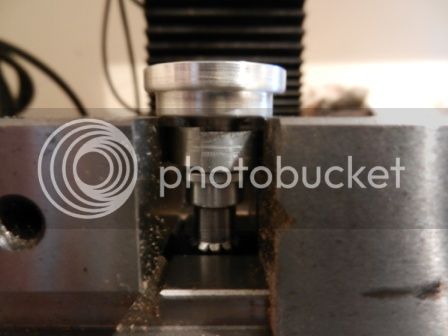
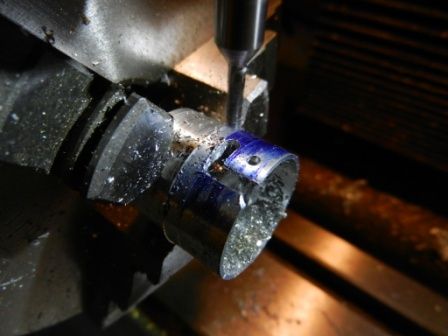
In order to hold the body on the milling vise for profiling the top where the cap goes, I made a kind of collet. I turned a washer with the ID the same dimension as the small Diam. of the body than cut it in two pieces.
You can see how it worked on the photo bellow.


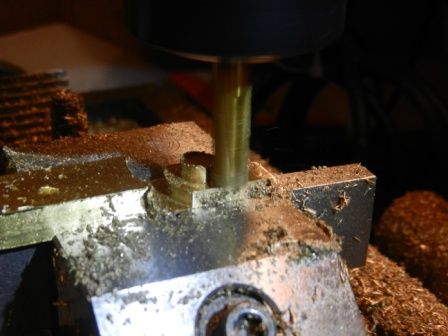
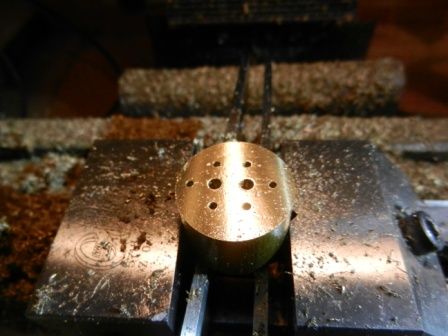
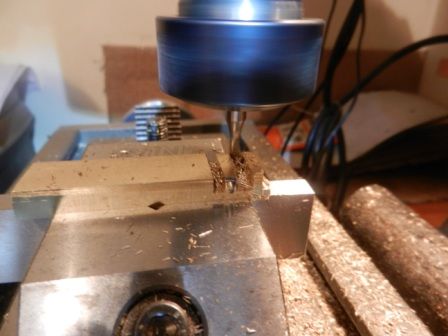
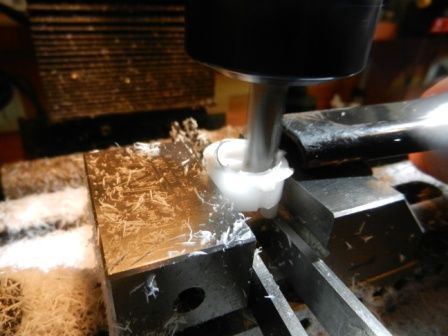
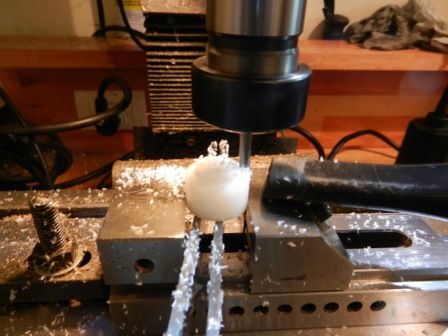
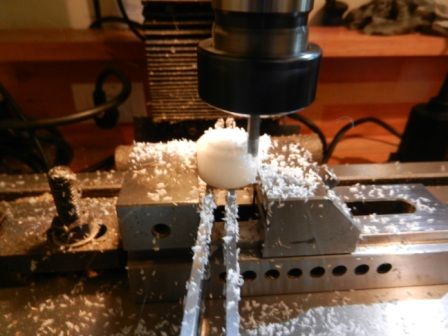
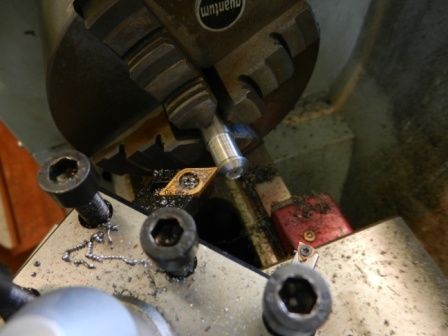
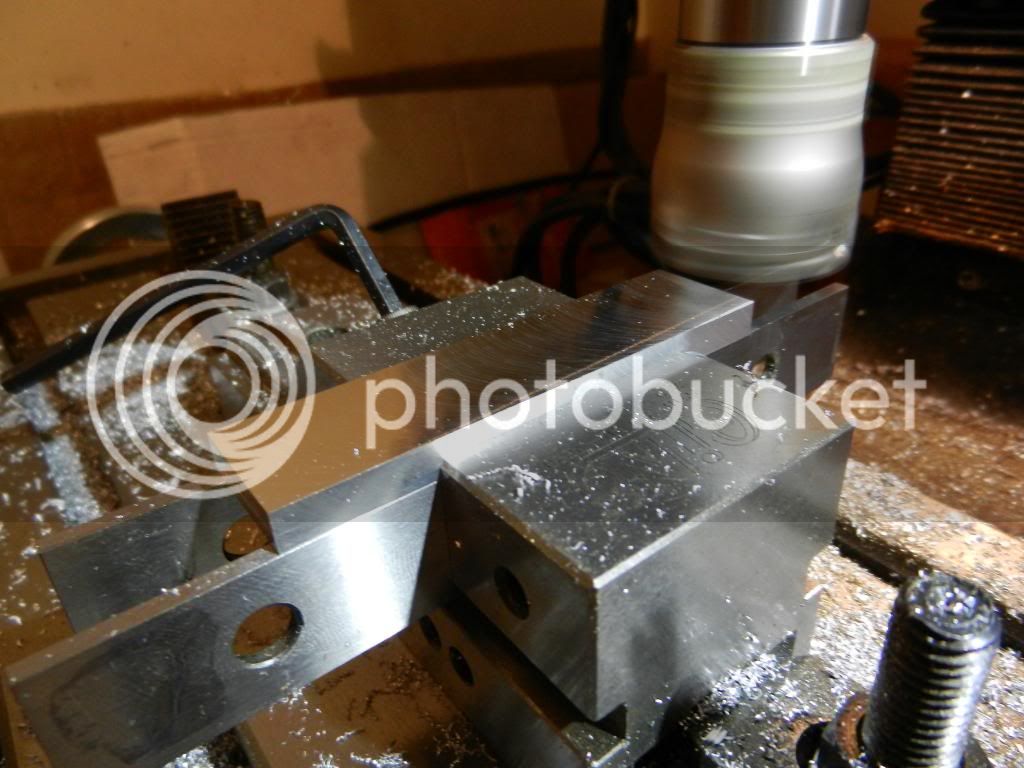
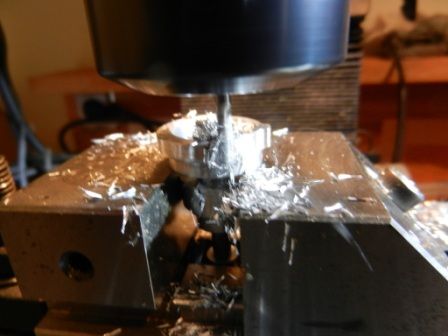
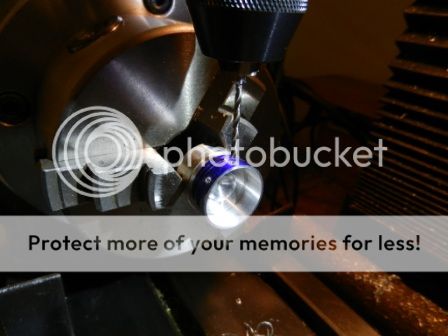
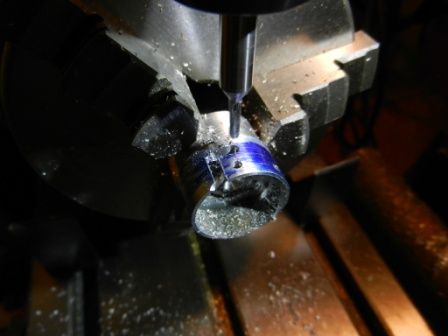
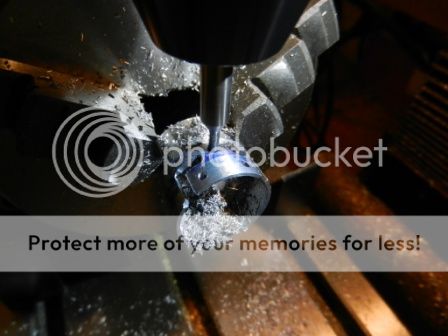
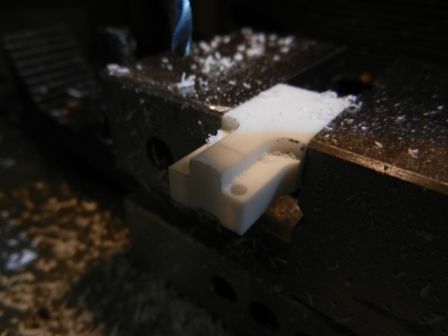
Here the body is ready for the milling operation


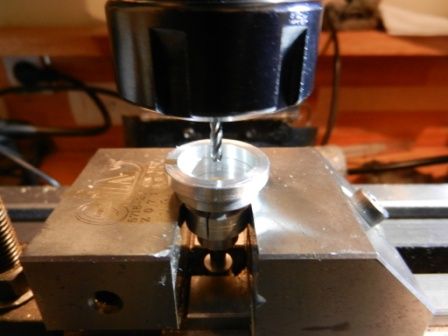
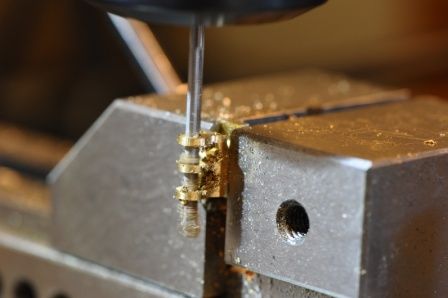
milling the contour for the cap. Sorry it is out of focus


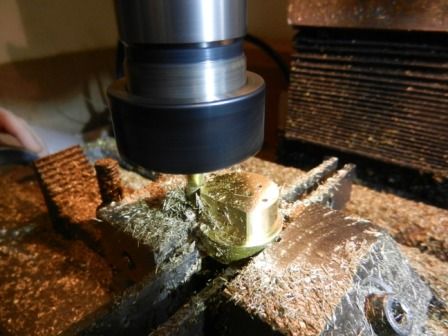
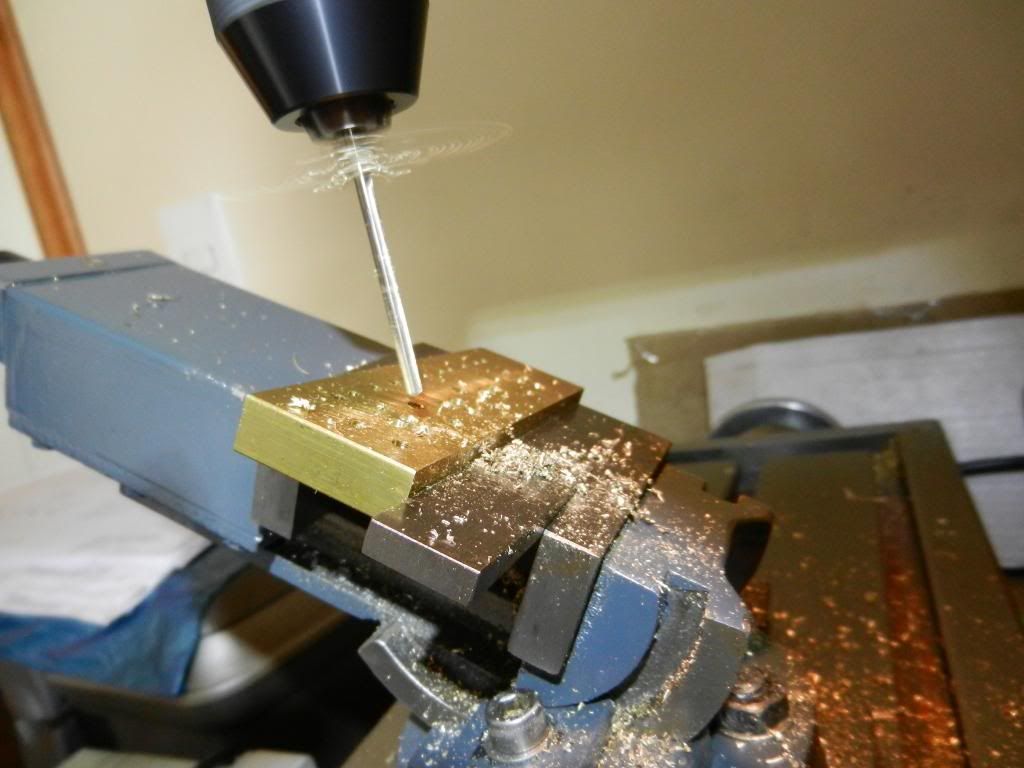
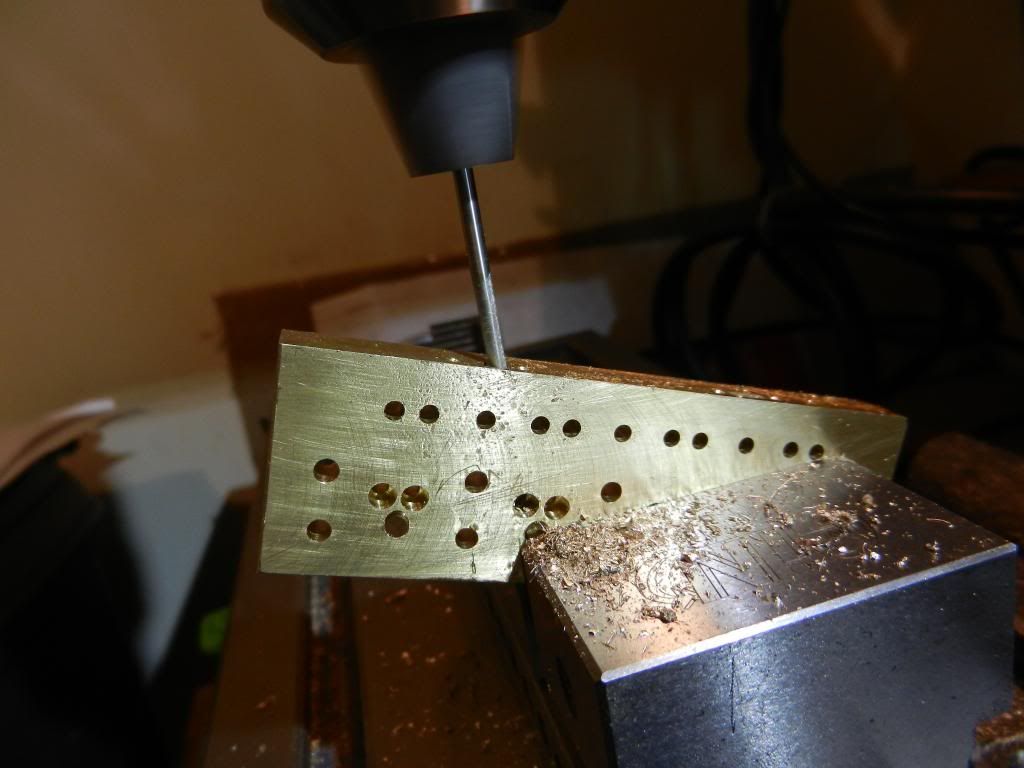
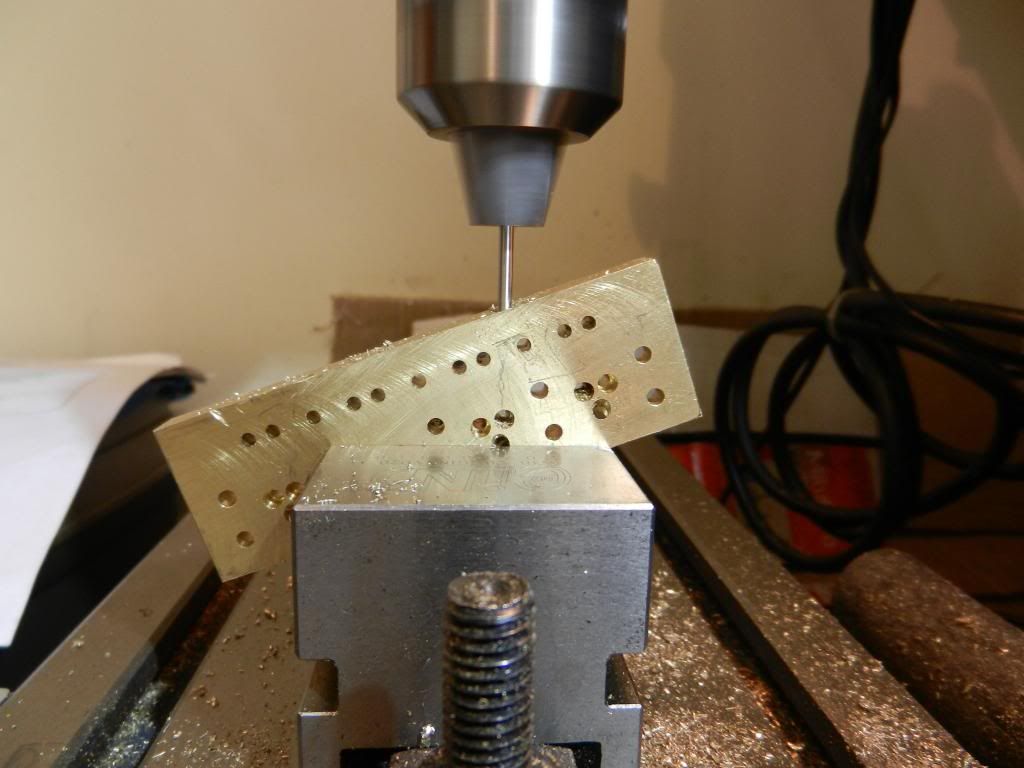
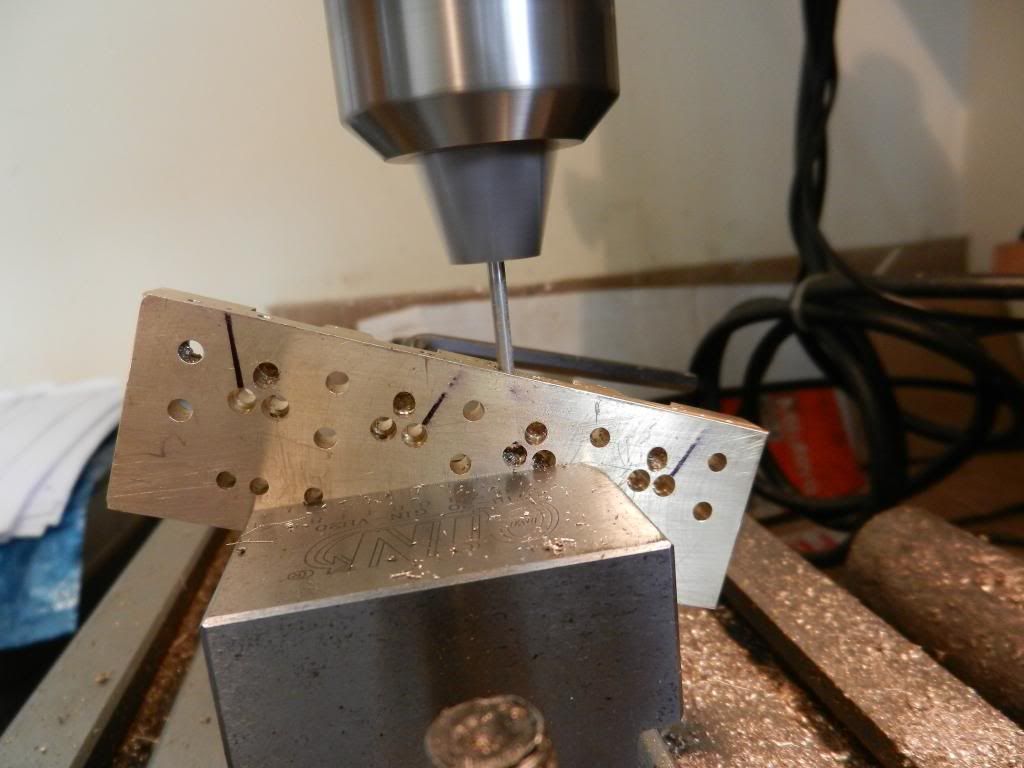
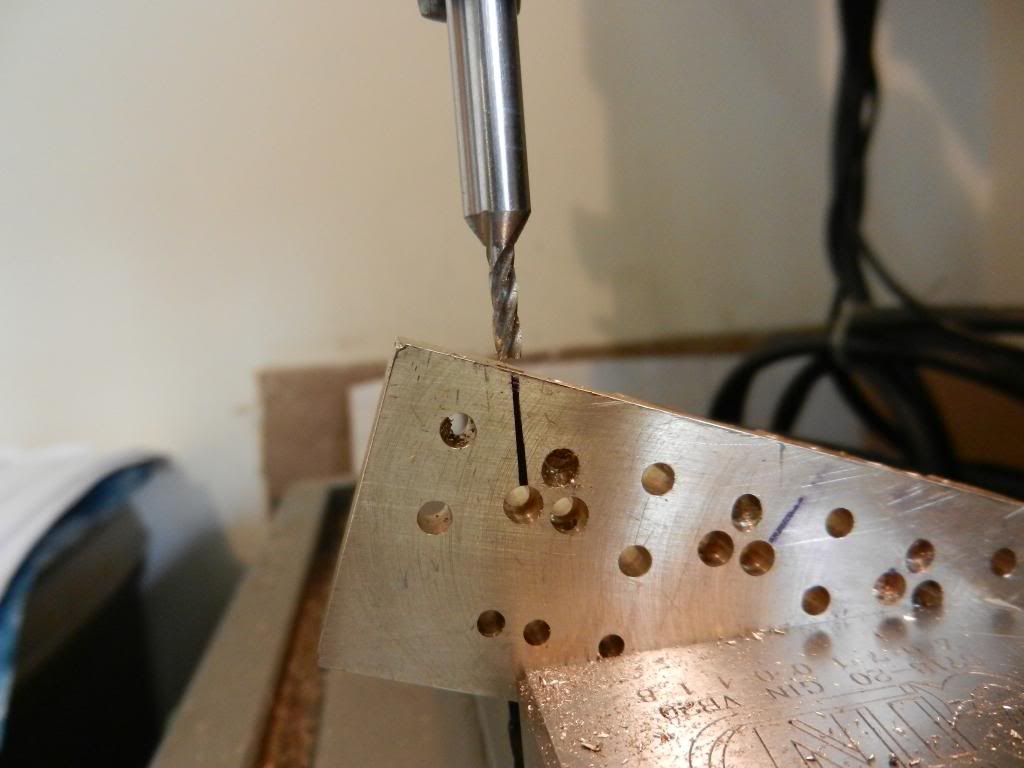
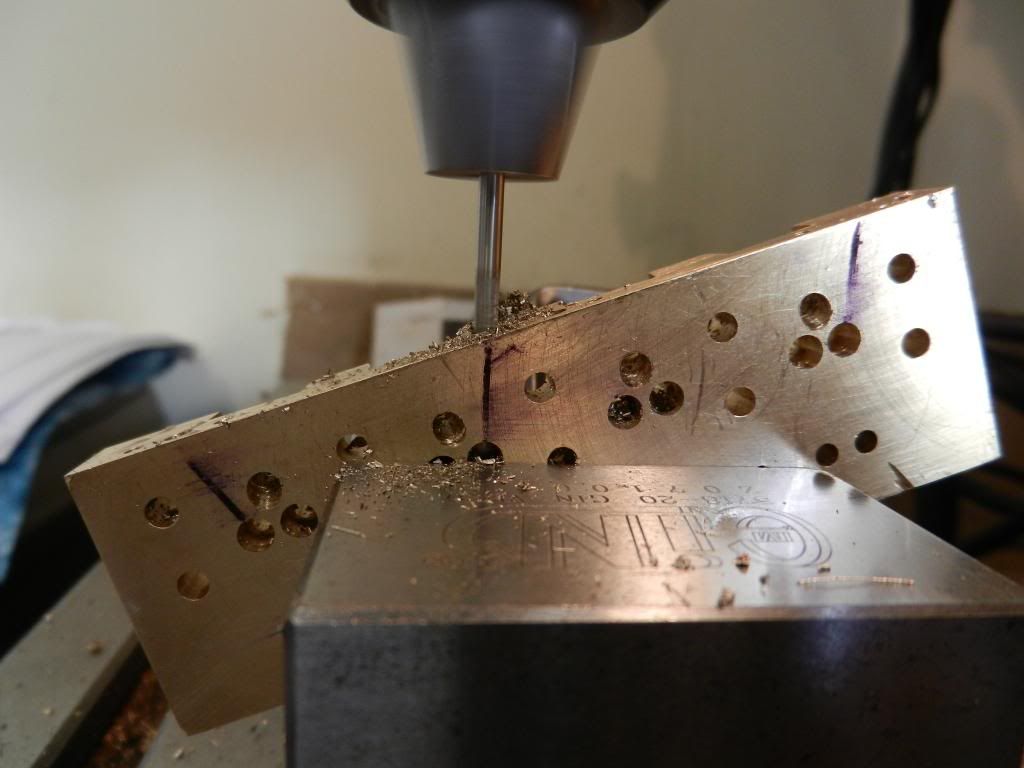
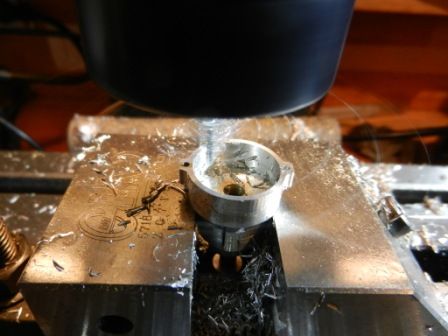
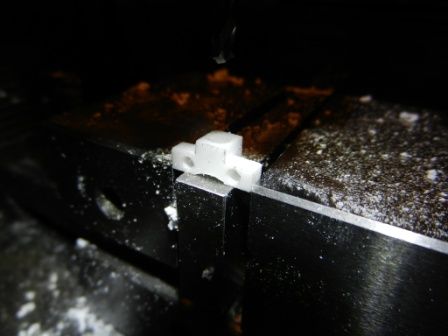
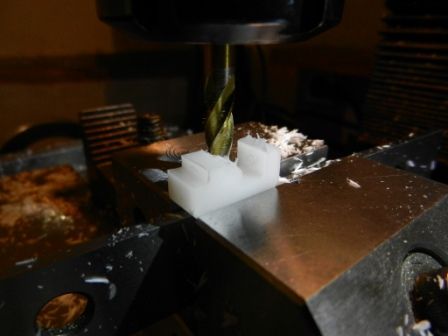
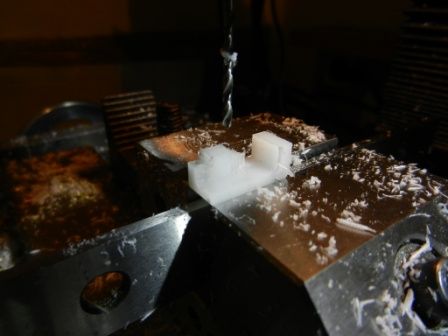
Drilling tho holes for the magnet bracket


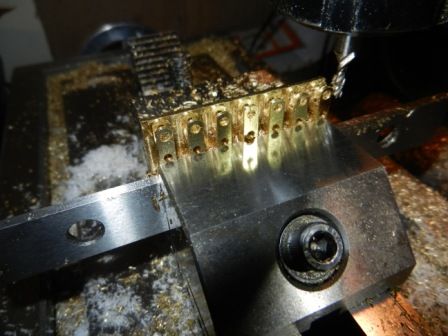
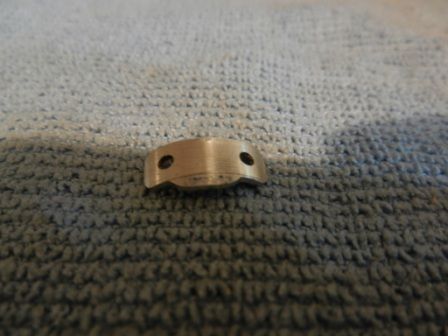
Here you can see the distributor clamp. I did that with the help of CNC.


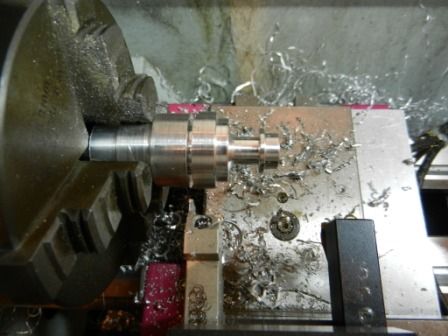
Here what you see is a arbor I turned for a small lathe chuck I purchased in Austria (Proxxon brand) during a trip with the family.
I decided to buy that because it is very useful for very small jobs. In spite of my lathe being small, it not good enough for such small works.
The store I purchased it is quite unique. I found it by chance waking down the street in direction to the metro station. I found a lot of very very intersting things there that hobbists like us would spend a fortune. Besides the chuck also purchased small drill in 0.1mm increments, small taps and dies 1.0mm, 1.4mm. I fell in love with a small rotary table but was too heavy for the luggage.


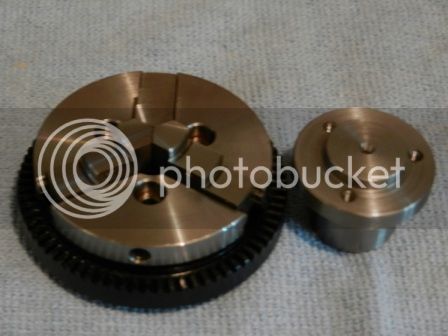
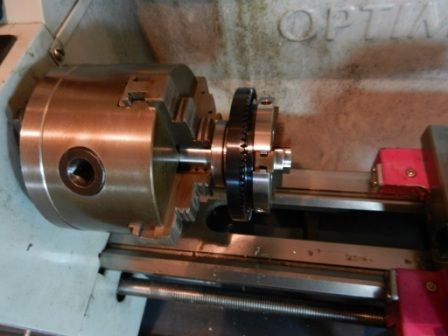
Here is the little baby installed on the lathe. It is OD. 64mm and the jaws are very precise.


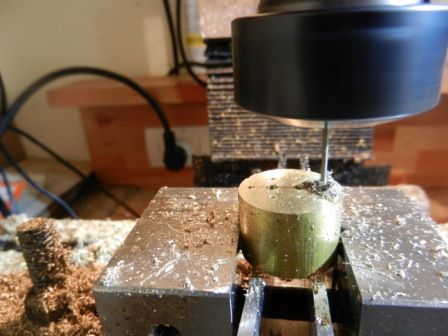
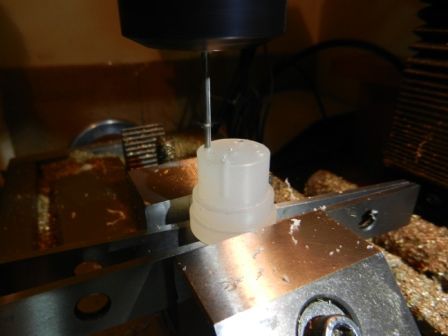
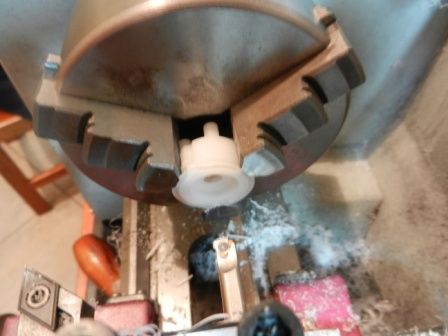
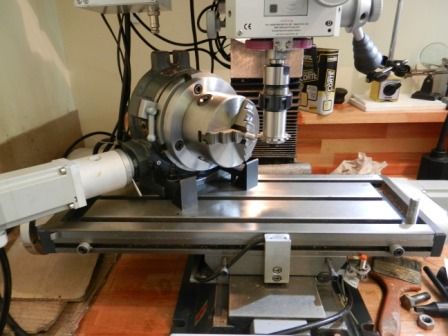
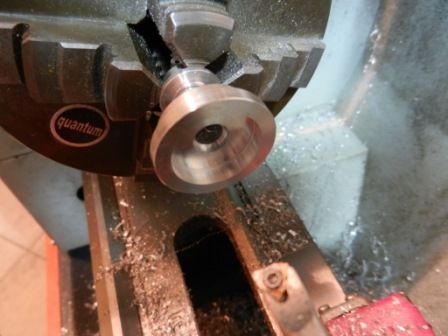
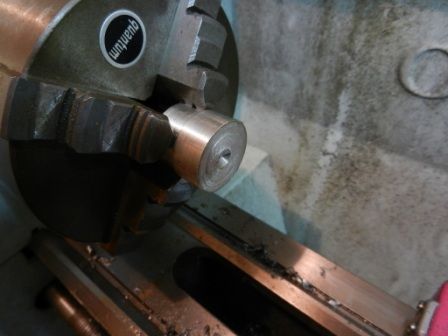
This picture shows the the preparation odf the hall sensor strap. I used the same process that Kelly used on his engine. Turned a kind of cap to provide the correct OD/ID than moved to the mill on the ratary table to cut it off.


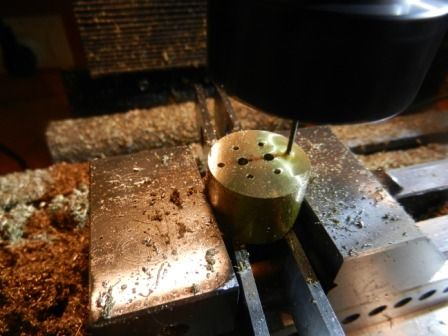
Here the blank is alrerady on the rotary table, drilling the holes for the small screws 50 degrees from each other.


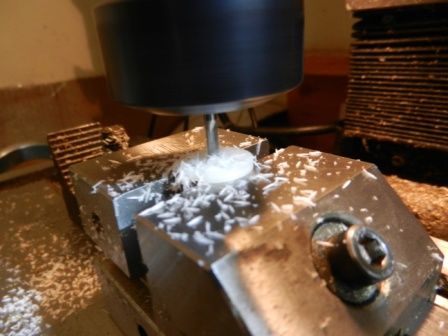
Now cutting it off with a 3mm end mill
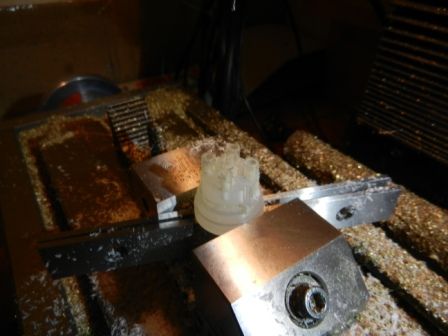


Finished part


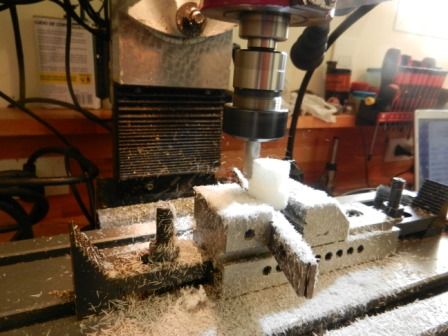
It now the turn of the Magnet Bracket.
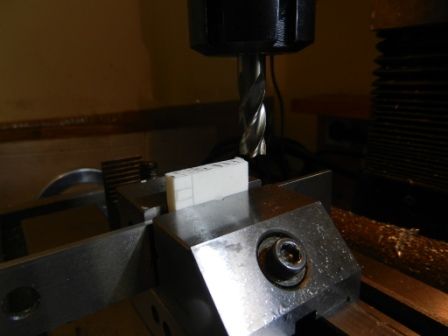
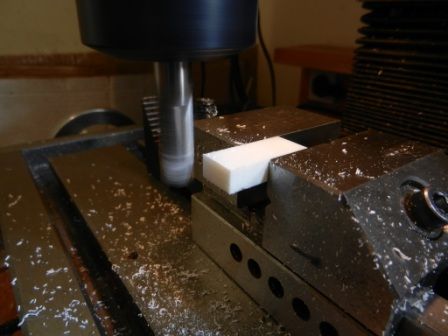
This part turned to be a huge headake for me. The project called for aluminum material, however the supplier of the CDI recommended to make it out of non metalic material. So I decided to use samll pieces of Corian I had over the bench. Kell recommended Delrin. After hour of machining work on the very final operation it suddenly broke (I found this material is good isolator but also very fragil). I started all over again using this time DELRIN!!!!!! Worked very nice.

Preparing the blank


[URL=http://s1266.photobucket.com/user/epicler/media/2013-05-05%20Distributor/DSCN2276_zpsb89d865f.jpg.html]

Here is where it broke:wall:
[URL=http://s1266.photobucket.com/user/epicler/media/2013-05-05%20Distributor/DSCN2284_zpsa2415c66.jpg.html]
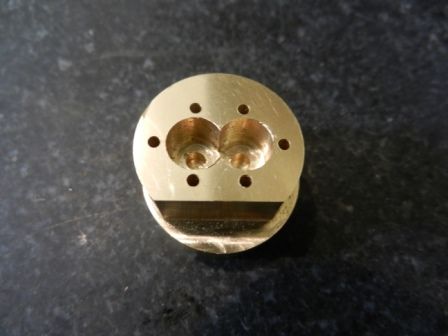
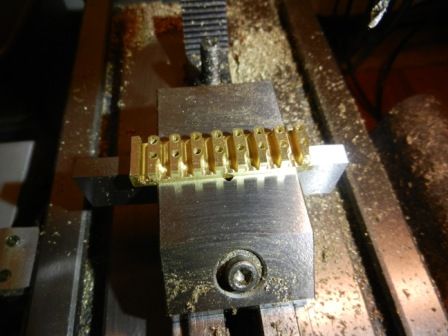
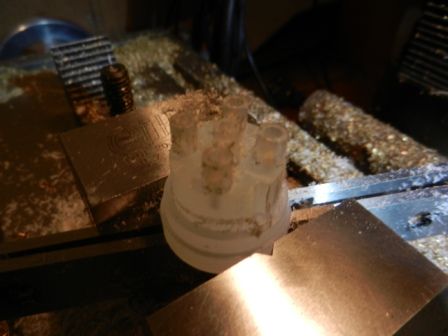
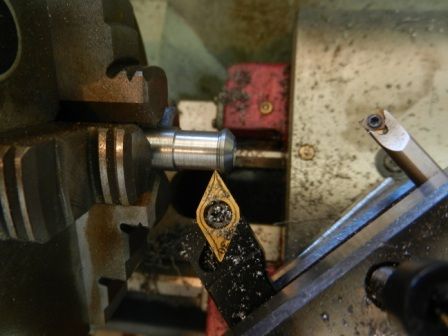
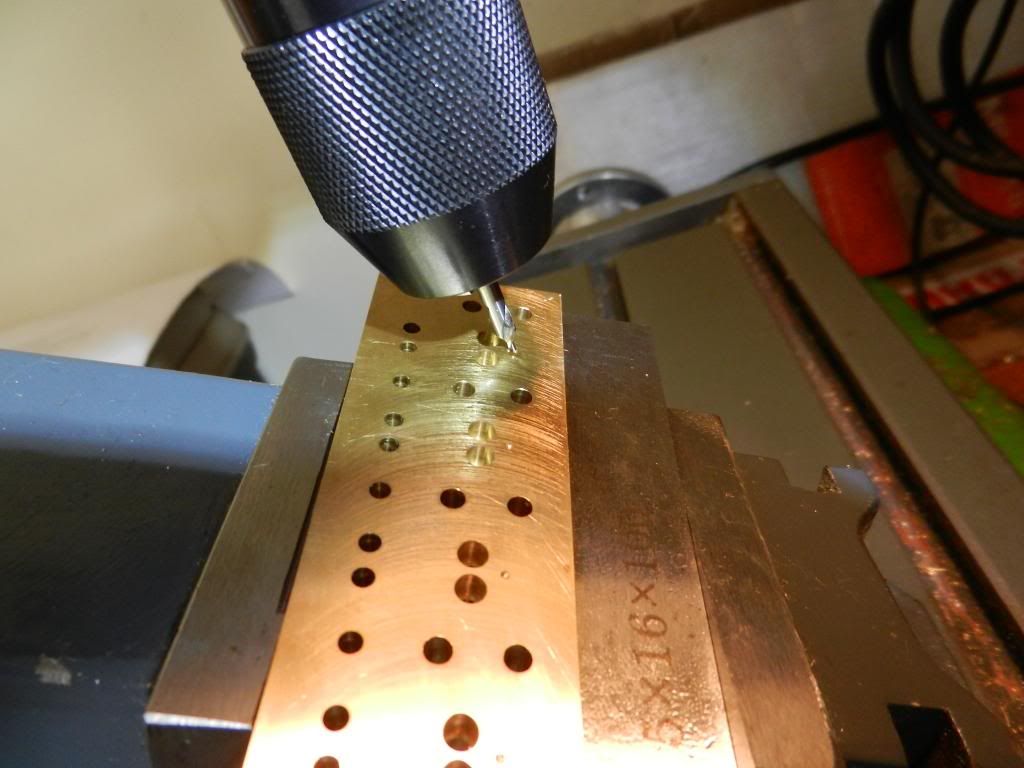
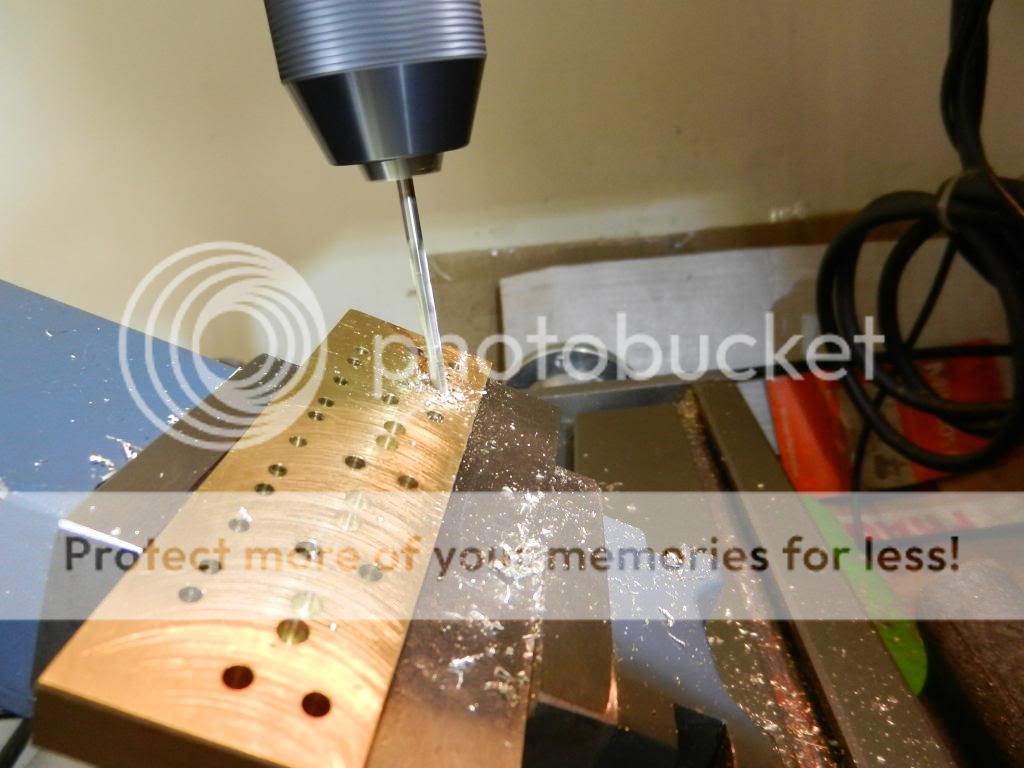
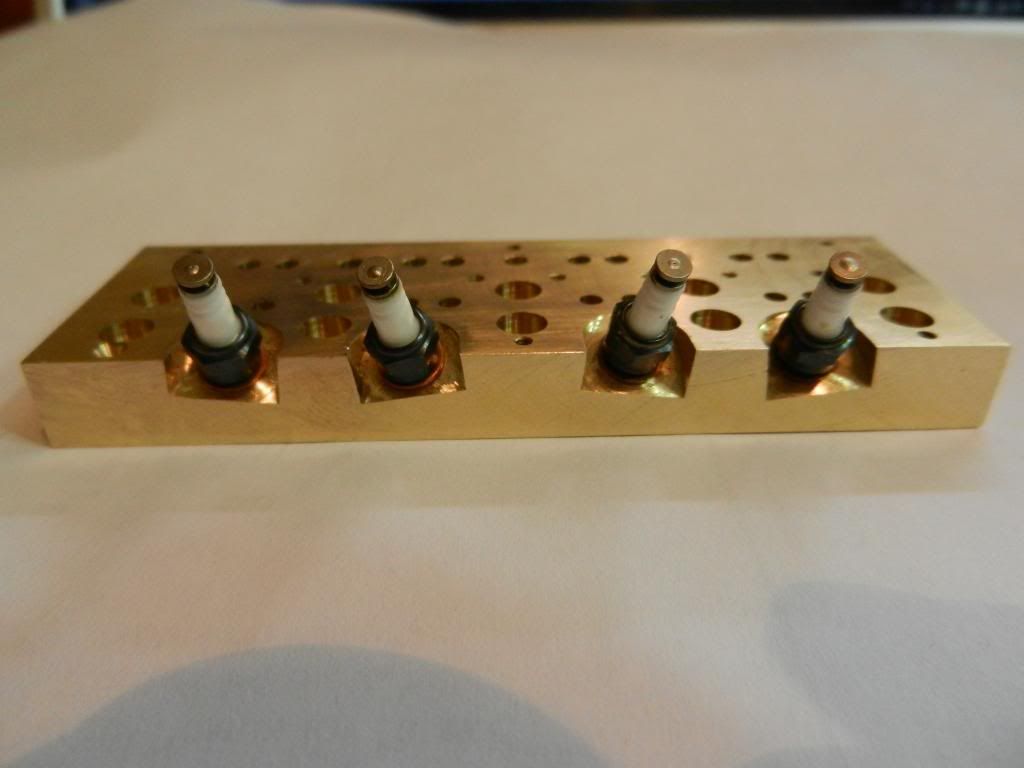
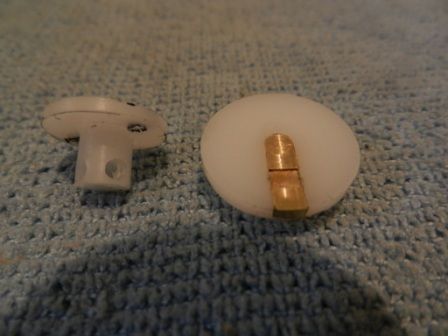

The Cap contacts


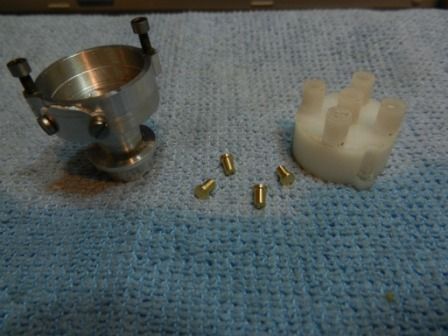
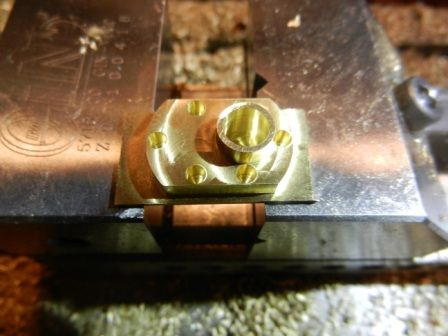
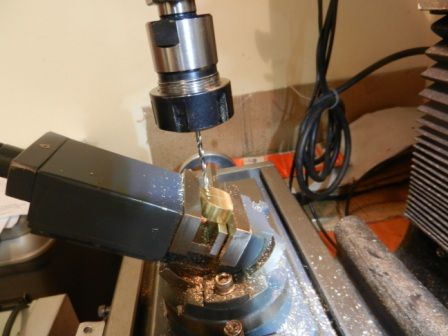
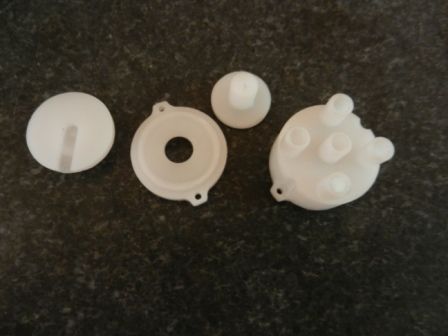
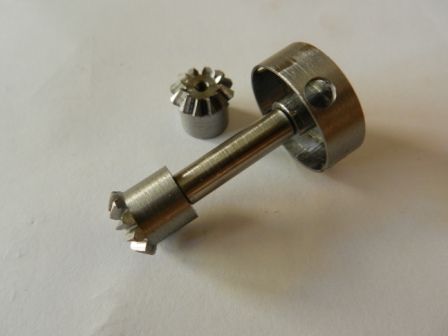
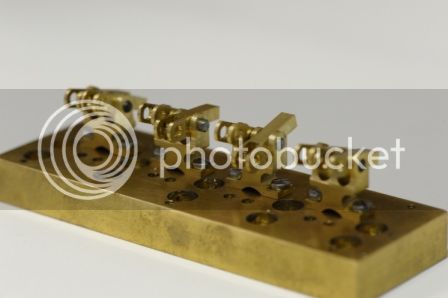
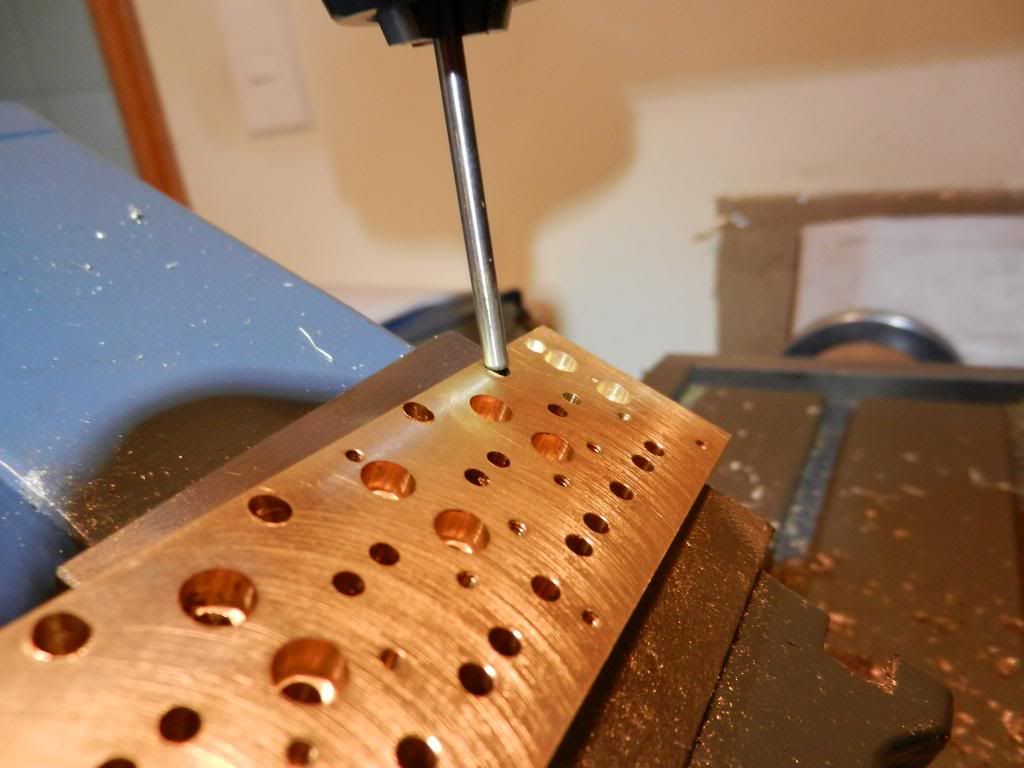
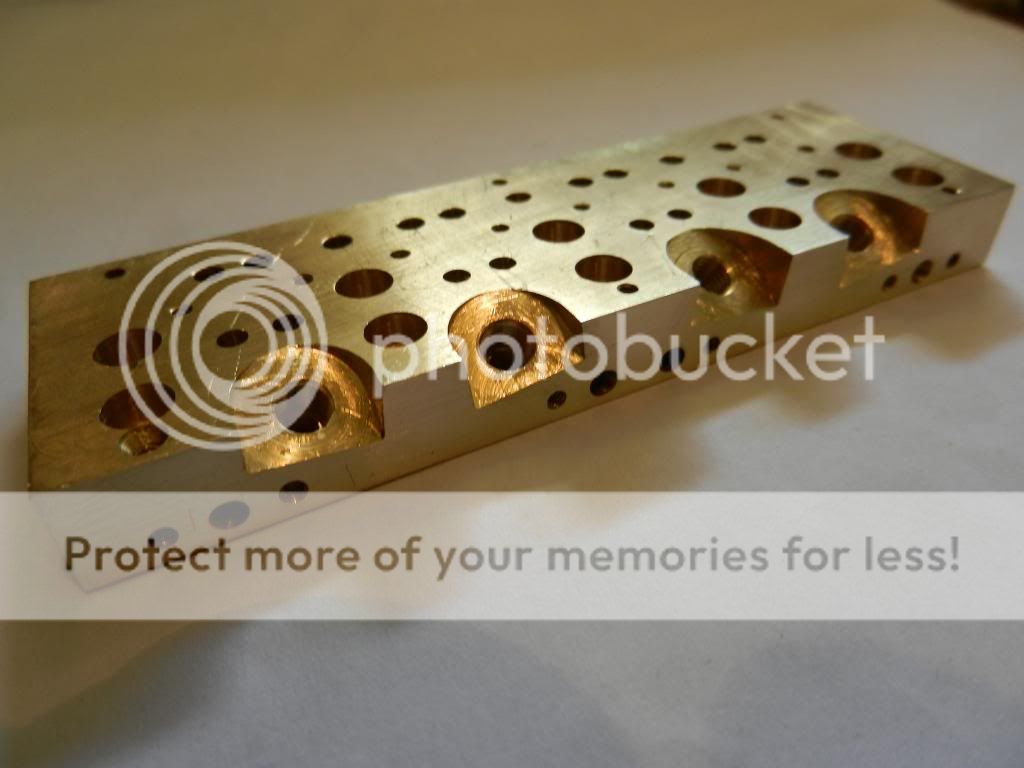
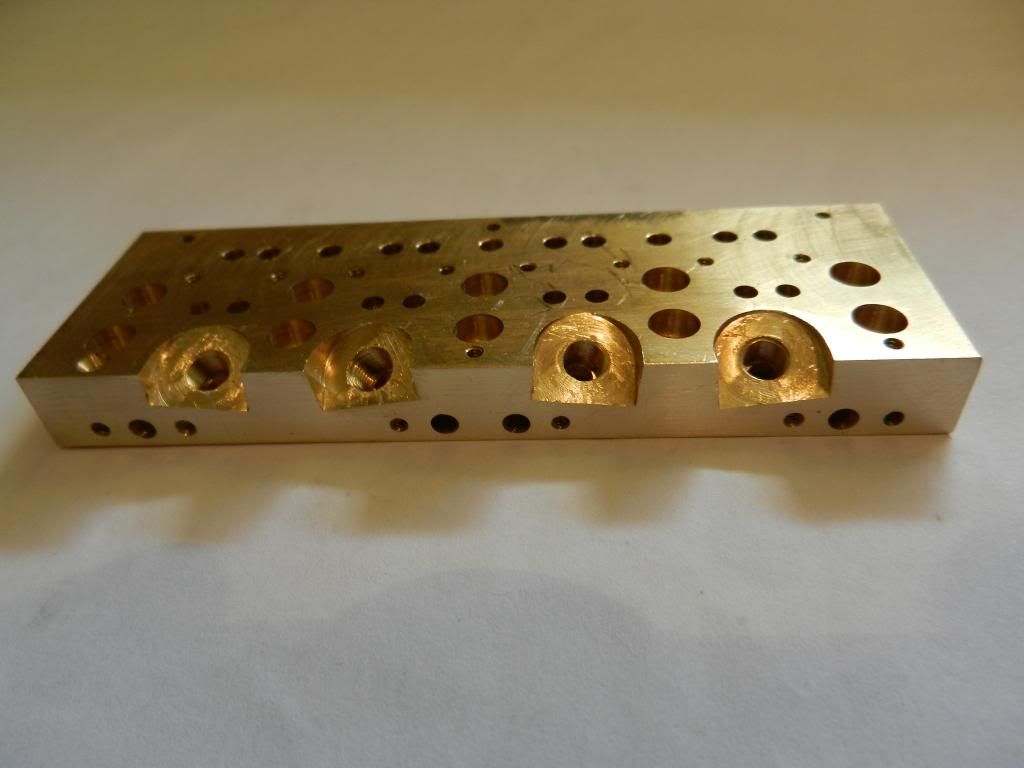
A few parts of the distributor


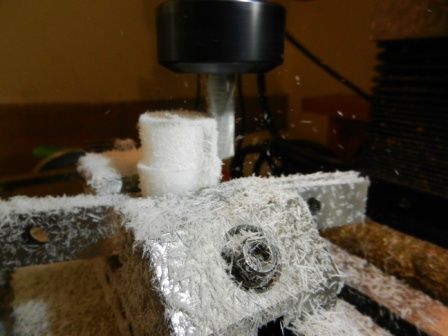
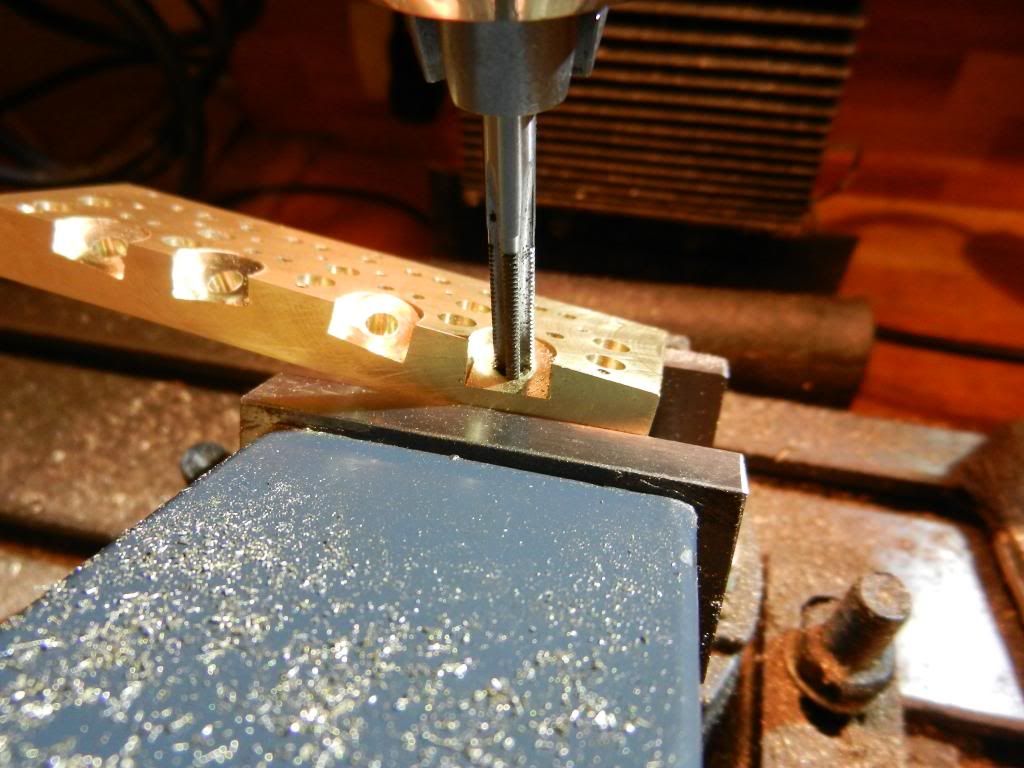
Here I`m making the Magnet Bracket ot of DELRIN!!!!:fan:


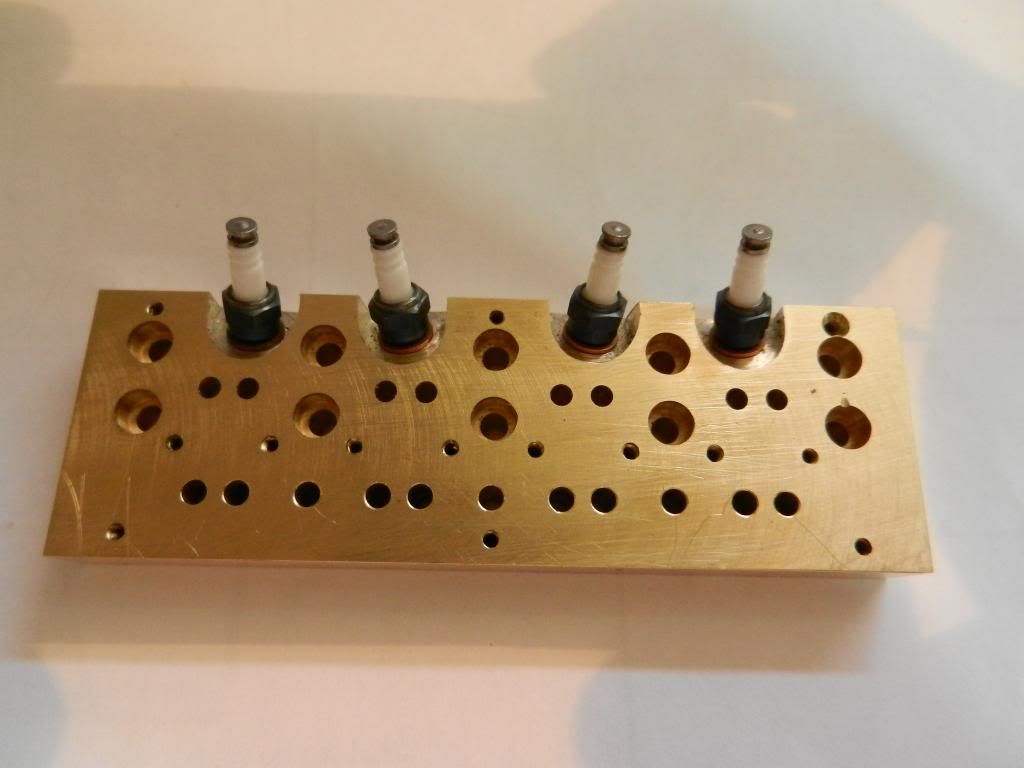
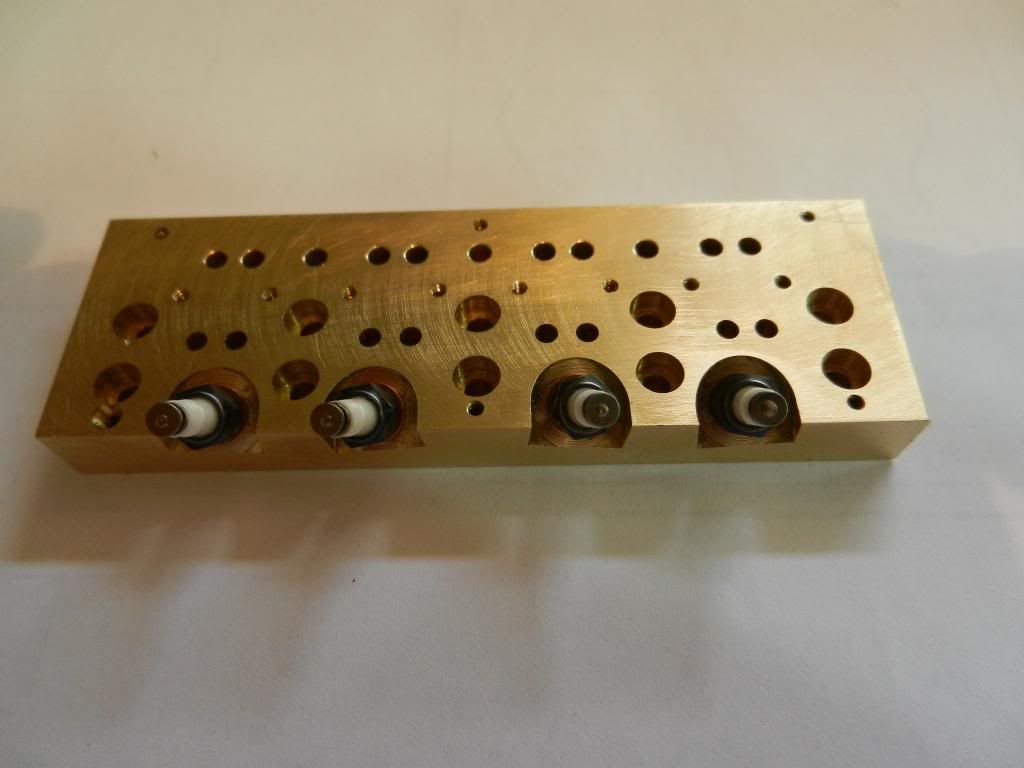
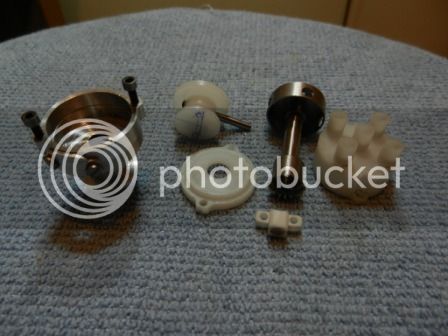
More view of the dist. parts


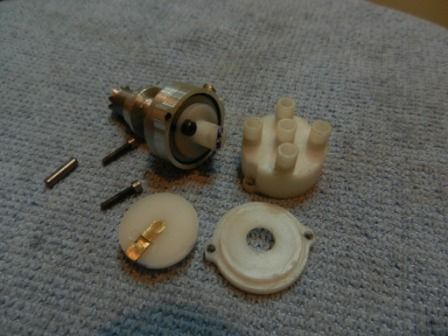
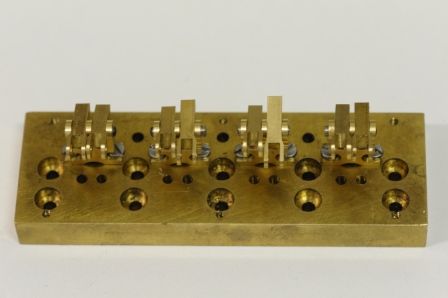
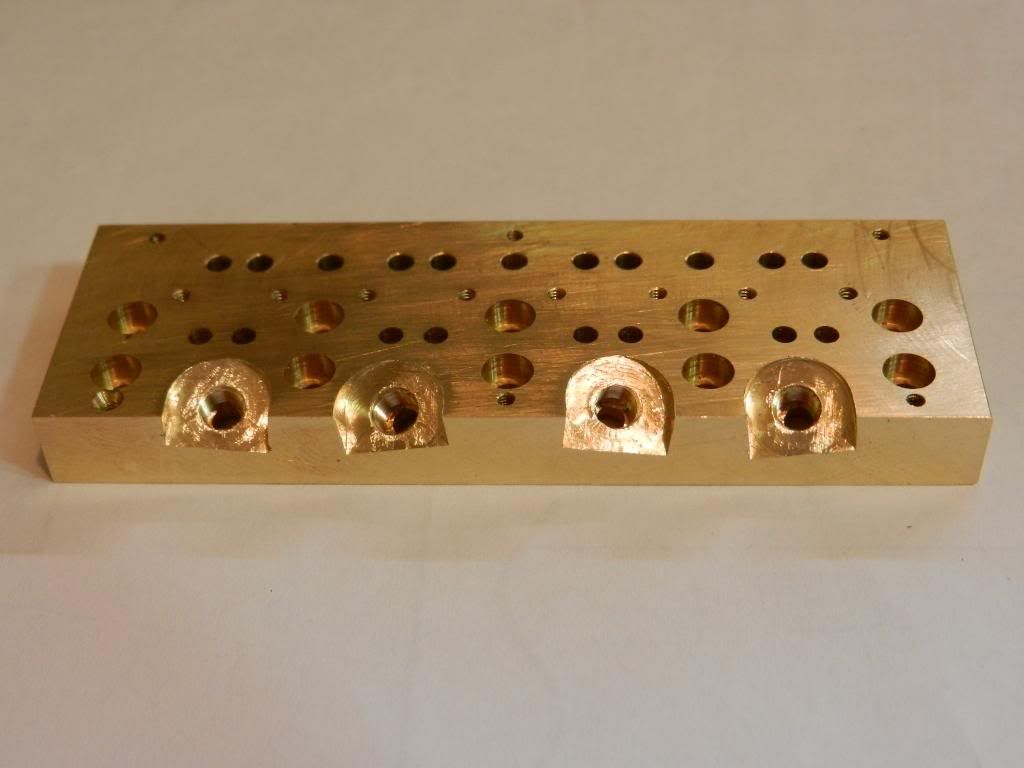
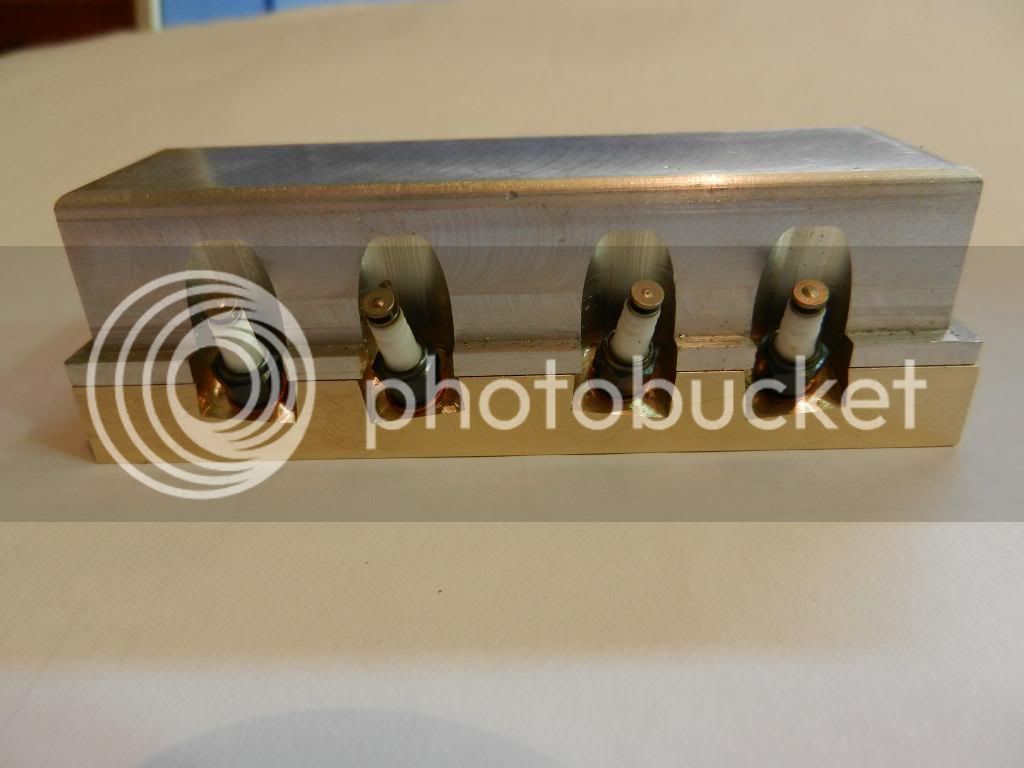
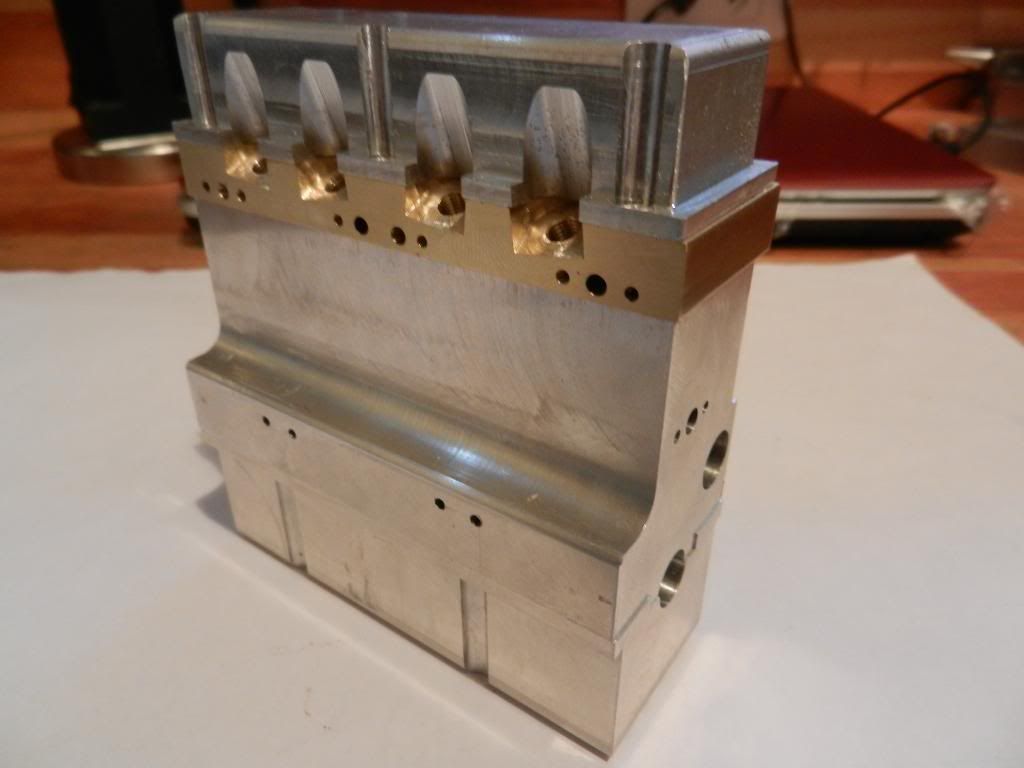
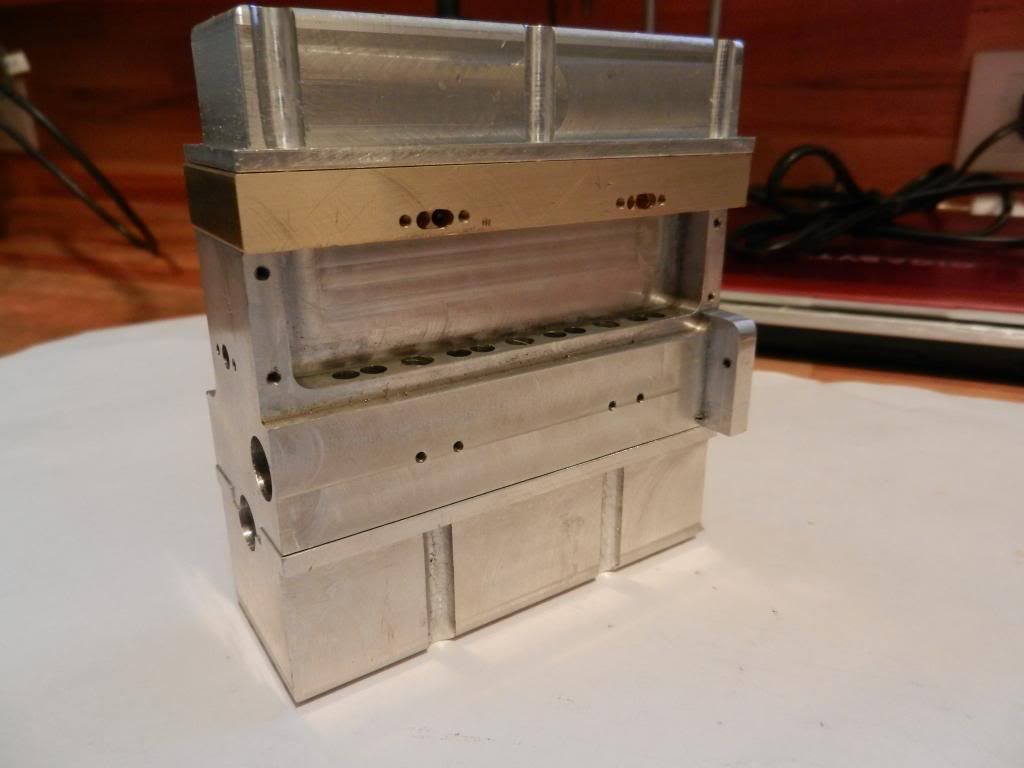
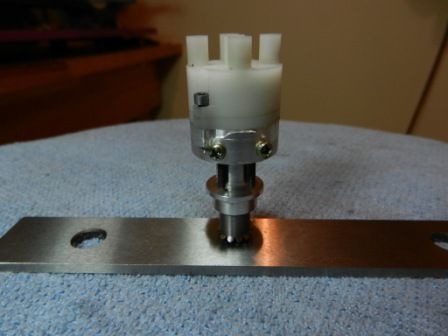
Finally the great Distributor finished:D


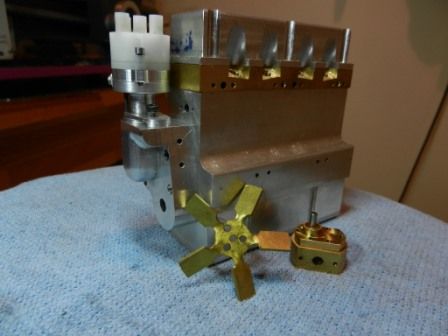
A view of how the little beast is looking like so far. I also have made several intarnal parts that is not shown on this shot.


Well, I can tell you guys, the distributor was really a big challenge for me. The parts are so small and precise, I had to make two or three parts each component. But that is OK. I got a lot of experience.

Thank you Kelly for your imputs and hints.

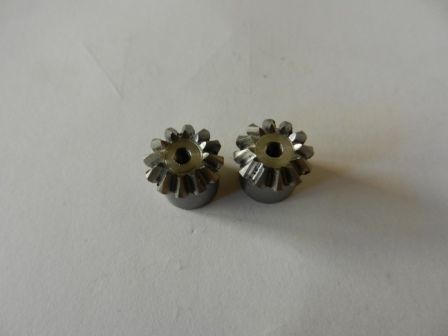
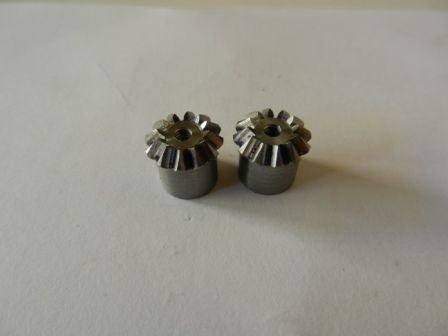
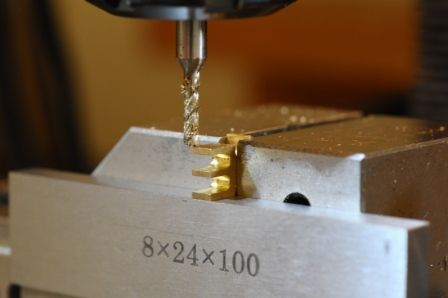
I will need to remake the small mitter gears for the distributor/camshaft. I did not correct the profile of the theeth.
Kelly sent me a link of a thread here talking about how to do that.

That`s it for today.

Edi
 
Hello Edi, great work you have there. I`m also from Brazil (Sampa). Canyou tell me where did you buy the metal blocks? They seem to be hard to find
 

Latest posts

Back
Top