Building it!

Home Model Engine Machinist Forum

Help Support Home Model Engine Machinist Forum:

This site may earn a commission from merchant affiliate links, including eBay, Amazon, and others.
I'd use a volt meter to check to see if you are getting voltage to the machine first. Check at the terminals at the main disconnect switch on the machine to see if you even have power to the machine.

Welcome to machine wiring 101. Used to do this at the place I worked. Check the fuses to see that they are OK. Should be three, probably Buss Fuses (brand name). You'll probably find them right after the main switch.

Good luck and happy hunting. ;)

Bernd
 
I tested power up to the 3 wirenuts in a box on the back of the lathe.

After posting on PM, I am led to a panel behind the headstock that I have not as yet removed. The fuses and contactor are apparently in there. I will be investigating later this morning.
 
Be sure about your phase connections. reversing one phase will produce little to no movement also, but you'll be able to hear the motor protest!
 
The motor would run in either direction. However, it need to run in the proper direction to prevent damage to the brushes. Once it does start and in the wrong direction, reversing any 2 of the 3 leads will fix the problem.

After more investigation, guided by some PM experts, it appears that the coil on the contactor is not being activated. Either the coil is bad, or there is a short/open circuit between the start switch and the coil. Hopefully I can determine which pretty soon.

I did determine that there is voltage at the input terminals of the contactor, and also at the switch terminals.
 
are there any interlocks in the power circuit? Door safety switches etc. etc.?
 
You know how the stop/off switches on machine tools are all RED? Well on the 10EE the start switch is red and the stop switch is black. So I have been trying to start the lathe with the stop switch. Reading the nice bronze switch panel would have helped.

In any case, I finally saw the light and pressed the correct button. The MG started right up ;D I did have to switch two of the wires to get the correct rotation, but after doing so I was able to start the spindle and test the feeds. I might even decide to make some chips tonight, although I'm not sure if I have any good tools. I do have some stock that needs to be drilled, however.

In any case, going through the process revealed a few existing shortcomings. At one point the lathe was rehabbed, and the motor starter was replaced. Whoever replaced it put in the wrong size overload coils, and then didn't wire them up properly either. The experts on PM set me straight, and as well indicated that adding some fuses for safety would be a good idea.

Outside of the lathe, my friend who helped me run the AC lineset and wiring in the framing is coming over tomorrow to finish installation of the inside and outside units. That's the major to-do item left before going for final inspections.
 
You no that reminds me of a story someone I no built a street rod and if had to bleed the brakes so his wife got in the car and he told her what to do. So he said pump she would pump hold it he would open the bleeder two master cly later and vac booster still no brakes.She was pumping the clutch pedal never torched the brake pedal. :fan: :wall: please I not making fun strange stuff happens you never no we all been there at one point or another
 
kvom said:
You know how the stop/off switches on machine tools are all RED? Well on the 10EE the start switch is red and the stop switch is black. So I have been trying to start the lathe with the stop switch. Reading the nice bronze switch panel would have helped.

Thanks for that :bow:

Now we all know that not all machine tool switches are RED for off/stop.

Great tip for restorers/renovators of machine tools. Now that you mentioned it, some time ago, I had use of an old Cincinnati Mill with that switch configuration.

Best Regards
Bob
 
Got the inside AC units installed yesterday by a friend. The outside units are hooked up to the linesets, and I have only to finish some electrical hookups outside. Just got back from HD with the stuff I need for that.

I did start on making an air manifold on the lathe. Chucked a 6" piece of 1.5" square 6061 bar stock in the 4-jaw, centered it by eyeball, and drilled a 7/16" hole for the length of my drill bit. I then tapped the hole for 1/4-18 NPT. I think I'll like working with the 10ee! I don't have any turning tools, so Tuesday at school I'm going to grind a few 3/8" HSS bits.

I ordered a fuseholder and mini 30a fuses to add to the contactor.
 
Kvom
I'd suspect that little exercise got you breathing easier.....eh?

Steve
 
Steve, it actually got me all hot and bothered ;D

I was "this close" to pulling the trigger and heading up to Cabin Fever on Wednesday. But then my friend volunteered to come over on Saturday to finish the AC install, which saved me about $900 if I had to pay to have it done.

Maybe next year.
 
Steve, it actually got me all hot and bothered

Now there is a mental image I really could have done without....LOL

I can tell you for sure that you missed a good show. You really gotta make it to CF at least once to understand its impact.

Steve
 
The bricklayers finished my side steps today, and tomorrow I should get the "scuttle hole" doors. I found a local cabinet shop that was willing to make a pair with framing for $65 each.

Valerie spent the past two days painting the stairwell.

Once I get the AC serviced, we will be pretty close to calling in the inspectors.
 
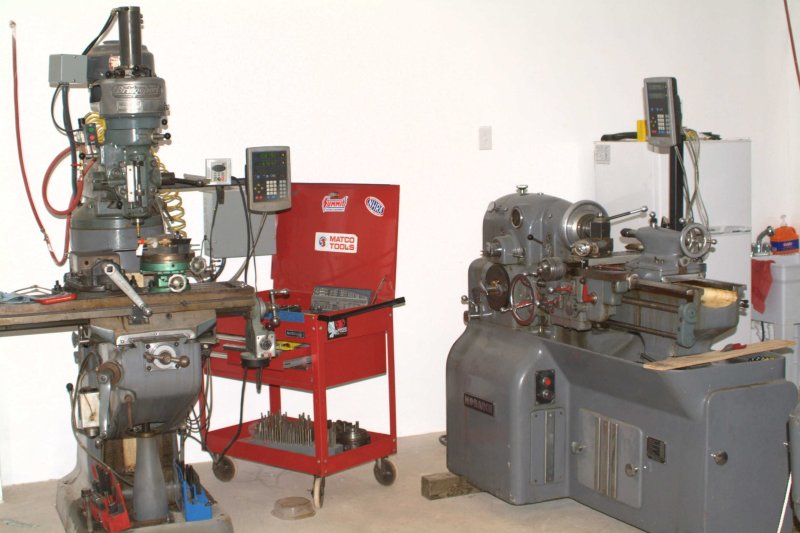
Got the camera working today, so here's a shot of the current working environment:

large.jpg


Once the inspections are over, I'll move the shop refrigerator, the the lathe with be closer to the wall with the headstock end to the inside, in case I ever need to cut long stock or get a collet closer.

I measured the test bar I cut on the lathe with a 2" Mitutoyo mic at school, and there is only a 5 tenths difference between the two ends over 5". It's a lot more precise than I am.
 
It's looking more like a shop 8)

Now you just need to get some oil splatters on the walls and chips on the floor ;D
 
Spent a couple of hours in the shop tonight ;D

Ruined another attempt at machining the valve. It seems 1/4" drill rod is not the best choice, as the inside seems pretty soft. In any case, I've gotten enough practice that starting a new one goes pretty quick. :mad:

I swapped the threading change gears on the Monarch before quitting for the night. It's an interesting process figuring out how to do it, but once you understand the design it's relatively simple. Mine was set up for coarse threads, meaning 24 TPI was the smallest I could go. I want to thread some 1/8" rod 5-40, but getting the threading die on straight is a challenge. So my plan is to partially cut the 5-40 threads with the lathe, and finish the thread with the die.
 
kvom said:
Spent a couple of hours in the shop tonight ;D

Ruined another attempt at machining the valve. It seems 1/4" drill rod is not the best choice, as the inside seems pretty soft. In any case, I've gotten enough practice that starting a new one goes pretty quick. :mad:

I've made a number of valves out of 1/4" drill rod. I usually support the outer end with a live center.

Another trick is to take the valve stem down to size, one section at a time. First take the outer 1/8" down to near the finish diameter. Then do the next 1/8", etc. The last pass, to take the whole stem down to finish, shouldn't remove more than a few thou.

Chuck
 
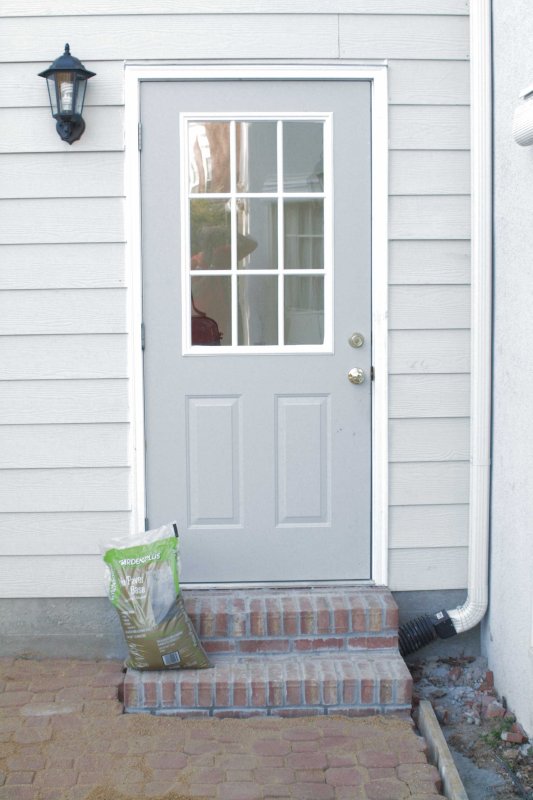
The past week we got the side entry steps built, and during the weekend we relaid pavers to extend the patio to the steps.

large.jpg


The space to the right is filled with lava rock.

Yesterday I finally cut holes to the exterior for the PVC condensation drainpipes for the AC units. Having done so the drywall people can come back in to patch up the various holes and dings. The AC guy is coming tomorrow to regulate the units, and when that and the drywall are ready we will be set for final inspections. ;D
 
Kvom
I'm gonna miss this thread when they finally issue your C.O. I'm worn out just from reading about all the hard work...LOL.

Steve
 
Can't have everything go smoothly it appears.

AC guy says there is a leak in the lineset for the upstairs unit. He checked the solder joints on both ends and they seem good, so it appears that there is a leak inside the walls. Might have to cut some holes to find it. We couldn't test it otherwise as it wasn't getting power. I discovered that the breaker in the panel was unsnapped after the guy left.

The downstairs unit is OK for leaks, but the air hander is displaying an error code. Might be a wiring issue. Hopefully the online manual will have more explicit info.
 
Back
Top