Building a model Drag Saw

Home Model Engine Machinist Forum

Help Support Home Model Engine Machinist Forum:

This site may earn a commission from merchant affiliate links, including eBay, Amazon, and others.
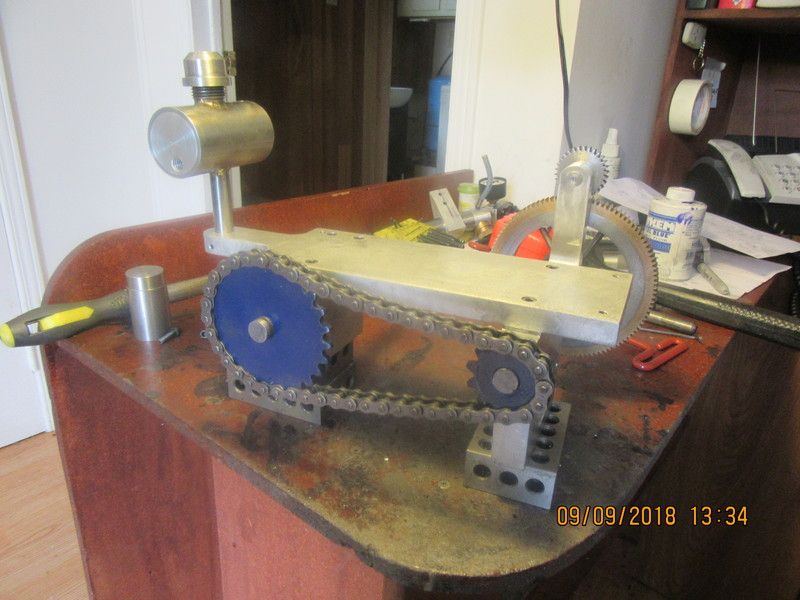
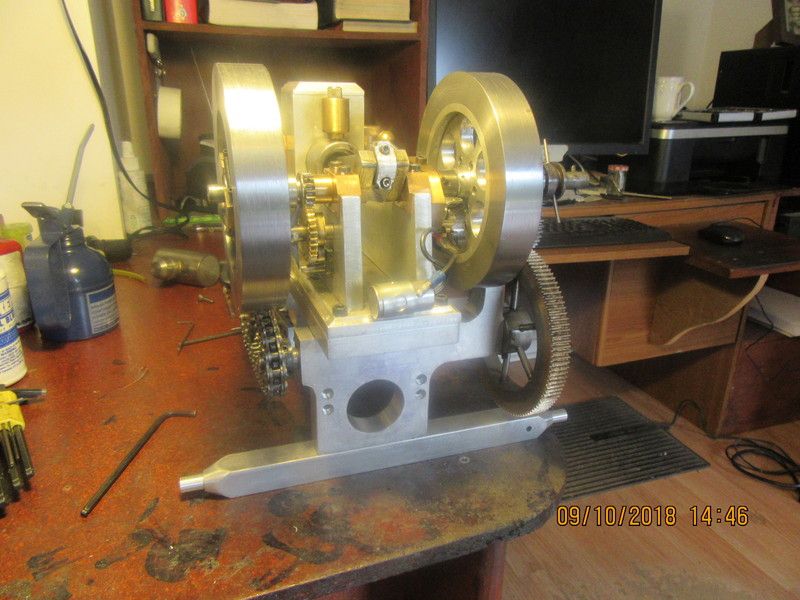
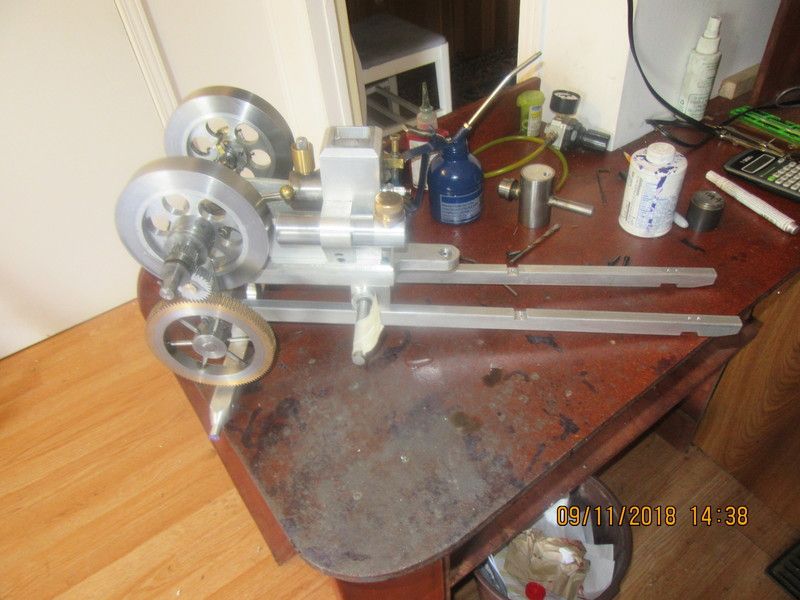
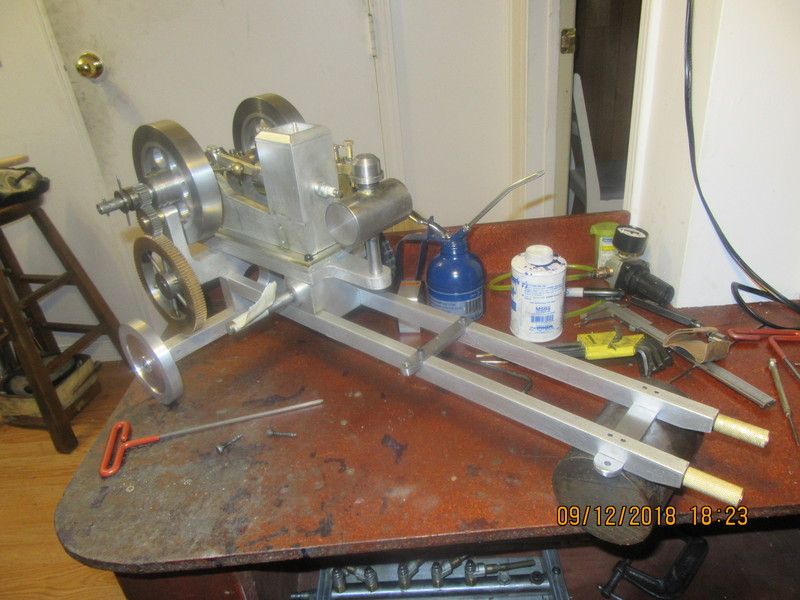
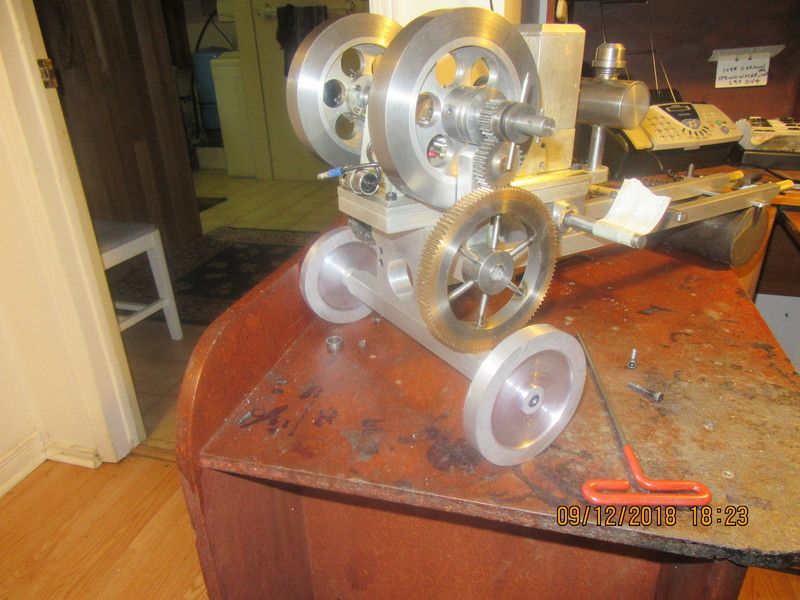
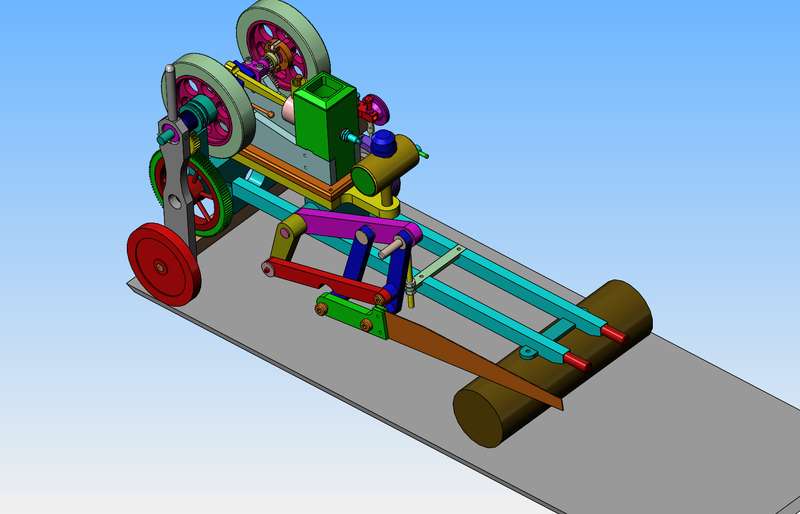
Nelson If you look at the very first post, I think that you will see that the engagement lever on my model is in the same place as the one on a full size saw. As I understand it, first you started the engine with the lever not engaged. Then you grabbed a handle on the parallelogram and lifted the saw blade so it was not touching the wood, then you engaged the lever and after the saw started moving you set it on the log so the weight of the mechanism would make the blade cut.---Brian
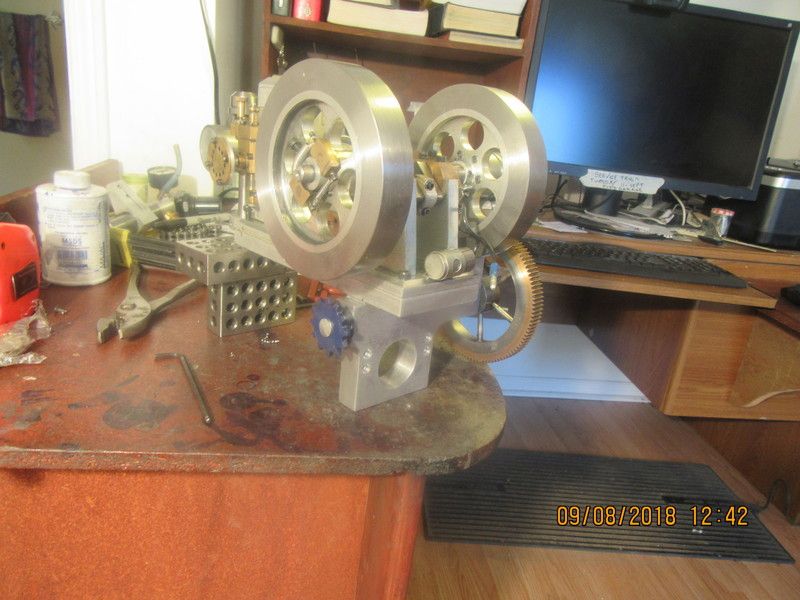
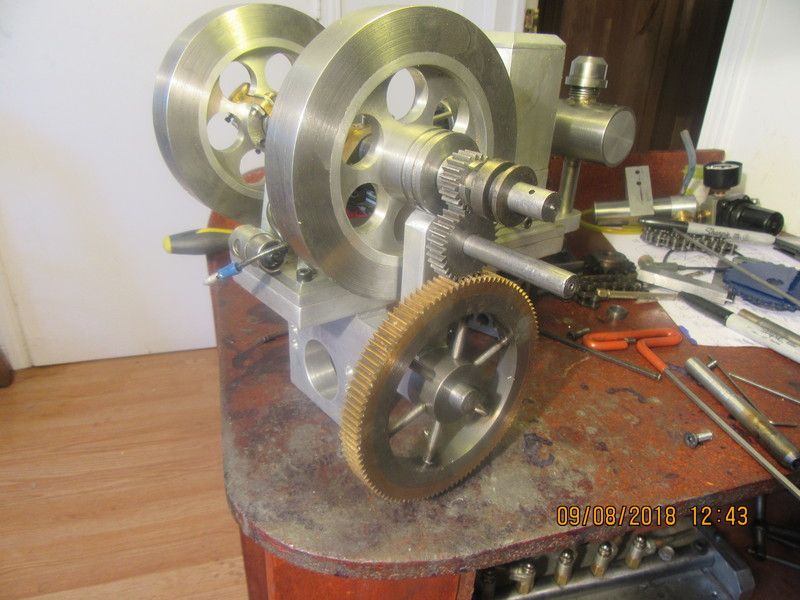
 
That went very well!! The riser plate is finished and installed. The gears all mesh perfectly. I have a couple of shafts to shorten, but all in all I'm happy with the way that turned out.
aOPpcC.jpg

M6ZesX.jpg
 
This morning I completed the other riser block, which serves as the bushing holder for the large sprocket shaft and also gives a place to bolt the two long rectangular "handles" to. I have removed the engine from the drag saw platform to make some adjustments to it before reassembly. The chain fits as I had intended, with no last minute surprises. While I was boring this last piece in the lathe, I managed to turn out the tailstock spindle too far and it all came apart, so now before I do any more work, I have to figure out how that goes back together.
exQ4yj.jpg
 
Brian
My mistake, I was not looking at the countershaft in front of the engaging handle. I was thinking it was on the same shaft. I can not wait to see it saw.
Keep it coming.
Nelson
 
One of the potentially exciting quirks of many drag saws is they were two-strokes. You pull them up and bounce them against compression to start , but they are almost as likely to start in reverse as well. It gets very exciting when you drop the saw onto the log and the whole thing attempts to fling itself over backwards, and then thrash about until you can hit the kill switch.
 
Today is a milestone in the drag saw build. I wanted to be certain that the Odds and Ends hit and miss engine had sufficient power to cope with the gear train of the drag saw. It handles it with no difficulty, which is great. Now I can proceed with the rest of the build.
 
Nothing real exciting machined today. Just an axle. The real, full sized drag saws had short stub axles, each attached to a pivot so the machine could be dragged along using the handles, or the wheels could be turned at 90 degrees to help prevent the drag saw platform and engine from moving as the saw cut through the log. Obviously, I'm not going to do that with mine. Mine will have the handles pinned to the log to prevent the platform and engine from moving as the saw cuts. If you look closely, you can see the 3/16" hole thru the right hand end of the axle where my dog clutch arm will pivot.
kD1Bd3.jpg
 
I've got a little mystery to solve here. The engine runs at 1000 rpm. I have an overall gear ratio of 12:1. That means the piece of tape should be turning 1000/12=83.3 rpm, which equals 13.9 times per 10 second interval. I just had my son count of 10 seconds on his cell phone/stop-watch, and it looks like the tape is going about 20 complete turns per 10 second interval.--Which would mean 120 rpm, which multiplied by 12 gives an engine rpm of 1440 rpm. Check the video and tell me how many revolutions that piece of tape makes in a 10 second interval.---Brian
 
Brian
I watched the video in Windows Media Player
When you click a restart point in the progress bar, the clock starts over and I counted several times to get 12 or 13 rotations.
Maybe others will help you out on this.
Nelson
 
Brian
I sit here watching the video and tried to imitate the holding a saw and keep up with your flag and I find it just about right. I am not rushing to keep up with it and it feels right.
Looking good my friend
Nelson
 
Hi Brian
I just checked at 1/4 speed and got 9.5 revs in 5 seconds so 19 in 10 seconds. 114 rpm 1368 engine rpm so pretty similar to yourself. I checked at three different points on the video and got 10, 9.5 and 9
 
It isn't a huge problem. That sought after 14 strokes in a 10 second time interval was based on me sawing a pine 2 x 4 with a handsaw. It probably won't hurt is the saw runs a bit faster. I have lots of room on the roller chain side to put on a larger sprocket to bring the speed lower if I need to. Thank you for confirming my count.--Brian
 
And there gentlemen, you have the long and short of it.--mostly the long. I knew right from the beginning that this was going to be a lengthy beast, and this just confirms it. The notches in the underside of the rails, out at the end opposite the engine, is for a cross-beam that bolts on and can be "pinned" to the log to keep the main saw body from dancing all over the place during a cut. The notch in the top side is for a beam with an adjustable stop on it that prevents the saw blade from trying to dig a hole thru to China after it has passed thru the log.
eihJ6G.jpg
 
So--We're getting right down to the "short steps" of this monster. Today I made and installed the two cross-members that fit between the frame rails, the brass "Handgrips" at the end of the arms, and the 4" diameter wheels. I still have to make an arm to control the dog clutch, and all of the parallelogram links in the saw mechanism. I went and looked at saws today, and nothing really appealed to me. Then I called a saw sharpening service here in town, and they charge $10 to sharpen a saw and $4 extra if they have to "set" the teeth. I have about 4 or 5 handsaws that I inherited from my father---They are all dull. I made an appointment to see the saw sharpener tomorrow and I will take my collection of handsaws over to him and explain what I am doing and have him sharpen one of the existing cross-cut saws to use on this project. I may use the keyhole saw I showed earlier in this thread. The only part of the entire machine that motivates the saw to cut thru the log is the weight of the saw blade and the parallelogram arms, responding to gravity. The arms will all be made from steel.
cxKk6D.jpg

Q1ebXk.jpg
 
I went over this morning and took three of my dad's hand-saws to the saw sharpener guy. I explained to him what I was making, and asked which of the saws would have the best tooth profile for the drag saw. He had a look at them and said that none of them had been sharpened correctly in the past, and there wasn't a lot he could do to sharpen them. Then he went over to a rack of used saws that he had sharpened and no-one had picked up, and he gave me one, newly sharpened, with the correct tooth profile. I gave him two of dads old saws in return, because I've had them over twenty five years and never used them. I am currently working on the parallelogram links to mount the saw blade.
UGtz54.jpg
 
Beautifull work as usual .
Can you elaborate on the tooth profile .
Does a drag saw need a different profile from a hand saw ?
When sawing by hand , the cutting action ison the forward stroke , hence the
teeth are a bit tilted forward .


I guess next will be a model log splitter , and then maybe a fireplace ...:)
 

Latest posts

Back
Top