Brian builds Atkinson Engine

Home Model Engine Machinist Forum

Help Support Home Model Engine Machinist Forum:

This site may earn a commission from merchant affiliate links, including eBay, Amazon, and others.
Hey Brian
Beautiful work I used to have to use a straight boring bar and just pull out the tool a little at a time it got real hairy when you got to the final few thou. Cliff
 
Hi Brian-

I just joined the group about a week ago and have been getting my feet wet. I have read all the posts in this build thread in one setting. Excellent all around. I hope to start making chips one an engine sometime next year. Still setting up my shop. I've ran a little SW & a lot of ProE. Can't wait to see how the mods work out.

Jerry
 
I haven't bailed out on this job. Its just that ever since Thanksgiving (2 weeks ago) I have been laid low with some kind of horrible gastro intenstinal flu that hasn't allowed me to get very far from that little room with the big white bowl. I seem to be recovering now, but its been a real rough go. Everybody in the area has it, or some derivation of it. I have built one more part, a much sturdier and more robust anchor post, as seen in the picture, but it is not finish sanded yet. I simply haven't felt well enough to play in my little machine shop. I have two engineering customers who are screaming their heads off for my immediate attention, but I have had to put them off as well. Hope the rest of you guys are well, and I expect to be posting more when I feel a bit better.----Brian
ATKINSON-2001.jpg
 
Brian,
You scared me. I thought I had lost a month until I remembered that you are in Canada and Thanksgiving is a month earlier than in the states.

Thank you for the update. I hope you are better soon. Remember to stay hydrated. :)
 
Hi Brian

Hope you get better soon I've had a bit of that Gastro Flu once and I don't want it again, It's really horrible.

This is a bit cheeky and I don't want to hijack you thread but I'm just starting to learn Solidworks and I can't quite figure out how to get it to do external threads it doesn't seem to like them much.

Regards Mark
 
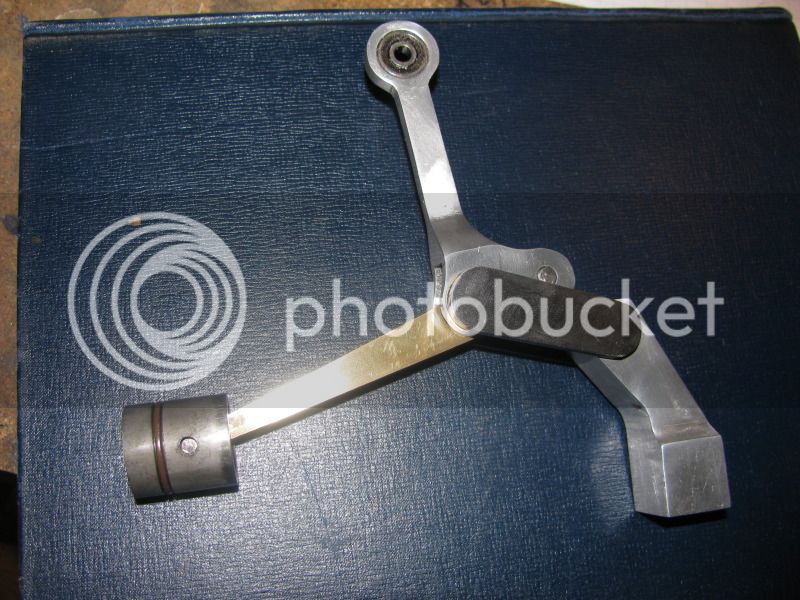
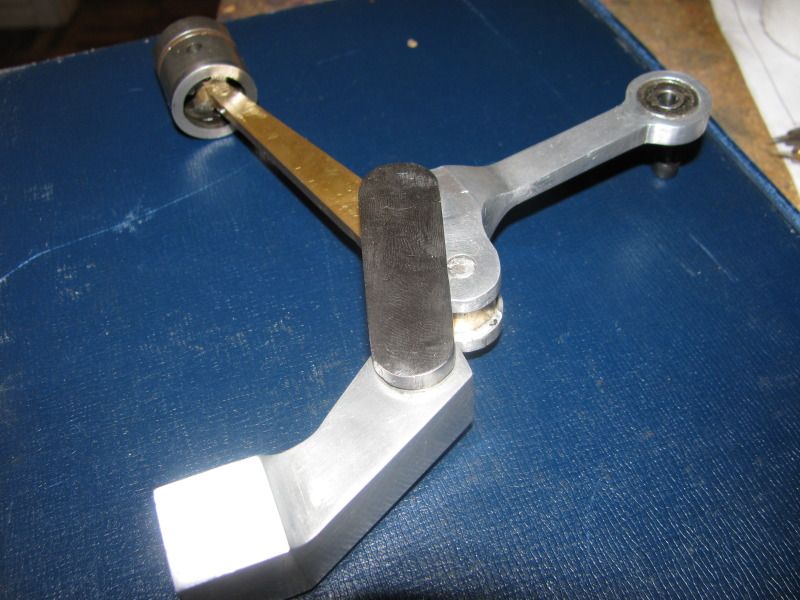
Cheeky Mark--when you model a round part that you want threads on, click on the line which forms the round diameter at the end you want the threads to start at and high light it. Go to the INSERT pull down menu, scroll down untill you find ANNOTATIONS and select "COSMETIC THREADS". This will open another pop-up menu which will let you select the parameters of the thread, be it metric, imperial, etc., or the diameter and length you want the thread to be. If the thread doesn't appear at once, go to "ANNOTATIONS" at the top of your feature tree, click it, and choose DISPLAY ANNOTATIONS. If you still don't see threads, go to the VIEW menu and deselect " HIDE ALL TYPES".---Brian
 
Thanks Brian. Solidworks is amazing I see why it's so popular, I just couldn't get my head round that bit.

Regards Mark
 
Well, its been a long time coming!!! However I now have all the new linkages finished and everything is centralized with no offsets. The geometry is identical to the original parts, so the actual running of the engine shouldn't be affected. I have a slight modification to do to the original flywheel shaft (Can't really call it a crankshaft because it isn't) and then I will be ready for reassembly. The engine runs very well as originally built, but at any speed higher than what is seen in the video, the linkages all want to shear off sideways and it sets up a terrible clatter. Hopefully this modification will address that issue. This will never be a well balanced high speed engine, but it should certainly be better when I get it all back together with no offsets in the linkages.---Brian
NEWCENTEREDLINKAGE002.jpg

NEWCENTEREDLINKAGE003.jpg
 
This is a short video of the Atkinson engine as designed by Jan Ridder, with modifications to the linkages by myself to bring the action of the linkages into a centralized position, similar to the Atkinson engine built by, I believe, Ron Ginger.---Brian Rupnow.
 
Engine is back together, timed, and running. I have a bit of adjusting to do and then I will post a new video of it running.---Brian
 
I went down to the auto parts store today and bought this little baby. It is a 12 volt ballast resistor. It is hooked up in series with the 12 volt automotive coil I am using, and essentially it provides a full 12 volts to the coil on "start-up", but after the resistor which is potted into the ballast warms up, it drops the 12 volts to around 8 volts. I have found that without a ballast resistor in the circuit, my coil gets so hot that it stops working correctly after a period of time. Today when I had put the Atkinson engine back together and timed it properly, it would start and run for about 2 minutes, then stop abruptly as if I had shut off the ignition. I'm not 100% certain that this is whats happening (loss of ignition), but the coil gets so hot on straight 12 volts that I THINK thats whats happening. I will find out tomorrow.
BALLASTRESISTOR001.jpg
 
Here we are, fellows, as promised. I spent a bit of time today resurrecting a mechanical pump that I built a few years ago, just to see if I could. The engine is working fine now, and I wanted to have something different to run with it for the last video. The engine certainly runs smoother now at higher RPM, with none of the clattering sounds that it made before I rejigged the linkage on it. This finishes this long drawn out thread, and I thank you all for sticking with me to the end.---Brian
 
Next project???? Well, I don't have anything mechanical in the immediate future, but It costs so much to buy an automotive coil and a ballast resistor and the appropriate leads etc. for each i.c. engine that I build, I may build a "shock box". this would be a small portable box which contains a 12 volt coil, a ballast resistor, an on/off switch, an indicator light, two leads with alligator clips for attaching to the battery and one high tension lead for attaching to a sparkplug. It would also have two terminals, one for the engine ground and one for the wire from the ignition points. that way I could use it for multiple i.c. engines.----brian
 
Well done Brian. I really runs so much better with your modification.

Vince
 
Very nice work Brian. I've enjoyed watching your engine take shape, although you had me on the edge of my seat for a while when it refused to run. Congrats on getting to the end of the road with this one.
 
Bryan, Great work, and I think that it is a very neat engine. larry
 
Very nice work Brian, your build logs are always a pleasure to follow, thanks for taking us along for the ride.

Regards.

Steve.
 
Hi Brian


I tend not to post a lot but I think a heart felt thank you and congratulations are in order on the completion and successful running ofyour engine.


So …CONGRATULATIONS on you excellent thread and your challenging build.

Any post you make is a must read for me.


A …THANK YOU for all your excellent build threads. Your willingness to share your plans and your experiences,both good and bad is to be commended. Well done!


Regards …bert
 
Last edited:

Latest posts

Back
Top