Boll Aero - my first engine build

Home Model Engine Machinist Forum

Help Support Home Model Engine Machinist Forum:

This site may earn a commission from merchant affiliate links, including eBay, Amazon, and others.
:)

No problem to relap with a longer lapping tool, it must be same resistand in all ways in whole length of cylinder under lapping. Never stay in same place under lapping, move in both ways while you are lapping the cylinder ---> you are creating cross hatching wall in cylinder. Wash and check, there is not tool marks and dull gray. Also it's very bad idea to lap the cylinder/piston to a mirror finish. Do it same with contrapiston but with tight fit into cylinder, still movable with compression screw/by pressure of compression.


Hi Jens,

I have same engine half done 10 years ago. No lapping experience. No height gage to mark cylinder ports. Will be following this thread. 2 stroke engines are not easy to build and run. Thanks for the tips.
 
Some one please give me, your blacbarry id..
to give me tutorial build ball aero
 
Hi guys,

So I got close to finishing and then life got in the way! Work has been absolutely manic, I'm in the midst of a bunch of home renovations, and my third child arrived safely a couple of weeks ago, so there hasn't been too much spare time to get out to the workshop!

I did manage an hour here and there over the last few months, but all I managed to do was destroy several parts I had already finished :wall:

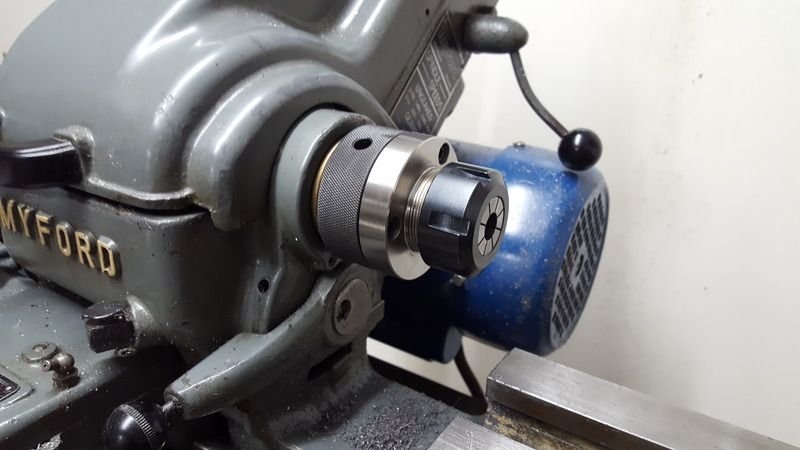
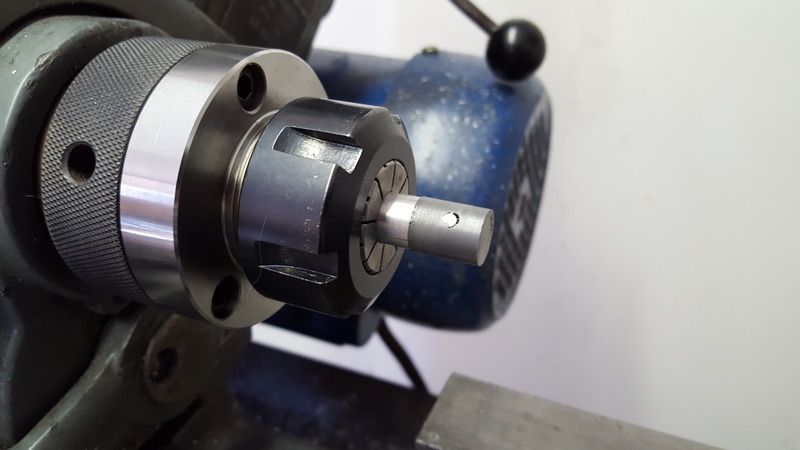
I ordered a ER32 collet chuck and collet set from RDG tools in the UK and after a bit of fiddling got it mounted up to the lathe with about 0.0005" run out which I thought was pretty decent.

2016-09-13%2021.19.26.jpg


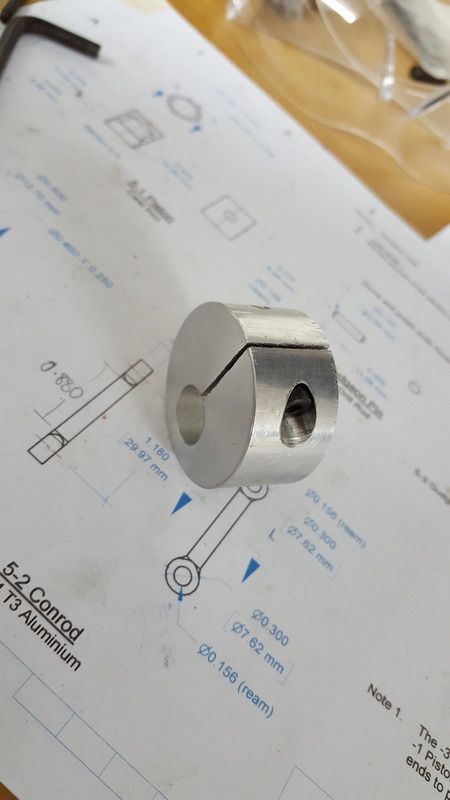
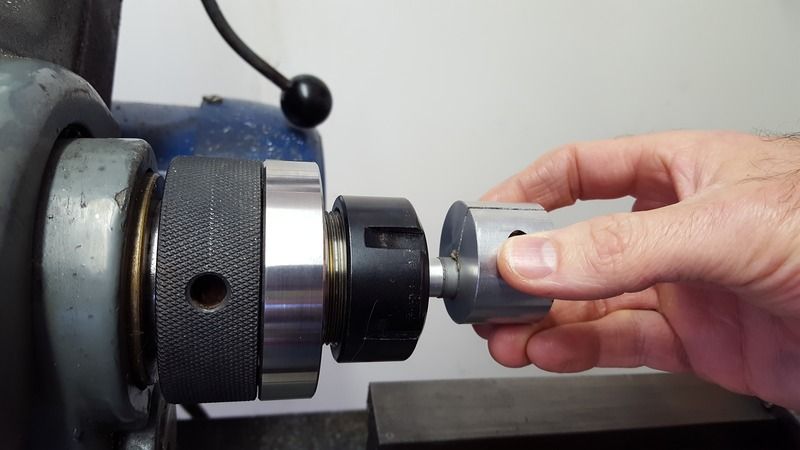
I had previously made a piston lap which I planned to use once I had the collet chuck.

2016-07-04%2022.12.01.jpg


I was a bit reckless with my piston at one point and in my haste I broke the skirt. After a string of bad words and a couple of days of brooding I remade the piston and got to lapping.

2016-09-20%2021.51.14.jpg


2016-09-22%2021.52.15.jpg


2016-10-22%2016.00.00.jpg


2016-10-22%2016.00.23.jpg


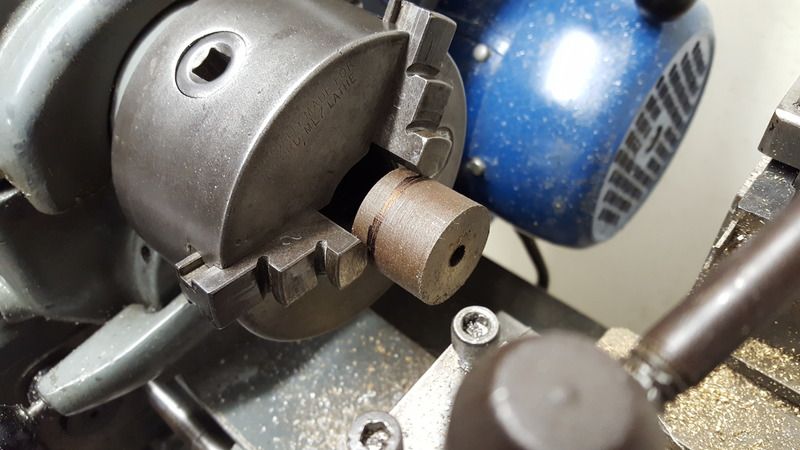
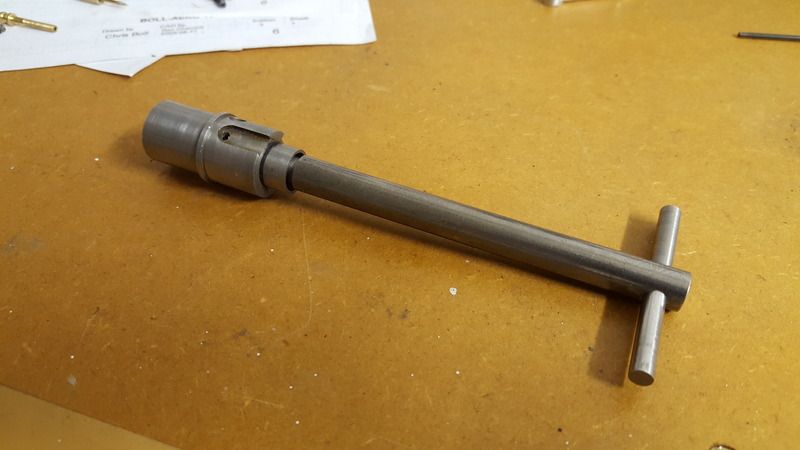
The last photo above is just to show how I held the piston lap by hand while lapping the piston. I ran the lathe at 290rpm and used ~400 grit and then ~800 grit diamond paste to lap the piston. I know people have reservations about the use of diamond paste vs a silicon compound, but I couldn't find the later in NZ and as this engine will likely only run a few times and won't see extended use I figured I would make do.

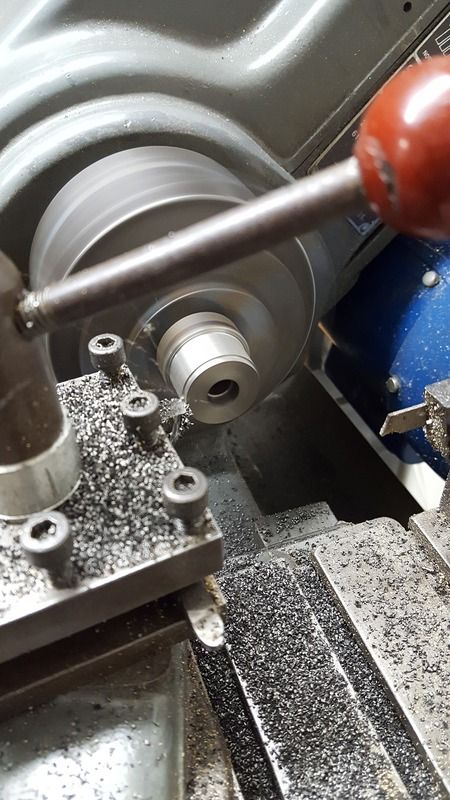
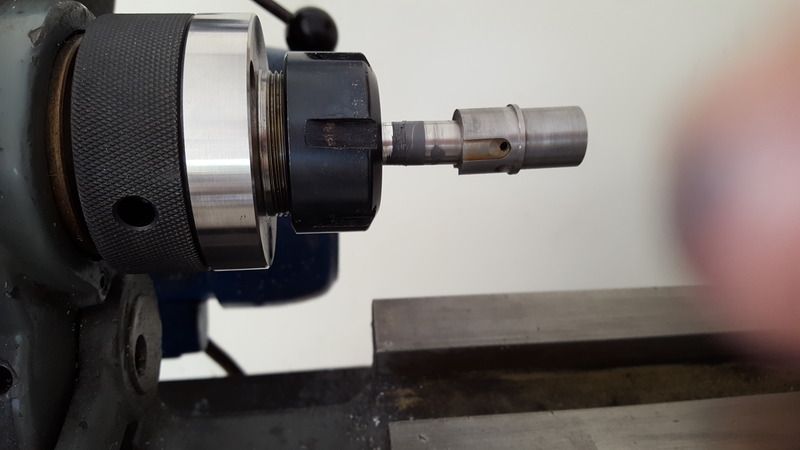
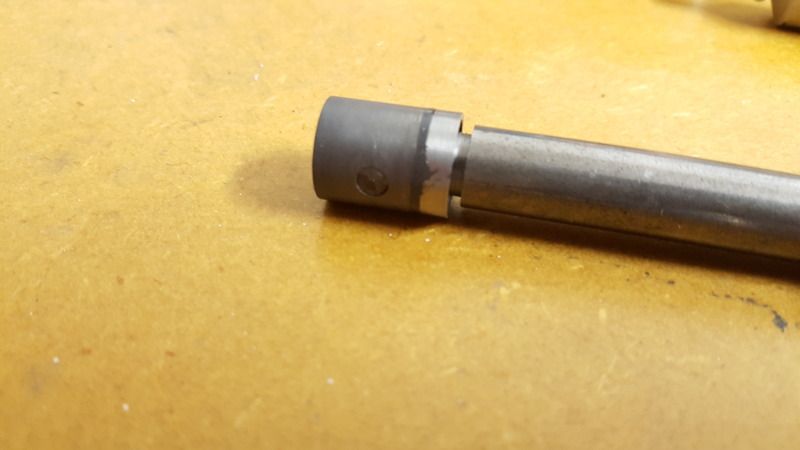
I'd obviously left way too much extra on the piston and ended up taking nearly 4 thou off by lapping (which took forever!) before the piston just started into the cylinder.

2016-10-23%2015.38.37.jpg


2016-10-23%2015.59.07.jpg


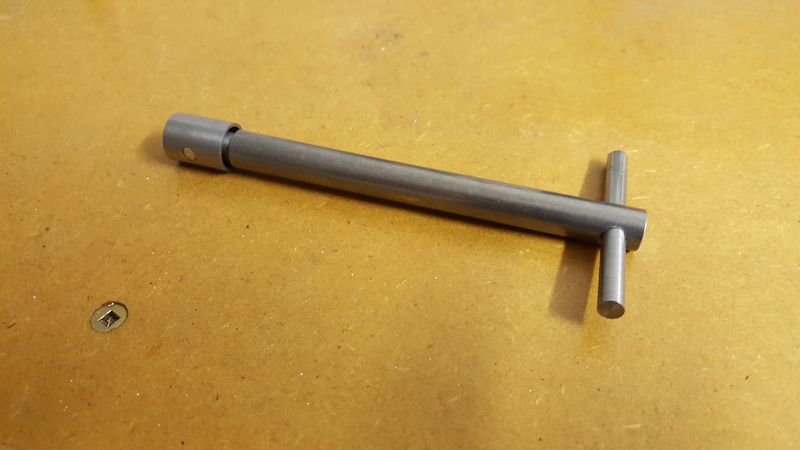
That's about as far as the piston will go at the moment, and I am just about finished making a T-handled tool to use to lap the piston to the cylinder to finish the process. I'm following the process described at the bottom of this page http://modelengineeringwebsite.com/Super_Tigre_12.html

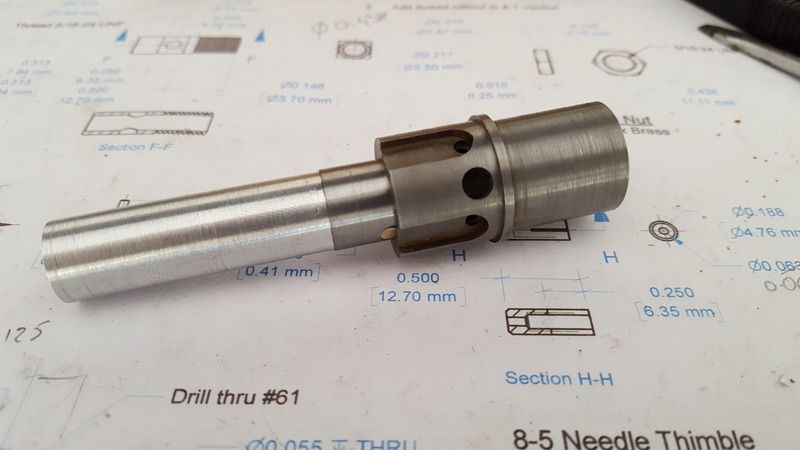
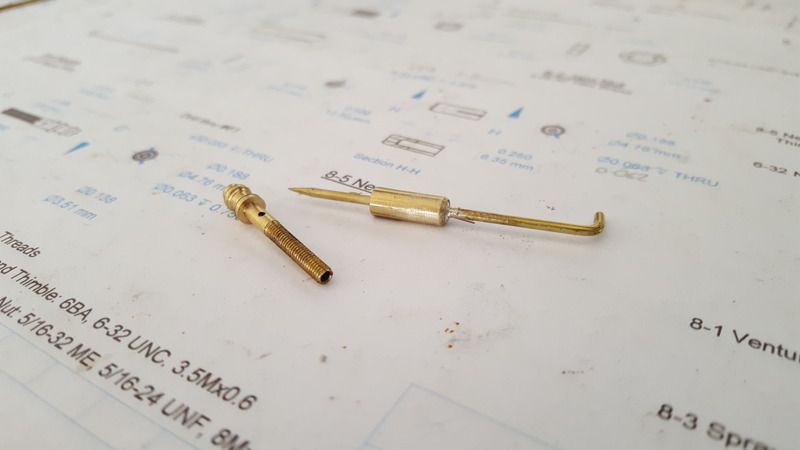
I also managed to stuff up my spray bar and needle thimble when I tried to solder the needle into the thimble. I had a bit too much clearance in the hole in thimble in my first version and the flux and solder flowed down the needle and very effectively soldered the thimble and spray bar together. :wall:

Lesson learned! I remade the parts and this time made sure the hole in the thimble was a tight slip fit for the 1/16" brass rod I was using for the needle (I was supposed to use piano wire but it was hard to come by and I had the brass rod to hand).

2016-10-27%2013.09.55.jpg


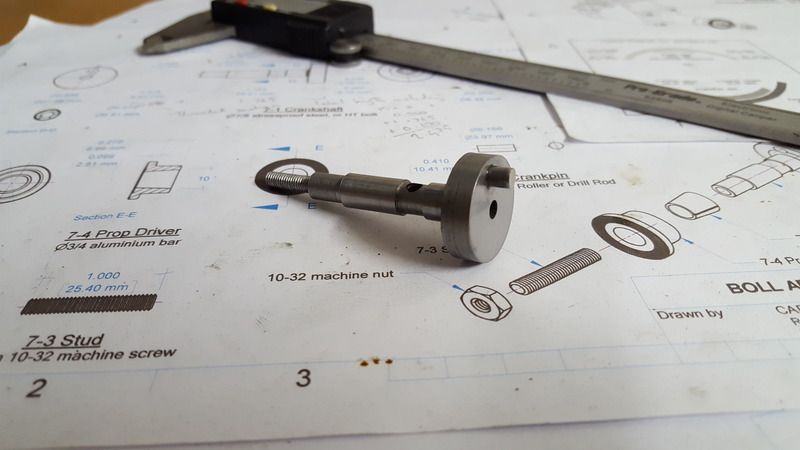
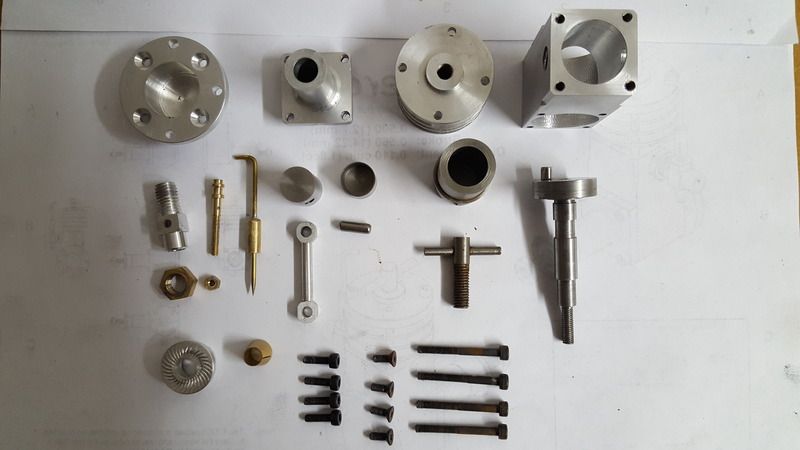
One other little job I had to do was loctite and press the crank pin into the crank.

2016-10-27%2021.14.20.jpg


I've also made and lapped the contra-piston, although it appears I didn't take any photos of that.

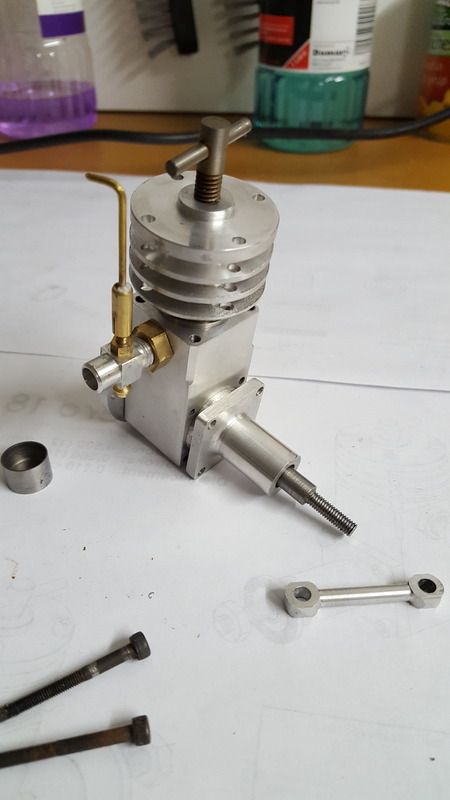
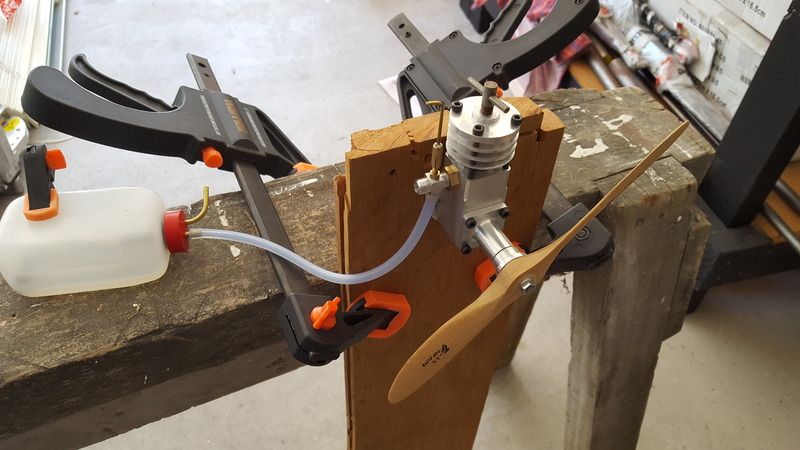
So, all that remains now is to finish lapping the piston to the cylinder, and test fit and assemble the engine and I should be close to attempting a first run!

Cheers,
James Fitzsimons
 
So, over the last month or so I've managed to grab an hour here and there and get the engine to a completed state. Here are some pics of the final parts collection and the assembled engine.

The last remaining job before assembly was to finish lapping the piston to the cylinder. I did this by making a t-handle tool and carefully lapping the piston into the cylinder with a very small amount of fine grade lapping paste.

2016-11-06%2021.20.12.jpg


Part way there:
2016-11-06%2021.23.47.jpg


2016-11-06%2021.47.42.jpg


All the way in:
2016-11-06%2022.33.25.jpg


Then it was time for a clean up and some family shots before final assembly:

2016-12-01%2022.21.43.jpg


2016-12-01%2022.25.14.jpg


Testing fitting some parts:
2016-12-01%2022.48.35.jpg


Today I finally had some time to finish assembly and try a start. After putting it all together I lashed up a crude test platform using an old saw horse:

2016-12-30%2014.48.36.jpg


2016-12-30%2014.48.29.jpg


Righto - time for the magic!

...

Bugger! It doesn't run. :wall:

My worst fears have been realised. I don't think it has enough compression and it appears to be leaking past the contra piston as I can see spent fuel and small bubbles around the base of the compression screw. Here is a (pretty rough) video of some attempts to start. It was difficult taking the video with one hand and attempting to start it with the other!

[ame]https://www.youtube.com/watch?v=JXoHEQLcqwc[/ame]
 
Bit more detail on what I've tried so far:

- tightened all the screws holding the block, main bearing and back plate up snug
- made a paper gasket for the back plate as felt that it was leaking too much
- screwed the compression screw all the way down to see if I could get a seal but no luck

Been thinking about what next.

I think I'm going to try making a new contra piston and making sure it's really tight in the top of the cylinder. Hopefully that might solve the leaking out the top of the cylinder. The other joints seem to be ok now as there is no fuel leaking out anymore.

I'm still keen to try and get a runner out of this engine, but I'm not about to remake a bunch of parts for the umpteenth time. I think if the contra piston doesn't get it running I'll probably be chalking this one up to experience and moving on.

I've realised now that this was not a great first project - take note any budding model engine machinists - small diesels are not a best first project!
 
Roboguy,

Don't give up - I am sure I heard a few pops when you were flicking... if that was the case then you should be able to get it to run.

The first start of a new motor is always the most difficult, settings unknown and piston / contra / cylinder fit unhappy as no running to bed it in even slightly.

I would try this ....

With around 40% ether content say a mix 40 / 30 / 30 ether kero caster oil turn the engine on its side about 45 degrees so you can get raw fuel into the crankcase by priming with the fuel bottle, 3-5 drops maybe more, then a good prime into the exhaust. Turn it over without flicking about 5 -6 times holding the prop but with the contra backed off. Now with the needle valve a bit more than what you think is running position, start flicking as hard as you can.

What you are doing is using the fuel as a means of just not making the engine run, but also the extra fuel will help seal anything that isn't fitting too well in its present state.

Be careful not to get a compression lock, although finger flicking shouldn't hurt anything, an electric starter can however.

Don't give up, when you are flicking using this procedure each 2nd or 3rd flick just turn the compression screw down a bit more, eventually you will feel it wanting to stop before tdc as the mixture fires, when this happens just leave the comp screw where it is or back it off by about 10 to 15 degrees only. If that wanting to stop goes away, keep the comp screw going down. Be careful not to get it so far down that it contacts the piston though.

When it starts you will need to be fairly quick to up the comp screw as the extra fuel helping seal everything burns off.

Believe me we have all been where you are presently, and when it does get going it is a terrific thrill.

GOOD LUCK .... Ed
 
Thanks for the encouragement Ed!

I'm going to remake the contra piston today and see if I can't get a much tighter fit. I feel like that is probably the main contributing factor to the lack of compression. Once I have that done I will follow your steps to attempt the start.

Unfortunately I don't have control over the ether content of the fuel I am using. It is an older bottle of commercial fuel, and even worse some of the ether has probably evaporated with age. To make things even more difficult you can't purchase model diesel engine fuel in NZ anymore, and you also can't buy ether as it is now a controlled substance (thanks to nefarious types who use it to manufacture illicit substances!).

Right - off to make a new contra piston - will report back soon.

Cheers,
James
 
Hi James

CRC Engine Start is a mix of petrol and ether etc. I wonder if you hold the can upside down (like a paint can) you would express all the propellant out and then be able to puncture the can to get the fuel out.

Is the ether more there for starting or is it there to aid running as well?

Cheers

Bruce
 
Hi James,
Are there any hobby shops in NZ that stock 'Hot Stuff' branded fuels by Ozzie Traders? If so, they may be able to get you the Ozzie Traders diesel.
Alternatively you could contact Ozzie Traders to ask if they have supplied anyone in NZ.
Apparently another option is visiting any Control Line Aero clubs as these guys still prefer CI engines.(this will be my first option when I get my CI built)
Regarding 'canned' starter mixes as sources of ether, from what I have researched, only John Deere brand is worth the trouble as it is 80% ether and apparently the remainder is mostly propellant, whereas the other brands are typically only 20-30% ether.

http://www.ozzietraders.com/Hot_Stuff_Fuel/Aircraft_Fuel/aircraft_fuel.html
 
Hi guys.

Thanks for the ideas re fuel. I had read about people trying to make their own from starter fluid. Perhaps that might be worth a try to boost the ether content in the fuel I already have.

I made a new contra piston today and got a really tight fit. It's no longer leaking past the contra, but still no closer to starting. If anything it feels less like popping today. I can hear leaking past the piston under compression when I turn the prop slowly. It looks like the piston is a fraction loose now. I don't think I can face making another one though!

Cheers
James
 
Roboguy, Don't discard the piston yet - if you are convinced it is too small there is a way of redeeming it called cherry bombing.

BUT if you are getting popping then it wants to run, maybe the John Deere extra ether if you can get it will help - if you don't have enough ether you won't get a start. You really need a minimum of 33% but 40 is better. Leakage at the piston/cylinder interface is common especially on unrun engines - they need to run to bed in.

Re the saving of a piston ...

I have used this process maybe 20 times now and it mostly works. I used it on my own pistons when I have made one a tad small, and on many worn out diesels bought on Ebay etc.

What you have to do is heat the piston on its own to a cherry red then drop it in oil. I usually go for a bit less than cherry and remeasure. Usually at this stage nothing happens I've even seen it regress slightly. If it grows great, if not - next time take it just a tad hotter and always drop in oil. 95% of the time it will grow, by the sound of things you are very close so you would be aiming for a 1 thou growth but I have seen them go 3 thou.

I then make a simple push on mandrel and push the piston onto that then using a fine emery backed by a ruler, linish it down to the size you want on the lathe. Be careful this process removes metal when you are talking tenths of a thou pretty quick, also have a good speed on the lathe to try to keep the piston round, I use 770 rpm at least. You are aiming to get it into the bottom of the bore up to the exhaust by hand, but no further. It isn't till you assemble it that you work it back and forth to bed it in with some oil that you will get it to go over the top, sometimes takes a couple of minutes just a little bit more up the bore each back and forth movement, not too much pressure though as you don't want to make the conrod ends oval, so plenty of oil here too. If you feel it isn't going to get there then disassemble and take off another 1/10th thou.

BollAero's are great little motors - you will get it to go, just have to learn the tricks .... I think I remade both the piston and liner twice before I got it to run - that was about 3 years and 15 motors ago !
 
I do not look very often at this website, have only just read this thread.
People worry too much about things like the accuracy of marking out screw holes, Just a rule and felt tip pen for marking fluid and a scriber is ok provided you always do the one part first and spot drill through to the mating piece, you do not need interchangeability like on a mass production engine.
The easy way to make conrods is to use square bar, Drill the 2 holes then chuck one end and support the other, and turn the round centre section, also start to shape the big and little ends in the lathe. Then mill the ends down to required size, finally cut off excess length and file to shape. Never had one fail yet and have made a 7.5cc diesel using this method. BollAero 750 on youtube.
 
I have read this thread over the last couple of days but alas, no photos. Perhaps the photo hosting service is off the air.
Is there any chance these photos/videos can be resurrected and republished?
I too have built most of the Boll Aero but am totally hung up on the piston/liner fit. My original cast iron contra piston actually had air going through it as the metal was so porous.
Perhaps the moderator can assist with recovery of the photos.
Cheers Peter
 
Veedub, the problem with the photos is extortion by Photobucket. The owner has to pay around $400 to retrieve their pics or lose them.
 
Sounds like extortion. Would the original Roboguy still have them on his phone or camera? I need all the help I can get in my attempts to complete this project.
 
There is another option.
If you use chrome there is an extension called Photobucket Embedded Image Fix that can be freely installed from chrome extension menu, that make the photo appears.
The problem is not that the author have to pay but that the viewer have to pay.
Using this extension you can avoid the problem.
Not sure if it is legal, but is in the chrome store, so it should not be our problem, eventually ;)

Hope this helps ( until it works )

Pigi
 
Back
Top