"Bas" Stirling, a Jan Ridders' design

Home Model Engine Machinist Forum

Help Support Home Model Engine Machinist Forum:

This site may earn a commission from merchant affiliate links, including eBay, Amazon, and others.

kustomkb

Project of the Month Winner!!!
Project of the Month Winner
Joined
Dec 14, 2007
Messages
1,181
Reaction score
31
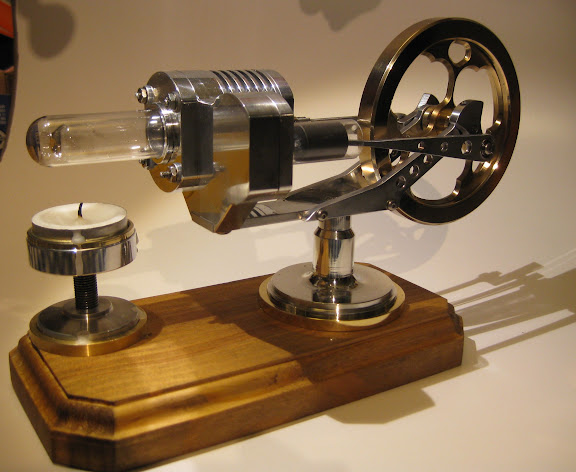
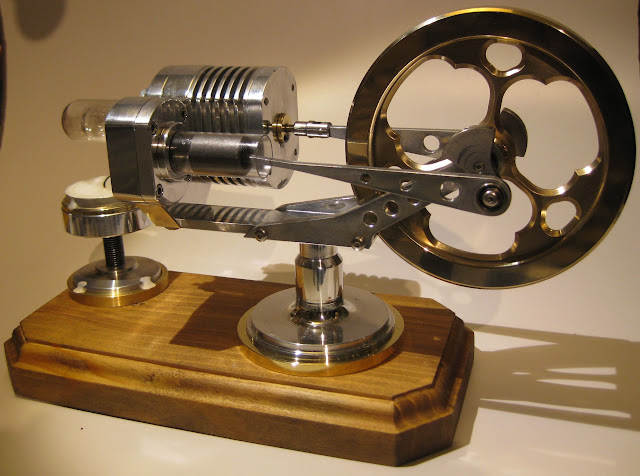
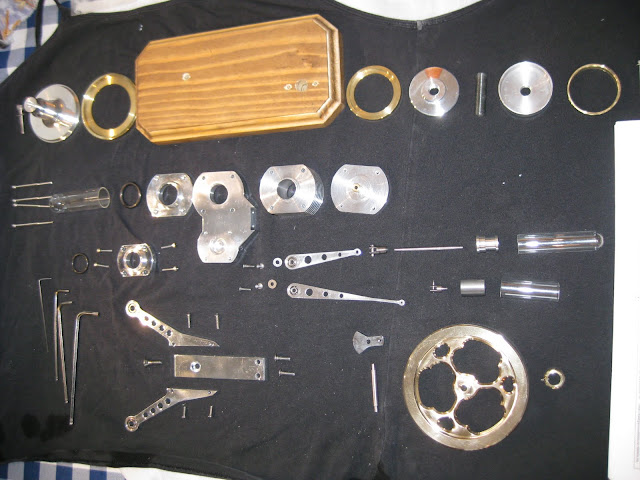
I have always wanted an engine that would run off of a tea light. Jan Ridders' "Bas" will fit the bill nicely.

I won't get any work done until the Hoglet is put to rest, but for now I just wanted to get some computer modeling practice in;


[ame]http://www.youtube.com/watch?v=9NOLnUc3QP0[/ame]


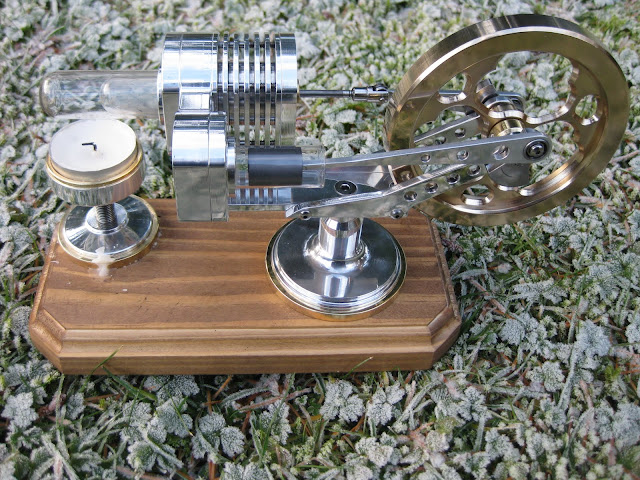
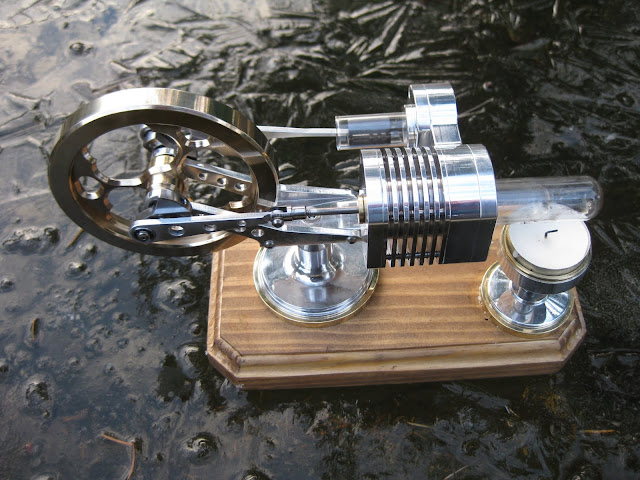
Here is Jan's finished model;


[ame]http://www.youtube.com/watch?v=VCkjdJzIXQE[/ame]


Have fun!


Here we have gone from "virtual reality" to "real reality";

BAS%20Stirling%20003.jpg


BAS%20Stirling%20004.jpg


Here is the second run, after only a little tweaking;

[ame]http://www.youtube.com/watch?v=yoWX_lkdNdc[/ame]

Now for a little polish and some fine tuning.

Have fun!


All I can say is WOW! :bow: :bow: :bow:
Beautiful engine! I like!
 
Looks great! I've got one about halfway done that I'll get back to one of these days. Due to a minor CNC error, it's now "left handed" :D
 
Thats a gorgeous looking engine, I really like the fly wheel design. I emailed Jan I while back and got the plans off him, and is on my list of things to do. I struggled for a while trying to get hold of the particular sized test tubes here in australia, so parked it for a while.

Pat
 
Thats a magnificent engine Kevin :bow: :bow: - Well done indeed!

And surprisingly big as well!

Regards, Arnold
 

Thanks a lot Doc, Shred, Pat and Arnold!

Shred, do you mean the through and blind bores are reversed? In that case, no big deal, I think it's best to put your own "twist" on things when working from someone elses design.

Pat, I couldn't find the correct tubes either, I emailed Jan with my alternatives;

Hello Jan,

I have started on Bas, I have these test tubes;

displacer cylinder ID 18.15 MM

displacer OD 15.75 MM= 1.2 MM clearance per side.

Your design

displacer cylinder ID 18 MM

displacer OD15.5 MM= .75 MM clearance per side.

Should I alter the length to compensate for volume?

Will these sizes work?

Thank you for your time.

Kevin

Hello Kevin,

These test tubes are perfect. You don’t need to alter anything; it is not that critical at all.

Friendly greetings and a lot of success,

Jan

And surprisingly big as well!

I thought the same thing when I noticed my hands got in the frame!

Four of us got together to build these, with a fifth made as a Christmas gift. That's why there were no build pics. I will take some photo's of the components and assembly when I put mine together. I just wanted to make sure we had a runner in time for Christmas.

Cheers,

Kevin
 
Very nice workmanship, I like the nice intricate details, with the linkages and the flywheel.

Excellent job on the polishing up, and nice work on the base, all around a real showpiece.


Kevin,

Beautiful :bow: :bow:

Best Regards
Bob
 
Thanks for the info on the test tubes Kevin, I'm going to have to dig out the plans and revist this.

Regards, Pat
 

Thank you Hobby and Bobby, your compliments are greatly appreciated.

No problem Pat, I hope it works out for you.
 
Kevin:

That's a real good looker! I especially like the flywheel.
KB raises the bar again th_wav

Joe
 
Great Job Kevin!

Beautiful Job finishing the parts. Incredibly shiny.

Kel
 
KustomKB said:
Thanks a lot Doc, Shred, Pat and Arnold!

Shred, do you mean the through and blind bores are reversed? In that case, no big deal, I think it's best to put your own "twist" on things when working from someone elses design.
When I drew it up, I reversed the small and large sides of the frame. No big deal. This one is somewhat to Jan's plans, but the next ones will be customized more for my material and tooling (imperial, both.. this metric stuff is cool and all, but driving me nuts)

The size surprised me as well. I happened to find 16mm and 20mm test-tubes locally. They cut easily enough chucked lightly in the lathe with a dremel cutoff wheel in the toolpost.
 
Kevin,
They just don't get any nicer than that. Thm: Thm:
Gail in NM
 
Beautiful engine Kevin. Like you I have long wanted an engine that ran on a tea light, but I have now concluded that I will never achieve it.

Is any of the work on your engine CNC?
 

Thanks a lot fellows!! :bow:

Thanks for the tip Shred. We cut them with a thin section diamond blade on the surface grinder with mixed results. I've tried the score, wet and snap method, carbide v-tool in the lathe and even tried mounting a glass cutting wheel in the tool post. Never got a perfectly clean edge and I'm afraid the stress risers created will eventually grow. I've made the bores a close fit so I don't want to try to flame polish the edges either.I will give the cut off wheel a go tonight.

Stan, the fly wheels and manifold were done entirely on a CNC. Just about everything else was first turned on a manual lathe and then moved to the CNC for hole drilling and profiling. Don't give up on your quest! You have shared a lot of valuable information on lamina flow engines with us, and a Stirling, I believe, will be much more stable.

All the best!

 
Thanks Kevin. I was wondering how you did the flywheels without CNC.

I have made several Stirlings that run but all seem to need more heat than called for. I have little success with LTD Stirlings. I have now accepted that my best days of machining are over.
 
Very nice Kevin! Thm: I'll have to think about making one of those when the weather gets better (far too cold in the workshop at the moment!).

Vic.
 

Stan, these Stirlings definitely can be frustrating at times.

Thanks Vic!

I went about assembling my own engine. I cut some fresh glass as Shred and Jan suggested;

BAS%20001.jpg


And then polished the edges with some wet/dry on the surface plate;

BAS%20005.jpg


And here are the components laid out before assembly;

BAS%20006.jpg


The assembly;

[ame]http://www.youtube.com/watch?v=Sb27f1cEwQI[/ame]

And a few more photo's;

BAS%20013.jpg


BAS%20019.jpg


Have fun!
 

Latest posts

Back
Top