Anodizing..another expirement...larger part this time.

Home Model Engine Machinist Forum

Help Support Home Model Engine Machinist Forum:

This site may earn a commission from merchant affiliate links, including eBay, Amazon, and others.

deere_x475guy

Well-Known Member
Joined
Oct 26, 2007
Messages
900
Reaction score
13
Location
Eaton Rapids MI
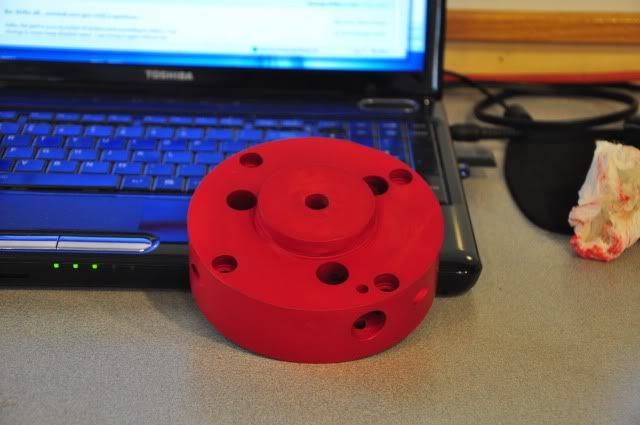
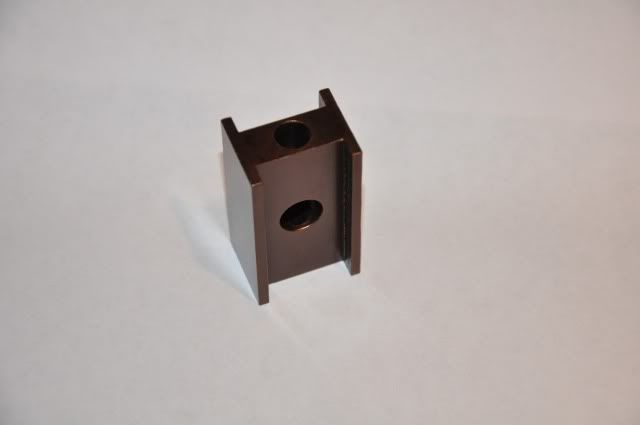
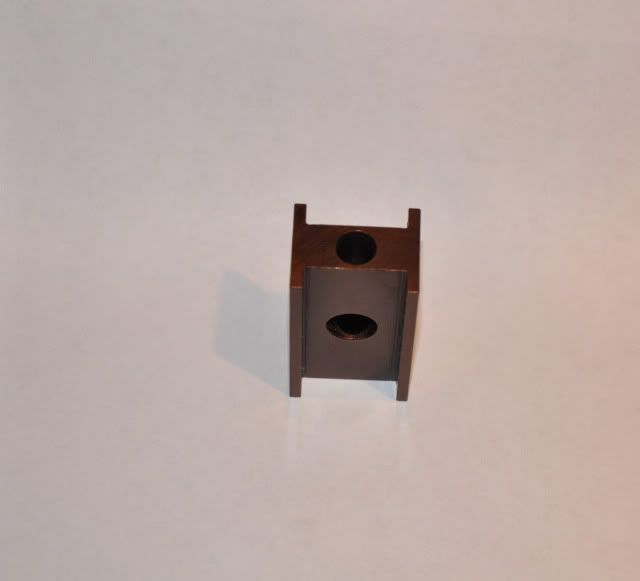
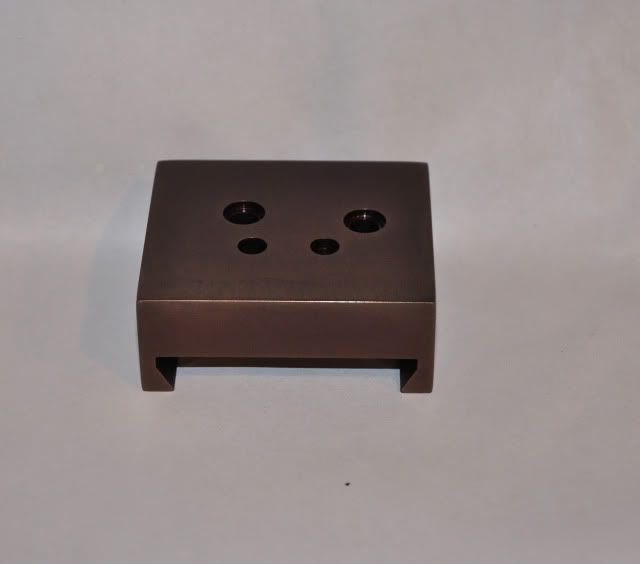
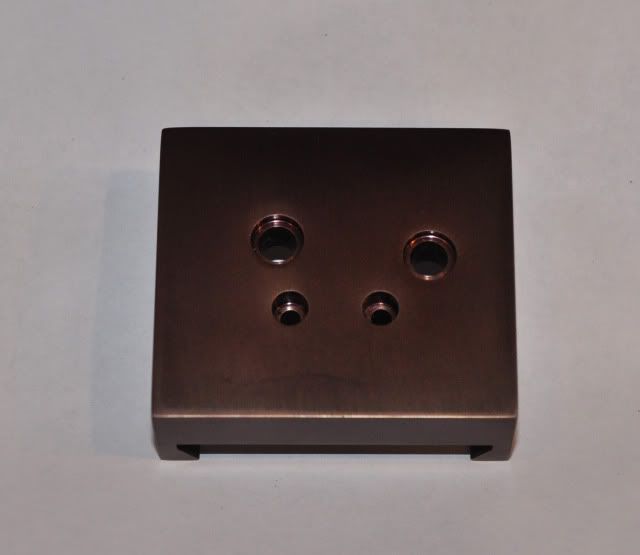
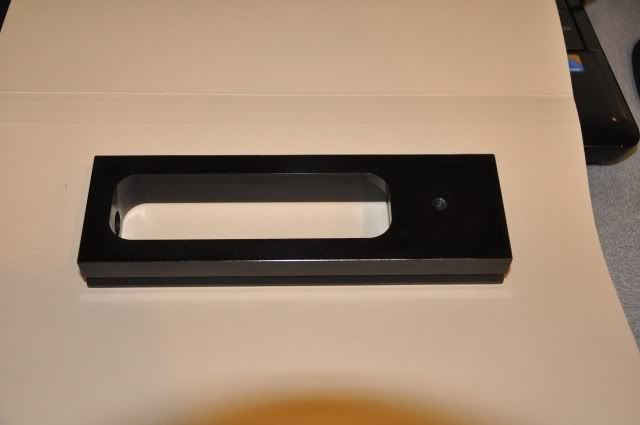
Today instead of going the the flywheels on the Siamese Twin I decided to try a part that I will most likely do more of and it is about the biggest part I plan on doing for now. This is just scrape now...many times over prototype.;)

DSC_1465.jpg


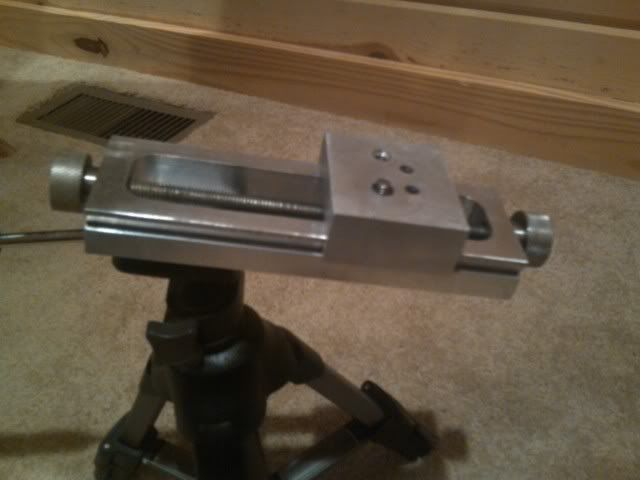
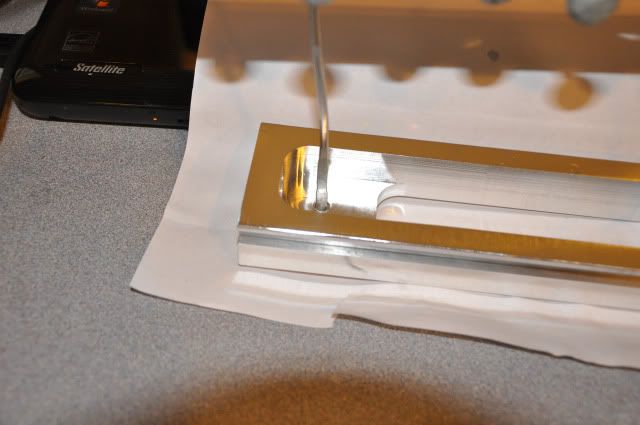
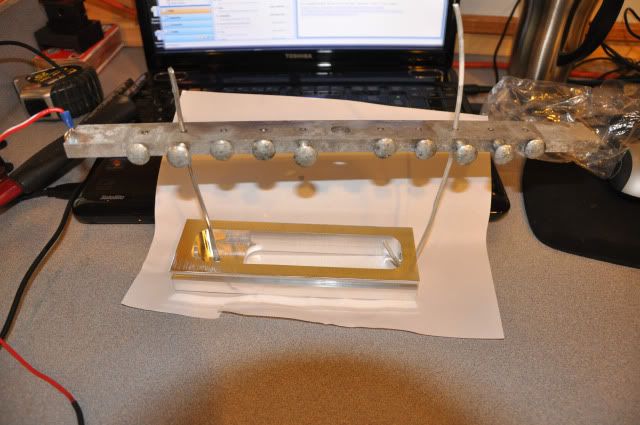
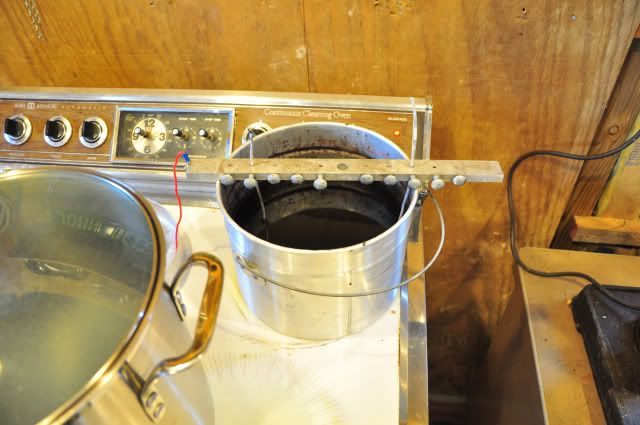
I put it about 30 minutes ago...it was a bear trying to bring the acid bath from room temp of 84 degrees to 70 but I finally got it there. More pics to come..
 
Richard, the results weren't so good. After 3 attempts I did finally get it to take color, but, somewhere along the line I didn't get it clean...touched it with my hand...or something...the finish is very blotchy.

DSC_1478.jpg


This part takes a lot of current and it was a constant baby sitting job, switching out bottles of frozen water to keep the bath cool. I think this one is going to wait for a redoo untill the weather cools a bit.....we were at 92 today.

I might try some parts off of the tubing bender next before moving on to the any more parts on the Siamese Twin.
 
Well...I have done several test parts and now I have had 4 good runs in a row. Here is the last one....it's part of the tubing bender I built a couple of years ago.

DSC_1500.jpg


DSC_1497.jpg


It's late and I will post more about what I am using and how I did it later.
 
Thanks Steve, I am very pleased with it.

I am keeping my temperatures in the anodizing bath between 68f and 72f and am making sure the parts are absolutely clean before I put them in the lye solution and making sure I get a complete rinsing before they go to the next step. It has cooled down some this evening so I am sitting outside the pole barn with another part in right now.

It's the carrier from the macro slide focusing rail I built for Pam two years ago. It is the top part that slides on the body in the pic below.

IMG00229-20090918-2040.jpg

 
Ok..got the carrier assembly anodized.

carrier1.jpg


carrier2.jpg


And now I am ready this morning to anodize the rail. Here are some shots of the process.

First I scrubbed the part in hot soap dish water useing Dawn dish soap and wearing rubber gloves. I wore the rubber gloves all the way up to putting the part in the acid bath. This was done to make sure I didn't touch it and leave finger prints. After scrubbing the part I dipped it into my mix of Lye and distilled water for 15 seconds to etch the surface. The pictures below show how I hooked the part to the rail that will suspend it in the acid bath, dye solution and boiling water. The first picture shows an aluminum wire that I pounded one end flat so that I could screw it into the threaded hole to get a good solid connection.

railAttachThread.jpg


This photo shows how I am using a second with to help hold the part horizontal. None of my tanks are deep enough to let it hang vertical.

railAttachAll.jpg


This last shot shows the part suspended in the anodizing bath. The calculations I came up with called for 120.6 minutes in the anodizing bath. I have 9 minutes left before it gets pulled out, rinsed well in cold water and then left in the dye for 30 minutes.

After the dye bath it will be placed in boiling water for 30 minutes to seal it.

I will post more pictues as I progress. Also I will post more about how I am doing the calculations...I am running short on time right now.....


Well the part has been through the dye process and is not in the sealing tank. I will bring this up to a boil and hold it there for 30 minutes to seal the part.

Here is a photo of the dye tank and the part suspended in it.

DyeBath.jpg


While I am waiting here is a shot of what I am using for a power supply. It's just an ordinarly ATX computer power supply rated at 250 wats. I am using the 12 volt output rated for 10 amps.

I got the idea from this link:

http://www.wikihow.com/Convert-a-Computer-ATX-Power-Supply-to-a-Lab-Power-Supply

My setup isn't nearly as refined as he has done.

powerSupply.jpg


Here is a better shot of the ano tank. The two horizontal pipes in the bottom of the tank have holes drilled in them for air bubbling for agitation.. I am using the little airbrush compressor to supply air. The 6061 aluminum plate to the right is the cathode. The negative lead is connected to this. In the upper left corner you will see some aluminum wire shaped in a spiral...this is my method of holding the recycled peanut butter jar of frozen water to cool the bath.

anoTank.jpg


The part is due to come out of the boiling water in about 20 minutes and I will post a follow up pic when it is done.....hoping all went well.....
 
Looks like things are going very well.
Thanks for the detailed shots and explanations.
I hope to do this someday and I'm learning a lot.
 
Your welcome Carl, I have having a great time doing it also. The part came out great. I am going to run up to the cabin to get something to eat and will post pics when I get back.
 
For over 3yrs I have been making a selling parts for motorcycles in my home workshop. I never dreamed that I could anodise & dye them in pretty much the same environment as well until I came across Caswell's forum.

Anodising aluminium can be very cheap & very easy if you follow the established rules, all the experimenting has been done before.

Why are you bothering (& ultimately confusing everyone else) with primitive power supplies?

The success of the whole process revolves around a constant current source of power. I'm getting proffessional results from equipment that can be sourced from a home environment but my constant current power source cost me £150 new.

It has paid for itself many times over, I buy my prototype products & clone them at a much cheaper price, no one who's inspected both can claim that mine is inferior.

Battery chargers & PC power supplies aren't worth the time it takes to experiment to get a good anodise that will take dye evenly, all it takes is to follow the established rules & use a constant current source.


Babba,

While I can appreciate your concern, I think your comments are a little off base. Bob is not trying to operate a production shop, but simply wants to anodize a few parts he makes. I too am interested in the process. I have several PC power supplies laying about taking up space, if I don't have to spend 150 GBP (~300 US dollars!) I'm not going to. Furthermore, PC power supplies are hardly "primitive" but quite "intelligent" in being able to adjust the current available depending on demand.

From what I've seen, Bob has not confused the issue at all. He has followed all the established practices that I have read about.

Remember, this is a hobby. It is all about experimentation and making do with what is at hand. Perhaps even recycling items that otherwise might make it to the trash bin.
 
ksouers said:
Babba,

While I can appreciate your concern, I think your comments are a little off base. Bob is not trying to operate a production shop, but simply wants to anodize a few parts he makes. I too am interested in the process. I have several PC power supplies laying about taking up space, if I don't have to spend 150 GBP (~300 US dollars!) I'm not going to. Furthermore, PC power supplies are hardly "primitive" but quite "intelligent" in being able to adjust the current available depending on demand.

From what I've seen, Bob has not confused the issue at all. He has followed all the established practices that I have read about.

Remember, this is a hobby. It is all about experimentation and making do with what is at hand. Perhaps even recycling items that otherwise might make it to the trash bin.

All the experimenting has been done, why is anyone bothering to experiment any further?

The rules of anodising are established, all the times, temperatures, concentrations etc all exist & all their flexibilities are known & very well documented.

If Bob wants to go back to the beginning & drain a car battery into a Tupperware box & connect up his battery charger/PC power supply in order to anodise his widgets then fair play to him. To some people it's all about experimentation.

However, when it's all about anodising cheaply in a home environment, we shouldn't confuse what's already been tried & tested with our own experimentation.

I never dreamed I could anodise in my home environment, I thought I would always have to pay the proffessionals £umpteen thousands of $ to do it for me. If I happened on this thread whilst in the discovery process I'd still be wasting my time in the shed trying to get an old PC power supply to anodise a part that should be earning me money.

Perhaps Bob works for a proffessional anodising Co' & he's not letting on !

 
Babba said:
... why is anyone bothering to experiment any further?

Because we can ;D

Just reading about something in a book or article does not make one an expert on the subject. Reading will not give real experience in applying the knowledge, that takes practice and even making mistakes along the way. We, as humans, often need first hand experience to see what does and does not work. Reading about it is not good enough.

As far as "wasting time" fiddling with a PC power supply, his results look pretty successful to me. He is happy with the results and the effort expended. That's all that counts.

I'm glad that you are making money with your professional anodizing equipment, but this forum is not about setting up production environments. Your comments about "production" and "making money" are simply in the wrong context here. It's about having fun, not making money.
 
ksouers said:
Because we can ;D

Just reading about something in a book or article does not make one an expert on the subject. Reading will not give real experience in applying the knowledge, that takes practice and even making mistakes along the way. We, as humans, often need first hand experience to see what does and does not work. Reading about it is not good enough.

As far as "wasting time" fiddling with a PC power supply, his results look pretty successful to me. He is happy with the results and the effort expended. That's all that counts.

I'm glad that you are making money with your professional anodizing equipment, but this forum is not about setting up production environments. Your comments about "production" and "making money" are simply in the wrong context here. It's about having fun, not making money.

You are wrong, you are very wrong. My anodising is not proffessinal, I'm just getting proffessional results by following the established rules. My equipment cost me £peanuts, it's nothing that can't be found in any home environment. The power source is VERY important to any anodising experience, if you choose not to use a constant current power source then every attempt at anodising any size part will be an experiment.

Why is anyone still playing around & experimenting with home anodising, it's all been done before & the results speak for themselve's, they don't wish to make a profit & they actively seek others to follow them.
 
Why am I not using a $200 dollar plus power supply? Simple...I am not doing 10 to 20 parts a week that you claim you are doing, and I am assuming you are selling your parts....so you should be using the best equipment and setup possible. You also mention in the post below "A simple battery charger / cheap PS set up may work well for occasional one offs after a bit of experimenting", but now your making a big deal of my experimental setup...and BTW, I no longer consider it experimental....my results have been consistant for the last 6 pieces...I do have a method developed for my setup.

And don't go on about how my results could change....because I already know you are right...and you know what....have a look around the Caswell forum and any number of others and you will find shops that suddenly are no longer getting consistent results...with their professional setups....and to solve the problem they are experimenting to find what changed...

Now, with that being all said, I am going to make another post with my last results and next parts that are soon to go into the anodizing tank. I am waiting for the acid bath to cool it down to 70 degrees with my free....non high tech, non professional method.....a peanut butter jaw full of frozen water.. ;D ;D ;D

Oh...and btw....I did change your quote slightly...I fixed your spelling and gramar mistakes....no offense...I make them also... ;)

http://www.homemodelenginemachinist.com/index.php?topic=6856.msg73756#msg73756

Quote from message #3.

I use the Caswell LCD method to anodise 10-20 parts per week & I'm currently enjoying GREAT results.

A simple battery charger / cheap PS set up may work well for occasional one offs after a bit of experimenting but investing in a constant current PS, agitation & something to keep the acids temp constant at 20deg C (68f) & you can look forward to consistent & professional results.

The only failures I have sufferred using the LCD method have been down to too low a temp (+/- 2 deg makes big a difference) & losing the connection during the process by using alu wire instead of titanium.

Give it a go, if you can assemble the kit cheaply enough you have nothing to lose.


Bob,
The slide looks great.

Are you going to do other colors, as well?
 
I plan to Kevin, I just haven't made up my mind what yet. I am looking at the colors available through Caswell and few others this evening. I will have the flywheels ready to take pics of in a hour. They are in the dye bath now.
 
Back
Top