- Joined
- Aug 16, 2013
- Messages
- 1,033
- Reaction score
- 764
Hi all
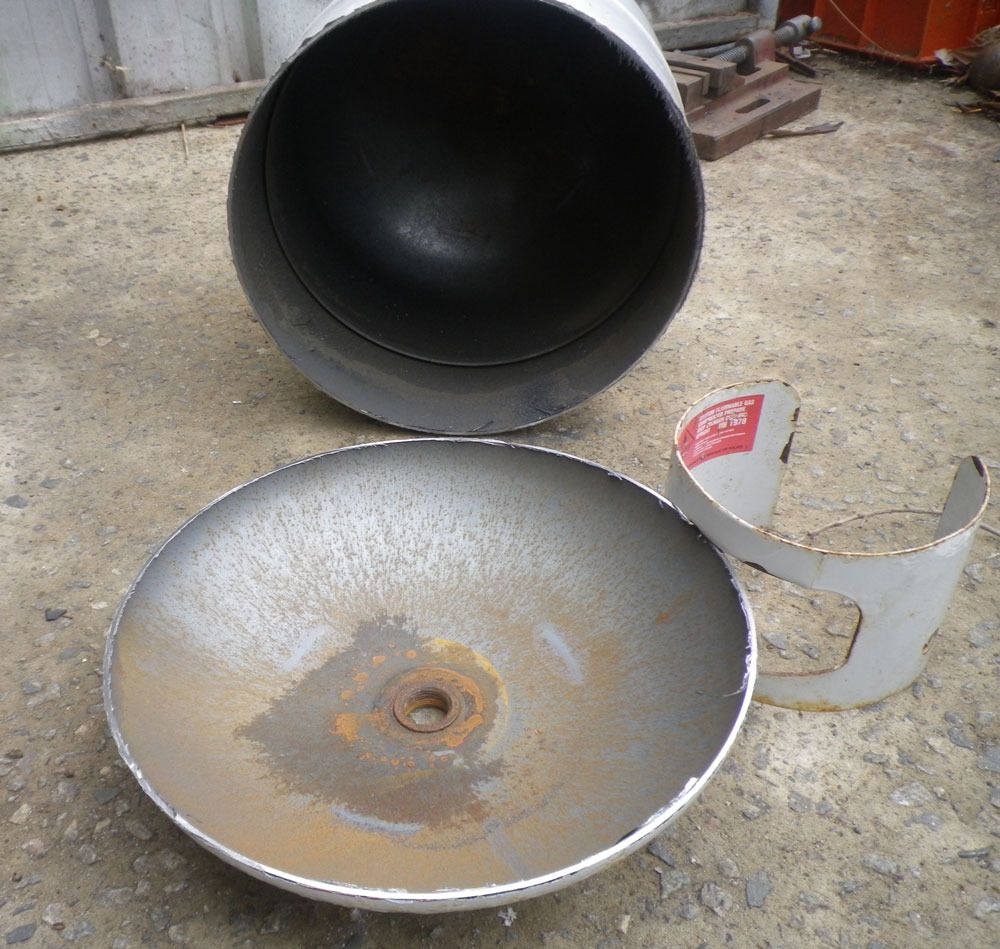
Thought Id throw out an update on the Troll (coffee can) furnace. As it turns out I was correct in my thinking that the physical act of melting aluminum is easy. If you gave 100 monkeys 100 matches and 100 pop cans eventually one of them is going to melt some aluminum. Getting a metal casting that actually looks like the part you had in mind . . . . whole different story.
I dont think Ive done this much reading since school. For every hour I spend doing something hands on I probably do 6+ hours of reading. Between working to get green sand I can live with, practising pattern making, and understanding the differences in how alloys behave, gates, spurs, runners and venting, dont forget to vent, I just dont spend much time actually melting metal.
My two must reads for anyone thinking of getting into casting are the US Navy Foundry Manual (http://www.hnsa.org/resources/manuals-documents/single-topic/foundry-manual/) and Wood pattern-making by Horace Traiton Purfield (https://archive.org/details/woodpatternmakin00purfiala). These are both free downloads.
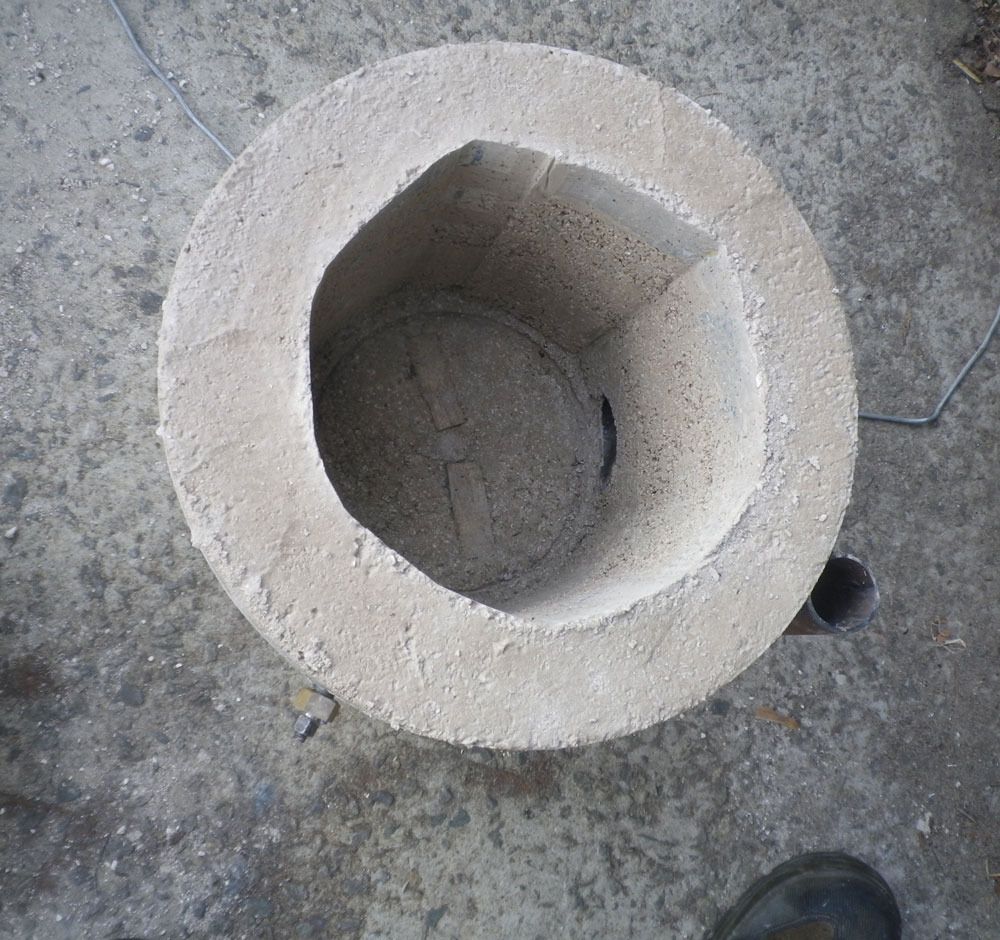
With my first crack at casting was going to be with a straight cylinder and a T that Id made up. Both required cores. A bit ambitious for a first try but Id have to go there sometime. I had picked up some sodium silicate to make the cores and did 2 cores for each pattern one in course sand and one in fine. Id been mixing green sand in small batches and realised I didnt have enough of the sand I wanted to use to fill two flasks so I could only do one pour. Go big or go home time. I decided on the T pattern with the fine sand core.


Thought Id throw out an update on the Troll (coffee can) furnace. As it turns out I was correct in my thinking that the physical act of melting aluminum is easy. If you gave 100 monkeys 100 matches and 100 pop cans eventually one of them is going to melt some aluminum. Getting a metal casting that actually looks like the part you had in mind . . . . whole different story.
I dont think Ive done this much reading since school. For every hour I spend doing something hands on I probably do 6+ hours of reading. Between working to get green sand I can live with, practising pattern making, and understanding the differences in how alloys behave, gates, spurs, runners and venting, dont forget to vent, I just dont spend much time actually melting metal.
My two must reads for anyone thinking of getting into casting are the US Navy Foundry Manual (http://www.hnsa.org/resources/manuals-documents/single-topic/foundry-manual/) and Wood pattern-making by Horace Traiton Purfield (https://archive.org/details/woodpatternmakin00purfiala). These are both free downloads.
With my first crack at casting was going to be with a straight cylinder and a T that Id made up. Both required cores. A bit ambitious for a first try but Id have to go there sometime. I had picked up some sodium silicate to make the cores and did 2 cores for each pattern one in course sand and one in fine. Id been mixing green sand in small batches and realised I didnt have enough of the sand I wanted to use to fill two flasks so I could only do one pour. Go big or go home time. I decided on the T pattern with the fine sand core.


.jpg")
.jpg")
.jpg")
.jpg")
.jpg")
.jpg")
.jpg")
.jpg")
.jpg")
.jpg")
.jpg")
.jpg")
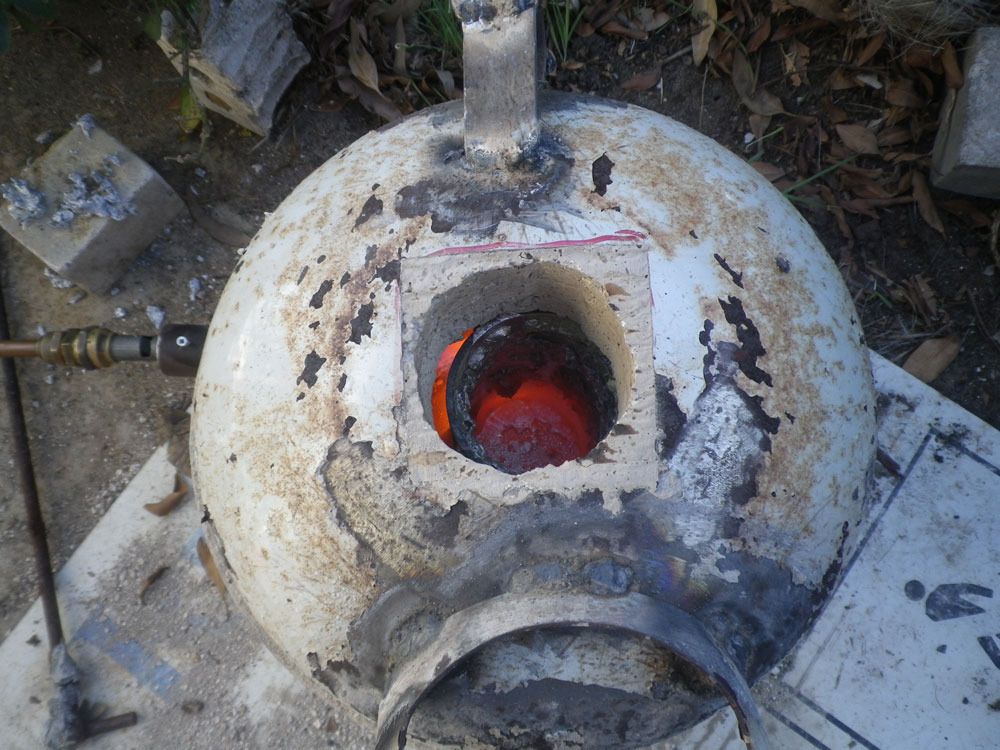
 When I first started I had the regulator set to around 2 lbs and it probably would have melted the load eventually but it would be like boiling a pot of water on low. By slowly increasing the pressure I found what I feel is a happy medium at around 6 lbs. This will melt a full crucible (3-4lbs) of aluminum in about 15-20 minutes from a cold start. I have run the burner up to 20 lbs and at that setting it will melt the load about as fast as you can feed it but its a bit ridicules on a furnace this small (