A Stuart Turner Triple Expansion Engine

Home Model Engine Machinist Forum

Help Support Home Model Engine Machinist Forum:

This site may earn a commission from merchant affiliate links, including eBay, Amazon, and others.

Hilmar

Well-Known Member
Joined
Jul 8, 2007
Messages
232
Reaction score
1
A Stuart Turner Triple Expansion Engine is borne.

I did buy the castings in the 1970s. We moved once in between and I lost all the Bronze castings.
Still have most, not all of the cast iron castings. I think it is time to start after 37 Years.
And this is the Start.
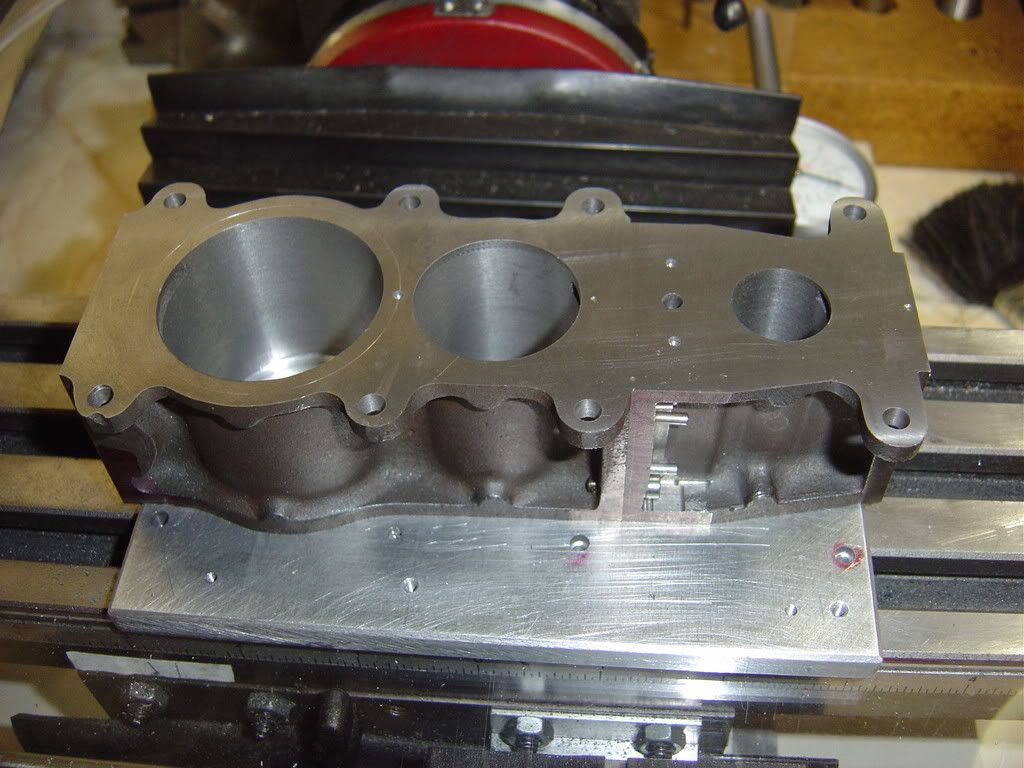
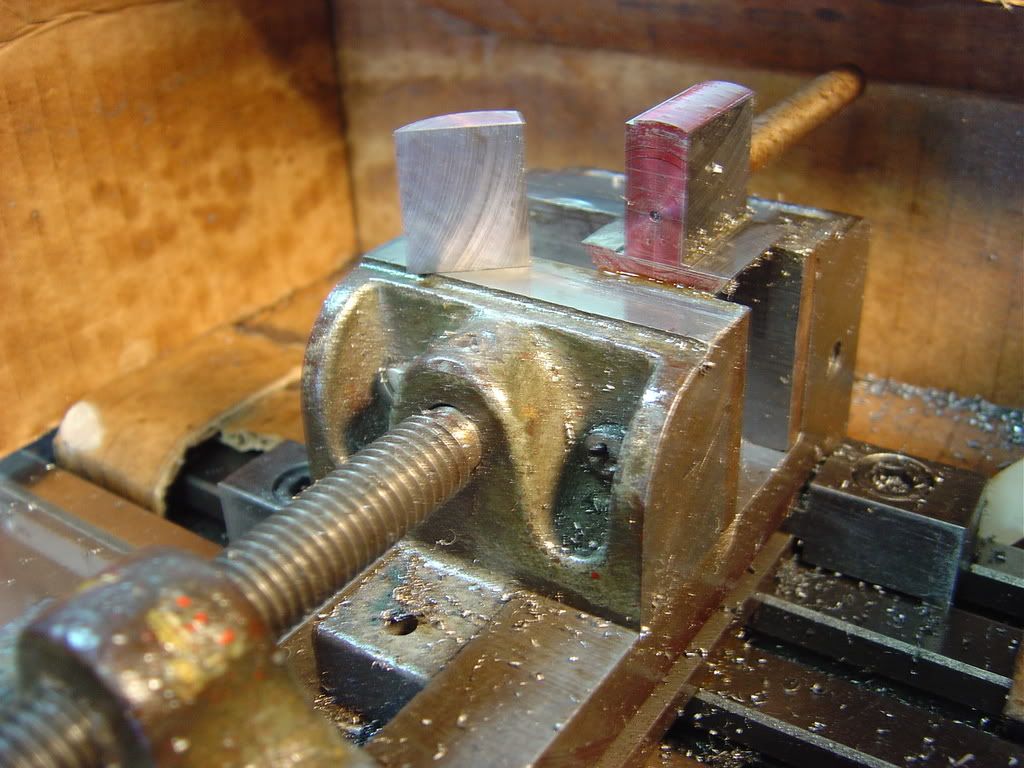
If some one tells you it:” Is easy to work from castings” don’t believe it. Only if you have good ones and they are a bit oversize, other wise you have a heck of a time to get there. These are not the best one. There is a problem with the cylinder ports.
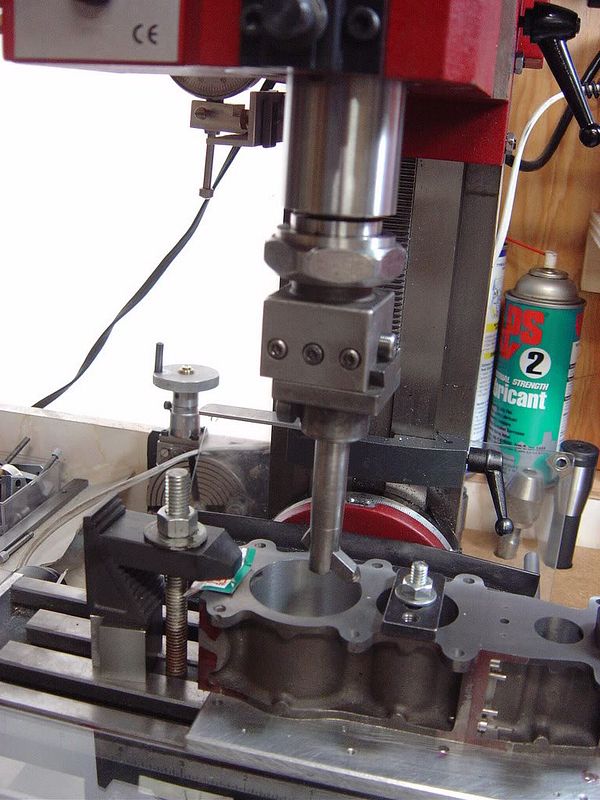
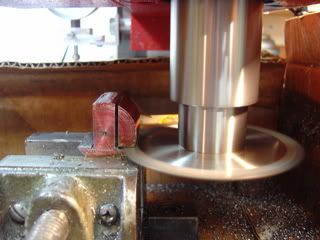
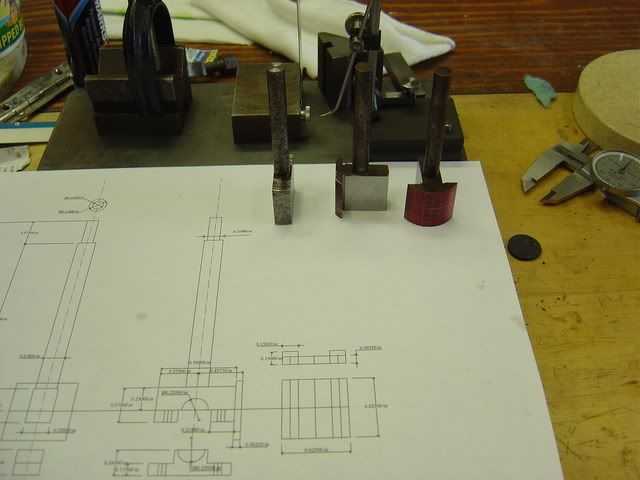
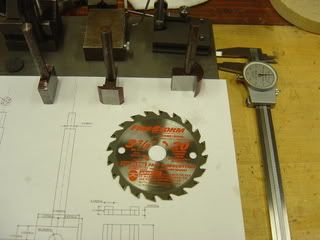
I will take pictures on a continues bases but it is slow going.
The decision has to be made if I should continuous with this post or just drop it.
Also the moderator may put the post in a different spot. I don’t know if this is the right one.
Is there a spell checker some where?
Hilmar

DSC00304.jpg


DSC00313.jpg


DSC00311.jpg
 
Hi Hilmar,
I have done quite a few Stuart kits over the years and have found them to be quite well done. You're correct on the amount of stock for finishing but with judicious layout it gives you less to cut. The iron has always been a very close grain and machines great leaving very sharp edges. I have done other peoples castings and was much less impressed with the quality. I have seen very few Stuart triples over the years but they are something to see when completed.
gbritnell
 
I have only heard good things about stuart kits. . And have admired the triple expansion engines they a classic marine design. But they must run on steam compressed air does not cut it without a modification.
Tin
 
Hi Tin

What is with the modification?
Hilmar
 
Hilmar:
IIRC there is a couple of things you can do. It has to do with feeding the cylinders pressure 1 you can feed air to the largest cylinder and let the others run free or you can feed air direct to all cylinders . The double or triple expansion does not work with air.
Tin
 
Without getting too wordy, steam is a working gas, meaning it has life. When the slide valve shuts off the supply of steam it keeps working, therefore even though it has a reduced pressure coming out of the exhaust it still has life (or work) left in it and can be used to power one, two or even three more cylinders. On the other hand compressed air only works when the valve is open. Once the supply is shut off there is no more work. The problem with admitting air to every cylinder in a compound or triple expansion is that there is uneven pressure applied to the crankshaft becuause of the surface area of the pistons. Just for round numbers lets say that you have 30 lbs. of air applied to a 1 inch piston. The pressure on the piston would be 23.56 lbs. Now you take an 1.50 piston and the pressure would be 53 lbs. Although the engine would run it would be very erratic in perfomance. You could feed the largest cylinder only but it here again it wouldn't run very smoothly because it would be fighting the friction of all the other cylinders and their mechanisms and linkages.
gbritnell
 
I too have the Stuart triple kit. I haven't started on it yet, but one thing that I found has helped me when machining the cylenders from castings. I found that if I machine the valve face first, then I can drive a wooden plug into the cylender hole, (it's not a "bore" yet) :lol: and then us that to find the center of the bore from the valve face. mark it on the wooden plug, use that to center it on your lathe, drive the plug out and go to work.
 
Tin .
I understand what you where saying .
I was thinking there was a mechanical modification in print or so.

I have two print sets, one from 5/2/55 which came with the casting in the
late 60s.
The second set is dated 19 April 1977 by Willis. I don't know where it cam from. Could be from Coles in CA.
So fare I came up on two different Dimensions. A P.I.T.A. when you partly
in to machining it.

Gbritnell.
A good explanation. Also in real life a Triple Expansion is basically
like a single cylinder Not self starting. If the HP Cylinder is TDC it just sits there. Then the machinist had by change of valves get the steam in one of the other cylinders to get is off TDC.

I did some more work on the Triple.Pictures will be fort coming.
Also I have some more gadgets may be I should post them under Tools
Hilmar
 
HI
The valve is caled a "simpeling valve" as you say it feeds steam into the high pressure and nudges the thing off TDC. Most compound traction engines use the same idea. Or if your my mate paul and too tight to rebuild the valve on his Fowler you pull the flywheel round whilst standing on the motion!

Never had a problem with any stewart castings and im on my fourth engine.

make yourself a boiler and run it on steam nothing better and as stated before compunding wont work on air.

Steam is king! LOL
 
Some more photos from the Triple.
I am cutting the Piston Rods and Cross heads. Notice the Slitting Saw I am using.
It is for a portable Trim Saw. The Carbide blade I bought from Home Depot for about nine $$ and change. Cuts true metal like butter. The slot is 0.050” and clean.
Hilmar

DSC00392.jpg


DSC00393.jpg


DSC00394.jpg


DSC00396.jpg
 
Hi Hilmar, the engine is looking great - i like the slitting saw idea too


I'm also working on one. several years ago I came to the point of working on the steam pipes, got sidetracked and have been building tooling every since.

time to get back to working on the triple :D 
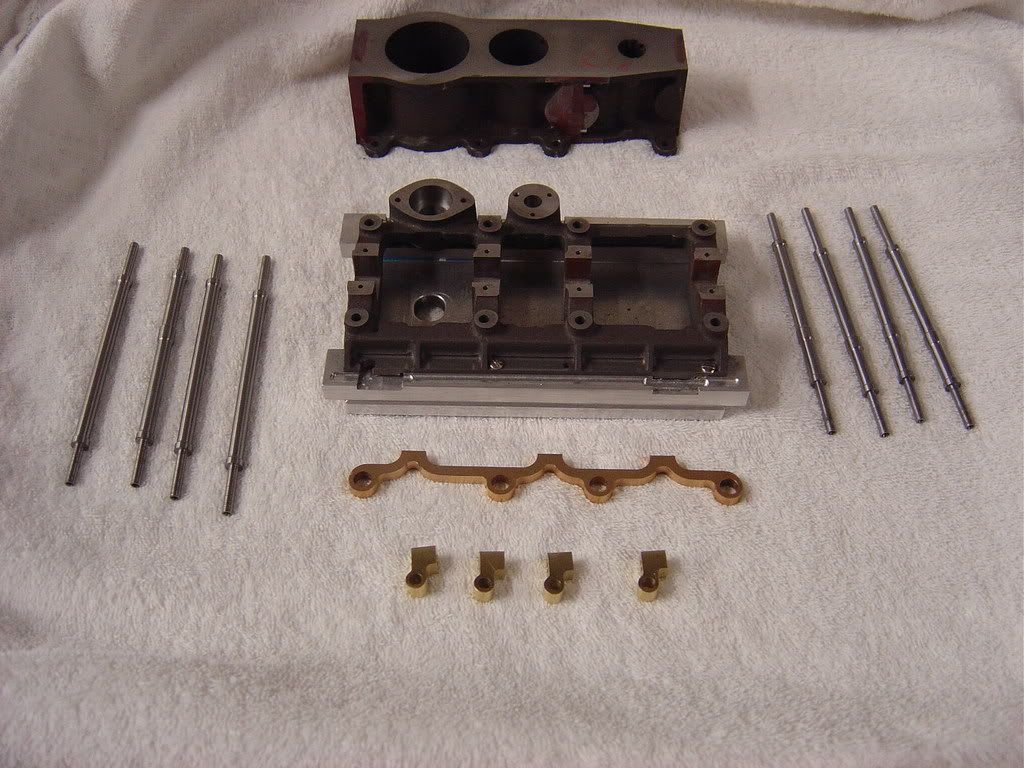
here's a pic of mine

http://i20.photobucket.com/albums/b201/michael0100/Stuart Triple Expansion/st2.jpg

what sort of port trouble are you having?
 
Mcgyver,
the castings had pits and holes in them. The valve ports had pits and where not parallel and also oversize. I will have to see how it works out. How did You finished the Crankshaft. One piece or put together. Also how do You make out with the two start thread for the reverse change?
Hilmar
 
that's too bad about the ports. i made the crank shaft from the solid, only way to go imo. The silver soldered fabrication that comes with the kit makes a better pretzel blank than crankshaft blank, its just too flimsy to work with. The crankshaft came out beautifully from the solid. I used free cutting steel to give myself a fighting chance. No, free cutting is not the best material for a crankshaft, but its a model not a lawn mower engine :D Also, I made the counterweights from steel. I had made them from the cast iron provided and first one i try to peen on split. dang. maybe that tip will save you some time

two start thread is still to be done, and it looks challenging. Current thinking is to make a progressive tap or several taps each taking out a percentage of thread depth. I want to get the torque on each down to a minimum. the taps won't have to be very long which helps. that said, i still expect it to be tricky, I've made taps but not that small.
 
Hilmar,
The way to go is to cut the multistart on the lathe, is is really easy to do if you just do it logically. It is just getting into a routine of dropping in on one threading dial number then repeating for the second start on another number before putting any more cut on. It is just done in equal stages, a bit off one start then a bit off the next. Don't try to cut one full start then attempt to cut the second, it just won't work properly.
I am sure that a man who has got as far as this on this build could easily tackle multi start threads. Practice on a bit of scrap first.
If you can make a multi start tap you can make the cut direct and cut out the middle bit.
I find it easier to make the cuts by not feeding onto the forward cutting face, but onto the reverse face, this takes all the pressure off the cutter and I end up with a much better multistart thread. That goes for both internal and external cutting.
But you do need your lathe running as slow as possible.

Mcgyver,
Still being sidetracked by your massive learning curve in electronics. Have you finished those damned flanges yet.

John
 
Hi
The better way o cut multi start is to set up your change wheels for twice the pitch required so lets say 10 TPI for a 5 TPI double start.

Cut the first start of the thread to depth and finish as a normal thread. Next advance the compound slide by half the 10TPI pitch and cut the next start.
Using the same number on the threading dial.

If your cutting a blind internal multi start it helps to have a stop on the bed or a bit of room at the bottom of teh bore for jiggle room. Best machine to use is a Hardinge but we are not all lucky enough to have one sadly.

Using different numbers on the thread dial can cause big errors in the thread and leave you lapping the nut to the bolt.

I still do a lot of these this way after my father laughed at my attempts 30 years ago.

Cheers Kevin
 
Mcgyver,
Still being sidetracked by your massive learning curve in electronics. Have you finished those damned flanges yet.

and the ball drops... hehe ... nope, not yet. almost got the spot welder done so i can make the enclosure for the bench top power supply so i can test the cnc so i can make the flanges . the process of learning electronics has been particularly effective at making me feel stupid. :D

on the multistart thread, imo the challenge isn't just that its multistart , it's that its 3/16". The tap idea occurred because trying to single point cut a 3/16 internal thread seemed masochistic. maybe I'm wrong though, knowing its 3/16 does that change your opinion or would you still single point it?

I do appreciate the good info on multistart threads.
 
Mcgyver,
Size doesn't really matter, both Kevin and myself have suggested different methods of doing it, it makes really no difference whether it is inside or outside threading, it's got to be done. Screwcutting it on the lathe is the way to go, either under power or if it is a bit too fast then a handle up the spindle or on the end of the leadscrew (preferable) will allow you to do it by manual power.
But I will tell you one thing, once you have done it you will wonder what all the fuss and worry was about. It is really no different than cutting normal threads, you just have to be aware of what you are doing all the time.
There are other ways to do it but the cost is very prohibitive. Like getting taps and dies made by a third party, having a dividing head on your miller connected to the lead screw of the table. If you had your cnc running maybe you could have done it with a 4th axis running on a rotary table. But I don't know how you would do the internal threading. Maybe that will delay it a bit longer while you sort that out. :lol:

John
 
Mcgyver,
I must have a different kit. There is no silver soldered crank shaft in my kid; it is a one piece blank cut partly out. Some times I think that I do not have a Stuart kid but a fake. On the ports I am thinking about to mill the whole thing out and insert one plate with the ports cut correctly. Not sure what material to use. On my print, the multi start thread calls for a
" 3/16 x 20 T.P.I. 2 start thread "
That should be 2x 10 TPI out 180° I hope this is correct?

Bogstandart

I find it easier to make the cuts by not feeding onto the forward cutting face, but onto the reverse face,
I don't get it. Do you talking about a rear tool post? Could you please explain that for me?

Hilmar
 
Hi Hilmar,
What I am on about when cutting on the back face.
When you cut a normal 60deg thread you set the compound slide to 29.5deg and when the cut is put on the compound is wound forwards. On a multistart thread, because of the fast forward motion a high force is exerted onto the front face of the cutting tool, to such an extent the gears or holding bolts or the cutter can break. That is why it is recommended to move the lathe with a handwheel on the leadscrew, this reduces most of the heavy forces on the gear train. In your case this doesn't really come into it because of the small sizes involved, but because of the small size of the cutter this can easily break or dig in badly. So you put the cut using the compound onto the rear cutting face by screwing backwards, by doing this it relieves a lot of the force on the cutter.
Once you have the machine set up and the technique perfected it will most probably take less than 30 mins to cut your threads, both inside and out.

John
 

Latest posts

Back
Top