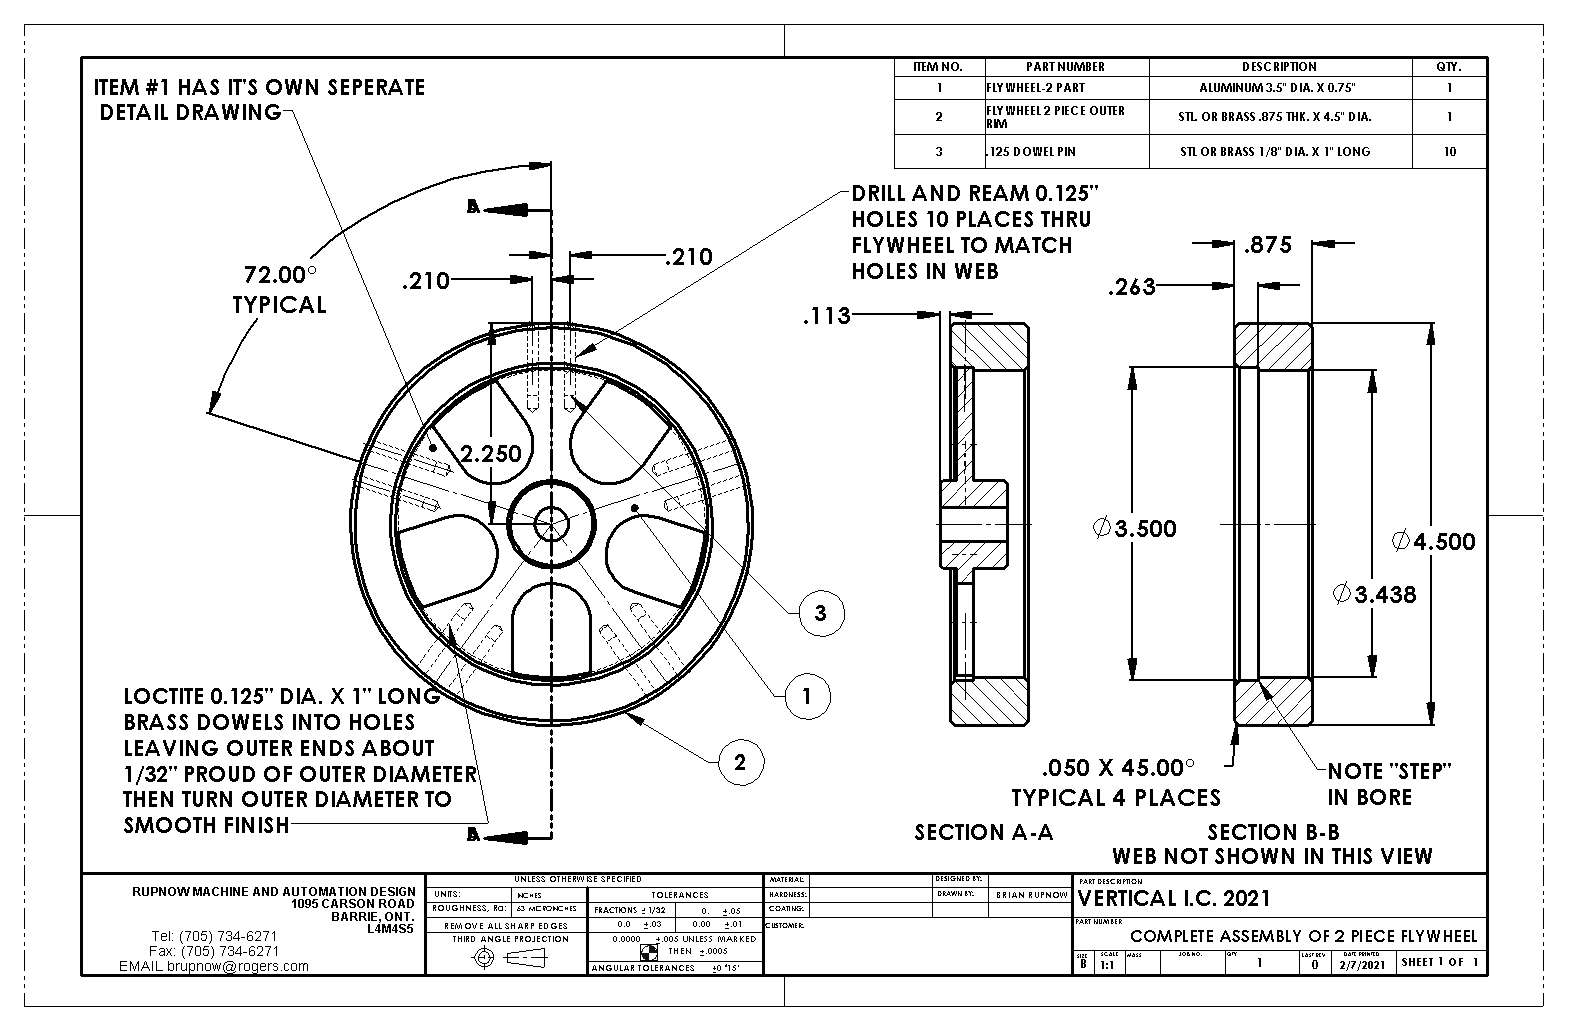
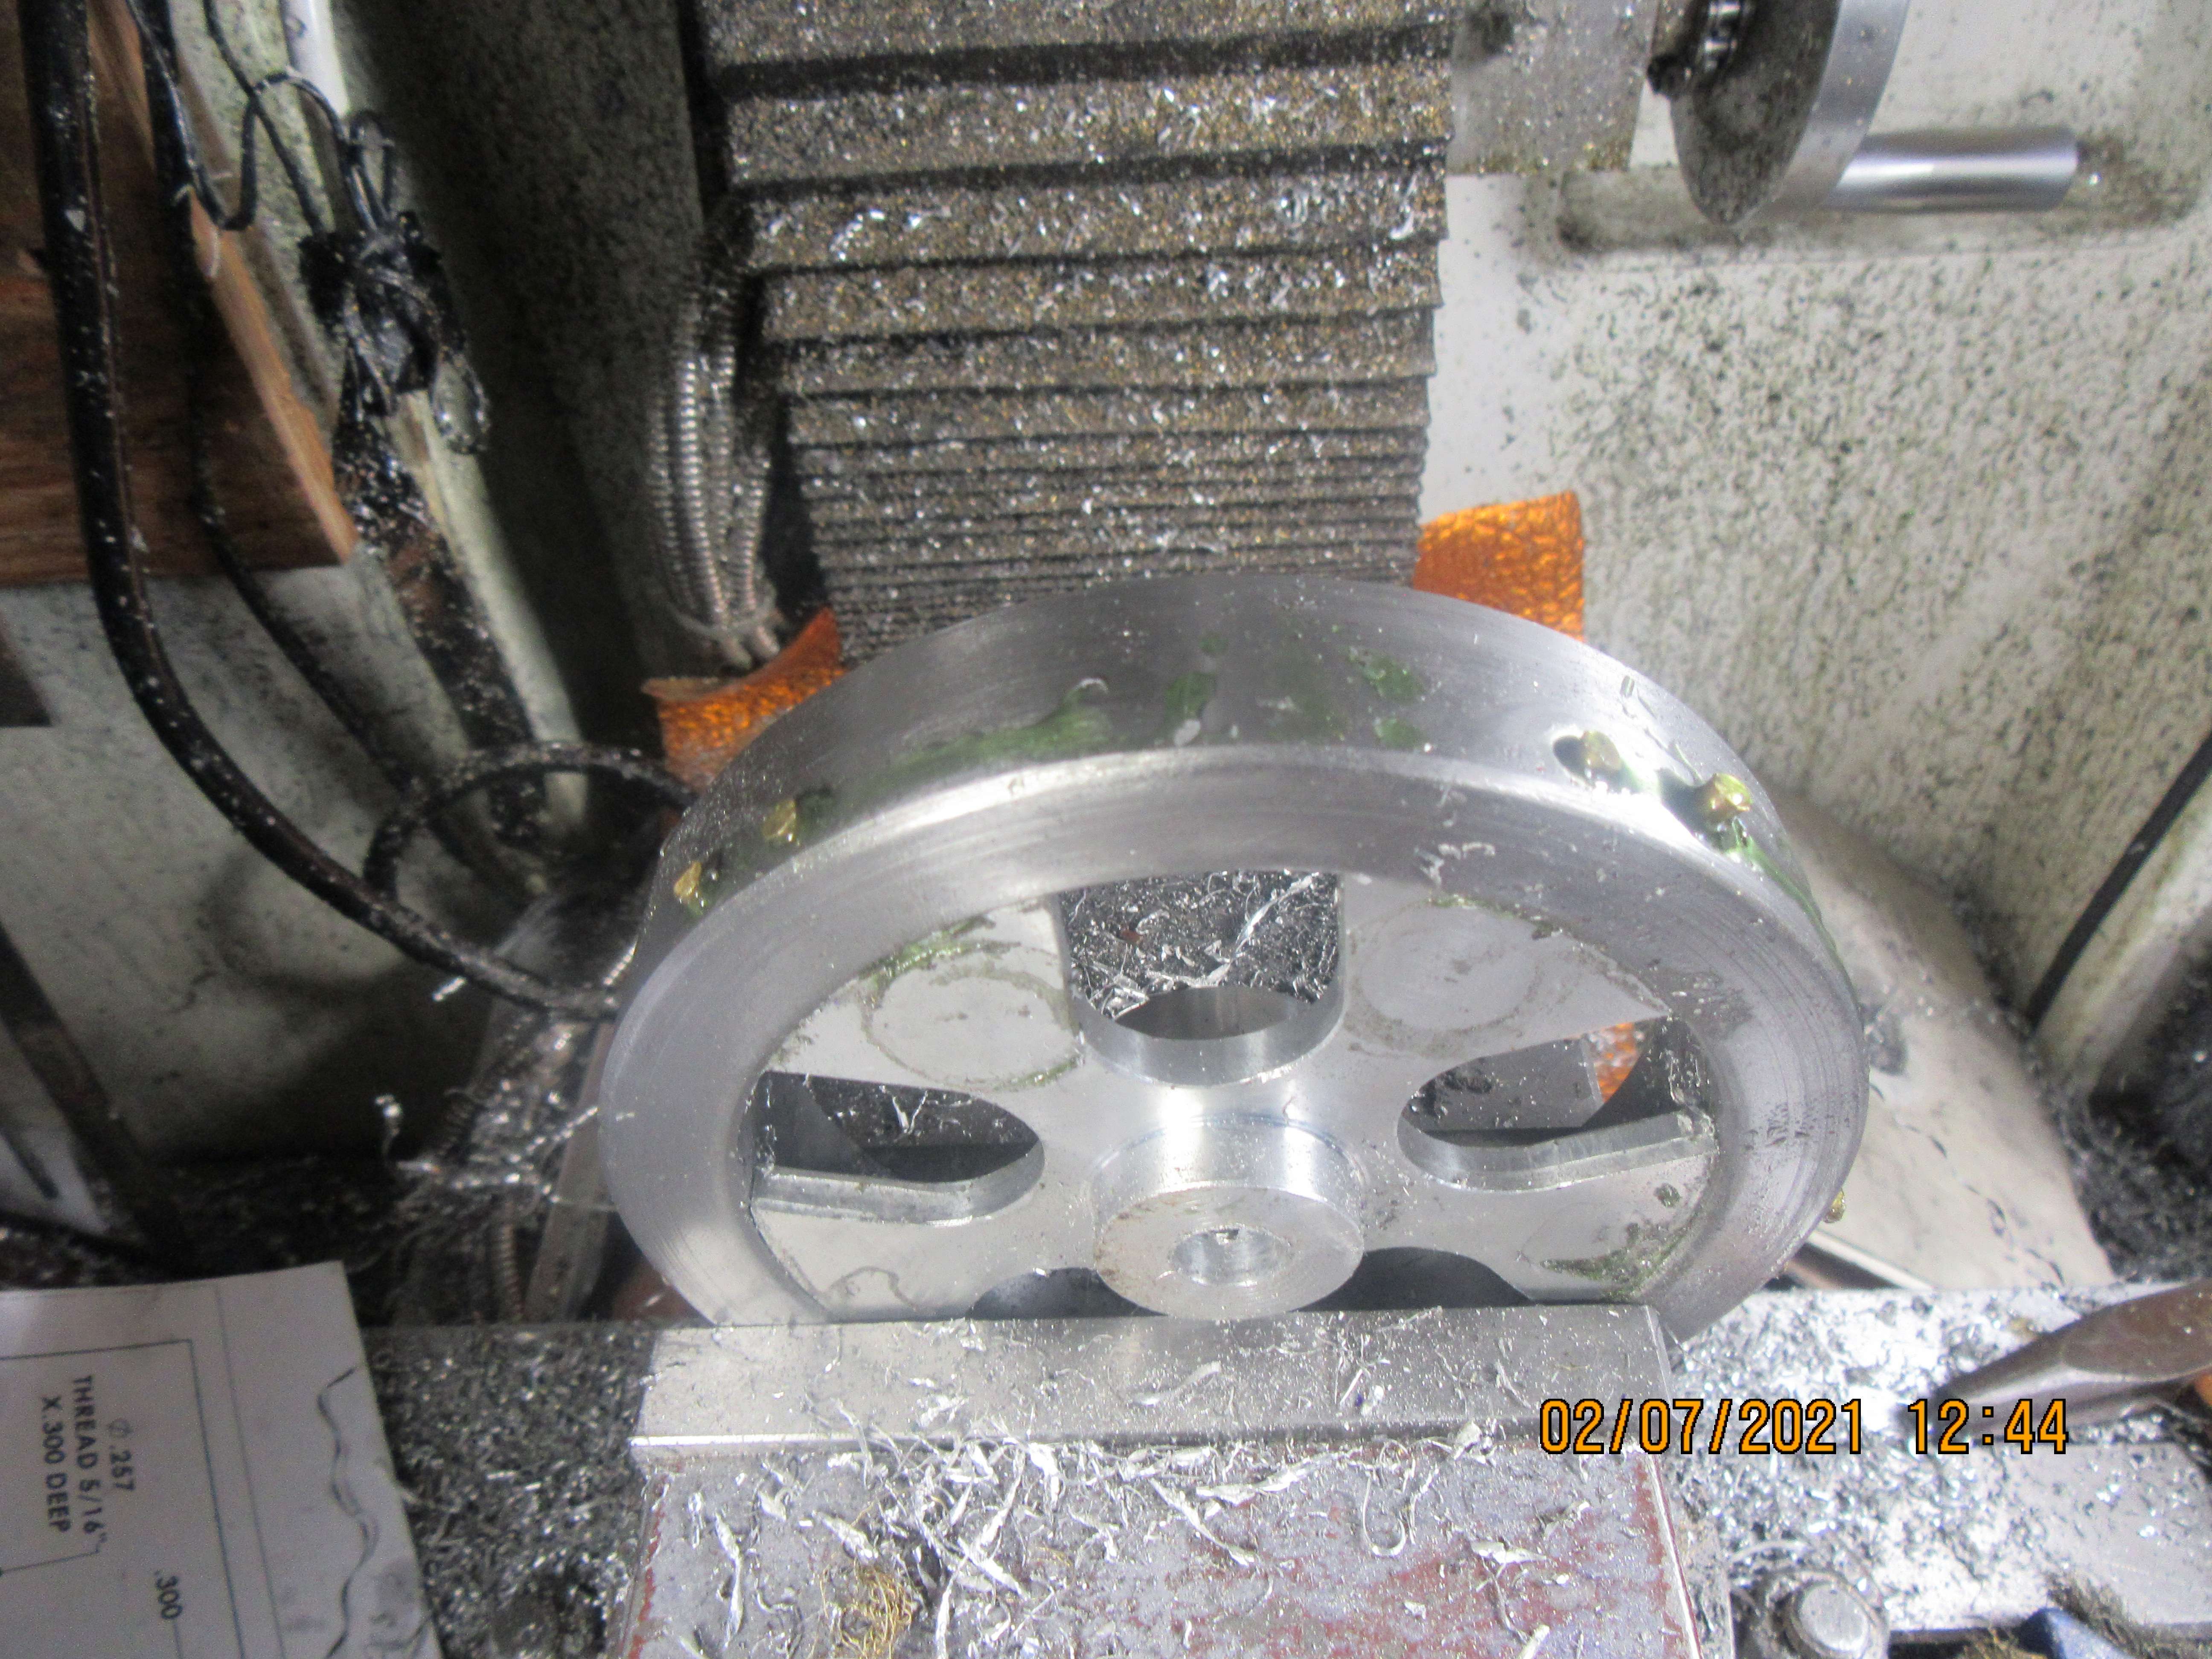
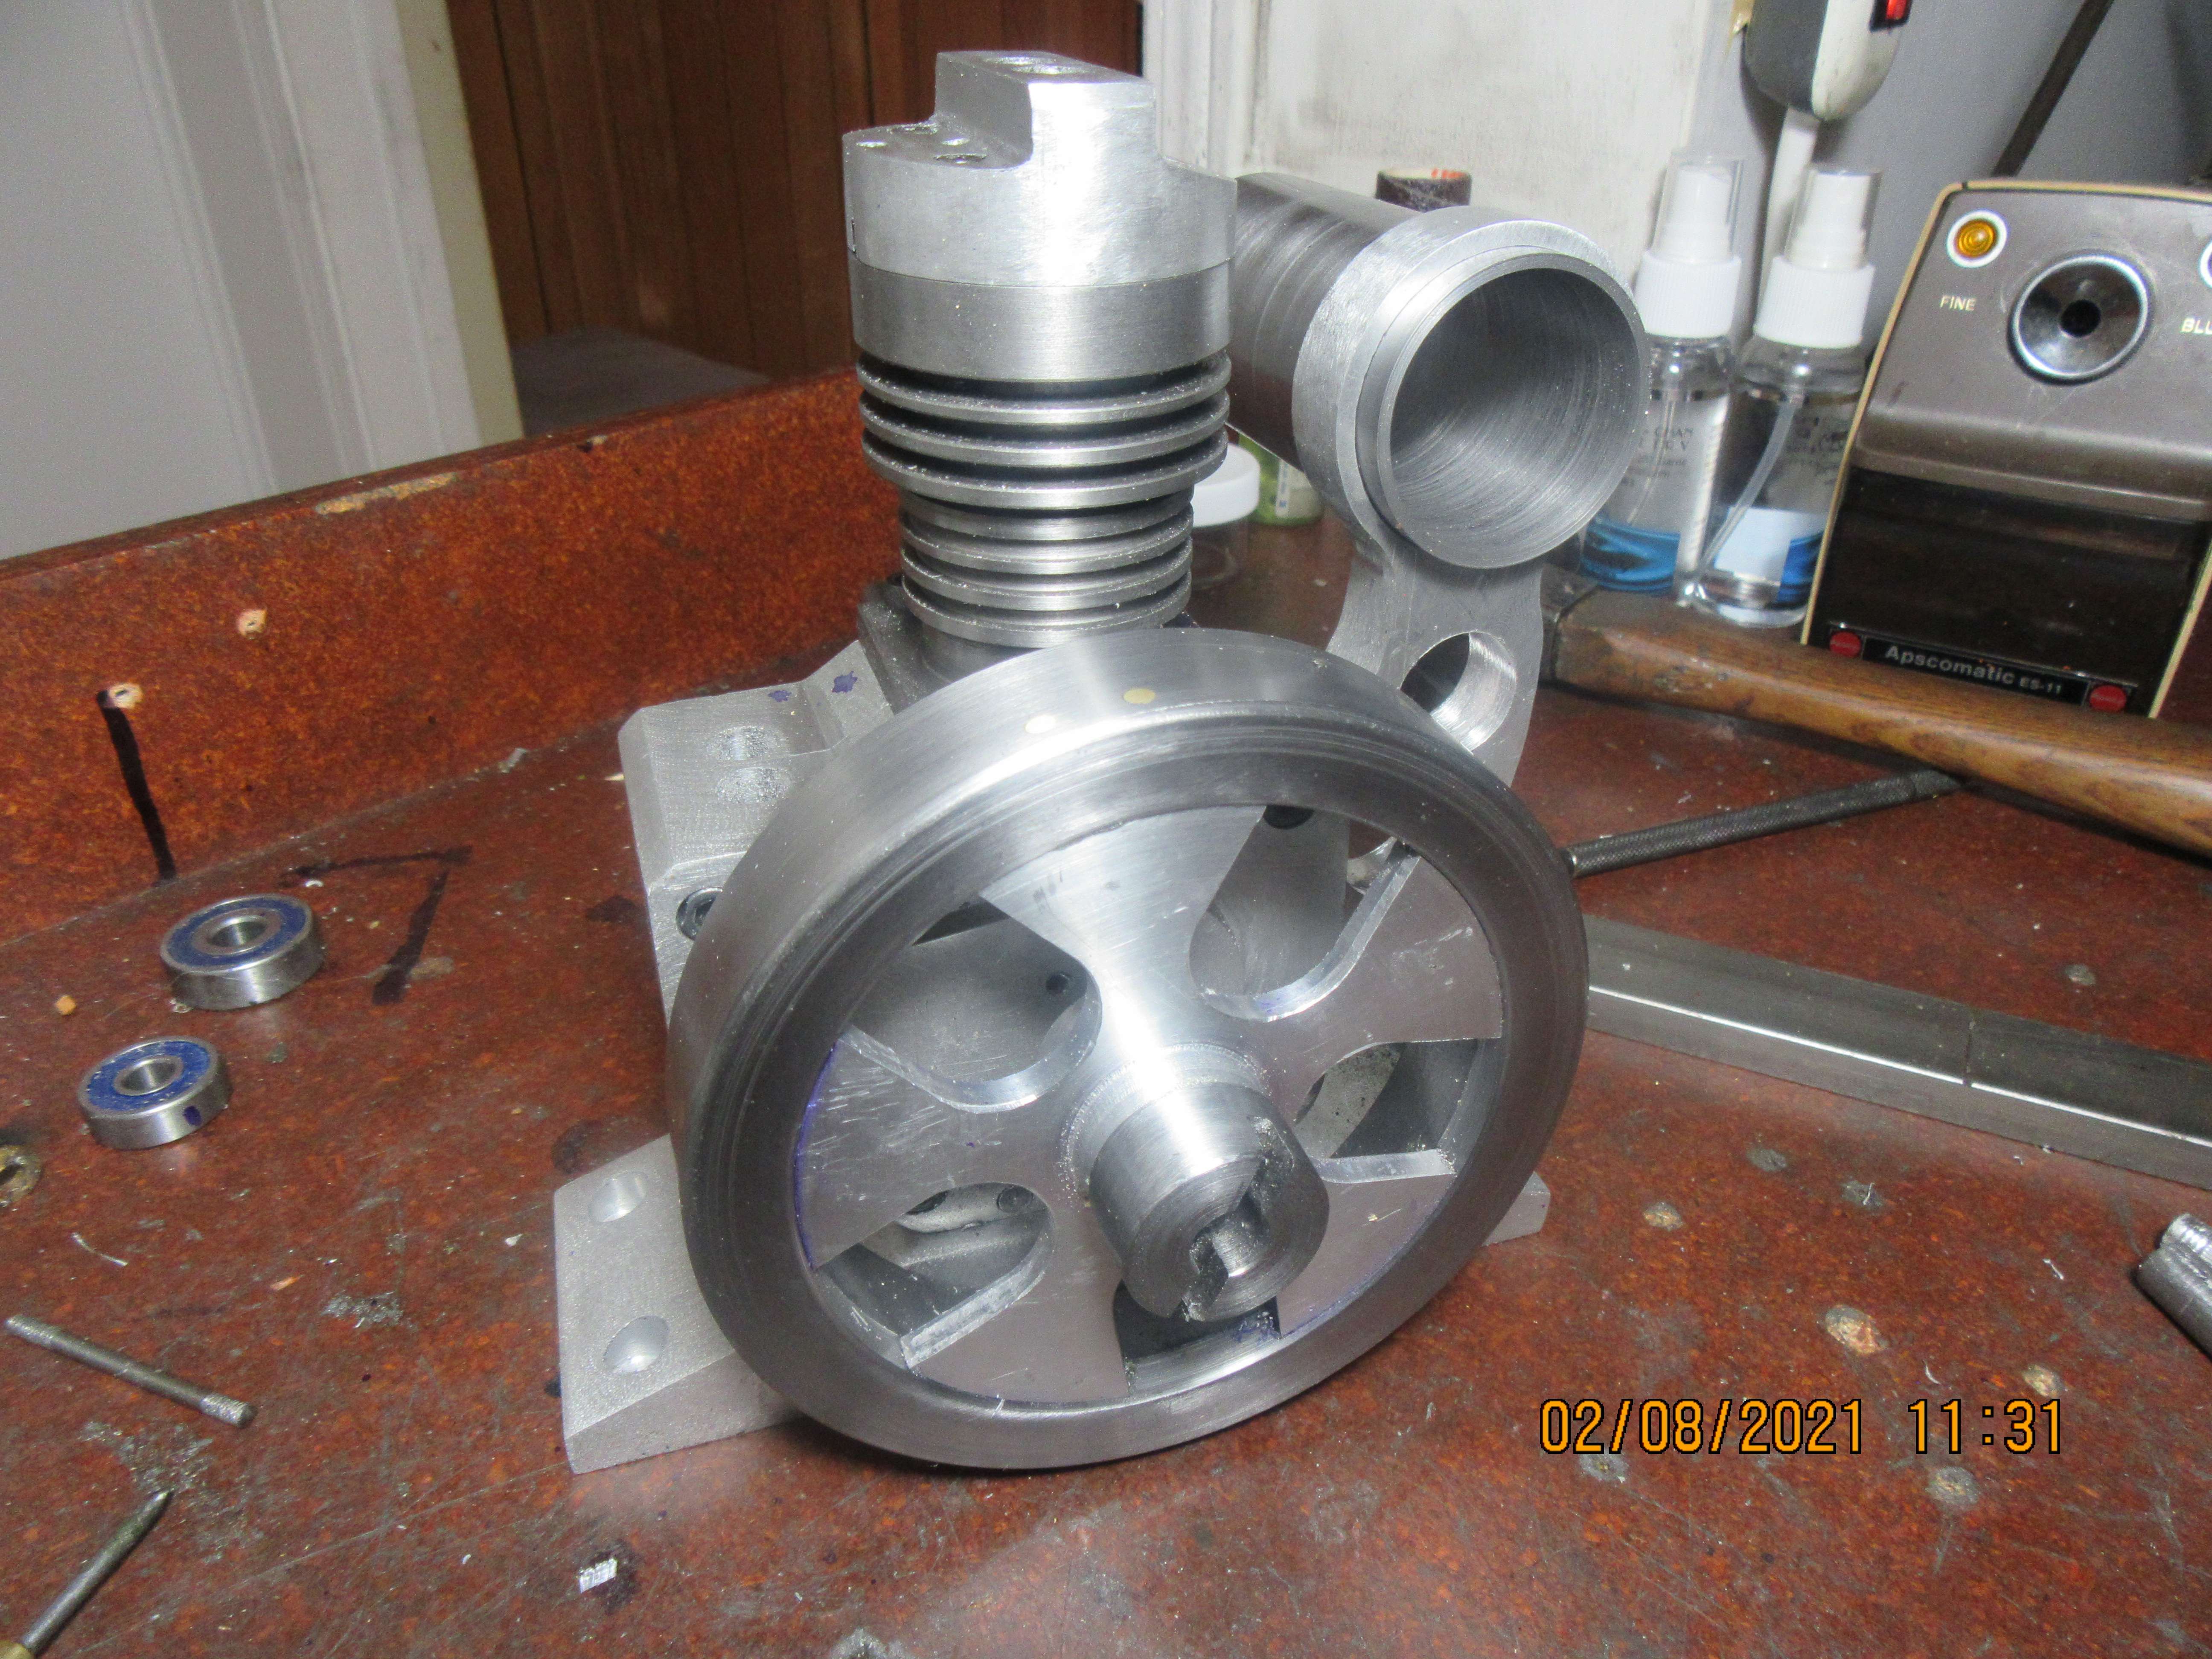
And what exciting things are in store for tomorrow??---A big clean up to get all of the cast iron dust and chips off my lathe and mill. Nasty, nasty stuff!!! I may work up enough energy to pin the spokes in the flywheel with a piece of brass rod I bought, but no seven hour thrash like today.