Old School Sawmill Edger

Home Model Engine Machinist Forum

Help Support Home Model Engine Machinist Forum:

This site may earn a commission from merchant affiliate links, including eBay, Amazon, and others.
Yup, either a mechanical "reverser" like you show, or just use a couple of long drive belts with one of them twisted 180° to change the rotation. They would have had enough distance between the pulleys that twisting the belt is probably the way it would have been done back in those days.

Don
 
Since I am running double or triple o-ring drive belts, twisting them might work but it's simple to add in a reverse gear. now the rollers under the board and the sawblades are rotating in different directions.
eaMAM7.jpg
 
Brian, I may be wrong here but if you arrange your feed rollers to feed on the top of your boards would that do away with a reverser ?

Mike.
 
Yes Mike, it would. I'm just trying to keep the same configuration as I've watched on a dozen YouTube videos about sawmill edgers.---Brian
 
I suggest you look for the machine you plan to build on vintagemachenery.org. kieth has many of the original plan for belt driven machines.

Cheers.
Andrew in Melbourne
 
I actually did some real work today. I can buy the 12 tooth sprockets dirt cheap from the local Princess Auto, but they have no hub. First job is to make hubs for them. The material in those hubs was supposed to be cold rolled steel, but it machined a lot like 12L14. It seems to take brazing all right--I'll find out when I clean everything up.
0vVqvc.jpg
 
12l14 brazes just fine Brian in my experience. I used that for the bj cicada engine to braze on the carb bung to the side as per plans. I did 3 different cylinders worth of them. they all brazed nicely (engine didn't run but not because of that). have also done some other brazing on it for a head light bar for my tractor and its held up with tree limbs and everthing else dragging across and smacking it for several years now.

one thing I will note is when heating 12l14 really hot I see what looks like little beads of sweat. little tiny ones. I feel like this is the lead melting in it but still never hurt anything Ive silver soldered on.

another thing is 12l14 rusts like crazy.
 
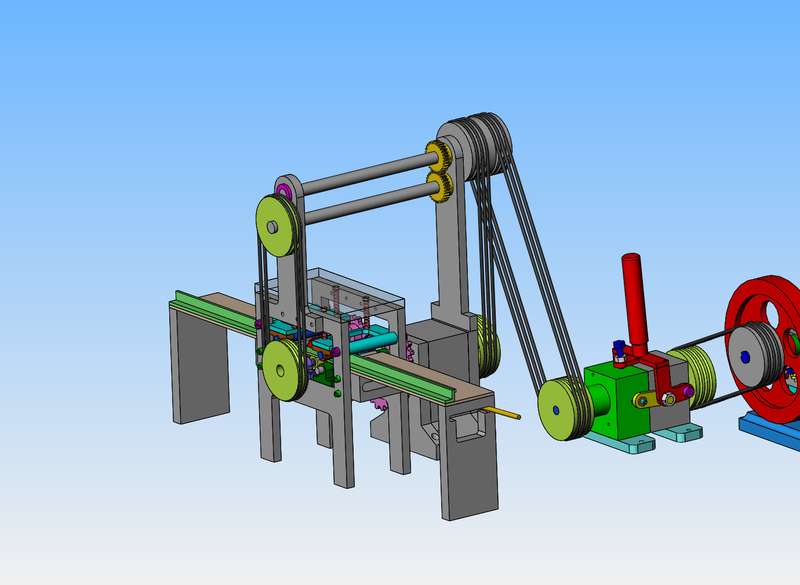
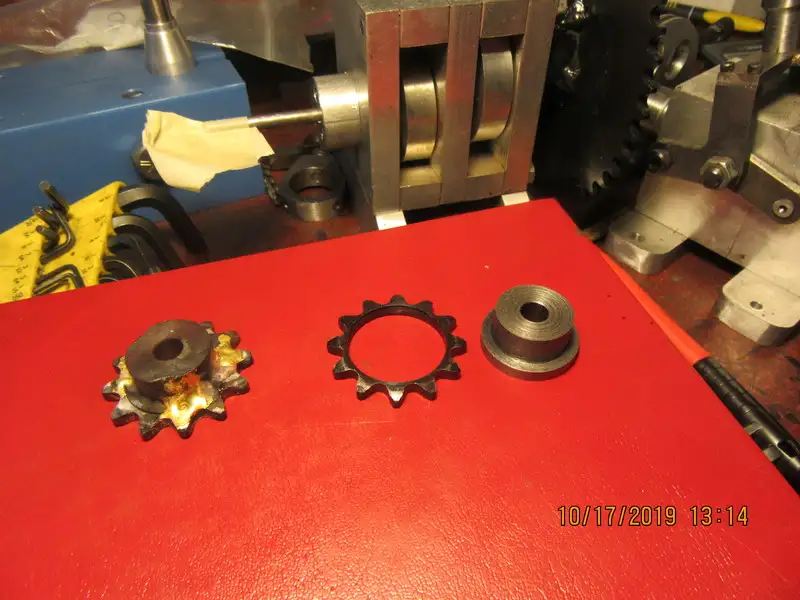
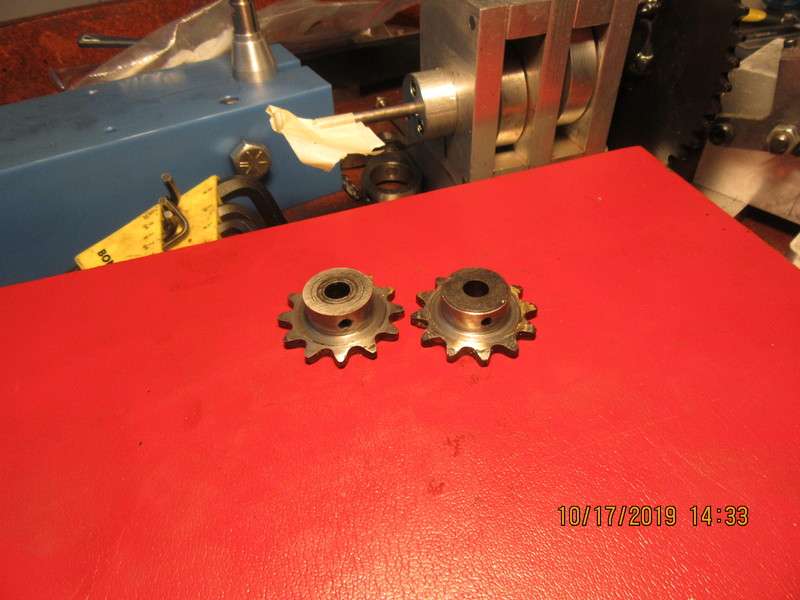
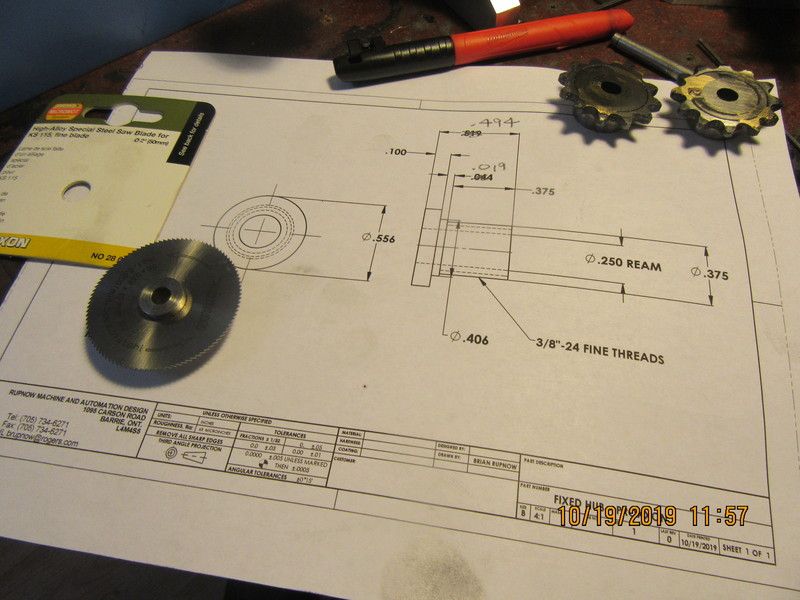
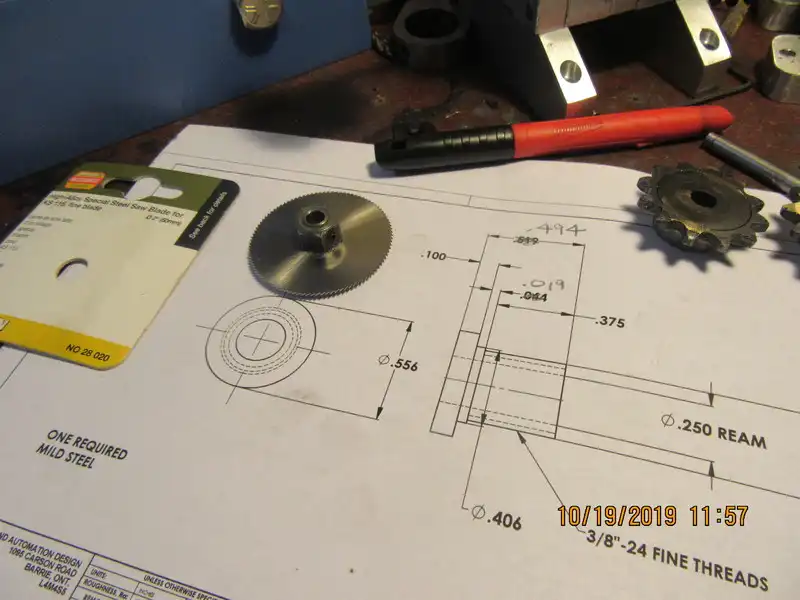
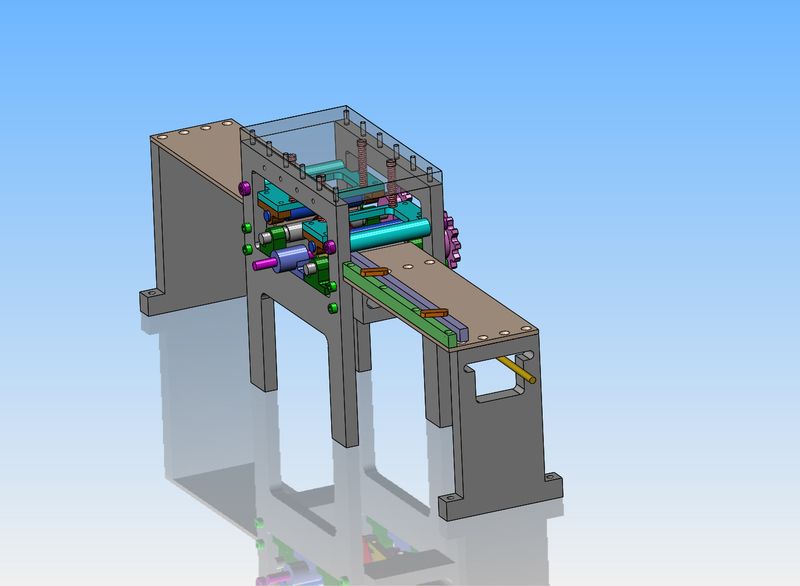
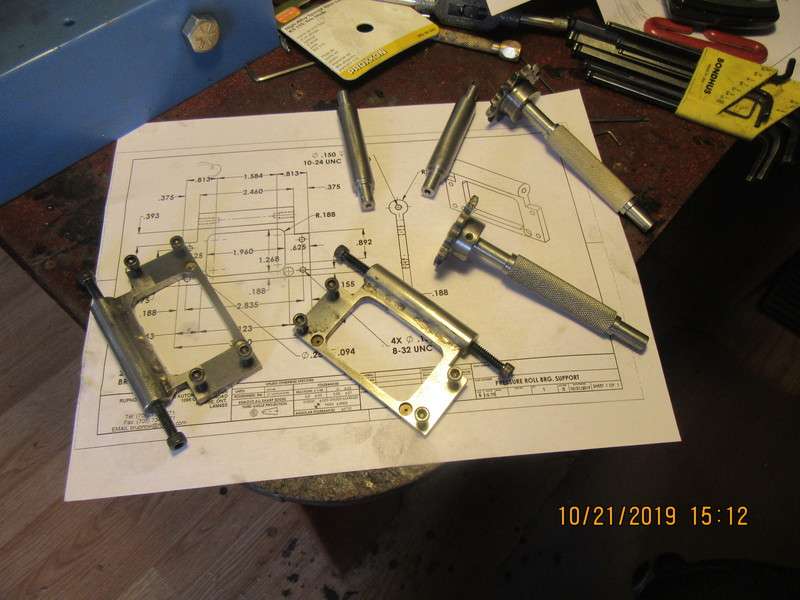
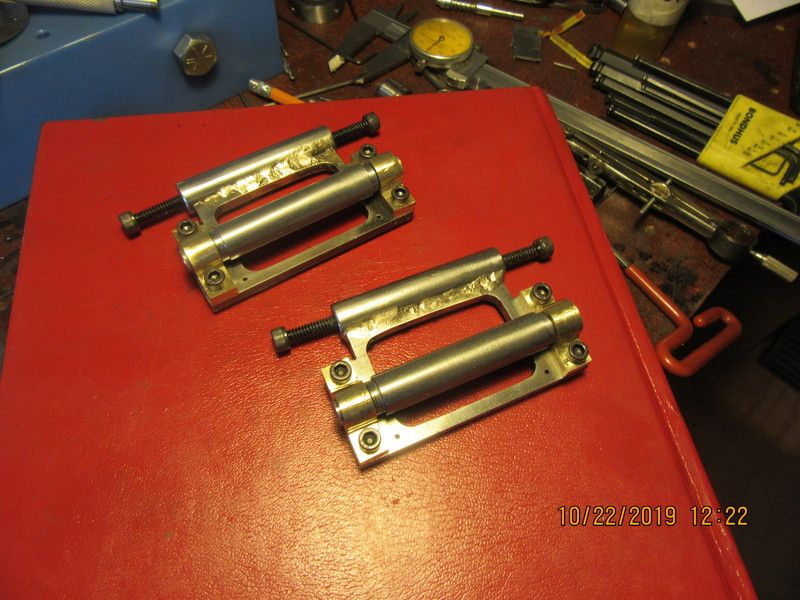
Drove up north to see my 99 year old mom today, and made a side trip on my way back to see my best friend forever who had a stroke. Mom is okay, but has dropped a lot of her memories. Best friend, who is the same age as me had a bad stroke, was in hospital for three weeks and come home yesterday. He has no lasting physical effects, but has aphasia. He can't speak, can't spell, but can understand when others speak to him. He was very frustrated today, trying to tell me things but couldn't speak. He can get a few words out, and I'm sure that over the winter he will regain most of his speaking ability. One of my 2" diameter Proxxon saw-blades was delivered today, other is on back order. It is very sharp, but has no "offset" to the teeth at all. I really wish I had access to small inexpensive toothed belts and pulleys, but since I don't I will use O-rings instead.
 
First trick of the day was to make a hub for the sawblade so I can test it and see if it cuts. I made the hub as shown in the picture, then found a 3/8" fine thread nut and locked it up tight against the saw blade. I used some 638 Loctite on the threads. Then I drilled and tapped #6-32 thru the nut and the machined hub for a set-screw to lock the hub onto the saw shaft. Next trick will be to set the blade up on something to see if it does cut the boards from my sawmill.
eWXfIW.jpg

0FSYeU.jpg
 
I'm going to have to spend some money tomorrow. I want all the pillow block bearings (bushings) to be a contrasting color. If I was planning on edging a hundred board feet a day, I would definitely make them all from bronze. For the sake of a model, I can probably get away with brass.
 
I've learned more about sawmill edgers in the last week than I ever have in my life!! One of the things all edgers have in common is an adjustable fence on the infeed fence. The setting of the moveable portion of infeed fence is to allow wider or narrower edgings from the side of the board.--for instance if you have a rough sawn board with a big bark inclusion on the side, you can adjust the moveable fence to cut a wider edging than normal.
5dTDTM.jpg
 
Today I made the two spring loaded brackets which support the pressure roll bearings. They don't look that involved, but I've managed to spend the entire day building them.
ZAEaUi.jpg
 
So far today I've managed to whittle out four "pillow blocks" for mounting the pressure rolls. They still need to be polished to remove any remaining machining marks. They are made from brass, which will work fine, since this edger when finished isn't going to see a lot of hours. On average it is taking about 1 hour per pillow block, which sounds ridiculous, but it is what it is.
nsFaCc.jpg
 
Back
Top