Verical hit and miss engine

Home Model Engine Machinist Forum

Help Support Home Model Engine Machinist Forum:

This site may earn a commission from merchant affiliate links, including eBay, Amazon, and others.
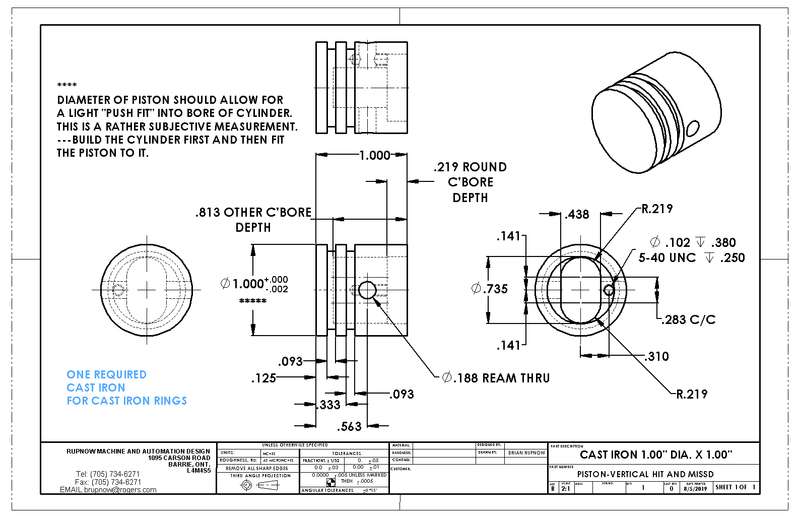
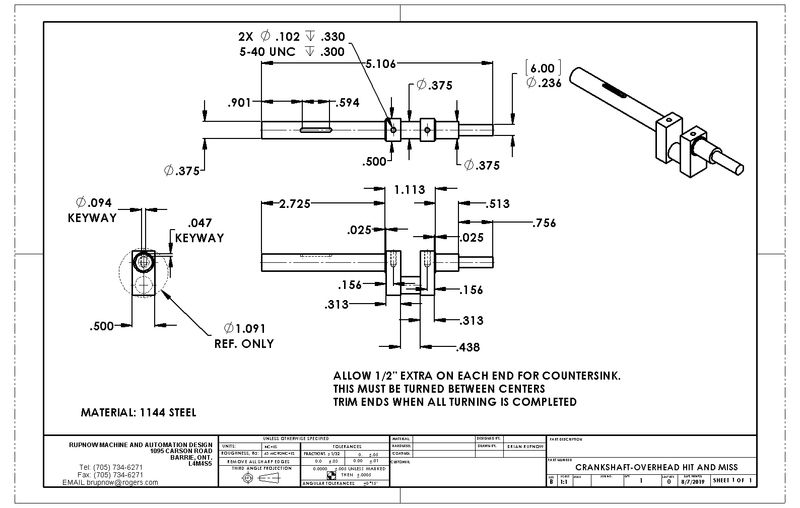
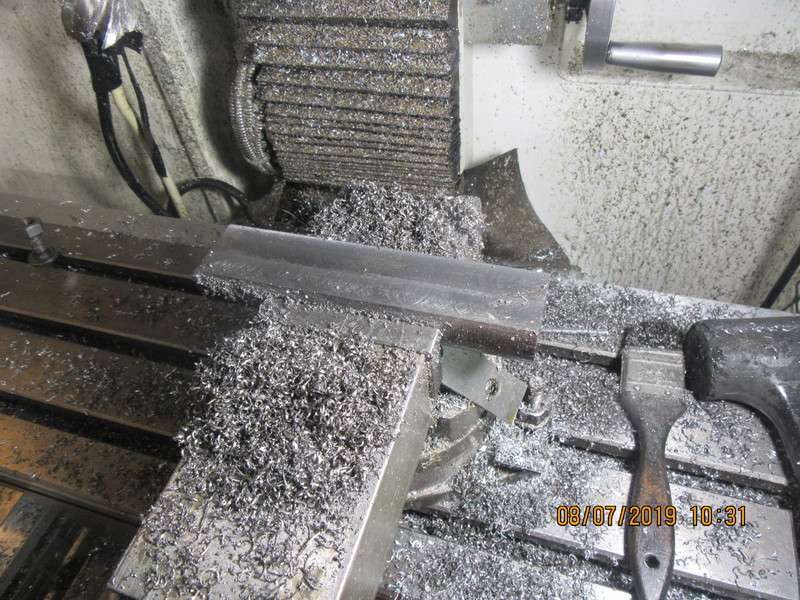
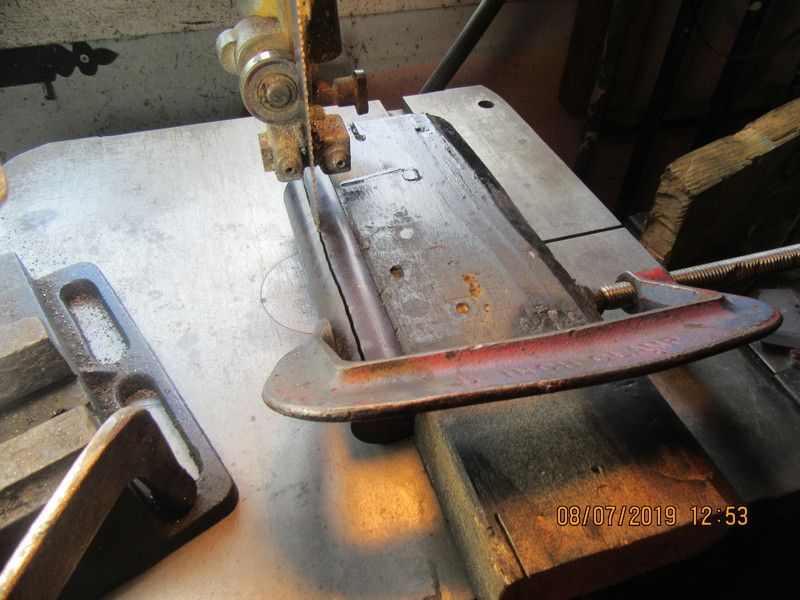
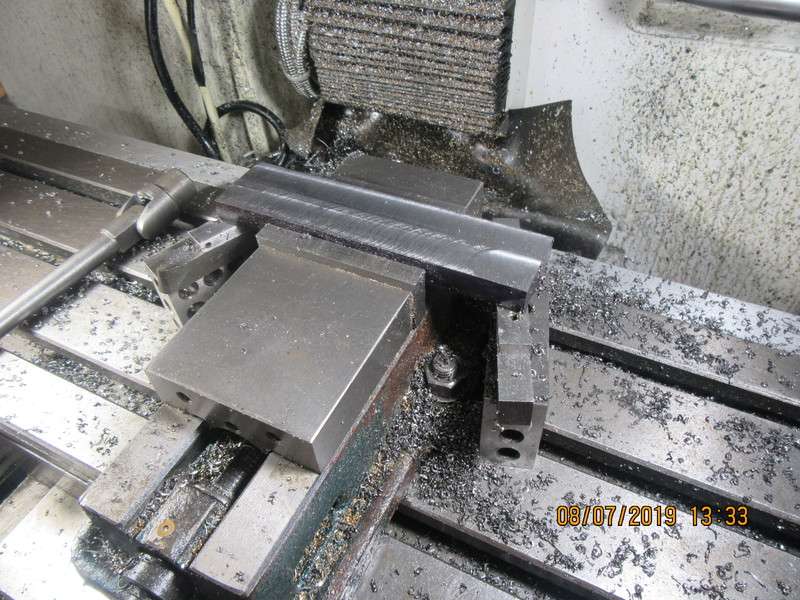
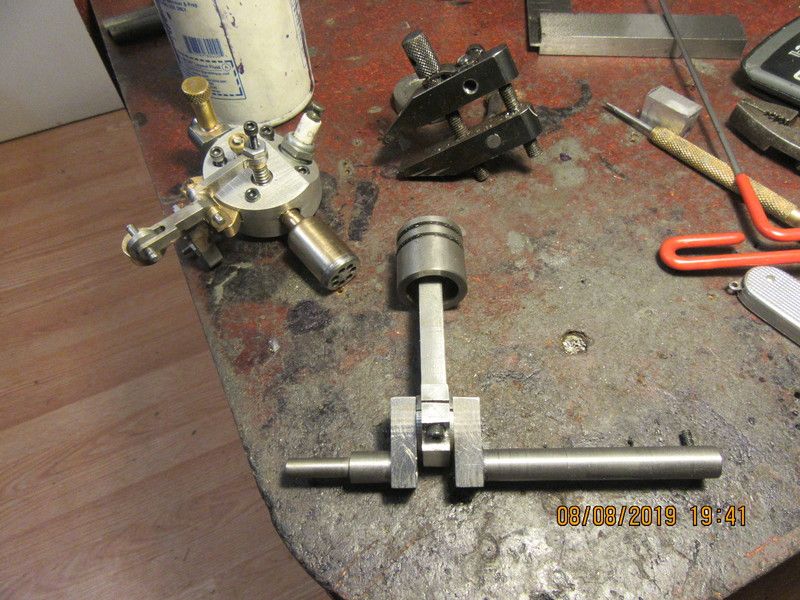
Today I deposited some mig weld on the short end of the lockout lever and filed it to shape. It now will swing under the rocker arm when it is "up" on the cam lobe, but not under it when it is "down" on the cam lobe. This is exactly what I wanted to achieve, so will be moving on to the piston tomorrow. I have been in a terrible fight with my computer all day. I bought an external hard drive to back everything up on my computer and plan on keeping it in my safety deposit box at the bank. Somehow this has affected my email, and it isn't working right. I've had two trips up to the computer shop today--no joy. I guess that I will call in "Geeks on wheels" this week and have them figure out what the heck is going on. And--Good news--You have no doubt heard me talking about my "Fat man's walk". After getting a too high blood sugar count in mid May, I decided to lose 50 pounds. My target is to lose it by sometime in November. Sixteenth of August is the half way mark in time between mid May and the end of November, and I have lost 25 pounds as of today.
 
Last edited:
hello brian thanks . el paso is a great town once they got rid of the problems. people here are very helpfull and nice. thanks again
 
Today we're off and running with a piston. I have decided to use cast iron rings on this engine, so the ring grooves are what was recommended by the ring supplier. I had hoped that there would be enough room on the piston to put in a groove for a Viton o-ring, (In case I couldn't get the cast iron rings to seal). Unfortunately, there isn't enough room.
MTjjxK.jpg
 
So here I am, using up a butt end of cast iron that was originally part of a longer piece which was used for an air cooled cylinder. The o.d. has been turned and polished with 200 grit sanding strips, until it "just about" slides into the cylinder (which you can see setting on the lathe bed). It actually just starts to enter the cylinder but won't slide all the way in. the round counterbore has been put in in this set up, and next step will be to cut the two ring grooves, still in that same set-up. Then the piston will be parted off for other operations.--Have also included a pic of the engine without cylinder on it.
0nKbip.jpg

M4xSSt.jpg
 
This is the finished piston fitted to an arbor and held in the lathe chuck. The piston is coated with 600 grit aluminum oxide paste and with the lathe set on its lowest speed (Which is really quite slow) the cylinder is gradually worked back and forth until the entire piston will fit thru the cylinder. This is not for the faint of heart. You have to be able to let go of the cylinder very quickly if it "grabs", then stop the lathe and work the cylinder loose before starting again. This makes an extremely good fit between piston and cylinder. The method works very well, and it doesn't take very long at all.
Nagg0r.jpg
 
Brian, I'm curious as to why you're lapping the piston to the bore if you plan on using rings? I'm thinking that if your lapped fit is good enough you won't need the rings and I would assume if it's not a good enough fit, the lapping process will make the bore so smooth that the cast iron rings won't be able to bed-in well enough to achieve a proper seal.

Again it's more intuition thank actual knowledge, but I would guess full contact of a lapped piston would also have a lot more drag than a more traditional fit with the rings doing the sealing and would give you a 'free-er' turning engine and potentially more misses between hits. Just my thoughts, I could be wrong.
 
Today was con-rod day at the Rupnow Ranch. Cast iron piston from yesterday, 6061 aluminum con rod from today. I have found that the rings I purchased (and which call for a 0.094" wide slot in the piston) are such a very very close fit into a 0.094" slot that tomorrow I will put a bit of 600 compound on a sheet of glass that I save for things like this, and "dress" the width of the rings just a tad.
EVGzCG.jpg
 
There comes a point in every build where one must machine the horriblest, awfullest scariest part. And that for me is the crankshaft. I have made any number of these one piece crankshafts, using 1144 stress-proof steel. Some turned out perfect. Sone turned out mediocre, and some were downright awful! I put the same amount of care and breath holding into every one I make, but the results are never consistent. Far as I know, the only things left to machine are the crankshafts and counterweights, so here we go--
DUat3Z.jpg
 
First step with crankshaft is to cut it to length (allowing 1/2" extra at each end where it will be center-drilled.) Second step was to set it up in the three jaw lathe chuck and square up the ends. Third step was to set it up in the vice, paying particular attention that it is setting parallel to the bed of the milling machine. The material is 1 1/2" diameter, but the crank has a maximum width of 1/2" at the crank throws, so 1/2" of material was machined away. Trust me, at 0.015" depth of cut, that's a lot of travelling back and forth.
3ee6VV.jpg
 
Now that you have one truly flat milled side on the round piece of round 1144 steel, you can scribe a line 1/2" over onto the uncut portion and clamp it to a piece of wooden 2 x 4. Then cutting "close to the line" you can cut off a lot of the excess material with the bandsaw, then finish up in the milling machine, to end up with a piece of flatbar.
uHmjH5.jpg
 
And here we are, finishing up that rough sawn side on the mill. Note the way the part is supported on dolly blocks at both ends and is not supported by the vice at all. This ensures that when milled to finished size, the two sides will be perfectly parallel. All the vice is doing is providing gripping power so the part doesn't move. Tighten vice lightly, whack each end of part to make it lay flat against the dolly blocks. Tighten vice some more, whack the part some more. When vice is fully tightened and dolly blocks are held tightly against mill table by overhanging ends of part, then its time to start milling.
Fmhoig.jpg
 
So here we are, all ready to rock and roll. The cad model shows the crankshaft overlayed on the material which it will be cut from. The crankshaft will actually be 1/2" longer at both ends to match up with the raw material. Then it will be trimmed to length after all turning is completed to get rid of the countersunk ends. The picture shows the 1144 stress proof all ready to go into the lathe. I am going to spend some time tomorrow making a new lathe dog that doesn't rattle back and forth between the chuck jaws. That scares the Hell out of me.
nUhky6.jpg

684dr4.jpg
 
First section of crankshaft is turned between centers. I kept checking it with my con rod until I was happy with the fit. Last evening I had all kinds of ideas for a new, super duper lathe dog that would fit on both sides of a chuck jaw. This morning I looked at what I had, and decided to just drill and tap another 1/4"-20 hole in the opposite side of the machinists clamp. Now I have a bolt setting on each side of a chuck jaw, so it doesn't rattle back and forth between chuck jaws. Works great!!!
mwe2ef.jpg

yWqtDe.jpg
 
Yes, I drilled them while the crankshaft was held in the milling vice, on the mill.
So there we have it gentlemen--a crankshaft at 95% finished. I still have to trim the ends and do a little clean-up, but that is a full days work. I really liked the way my new improved lathe dog worked. Now my back hurts from standing at the lathe all day, and I still have to go for my "fat mans walk". That blob in the center is a spacer glued in place with hot melt glue to keep the center gap from closing up when I tighten the tailstock center.
bleqgh.jpg
 
The crankshaft is finished except for the keyway, which I will probably cut tomorrow. The main thing that I don't like about turning between centers, is that you can't readily check the size you've turned to by sliding the bearing over the shaft. You just keep checking with your micrometer and praying you don't turn undersize. In a perfect world, I like to leave about 1/2 a thou on the shaft and take that down with 200 grit carborundum paper. In this case, I must have guessed right, because a 3/8" bearing will just start to slide onto the shaft ends. A bit of sanding should bring things right. 1144 stress-proof steel does move a little when machined. Not anywhere near as much as cold rolled or even A36 steel, but it still moves some. The crank as shown has about .010" total indicated run-out. If that poses any problem when I assemble the engine, I will set one end up in the 3 jaw chuck and whack it with a dead blow hammer. These little one piece crankshafts are amazingly flexible.
Nvr5ZT.jpg
 

Latest posts

Back
Top