Corliss Engine Build

Home Model Engine Machinist Forum

Help Support Home Model Engine Machinist Forum:

This site may earn a commission from merchant affiliate links, including eBay, Amazon, and others.
Joined
Oct 20, 2010
Messages
913
Reaction score
132
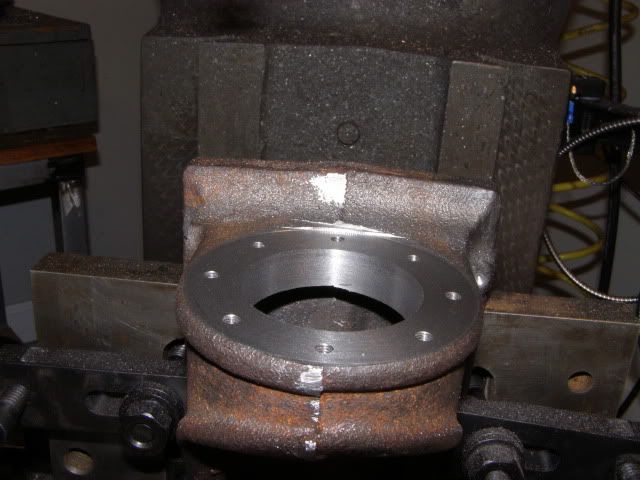
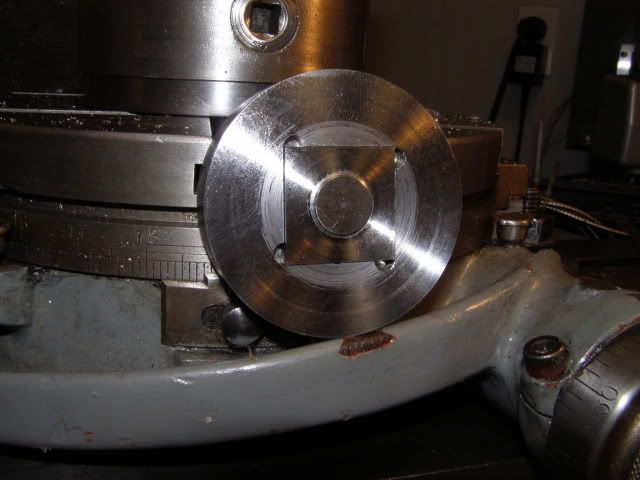
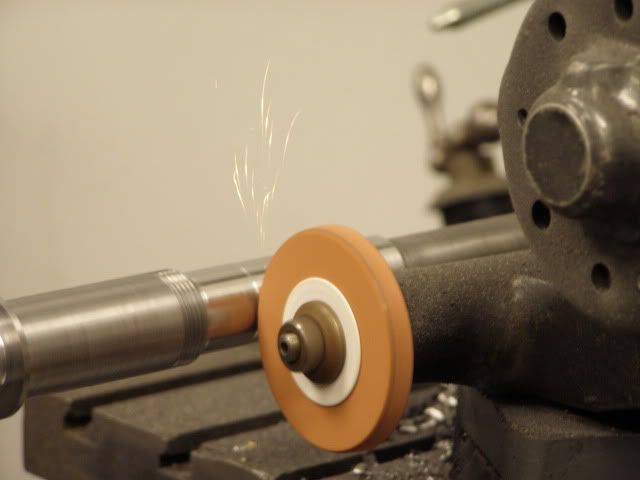
This will be my first model engine build, and rather than something simple, I thought a more challenging project would be right. So the casting arrived and appear to be nice material. Having turned some crap chinese cast iron back plates, I didn't know what to expect from these castings, the seller said they were cast USA but who knows. The first thing was to check out the flywheel, mounted it in the Monarch and give it a spin, the material cut beautifuly, nice finish no divots. After squaring up the surfaces, it was put in the drawer with the other iron lumps.

octphoto10054.jpg


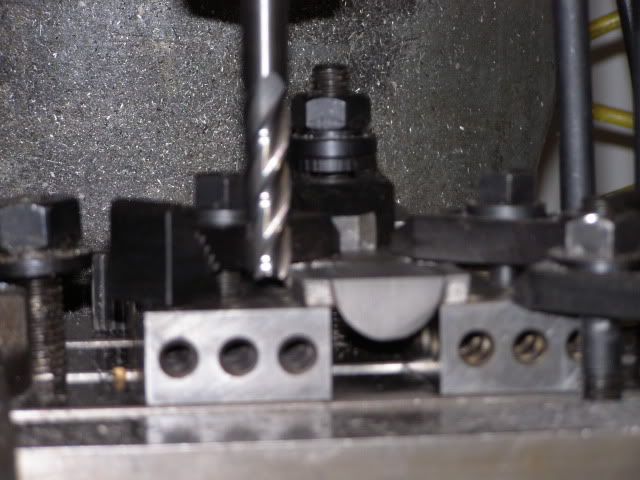
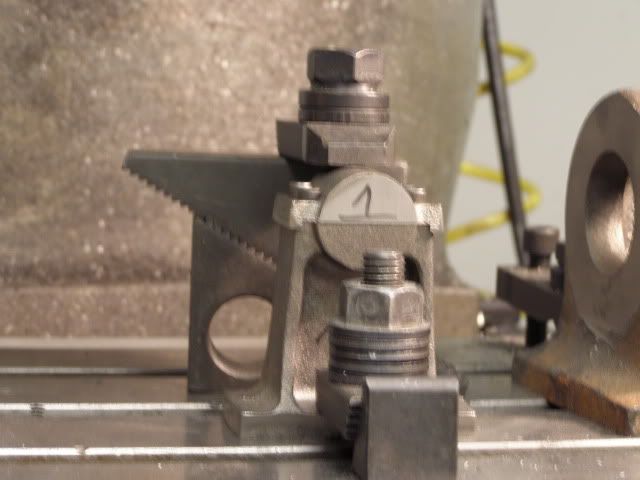
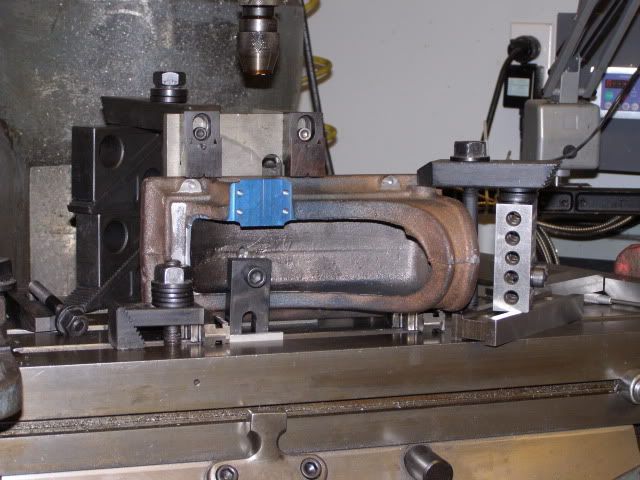
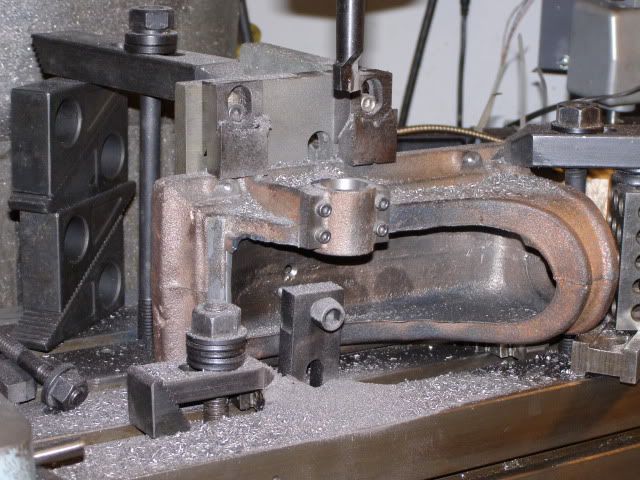
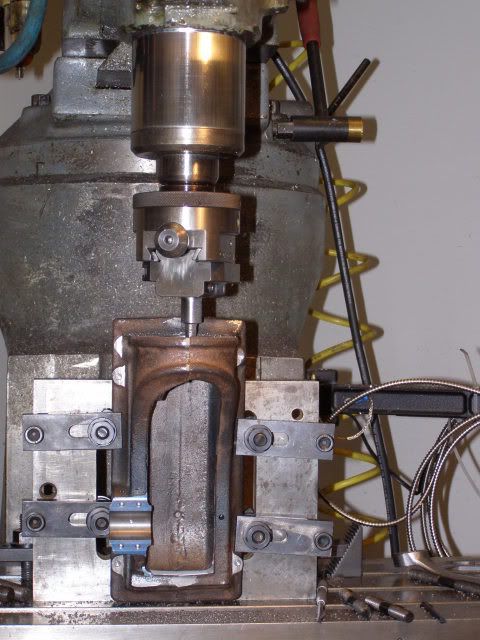
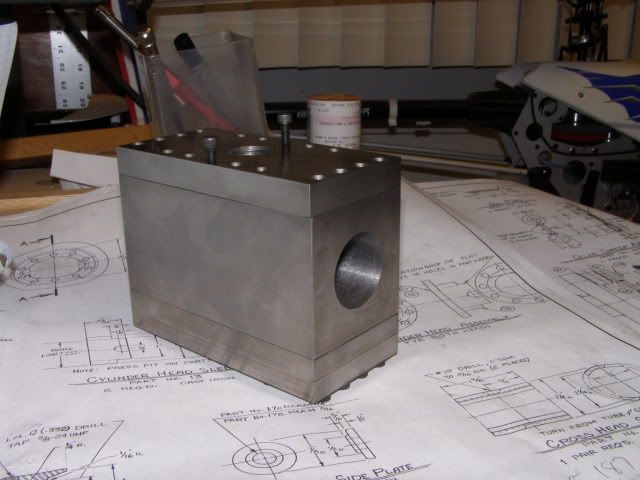
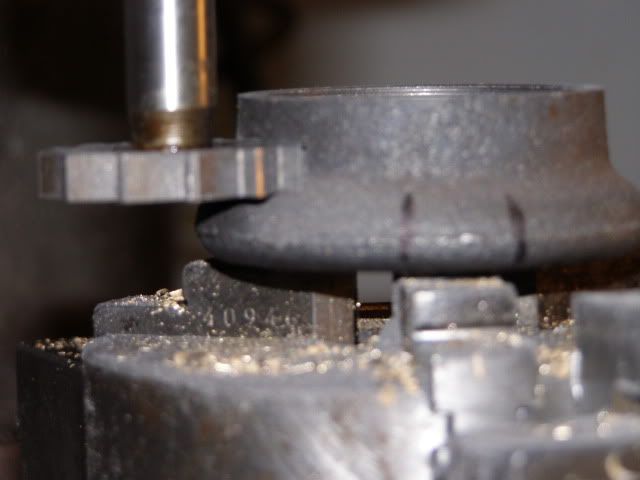
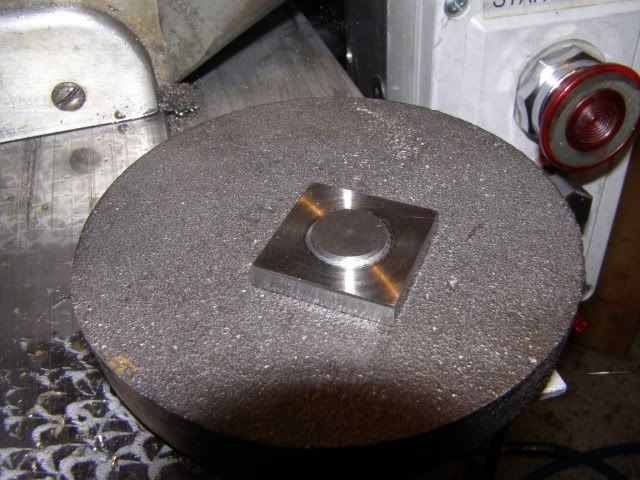
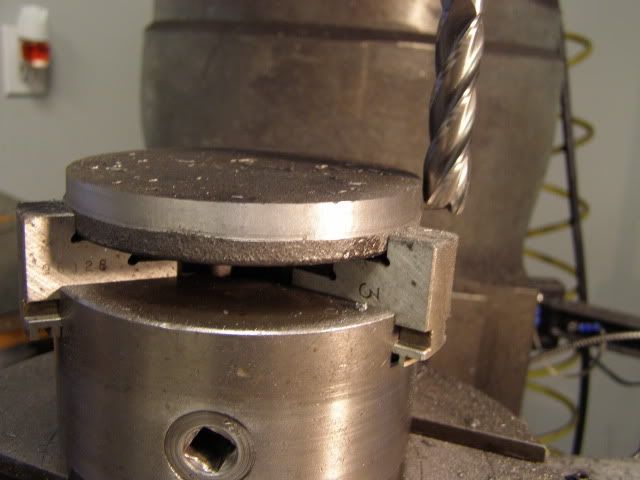
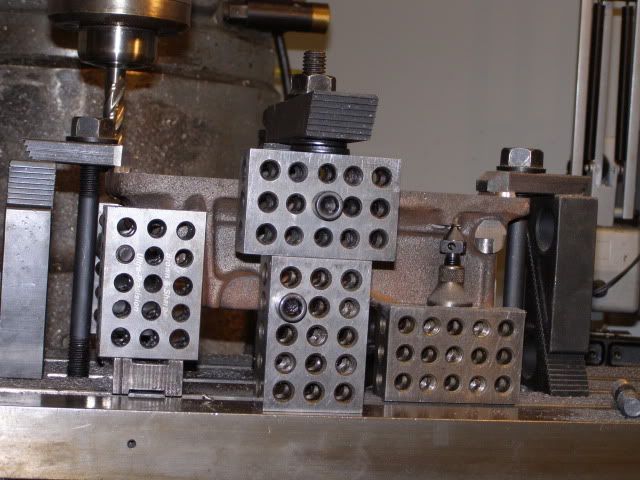
The Crankcase was next, the bottom was real rough with flash, so it was mounted about level using some cast in features that appeared to be even R/L. after trimming, that it was mounted bottom down and shimmed to bring the 4 mounting bolt bosses level, They were then spot faced, this would would serve as the datum to bring the bottom to size. The bottom now milled to size. These are the hold downs used for that operation, each end was held until final size, then a center clamp used to allow machining of each hold down area

octphoto10056.jpg


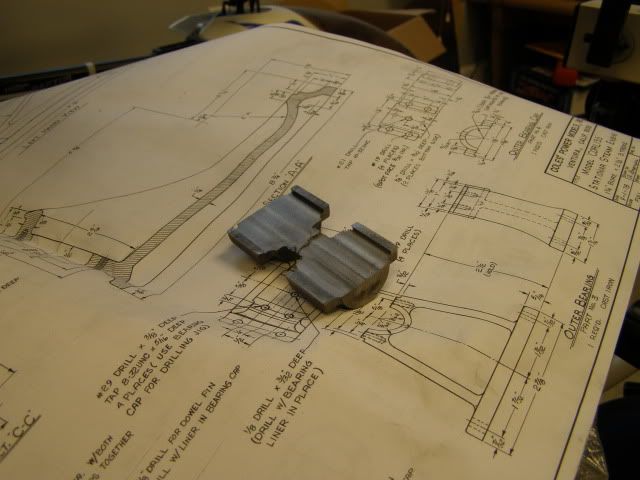
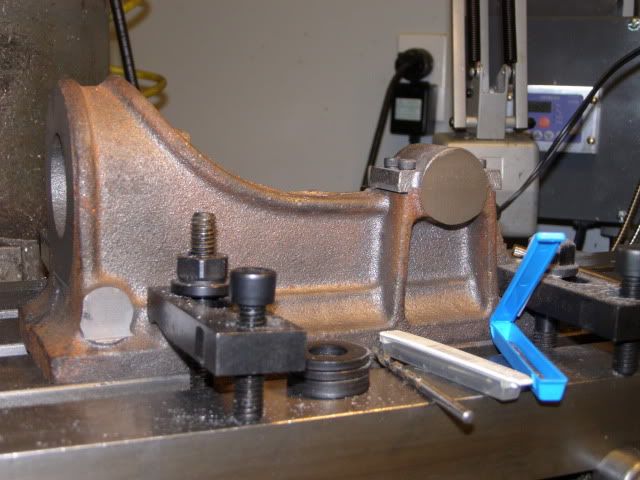
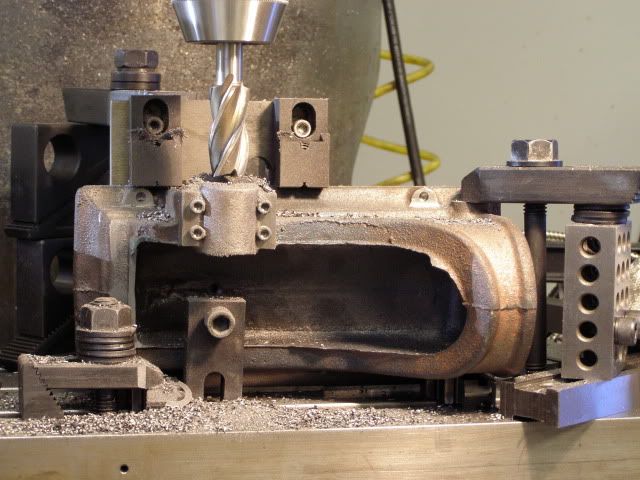
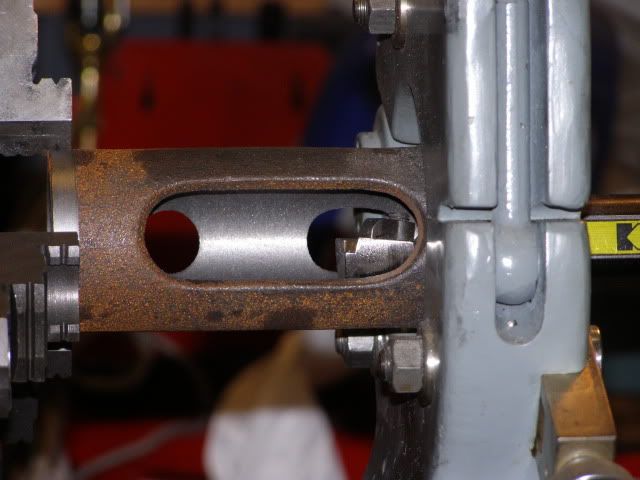
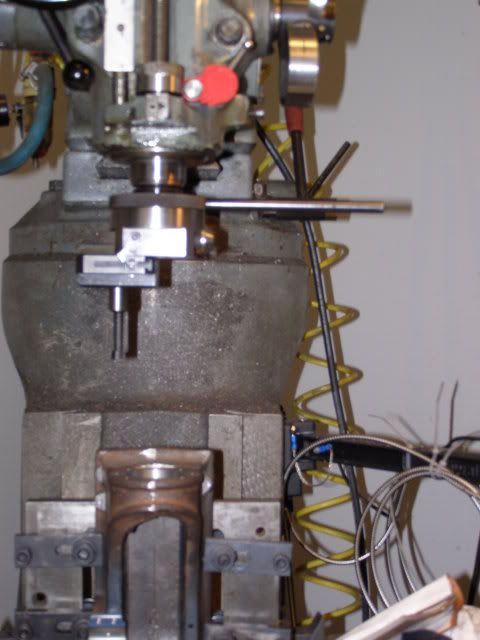
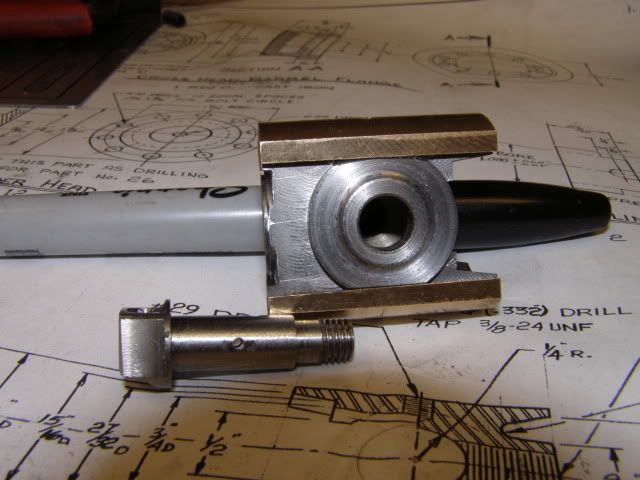
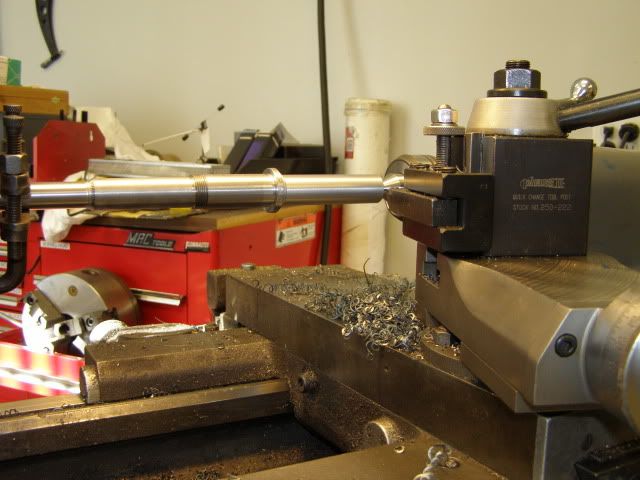
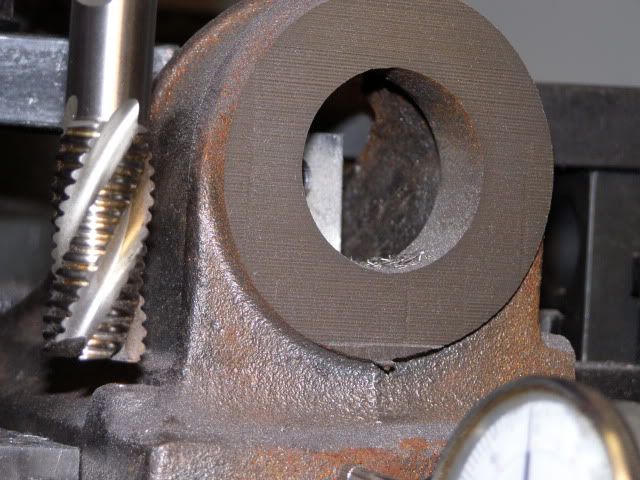
The drawing showed a center datum point positioned under the crankshaft centerline and all dimensions from that, so I centered the pillar for the crankshaft in X and the parting line of the casting is Y, before I drilled, picked a couple of the base mounting bosses check the measurments and things looked good. Proceeded to drill the mounting holes, main bearing cap holes all good, then I started facing the mount for the crosshead cylinder, at the point where the casting transistions from straight to the bead part of the casting, there is supposed to be a .060 area, nope all gone and the face is still .020 long, measured enough times and ways to know its what is there. Heres a shot of the face in the rough.

octphoto10053.jpg
]

More later.
 
This looks interesting M'Tom. Where did you get the castings from?
 
The castings are from Coles Models.

The main bearing caps come together which makes hold them much easier. First they were placed on the SG and upper bolt mount surfaces were ground, this left a nice flat area to place on blocks, then machine the mating surfaces.

crankcase001.jpg


Here they are before cutting apart.

crankcase005.jpg


The outer bearing support was another part easier to start on the grinder, shimmed and blocked I just ground enough to get the top flat, then flipped it over to grind the base to size, before placing on the mill to finish the part.

crankcase003.jpg


Base ground ready to mill and drill.

crankcase007.jpg


Outer support ready to be bored for bushing
crankcase009.jpg


later
 
You've got my interest up. I'll be following

Cheers
Steve
 
Now its time to mount the main bearing cap and bore the crankshaft bearing bore. With the base flat on the table it was easy to remove the cap and scribe CL lines to be used for the boring setup.

crosshead002.jpg


with a DI and the scribed lines the base was positioned to be bored. Squaring of base checked against milled face with DI.

crosshead005.jpg


Centered and ready to bore I started with a 3/16 drill, then a center cutting 1/2 EM, then a 3/4EM, a large drill in that thin cast iron was asking for trouble, the EM's are much kinder in cast iron, after the 3/4 a boring head took it to .875, funny thing about these plans all dim are fractions, not decimals.

crosshead009.jpg


crosshead011.jpg


The Crosshead Cylinder was next. The material allowance for this part were a bit short compared to the other pieces that had been machined. The print showed the body of the cylinder as 2", well it is only 1.994 as cast, and not very round, but it had no need to be machined round, there is a large flange that is to be finished to 2.875, it was 2.885 to start and not round, aside from that the casting was fine. Boring a 6" deep bore with three irregular openings means chatter. So slow speed and smaller DOC is needed. 400 rpm with a .0097 feed and .020 doc was max. The boring bar was a Kennametal 1".
crosshead003.jpg


I did stop the lathe for this shot.
crosshead004.jpg


To part off the excess material on each end, a delring plug was turned and tapped in the cylinder bore then chucked up and the excess parted off. When the material is thick like this is .187 wall, I will cut about .125 through it while chucked up solid, then install the plug and finish the job. That groove is the parting line.

crosshead007.jpg


Now to make the bearings.


Coming along nicely. Looks like your making use of your Clamping set or sets :big:

Keep up the great job and love all the pics.
Matt
 
Time to make the Main Bearing Shells. A piece of cored 932 Bronze was machined to .8755 dia. Then mounted in a collet holder on the BP, to control deflection a machine jack supported the end. A slitting saw remove the top third, and an EM did the rest.

crosshead013.jpg


Another view, then the lenght was sawn to yield to half shells.

crosshead012.jpg
 
More nice work MachineTom.

I have a theory that it is possible to have too many tools and have been trying to prove it. So far I've failed miserably :eek:

Steve
 
MTom,

It is nice how you are showing the correct way to start off machining castings and the way to hold them.

A lot of people have casting machining problems because of not paying enough attention to where they are coming from and going to.

Get the basics first, then everything should fall into place later, rather than diving in and finding you haven't got the metal there to machine later on.

This is going to be a post that is well worth following.

Nice one


Bogs
 
Great pictures.

I have a set of C/I castings for a Lone Star Engine Works "Monarch Corliss" that I hope to build some day. This build will be a great help.

Tim
 
MachineTom,
You may already know this but for those that don't, Live Steam Magazine did a full build artical about the Coles Corless years ago so I'd imagine reprints would be avalible.

You have a very well equipped and large shop. I'm impressed and slightly jealous.I'm also learning a lot about the proper way to obtain referance surfaces when maching a set of castings.

Pete
 
To finish up the crankcase, a counterbore and a circle of bolts was needed. With a larger ebay right angle plate to mount the crankcase vertical a counterbore to fit the Crosshead Barrel was machined.
crosshead015-1.jpg


At the same time I wanted to clean up the machined mounting surface for the Crosshead Barrel as the side of an EM does not leave as nice a finish as I like. This boring head is also a facing head, and left a much better surface.

In use its quite simple, flip a small lever to engage the advance ring, set the max diameter, hold the torque lever, and turn on the mill, quick work.

crosshead018.jpg


Here's the results, Crankcase is done.
crosshead020.jpg


The Crosshead Slides were cut from solid rod, then slit on the BP.
crosshead022.jpg


Finished slides
crosshead024.jpg
 
Well I've not been posting, but continue to progress through the build. The cross head cylinder was assembled with the slides, and the crosshead piston was finished. The steam cylinder and plates was also started and not quite finished as yet.

Crosshead Piston, and Wrist Pin

crosshead031.jpg


Steam Cylinder

crosshead029.jpg


The piston rod was a bit of a challenge for me, I don't have a follow rest for the Monarch, so the Myford would have to do. After turning the rod slightly oversize, I wanted to lap the surface to a better finish than turning could provide. My idea was to make a lap block and see what could be done.

Lapping the piston rod

crosshead025.jpg


crosshead027.jpg


I only had valve lapping compound, a bit rough, but it sure worked quick.

crosshead032.jpg


A closer shot

crosshead033.jpg


It does not show well but there is no machine marks to be felt, about 5 minutes work. The finer lapping material should be here soon so I'll post after the rod is done. The block is a piece of 4140 with a reamed bore and sawn partly through.

 
I find this a very interesting project. Hope you post more as you progress Tom.

Pat, apologies if you already know this one. When filing in the lathe put some soluble cutting oil on the file. It is very effective at stopping pinning (i.e. scratching the job from work hardened chips in the file).

Steve
 
Wow, nice project Tom - watching with great interest.

Nick
 
To catch up on the progress of the engine heres somr more shots of the progress.

The crosshead piston, rod, head, and cylinder. As well as the steam cylinder.

crossheadassembly001.jpg


Cutting wrench access slots in the cross slide head.

corlissproject002.jpg


The valve plates are held on by 18 bolts each, but did not make he comfortable that then would not move while boring the valve bores, for that reason I added 4 dowel pins to each plate. Thank goodness for a good DRO which makes holding tenth's possible on a 40 year old BP mill.

crossheadassembly002.jpg


Sometimes a simple job takes lots of time just to hold the darn parts, this is the case with these valve bore covers. First a fixture to hold the parts, probably 2 hours to make it, Then grind the parts square to fit the fixture, another 45 min, to turn on the lathe one side of the 4 parts, maybe 20 min, then mount on the RT and mill the backside groove, another 20. Total time almost 3 hours for the fixture and parts squaring, maybe 40 minutes to machine the parts.

fixture with Back side of cover

corlissproject007.jpg


Front side

corlissproject008.jpg


Part

corlissproject009.jpg


This will be the Crankshaft Disk, started with milling the disk round for a good grip in the lathe

corlissproject013.jpg


Now on the lathe to bring to size.
 
A few weeks in Florida stopped down the engine progress and postings. Back home to face winter, but time to build the engine.

The crankshaft was made from O2 on the EE, then finished on the Myford with a Tom Thumb TP grinder. This grinder has so little power that .0007" is a big cut, feeding with the compound works best.

Rough turned
cranlshaftbeadtool007.jpg


Myford setup
cranlshaftbeadtool008.jpg


At Work
cranlshaftbeadtool009.jpg


The Corliss design uses dashpots to control intake cut off, these are air pistons using vaccum generated by the upward movement of the linkage, then pressure from the doward movement of the linkage. By design these buggers are now adjustable, so clearances are the factor that controls their proper functioning.

assembly drawing
corlissproject027.jpg


Rough casting
corlissproject015.jpg


Turned
corlissproject018.jpg


When machining the outer bore, there was some chatter, so I wrapped the outside with electrical tape and it damped it right down. The bore gauge is a Fowler Bowers reads .00025"

corlissproject019.jpg


Piston and Barrel, The inner bore was reamed .001 undersize then lapped to size with a brass barrel lapper.
corlissproject026.jpg
 
The pistons were roughed on the lathe. The grooves act as seperators to create lands that act as rings.

corlissproject023-1.jpg


Then ground to size of the finished bore.

corlissproject025-1.jpg


Completed parts

corlissproject028.jpg


corlissproject026.jpg

 
Its been 9 years since I started this thread WOW!!!

So work continued for awhile then stopped, other shiny things took its place. Now I am back on the project. Updtes will follow.
 

Latest posts

Back
Top