Building of TINY INLINE 4 in Brazil

Home Model Engine Machinist Forum

Help Support Home Model Engine Machinist Forum:

This site may earn a commission from merchant affiliate links, including eBay, Amazon, and others.
Fantastic build Edi, amazing its your first engine. I'm still not brave enough to tackle the crankshafts for multi cylinder engines but I really like the look of the tiny inline 4.
 
Wow, first engine Edi.
You have got some very good skills already. I struggled with my engine and it is a drop in the bucket compared to your creation.
Wow.....
John
 
Parabéns! Excelente trabalho.

Hello everybody.
I got able to do some more work done this week. Still on the block.
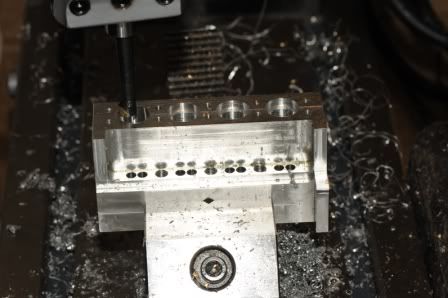
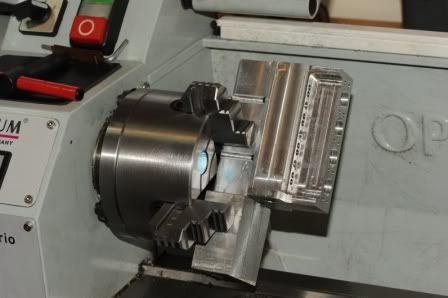
As I received the boring head I ordered few weeks ago, I was able to finished the liners holes and water jackets. The tool showed to be very precise holding the dimensions and easy to adjust. Photos ahead!
21-04-1201329.jpg

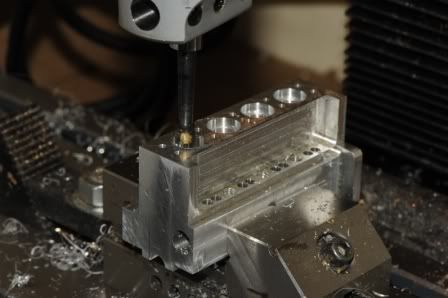
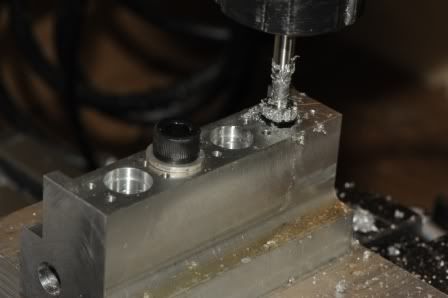
Counterbore operation
21-04-1201330.jpg

21-04-1201328.jpg


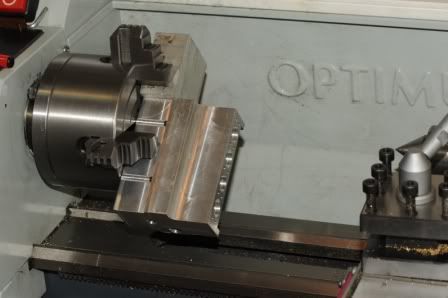
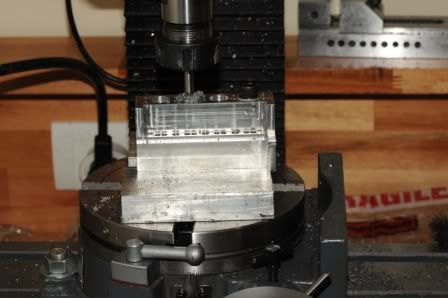
Next operation was the water jackets.
I tried to do it on the lathe, however I did not feel safe with the setup, so I had to use the traditional dividing table and a grooving mill.
21-04-1201322.jpg

21-04-1201321.jpg

21-04-1201325.jpg

21-04-1201324.jpg

21-04-1201326.jpg


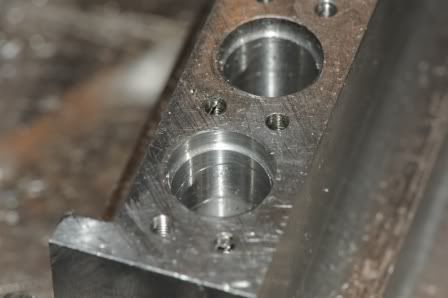
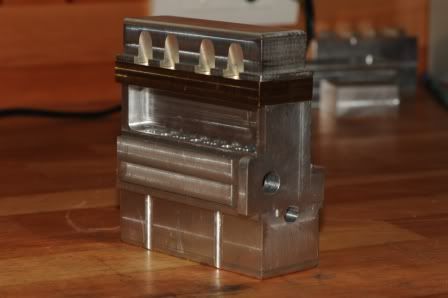
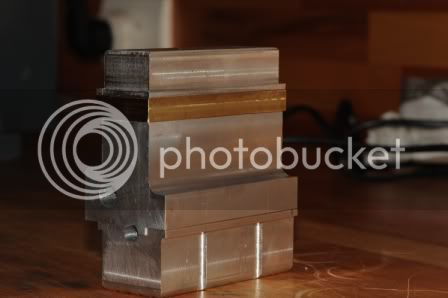
Here is where I'm so far.
21-04-1201315.jpg

21-04-1201316.jpg


No internal parts done so far. The head still need all the holes.

Thanks.
Edi
 
Hi to all!

Thanks for the words Jamie, John1958, John69 and Cogsy.

It is running better but not yet the way I would like. For now, it is OK latter on I plan to make a new carb and see what I get.


I just started the radiator. It gave me a lot of work to make the bottom and top caps removing a lots of material to provide the internal space. It reminded me machining the crank case and the bottom of the block.


It is almost finished, missing only the brass components (Cap, spouts)
IMG_20180531_174344159.jpg

IMG_20180531_205227274_HDR.jpg
IMG_20180601_153732666_HDR.jpg

IMG_20180601_084222561.jpg

IMG_20180602_102122464.jpg

IMG_20180602_102129345.jpg

IMG_20180602_105516343.jpg

IMG_20180602_175454021.jpg

IMG_20180602_222153529.jpg

IMG_20180602_222231762.jpg


If I get some time today I will turn the cap and spouts.

Thanks for following this building.

Edi
 
Hi Edi.
Wery nice work[emoji4]
Are you using aluminum?
Not having had time in the shop for a couple of weeks. House maintennance=summer here on the northern part of the planet earth.

CS
 
Radiator looks very impressive. How are you sticking it all together without leaks? I see most people use brass so it can be all soldered up but yours looks like aluminium. I've purchased a cheap aluminium PC radiator that looks surprisingly scale-like but haven't worked out how to install a fill point/cap in the ali, so if your methods works I'll likely copy.
 
Hello CS and Cogsy!

Yes, the material is aluminum highly recommended due to its heat dissipation properties.

According to the instructions from Kelly, TI4 Designer it is glued with 5 minutes epoxy.

I have not tested it yet for leaking. I still need to glue the bottom end upper caps then I plan to fill it up with water and apply a very little pressure (during the running condition there is not much pressure inside the radiator or almost none, only liquid circulation.

I was able to machine the spouts and the cap this weekend and they are all glued.

Tks,
Edi
 
Edi
I am very impressed with your tiny 4. Your crankshaft was very impressive and I saw something that might be another method that looked very effective. The video is:
Enjoying your build.
Nelson
 
Hi Nelson!

The TI4 is a very enjoyable project and look nice as well. You got to be prepared to deal with a very small parts.

I really liked the video thanks for sharing. Very interesting method. I only did not understand why he did not use the tailstock to align the journals once he did the center holes. I barely understood what he was saying, the audio was poor and he has a different accent. My English is not that good.

It is amazing how good the tool was cutting, looks like he is cutting butter. Is the material aluminum? It does not seem to be steel.

Tks,
Edi
 
You are right it is aluminium and I believe that is the reason for not using the tail stock. But cutting like he did held everything up close to the head or chuck which takes a lot of the vibration out of it. The most impressive thing to me was how he did his throw. Emergency collets are very special because they can be bored to any size or as in this case to any position. Joe is from Texas USA and I understand the language difficulty, it is a damn shame that we have so many words for the same thing. It's like a metric and SAE discussion I got in and should have let alone. I just wish the world could come up with a system we all could use and when a part measuring XXX we all know what it means. It should not be that hard. I love your build and the tiny built with CNC is almost got me wanting one for my own.
Good job and I'll be watching as you finish up.
Nelson
 
I just wish the world could come up with a system we all could use and when a part measuring XXX we all know what it means. It should not be that hard.
Actually this has already been done for almost the entire world - we call it 'Metric' :p. There are still 3 countries that refuse to use it though...

(Sorry, couldn't resist)
 
Hey Cogsy!
Are living in a Metric Country?

If I'm not wrong when Reagan was the president of USA, he issue a document changing the imperial system to metric but it was never implemented.
I worked for a USA company (saw chain manufacturing) here in Brazil for 23 years and I never got used to Inch, Feet, Yard, Miles..... Metric is a lot easier :D

Once I visited the branch of the company in Canada and realized that they have both system for exemple, on the road signs it shows numbers in Metric and Imperial (Km and Miles).

I did not know about Emergency Collets.

Edi
 
Hello to all!
Radiator is finished. Shroud installed.
IMG_20180610_190716566.jpg

IMG_20180610_190748331.jpg

IMG_20180610_190824252.jpg

IMG_20180610_192940168.jpg

IMG_20180610_193016575.jpg


This video shows the machining of the top side of the radiator shroud with 10mm flat end mill


Here machining the botton side of the shroud with 5mm flat end mill


Next I will make a new carburator.

Tks,

Edi
 
Hello to all!
Little more progress on the TI4.

I started the new carburetor. As said before, I'm not satisfied with the performance so, I decided to make another carburetor.
For this time, I decided to change the way it was machined. The original drawing the dimensions depart from the side and the bottom of the body, so I changed it to use the centerline as the coordinate zero (X0, Y0). With the change on the machining strategy, I did almost all operations on the milling machine using a small rotary head.
Next operation will be cut to the final length and drilling/turning the venturi hole.

Here are some pictures that explain better how I did it. (a picture tells more than a thousand words)
First I machined a blank on the lathe then cut the central body on the milling machine
IMG_20180611_211851238.jpg


Cut the central body
IMG_20180611_231140502.jpg


Tapping the bleading and idlle screws holes
IMG_20180613_224214049.jpg


On this operation I drillled the spray bar and the barrel hole and finished with the reamer and tapped the spray bar hole so both holes are on the same center line.
IMG_20180613_225355527.jpg


Also started on the base for the engine. The plans call for aluminum but I decided to use wood. It is very hard wood and heavy. I will provide two pockets on the bottom side for the CDI and battery
IMG_20180614_075722432.jpg


IMG_20180614_075800573.jpg


Project almost finished:):).

Edi
 
Back
Top