broken tap in aluminum cranckase

Home Model Engine Machinist Forum

Help Support Home Model Engine Machinist Forum:

This site may earn a commission from merchant affiliate links, including eBay, Amazon, and others.
Peter, I know you said the part is just about scrap now, but if you wanted to experiment further, just out of interest, then could you set up a lash up anodising tank?
Plastic bowl, battery acid, bit of lead sheet and 12 volt supply. I would be surprised if the tap wasn't out in under 2 hours. You'd only have to put part of the block in the acid, so you wouldn't need much.
If you leave the part in the acid after anodising, with no power on, then the anodising should dissolve.
I've done a couple of broken taps this way, but then I'm already set up for anodising.
Keith.

I mentioned this in post #14.
Whay anyone would want to mess about with Alum, even if they can get the right grade seeing as Alum is a generic name, puzzles me.
Same for all the weird and wild guess but never do brigade who advocate welding a stud to a M3 tap inside a hole with not welding equipment or skill.

As Keith says. two hours tops and the job is done.
 
Peter, I know you said the part is just about scrap now, but if you wanted to experiment further, just out of interest, then could you set up a lash up anodising tank?

Hi Keith. Anodizing is for sure on my long term to-do list. But after de-blackening after this extended bath, I think you'll agree its belongs alongside some artifacts from the Titanic. I think the folks who were able to remove HSS after a couple hours soak time suffering only a dulled finish is about as good as can be expected. But my tap refused to decay & the process took its toll for this duration. I'll keep it as a guinea pig for subsequent operations.

I've put this behind me & already have a new piece in the lathe. CC-1 taught me the importance of a better setup on the RT now with a better fixture & 4-jaw chuck. CC-2 taught me to pay special attention to tapping operations & some more proficiency required. Its a radial engine, multiple parts are required. Just not this part! :p 
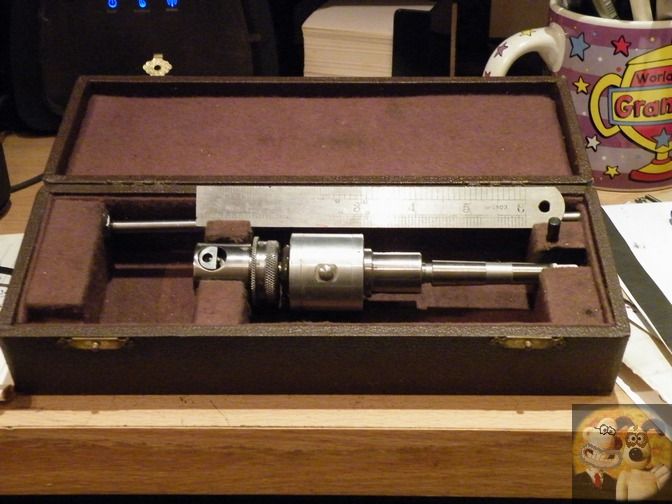
I've got some experiments in mind for my tapping head on scrap aluminum to become as proficient as possible. I will also try some simulation fixes because wishing this will never happen again is probably naïve. If I evolve to more complex engines one day than I have to be able to deal with this.
 
Last edited:
Pictures of CC-2

IMG_5800_edited-1.jpg


IMG_5801_edited-1.jpg


IMG_5802_edited-1.jpg


IMG_5803_edited-1.jpg
 
Peter,

If you had your Tapmaster adjusted correctly on the clutch it should never have been able to break the tap.

I have a very old (from the 60's or 70's) tiny tapping head that actually uses a fibre type washer for the slipping clutch. Yours is most probably the same method of clutch control but hidden inside the unit at the top. Mine is underneath the head before the holding chuck.

Miniautotapper.jpg


The way I set it up with something like a 2mm tap, is with the correct sized hole drilled, I start off with hardly any clutch pressure at all, then try to tap the hole, usually it just starts to slip, a bit more pressure and try again. Eventually it will start to cut the thread, but if anything goes tight the clutch again starts to slip. Eventually the tap will cut to depth and then the head reverses and the tap is withdrawn. Even if the tap bottoms out, there is no way it should break because the clutch starts to slip before it can happen, maybe your problem is that the clutch isn't slipping soon enough.


John
 
Thanks John. I want to delve into this with some further testing. I may even call Tapmatic, I recall they were pretty helpful when I was first deciding on the unit. The unit is new & lightly used thus far. I guess its possible its not quite (factory) calibrated, but I'm leaning more towards the my depth boo-boo. But like you I was thinking if the clutch stops under whatever safety margin is correlated into tap size setting then it shouldn't really matter what the source of sticking is? All the holes were positioned with DRO & depth stop. Even though the tapping head uses rubberized collet & is somewhat forgiving on positioning, all my tapped holes were re-positioned exactly to same prior drill XY DRO position. The pilot holes were 2.5mm, 0.300" depth. One thing crossed my mind as I was rotating CC on RT, same operation on each of 5 facets - maybe some neighbor chips migrated in & clogged it? I'm not sure if this would be enough to catch the tap off guard as it screwed in. But my 0.050" cellar probably didn't help matters. My new procedure is have my compressed air handy to give it a mild blast before tapping fluid & tapping operation.

If you look at my pic under the knurled ring, Tapmatic clutch setting is performed by rotating body to desired setting along progressive sizes. I set mine 1/2 stop under M3, meaning theoretically clutch should slip out on the conservative side of their rec. Now the secret sauce behind what that's based on is what I don't know but will find out. I cant see my tap being weaker than a typical off the shelf one of same size. They use it in cnc environment. Now whether there further allowances to be made based on material or whatever I cant say. I mentioned in hindsight maybe this wasn't the best tap for my aluminum (although in recommended materials I think they say cast aluminum). It works killer in mild steel & has remained razor sharp. I intend to test with a HSS version of same chip ejecting style.
 
Going back over the replies to this thread it splits between Alum, welding a stud on, trepanning out oversize and plugging and drilling out with a carbide cutter.
What many have not read is the size of this broken tap at 3mm.

Alum whilst working for many is a bit hap hazard as it's sold under many names and for may uses so Alum from one place isn't the same as Alum from another place so no one actually states a trading name.

Welding unless you have a bit sticking out is pie in the shy. In this case the tap was buried and the OP said he only had basic workshop gear. A TiG welder isn't basic workshop gear.

Removing with a carbide cutter as a method does work but not on this scale.
I personally wouldn't try it on anything less than 6mm.
The reasons being and we will take this example of a 3mm tap is the tapping size should be 2.5mm minimum so to get in there without it deflecting and damaging the parent metal you need a 2mm carbide cutter.

Now carbide by virtue of it's manufacture has no grain or tensile strength, end of the day is a powder that has been heated and pressed into shape and is very, very friable. Now the tap has broken to no standard at all, chances are some of the top surface of the tap is made up of smaller broken bits jammed into position and nothing is flat.

So our 2mm cutter which indecently has to be mounted very rigid and no bench drill is god enough for this job is fed into the work and one flute hits the first peak which will either remove the cutting edge of a very brittle and fine tool or it will tip the bit of broken tap so the next flute hits it and snaps that. Result is we now have a cutting tool with no cutting edges which is about as much use as a left hand lollipop stick,

If you have a big enough broken tap then a carbide cutter 'can' work but be aware that the cutter isn't going to come out of the meeting with a piece of loose HSS unscathed, it may even take 2 or 3 cutters to complete the job and if you are talking quality cutters here as the cheap Chinese ones can't cut it, literally, then you can be talking upwards of 30 pounds or even more.

The problem is the internet.

Someone reads what one person posts and then repeats this ad hoc, never actually having done this but hey it was on the internet.

Trepanning will work and work well in this situation and is not out of the realms of a simple home workshop.

In this case take a short length of silver steel or drill rod, 5mm, 6mm or even larger and drill a hole up the centre12mm or so, not critical and drill at 3.2mm.
Then turn the outside down to 4.2mm and then file 4, 5 or 6 deepish teeth on the basically make a hole saw, get the teeth pointing the right way.

A tool this small can be hardened off on just the teeth on a kitchen gas stove.
Then set up in the mill as you need rigidity and absolute position and drill down carefully over the hole, using lubrication, WD40 is good for alloy, and go as deep as the original hole.

Once drilled you can then prise the core side to side with a screwdriver until it breaks off. That gives you a nice clean hole to tap to M5, screw a stud in, cut off, clean the top surface and then drill and retap.

Yes OK you have read this on the internet but it works.
 
I called Tapmatic today & got some good information (paraphrasing)

The dial clutch setting on the unit is indeed a ballpark starting point. For most through holes this 'should be ok'. But the usual caveats, material type, tap type, tap condition, speed, lubrications...

Blind holes are a different animal.

- The tapping head allows the spindle to continue tapping for another 3mm (0.118") extra travel on my model after the tap down feed has completely stopped. You can actually pull the arbor down from resting position, its kind of under spring tension. This is part of the allowance calculation I mentioned above. In my case it was evident I was set too close to bottom at 0.050". So now its a dog race of which problem arises first but bottoming the tap is likely what was going on & I can see full threads to bottom in my good holes.

- He also mentioned its best (as I think Blogwitch John is saying) to start conservative clutch setting & see how the tap progresses & how/where stops. In other words tune the setting on a practice piece or at least base it something comparable which I didn't do. So I was likely at too high a torque setting for this particular operation.

- Even though a tap is a chip ejecting style, that doesn't mean 100% of chips are coming out. I saw nice swarf stringers come out during tapping but I also saw a little pile of mini chips when tapping was complete. The flutes could still be getting bunged up to some degree.

Well, it makes me feel a bit better to have some likely answers. Now I'm going to tap a bunch of test holes in scrap & carefully observe things until this becomes second nature.

ps - I like that core drill-out idea. Kind of like a mini annulur cutter. May as well mess with that as well. I know that just making the tool in preparation will help ward of evil tapping spirits! :)
 
There is a device sold to wood workers to remove broken off screws. It is simply a roll pin of the right size, with a few saw like teeth ground on the end. The important part is the teeth are ground to cut in the revers direction, so the cutter will likely catch on the screw and turn it out.

These are the roll pins made of a hard steel, rolled into a cylinder. In use as a pin the spring compresses so the pin is a force fit into a hole. I have made the teeth free hand with a dremel cutoff wheel.

A roll pin will be easier to make and is already hard.
 
Just some added FYI on this saga. For kicks I tried over-milling on the stuck tap in junker crankcase. First with Tin coated endmill. It met resistance. I pecked at it for 0.025" or so, but figured maybe it wasn't ground quite correctly for that kind of center cutting. Then I switched to brand new 4.5mm center cutting carbide ball end mill. Almost same result. I need to use these tools so didn't want to bugger them up experimenting. But the tap seems to be tough stuff. One day maybe I'll try a carbide drill.

IMG_5828_edited-1.jpg


IMG_5827_edited-1.jpg
 
I ended up making a new crankcase. They get better with practice :). After trying all kinds of different setup variations & tap types & fluids... this time I offset tap from bottom of hole the proper amount & it everything went smooth & predictable. Concluding that the broken tap arose by a combination slightly shallow hole (drawing interpretation error) and insufficient bottom clearance (my fault).

I'm going turn up some little dedicated (hand) tapping knobs as I have some M2.5 threads into even shallower blind holes in my future. I think I want to do these by hand. But anyway I'm much more confident of my tapping head operation now when the need arises.

IMG_5837_edited-1.jpg


IMG_5835_edited-1.jpg
 
One way which will succeed is to use a hot sodium hydroxide (Caustic soda and lye are other names) solution. Your crankcase will go into solution, and the tap will be lying in the bottom of the container. As an added bonus there will be copious amounts of hydrogen released as well;D. The new one looks great by the way:thumbup:
 
I haven't trolled through all the replies here, so forgive me if this idea is already there somewhere.
The basic idea is to weld a steel rod to the tap. I know this is not always possible, but now and again, it is. If the welding is successful, it will almost certainly get the broken tap out.
 
i have had great success with removing broken drills from aluminum with alum powder. i am actually removing a #50 drill now.

here is what i use, mason jar with a bottle of alum in it and water. i have spring water at my house. sort of a double boiler setup because i don't have a pyrex or glass pot and don't want to ruin my wifes good pot. anyway i het on the simmer burner on the stove. you can see the little white dots in the picture, those are actually bubbles that the flash made look white. those bubbles are coming from the hole the drill is in.

the drill is just a cheap black oxide coated drill. when its done the aluminum will look dull gray in color but will rub right off with some fine steel wool or hit it with the buffer for a second. once done ill show what it looks like

IMG_0113.JPG


IMG_0114.JPG
 
You're going to be very lucky in getting it out with all these suggestions. I would take it to a shop that has an E.D.M. -- and hopefully they will be sympathetic and do it for free. It's the only way of getting it out without making a mess, and ruining your crankcase and doing more damage. Good luck!
 
The 'mess' is behind me & a new crankcase successfully machined. I learned some important lessons about blind hole tapping. Good thing, radials have a lot of these. I am going to turn myself some knurled style mini tap holders 'knobs' so I can feel the hole & tap progression by hand. I have some even smaller M2.5 & M2.0 ones to do. Stay tuned. Right now I am doing some lathe repairs / upgrades. It coughed a fur ball half way through my crankshaft.

BTW, this fellow is building an homebrew EDM
http://www.****************.com/threads/building-a-pulse-edm-machine.55621/
 
Peter,

I uploaded a cheap and easy spark eroder to make a few moons ago.

http://www.homemodelenginemachinist.com/downloads/cheap-and-easy-to-make-spark-eroder-240.html

Instead of making finger turners for your taps, where they can still go in not square, what you really need is a tapping stand.
I made mine from an old cast iron surface plate but almost anything can be used as long as the column is truly vertical to the base.

Just search for tapping stand and look at the images, they will give you enough info to easily make your own.

There are even a few shown on here. This is a basic one, I fitted a small chuck to mine so that it is a lot easier to fit different sized taps.

http://www.homemodelenginemachinist.com/downloads/mini-hand-tapper-166.html


John
 
Thanks John, appreciate the plans links.

For this specific part I wanted to preserve the indexing setup on RT & mill. Each of 5 cylinders needs to be facet cut, cylinder skirt bored and the 4 M3 blind tapped holes on a pattern. It was easier to set the XY hole coordinate & then repeat for all 5 facets vs. tapping off the mill or a different tapping fixture. But that looks to be a very useful tool nonetheless.

I have made one finger wheel type tapping knob for a similar size tap (4-40) & it worked quite well. I ground a flat midway on the shank to seat a setscrew in the knob & that allowed the top of tap to extend up into the chuck for centering. I just lightly clamp the jaws so it was free to rotate & slide up & down. One could get fancier with a matching socket that enveloped the shank. There is so little torque required to tap in aluminum it actually goes quite well & I suppose more importantly you can feel by hand.

On the radial I figured let the tapping head do the work & do 20 holes in one tapping operation. Now with an uneventful 'good one' behind me, my entire problem issue was insufficient over-hole depth to accommodate the tap extending further. The instructions are quite clear regarding this, I just made an error on depth.

Hope I don't have to use an EDM but good to have on the project list.
 

Latest posts

Back
Top