Stirling engine build

Home Model Engine Machinist Forum

Help Support Home Model Engine Machinist Forum:

This site may earn a commission from merchant affiliate links, including eBay, Amazon, and others.
Wow thanks very much Mitch, its looking superb, cant wait to see this baby running.
Thanks very Much for posting the Plans, I will print tomorrow, Just have to work tonight! One of the bad things about
Being your own Boss!!
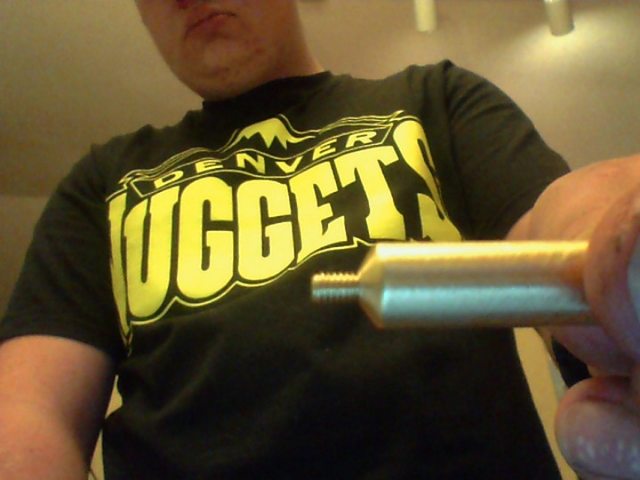
Just one quiry, the Flywheel shaft is steel, is that running in the steel side plates? or did you have to bush the side plates?
Good luck and your flywheel is awesome, I love it!!

it is running in aluminum side plates
 
Here is what I made yesterday...
akvKScnl.jpg

zsjQeybl.jpg

It holds up the displacer standard like so...
mck45E6l.jpg

iS39gRIl.jpg

2rVZjOpl.jpg
 
i have to agree with canalzombie about your displacer piston it does look like solid ali having looked at the pics the plan does say hollow.


you made a great job of the flywheel well done.
 
i have to agree with canalzombie about your displacer piston it does look like solid ali having looked at the pics the plan does say hollow.


you made a great job of the flywheel well done.

true it does say hollow, i am not sure about doing this... It does not show any dimensions for it, just the external dimensions.
Do i just go at it nice and slow with the boring bar and leave the side walls .050 thick, the crown .250 thick and the center were the connecting rod goes in at least .250'' thick?
 
the wall thikness of .050 is ok i would go to .125 on the crown and the end for the conecting rod .025 as you say
be carefull when boring the wall as it may colaps in the chuck jaws i had this happen to me. Don't worry about the wall thikness being a little thicker the idea is to make it as light as possable
good luck
 
Ok, today started out not so good but got way better by break time in my class... I tried about 5 different cutter bits before finding one that would not give me any chatter, or loud squilling when cutting my newest part...
I made a new Displacer piston today, 2.500'' long, 1.125'' diameter and I hollowed out as shown on plans, I will have to modify they design of the pushrod to be 5'' long and theaded 1/4x20 at the top
CfnHN2El.jpg


7Xhy4tCl.jpg


26aXmcCl.jpg


x7rNUlDl.jpg
 
Hey looking great Mitch, I am trying to get myself a bigger lathe with a milling attachment so I can also make one.
keep up the good work
 
Your welcome :)
I hope to make the other crank disk today and drill all holes for both, Im loving this build so much :) it has taught me alot and improved my skill greatly.

Hi Mitch, I'm a new member here at HMEM but a long time machinist. I just started reading your build thread today and it's been awesome. I'm currently designing my second motor (first was a finger motor I did without a lathe) and some of the things I've learned in this thread about engines are going to help me with my future builds.

As for you, I'll tell you as a 3rd generation, 3+ decades machinist your attitude (i.e. passion) towards this project can take you a long way if you keep at it. Pops told me two things about this profession when I was a kid; 1) The more you learn the more you realize you don't know, and 2) I'd never get super rich but I'd never be out of work either. So far he's been right on both counts.

Yesterday when I was parting off the crank disk I almost broke the tool. Lathe was going in back gears, I was feeding extremely slow with plenty of oil and pulling away from the part to break chips. But the part grabbed to the tool made a loud "pop" so I pulled out real quick and my teacher looked at me smiling a little and said with a slight laugh "you break the tool?" which I did not then he said "you okay?" i said yes, but anyway he is a great teacher :)
P.S the parting tool was on the exact centerline of the part

I've found that lowering the parting tools slightly from center-line helps keep that underwear-changing grabbing from happening.

Keep at it. Thm:
 
Hi Mitch, I'm a new member here at HMEM but a long time machinist. I just started reading your build thread today and it's been awesome. I'm currently designing my second motor (first was a finger motor I did without a lathe) and some of the things I've learned in this thread about engines are going to help me with my future builds.

As for you, I'll tell you as a 3rd generation, 3+ decades machinist your attitude (i.e. passion) towards this project can take you a long way if you keep at it. Pops told me two things about this profession when I was a kid; 1) The more you learn the more you realize you don't know, and 2) I'd never get super rich but I'd never be out of work either. So far he's been right on both counts.


I've found that lowering the parting tools slightly from center-line helps keep that underwear-changing grabbing from happening.

Keep at it. Thm:

Thanks for the kind very words, What you said is so true. I have realized how much more there is to learn than what I know already, and I love learning new things about machining :) I will take your tip into mind when I part off another part, by setting the tool just slightly below center line, dont want to do any more underwear-changing from that happening again
 
well, i wont be able to finish the engine this school year. today we spent the whole day cleaning our shop, getting things put away and accounted for and we had to turn in our parrallel kits and our tool boxes with dial caliper, micrometer, and 6 inch rule
 
Oh Hell thats not so cool, when does the next term start? and can you continue with the motor then?
cheers Frans
 
Have you joined a local model engineering club? Chances are one of the members will help you or even let you use some tools under supervision. And you get to know some of the like-minded lunatics in your area.

Jim
 
Frans: I believe the new school year for me starts again in august and I plan to continue working on it when I get back
Aussie: I have not joined any model enginering clubs in my area because I dont know of any
JW: I unfortionetely do not know anyone with there own shop
 
Try Googling "Men's Shed", Model Engineering Clubs in your area, look up the phone book, go to the College and ask the teachers, go to the local tool shop and ask and to the local hobby shop. Look for model aircraft clubs.

By August you can have this finished and be on to the next engine. Don't wait!

Jim

thanks for the tip Jim :) ill start searching :)
 
Well after about 5 months of not working on this engine, my pal Jared talked me into finishing it in class. I have about 4 or 5 parts left to complete
Today I started making a connecting rod that is about 2'' long and threaded 5-40. And I made a ring that is a very tight press fit onto the displacer cylinder so that I can have a better way of attaching the 3/16 brass tube to the cylinder
oEKLhyul.jpg

DOY7pmFl.jpg

Nm39nvSl.jpg
 
I followed back in April/May and hope to see you complete it. You will be glad you finished it! There is a special feeling of completion and satisfaction with seeing a project all the way through to the end.
 
now that is for sure jwcnc1911! :)
I made an alcohol burner last week, not really to any specified dimensions, I just went by feel and what I thought would look awesome
Here is the burner...
rLPCg2Fl.jpg

Here is the holder for the burner
q1EQRXul.jpg

The burner is just a loose slip fit into the holder
PCCNXy3l.jpg

This the burner can be rotated to any degree that I might need
tP7rla2l.jpg

and here is how it will sit on the finished engine right underneath the displacer cylinder.
4EL4u9Ml.jpg
 

Latest posts

Back
Top