A Small Vertical Steam Engine

Home Model Engine Machinist Forum

Help Support Home Model Engine Machinist Forum:

This site may earn a commission from merchant affiliate links, including eBay, Amazon, and others.
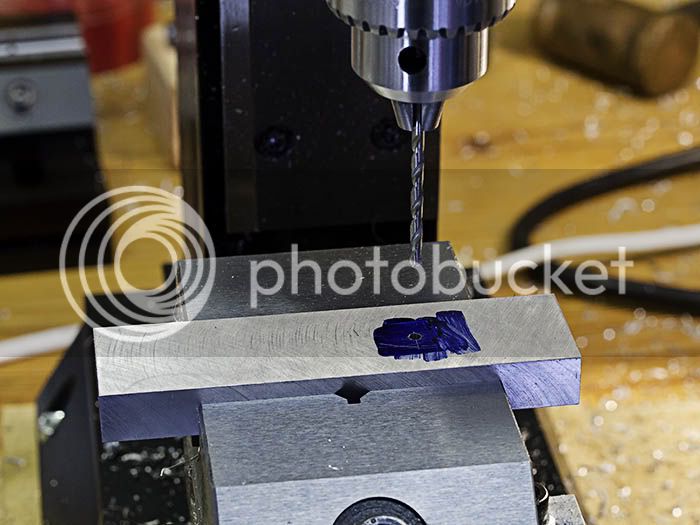
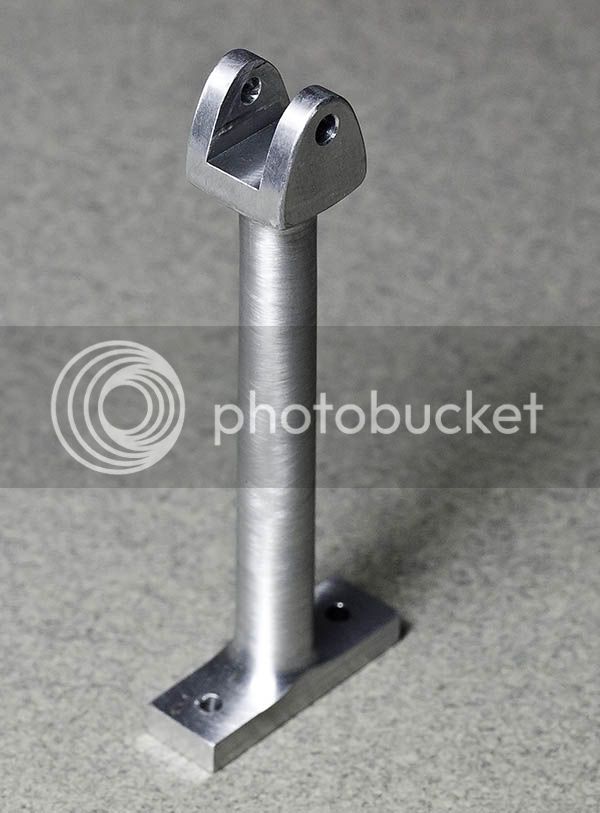
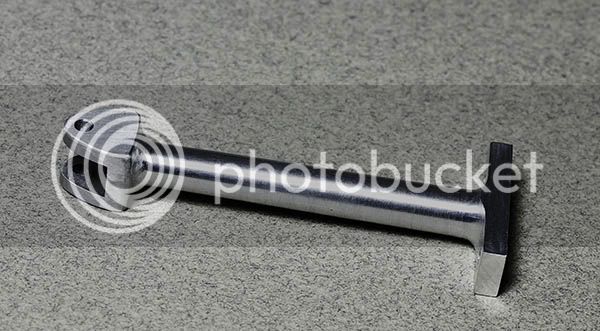
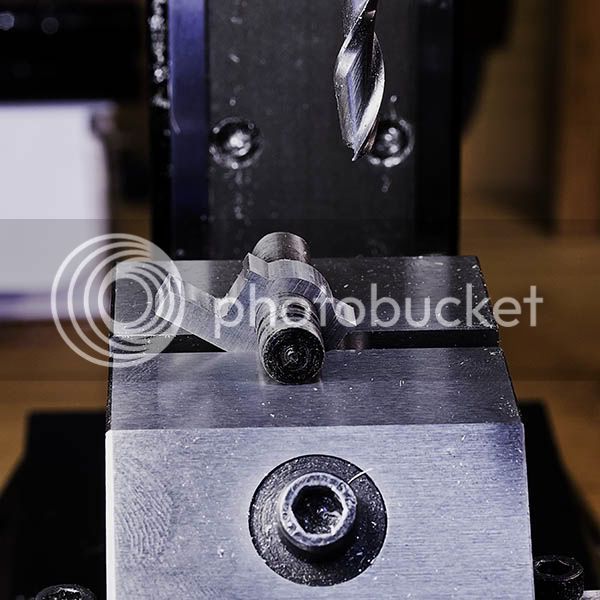
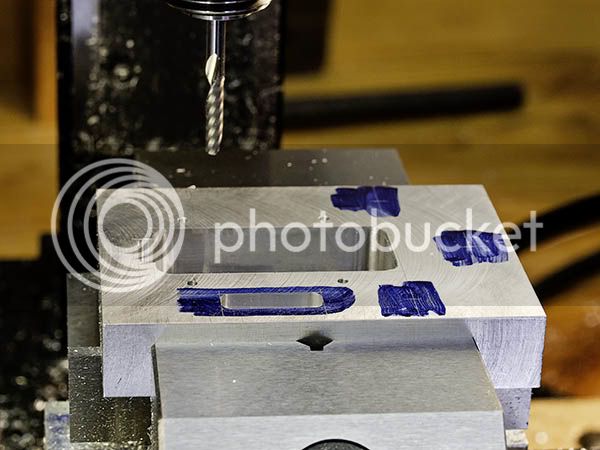
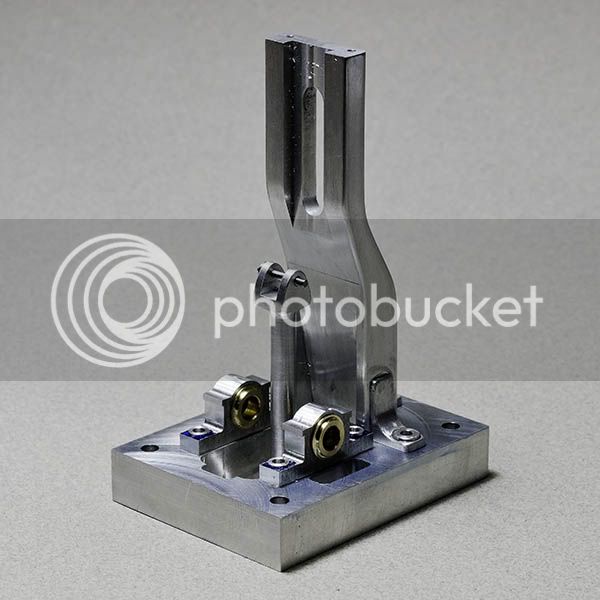
After quite a few hours of filing and sanding, the shaping of the standard is complete. The feet are now bonded so the part is finished until the engine is running, when the final detailing will take place. The edges where rounded using a variety of techniques and a few things where learned. A file is slow and steady producing a good finish and no surprises. A Dremel with a sanding drum is very quick but leaves very deep scratches which are no fun to remove. Next time I will try the Dremel with a carbide burr and maybe a finer sanding drum.

StandardComposite.jpg


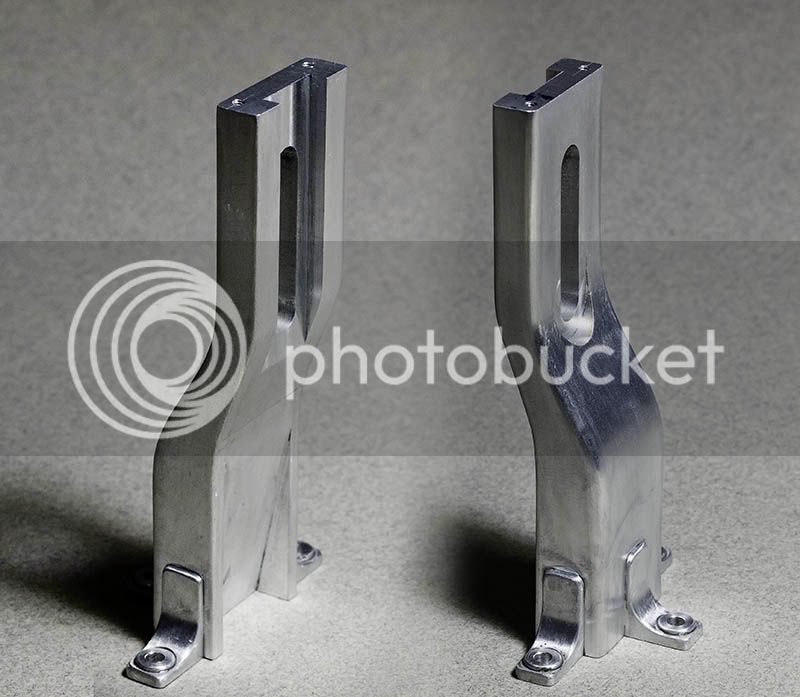
The idea behind this approach was to create something that looked a bit like a casting, did it work? The picture is a Photoshop composite, making two of them would tax even my patience ;D
 
Looking good Jan.

I learned the lesson of the Dremel and the sanding drum a while back. If you manage to find fine grit sanding drums please tell me from where you found them. I think they are very hard to come by.

Vince
 
Hi Jan, I know you put a lot of time into making those Standard. Filing, scraping and sanding take a lot of time. Your finish shows it. Very good work and presistence. I just purchased a Foredom with an angle grinder attachment. I haven't tried it yet, but a lot of the disc that come with it is for finishing. I have the metal workers kit also. Yesterday I ordered a chisel attachment with a set of chisel. I want to give them a try also. I will let you know how this works out. Could be a time saver. Great work so far and you still have my interest.

Don
 
Jan,

I think you went beyond the casting look straight into "How the heck did he do that?" Your effort is truly inspiring. k points for that :)
 
Vince,

Dremel supply 60 and 120 grit drums, I have both but have to admit the 60 grit was installed and I didn't even think about it before applying the tool to the job! I will try the 120 grit on an offcut and see how that goes. My local hardware store, Bunnings, carries most of the Dremel range.

Don,

I was looking at the Foredom range yesterday in the local jewelry tool supply house and wondered how that would work out. The equipment is expensive so I would be glad to hear your opinion. Hand work is important to me but I like to save it for when it is necessary rather than just making hard work of something. Good hand tools are also expensive but a Swiss file is a joy to use compared to a cheap file; you have to try it to believe it.

Brian,

Thanks for your kind words, I am sure that knowing somebody is watching makes me push much harder than working in isolation would allow ;D

Jan
 
Jan

That's the problem. Even 120 grit is too rough for finishing. I used to use a worn out sanding drum and attach a strip of 400 grit sand paper with Blue Tack. It gave acceptable finishes but was a bit fiddly to set up. Eventually I gave up.

Vince
 
Once again, excellent finishing on your parts. Although it time consuming I really enjoy the hand work as much as the machining.
gbritnell
 
Thanks George, hand work is pleasant change of pace and quiet too :)

Last week I started on the bearing blocks but ran into the problem of not having decent parallels. To remedy that problem I ordered some AR Warner items from LMS. These have a useful size range and good accuracy but at a price. Occasionally it is great just to buy something not made in China so even at three times the price it put a smile on my face.

So the con rod was next on my list to make, the order of build being a bit random. I chose to make the con rod from aluminium whereas normally steel would be used. On such a small engine the strength will not be an issue and both machining and hand finishing are made much easier. The finished item will be painted so the appearance of the metal is not a problem.

Started off by milling a block to the external dimension of the rod. The only important features of the rod are that the end face is parallel to the crosshead pin bore, everything else is clearance or cosmetic. This requirement was met in the first operation.

ConRodDrill.jpg


The block was left overlength so that it could be gripped in the 4 jaw chuck. The work piece was centered in the usual way.

ConRodSetup.jpg


The rod was turned down to 6mm though it will have a taper when it is finished. I left it parallel so I could use a split collet to grip on. The fillet in the end was turned with a form tool ground from some strange 4.3mm diameter HSS and then I had to make a holder for it.

ConRodTurning.jpg


Final operation for the day was to mill the slot for the crosshead.

ConRodSlot.jpg


Should be able to get back to it on Wednesday as I have a few days leave. To add to the fun my rotary table and a bunch of other tooling should arrive mid week, after which there will be no excuses left ;D

Jan
 
Despite the fact that me and paint don't get along, this one will be painted.


Using a spray on etching primer will help a lot. IIRC use it before you regular primer.
Tin
 
Nice set up and execution Jan! It's coming right along!

Dave
 
Nice job Jan and I do like you set up also. I usually bead blast brass or aluminium before painting and prime it also. Never tried etching primer before.

Don
 
Thanks for the encouraging comments guys, most important thing is I am enjoying myself :)

Bead blasting is an attractive process and I looked at a small unit on Friday. The only problem was that they wanted $880!!!!! for it so I declined. The principles are simple so it should be possible to make most of it at little cost. Etch primer is a good idea, never used that before so will need to investigate. The painting is some way off yet, many hills to climb first.

Jan
 
It's been very cold in the mornings and I can't work with frozen fingers so my start time in the workshop has been a bit late.

When I turned the conrod I left the rod parallel so that I could use a split collet, this turned out to be unecessary but I still had to turn the taper. The big end has a centre hole so I made a drive dog up for the small end. Needed to make up the pin that will connect the rod to the crosshead so that I could put it all together. The bit of paper takes up the small clearance between the drive dog and rod.

ConRodTaper.jpg


The big end of the rod is narrower than the small end but I left them the same width initialy to ease work holding. Milling the first side to width was easy on my beatiful new AR Warner parallels that had arrived one hour before:)

BigEnd1st.jpg


For the second side I needed a shim .9mm (.036") thick to pack up the rod and was right out of stock! For non critical jobs like this I use copy paper which is consistently .1mm (.004") thick.

BigEnd2nd.jpg


That just left the best part, the filing and blending.

ConRodFin2.jpg


ConRodFin1.jpg


Work now continues with the main bearings and the base.

Jan
 
Looking good Jan. Still following your build.

Vince
 
Hi Vince, thanks for looking in:)

With the con rod finished work resumed on the main bearings. This is a simple milling task so only one picture, rounding the caps. The method has been seen here many times before, a rod through the bore resting on the vice face and then just moving the part around and taking a cut. The angle for the cut into the corners can be calculated or just eye balled.

MainBearingCap.jpg


As the bearing is not split the bush has to be and both halves are identical. The radius on the bush was added last with the work held in a collet chuck. There is only 2.5mm of bush in the collet and it is tightened by hand only to avoid crushing. A form tool was groung from 1/8" HSS, easy stuff.

MainBushForm.jpg


I also made the nut pads for the bearings and will take some pictures when the bearings are filed and sanded.

Work has started on the base and all the bits together are starting to look like an engine. More tomorrow with a bit of luck:)

Jan
 
It is really taking shape Jan. I enjoy all of your setup photos. :)
 
Jan, love the way your project is coming together. Looks like the cold weather is not slowing you down to much.
I said I would let you know about my side grinder for my Foredom. With the different attachments it is a dream to work with. Having the foot pedal to control the speed, you can control the sanding and grinding very Easily. Also the chucks are quick change. I have the H 30 and H 50 chucks. I would highly recommend it.

Don
 
Glad you are enjoying the pics Brian, the photography is now part of my process and not much trouble.

Don, the Foredom is on the dream list, we will see how it goes.

Got a bit more done today, with the base receiving most attention. The pockets in the base where drilled first to get rid of most of the waste and then milled with carbide cutters of two different diameters to provide the required corner radius.

Pockets.jpg


And that was about it for this weekend! Next will be the nut pads for the base and then a crankshaft maybe. One last picture just to show all the bits made so far together.

Progress.jpg


Jan
 
Last edited:
Are you following a plan? Is the plan available so we can follow along with plan and pic of construction? Fascinating to see how one person approaches the work and how another person would have thought to do it. Marvelous pictures Thanks Fred
 

Latest posts

Back
Top