A Table Engine Tale

Home Model Engine Machinist Forum

Help Support Home Model Engine Machinist Forum:

This site may earn a commission from merchant affiliate links, including eBay, Amazon, and others.
Very good Ramon, giving us a peek before completion. I love it what a beautiful work of art.

Don
 
Hi Ramon,

Glad you are back in the workshop.

I have only just caught up with the state of play and am completely in awe of your talents, both the building and the telling!

I have lost most of my workshop time as Miranda thought it would be a good idea if WE help out at Forncett, so I go nearly every Sunday while she stays in bed!

It is nice to play with the big toys as well as the little ones though. For those who don't know, Forncett Industrial Steam Museum has one of the largest displays of WORKING steam engines in the UK with the largest weighing in at 300 tons!

Andy
 
I've seen work like this before, but only in museums and fine galleries. I've never seen it in progress like this. Your methods and workmanship almost make it seem possible for anyone to achieve. I know better but still it seems possible.

Thanks for presenting your methods in such clear detail. I'm not so anxious to see it run. I know it will run. I am just enjoying watch it come together.

Jerry
 
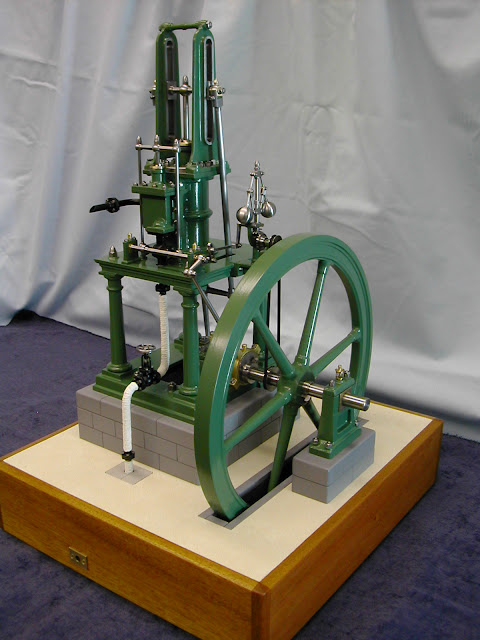
Well guy's I guess you'll be pleased to hear it's the end of the road at last.

Despite best intentions things got a little dragged out these last few days - nothing serious, touch of 'Man-Flu' - you know how it is, we have to remind 'em how we suffer from time to time ;) :big:

Anyway it's all finished save a video - I've just set it up for that but the new camera battery has to be charged but that'll give me time to read the destructions ???.

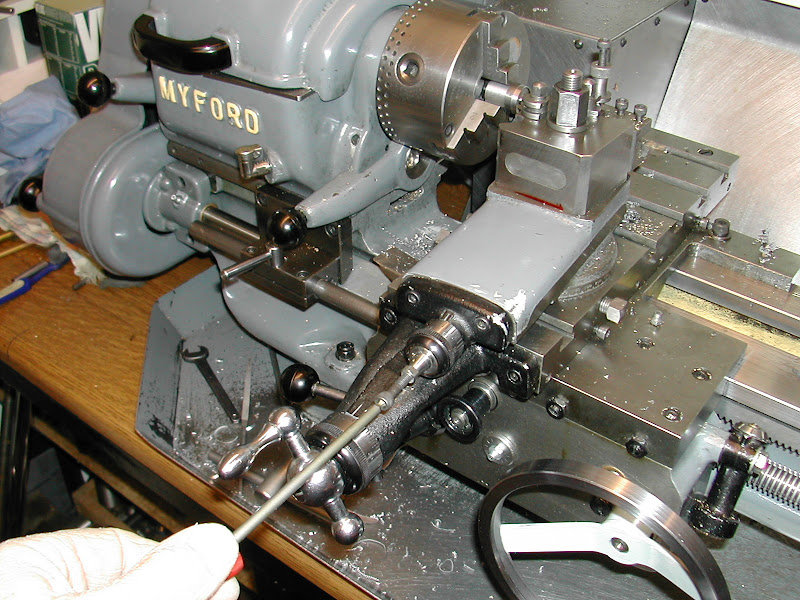
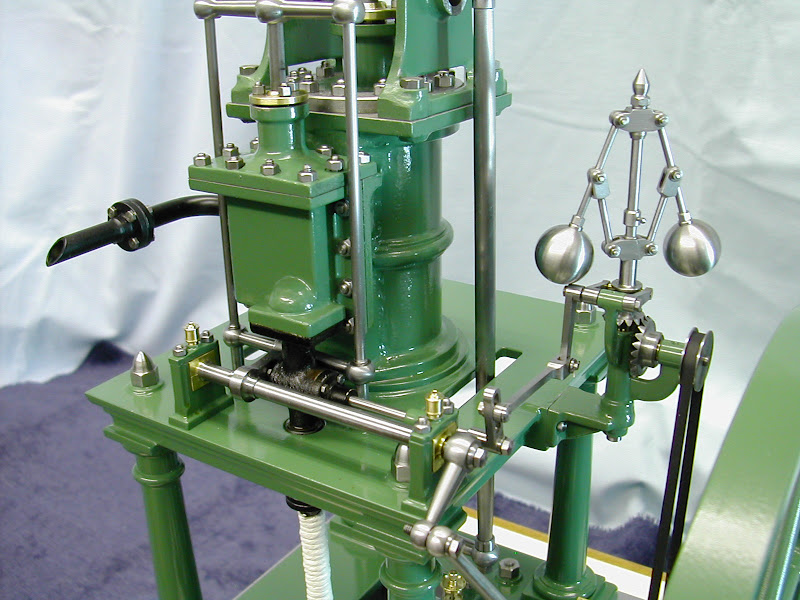
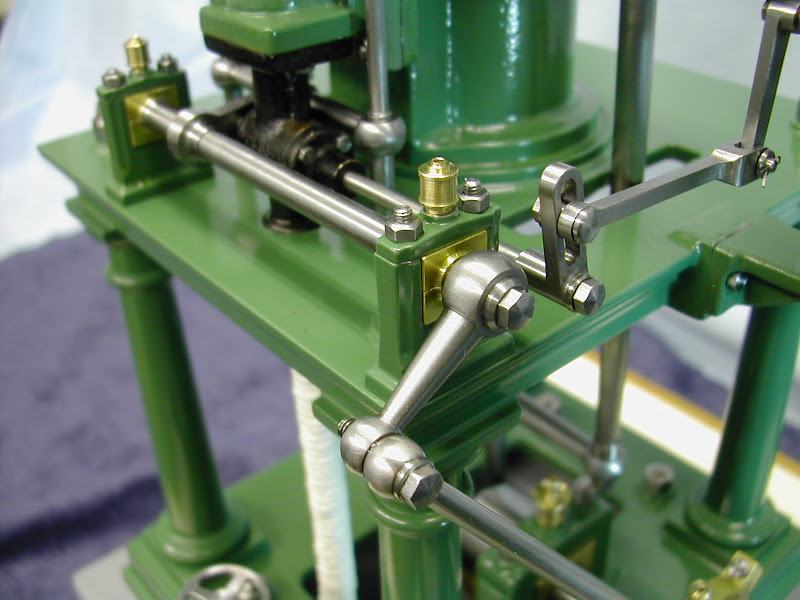
Getting it all back together went reasonably well though there was a hitch getting it to run. Having had it running nicely previously to see it do half a turn and stop at the bottom of the stroke gave cause for concern especially as I couldn't fathom out why the valve kept moving relative to the piston each time. You may recall that the throttle block and valve rocking shaft had to be fettled to get some clearance. Well after tightening the inlet block bolts fully on assembly it moved it enough for it to just catch the rocker shaft and hold it enough to cause the rocking arm lever to move on it's taper. Literally a few strokes of a riffler on the inlet block gave just enough clearance - probably only around a thou or two but a gap is a gap and off it went - phew ::)

A few last pics then ....

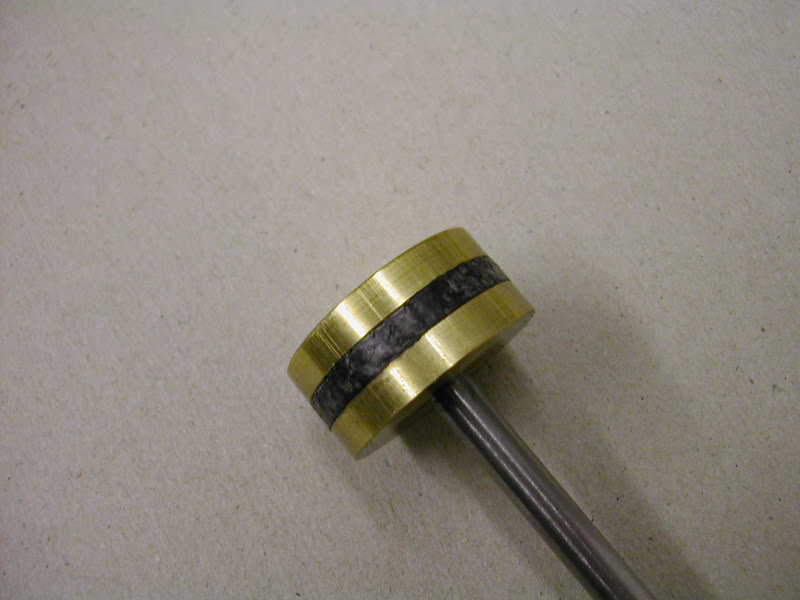
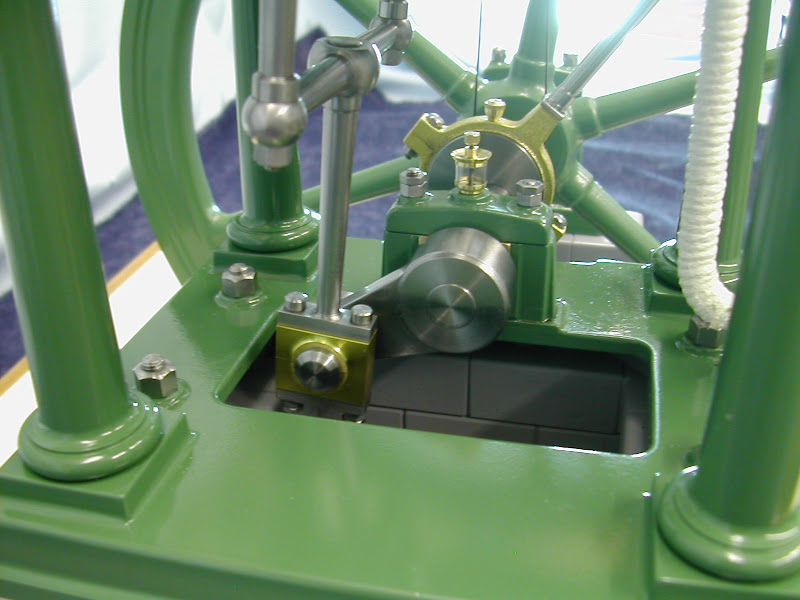
Thought you might like to see one more of the piston packing. Unfortunately the image doesn't convey it's smooth and glassy like surface too well. This is as it was removed from previous running and has bedded in nicely. It went back into the bore with ease without catching and has a lovely seal with very little friction. If an engine is only to run for demonstration and on air at that this is such an ideal way of getting a good piston / liner relation without high tolerance.
DSCN4501.JPG


Next up was to get it running again and get some steam oil in to coat the surfaces to prevent the likelyhood of rusting. Two good slugs of oil were injected into the clear tube and the engine run until it worked it's way through and out the exhaust.
DSCN4514.JPG


DSCN4513.JPG


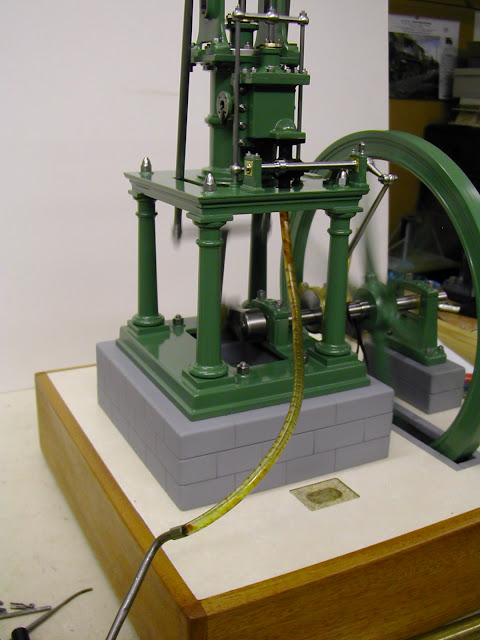
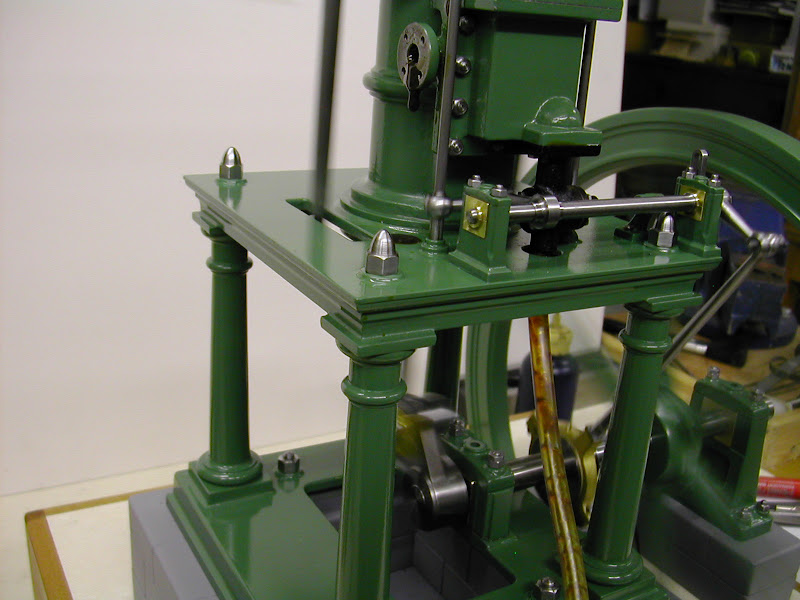
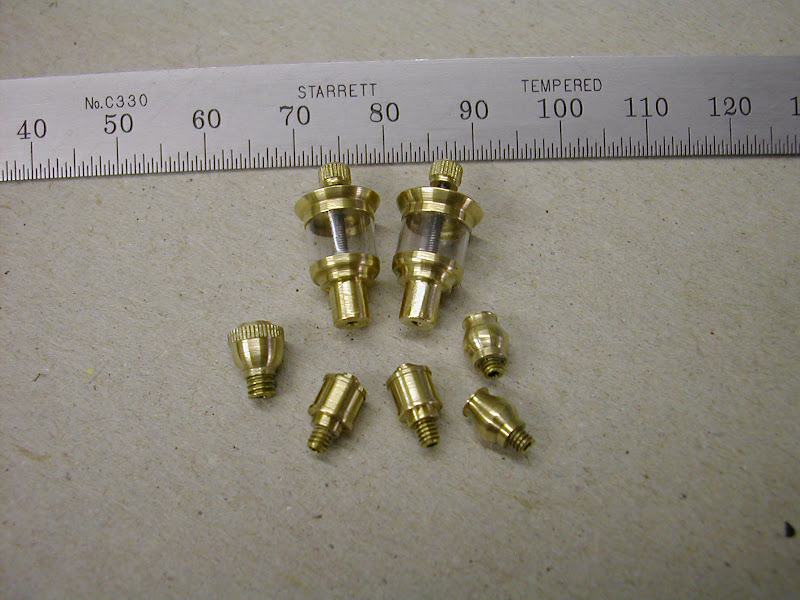
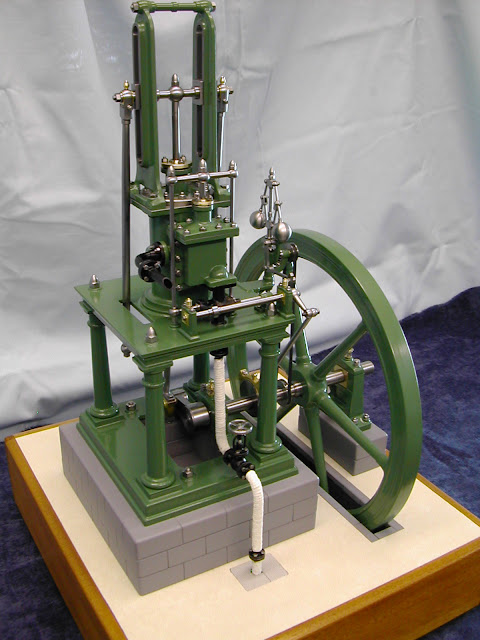
With it all up and running again it was time for the finishing touches - the oilers
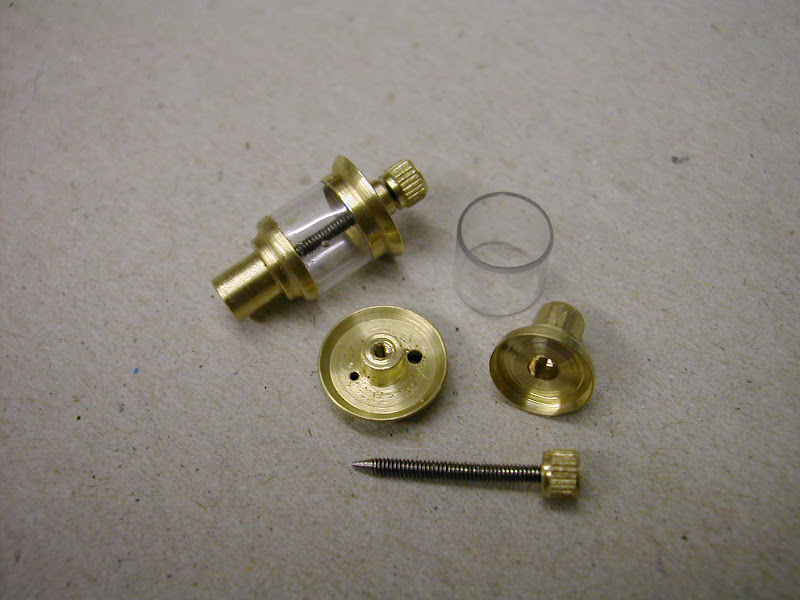
The two on the main bearings are 'pseudo' scale like based on some seen in books and do have a small degree of oil flow control. All the others are semi dummies in that they have a hole all the way through to enable oil to be injected but have no cavity to act as a resevoir
DSCN4515.JPG


DSCN4519.JPG


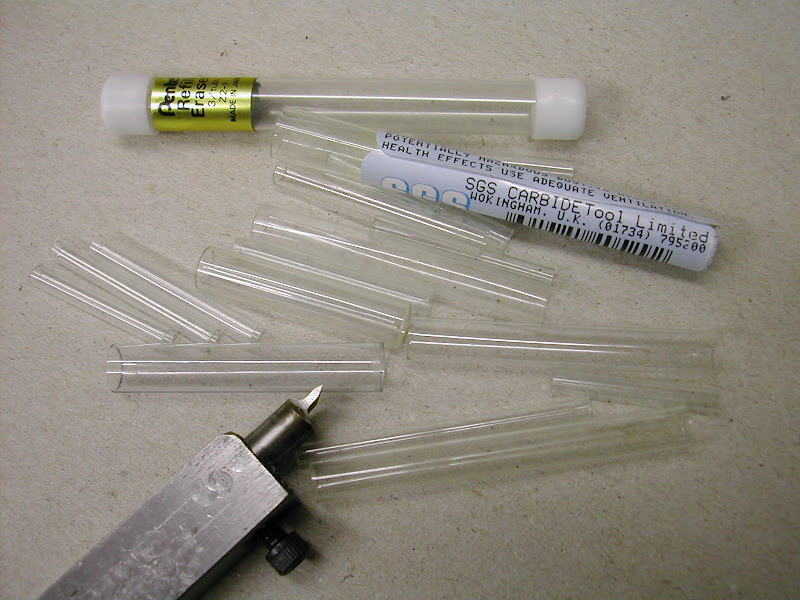
Incidentally a good source for the 'glass' on oilers is the near crystal clear tubes that are used as artists paint brush protective covers closely followed by small tool enclosures. Most art shops have a few of the former under the counter normally free for the asking. The more rigid can be parted off simply nipped in the chuck but if a little flimsy they can be held over a ali spigot turned to suit the id. A sharply pointed 'parting' tool has been found best to cut them to length.
DSCN4532.JPG


A new hand wheel for the stop valve was made and like the previous one was dished. On the Myford S7 setting the top slide over to such an angle means the ball handle interfering with the cross slide handle support. I don't know if this will be of interest for anyone but I get over this by using a 2BA caphead and a ball ended driver
DSCN4525.JPG


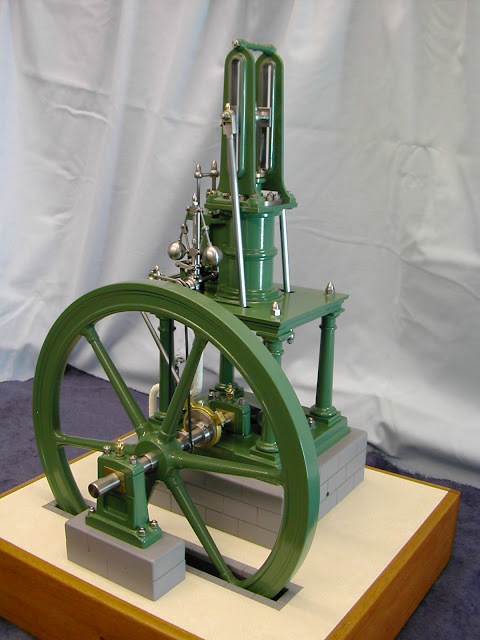
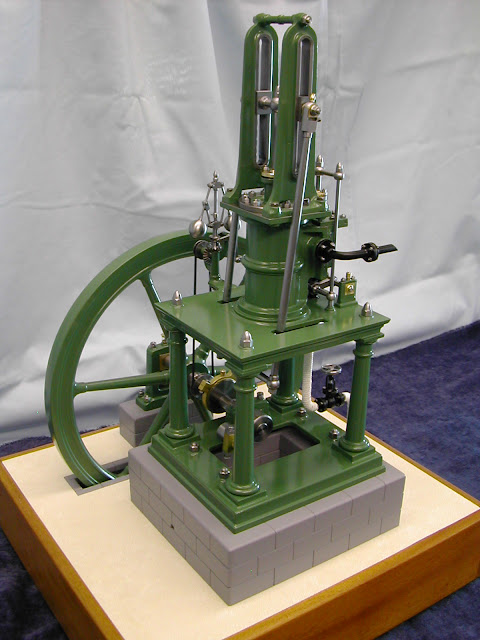
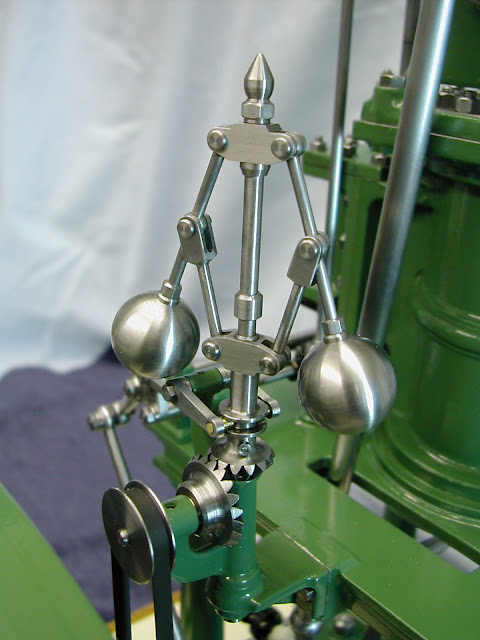
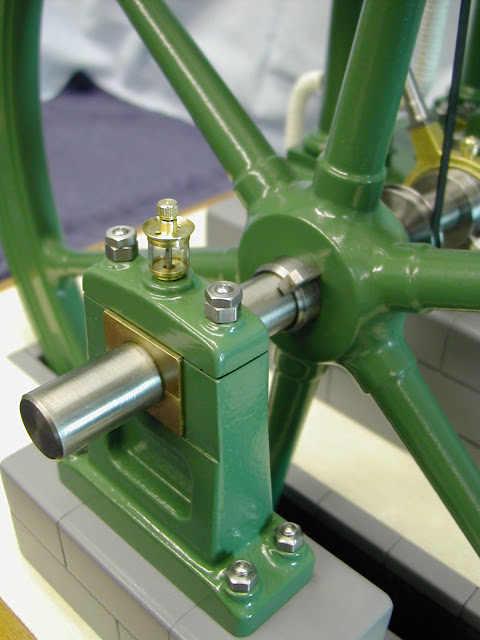
And that was it - a few domed nuts and it was ready for handing over to it's new owner - Sue - I'll let the pics finish it off...............

DSCN4542.JPG


DSCN4543.JPG


DSCN4546.JPG


DSCN4552.JPG


DSCN4557.JPG


DSCN4558.JPG


DSCN4559.JPG


DSCN4562.JPG


DSCN4563.JPG


DSCN4567.JPG


DSCN4568.JPG


I'll do my best later to get a video - it's a new camera and getting something onto You Tube previously has not been too successful but I will try.

Well to coin a phrase 'That's it Folks'. End of the Line.

My thanks once again to all of you for your kind remarks, input, comment and thoughtfulness throughout. Thanks for the PM's too, posting on here has lead to new 'friends' so once again a big thanks to Tel for getting me 'unbanned' and off my butt to actually post something - it's been a very pleasurable journey indeed and finall, going by the number of visits a thanks to all those silent ones who 'look but don't touch' you must find something worthwhile to keep coming back and that in turn has certainly made it worthwhile for me

Regards to you all - Ramon

PS - Just noticed it's not quite finished - theres a nut missing off the valve rocker arm pivot ::)

 
Well I want to thank you for posting the whole build, I've learned a huge variety of different techniques. And it's a stunning example of machine art in my opinion. :bow:

Pete
 
That is as fine a model as I have ever seen. Thanks for doing this entire series. To be able to see the parts built one by one has been very helpful.
 
Lovely engine! Very nice work.

Chuck
 

Outstanding!

What a beautiful model. Thank you for documenting the progress.
 
th_confused0052 th_wav th_confused0052

Today is a sad day in the HMEM forum....
This has been such an amazing thread to follow and comment on!
So many new techniques shared.
And the pictures to go with the descriptions were second to none!

At least we have one more post from Ramon on this engine to wait for!
A video of it running!!! ;D

I bet there are a lot of us out there that wish we were as fortunate as Sue is!!! :big:


Now you need to build an extra large display table for Sue to place the engine on!

Thanks for sharing Ramon and it is good to have you back again!!!

Andrew
 
Exceptional build Ramon - very well done indeed :bow: :bow:

Kind regards, Arnold
 
Nice build ... something for me to work towards. th_wav

Hope to see more.


Pat H
 
Super job Ramon, I've enjoyed following along and it was worth the wait for the final outcome.

Look forward to reading about the next one even though its going to be an oil burner ;)

J
 
Thank you Ramon, it has been an inspiring journey all the way and the result is truly a work of art that people will still appreciate in 100 years time.

Your attention to detail is exemplified by the fact that it looks good even in those closeup photos of the finished article.

I will miss my regular dose of Table Engine and look forward to the next one.

Thank you

Jim
 
Ok hands up which one wanted the video?

I have to confess I'm much more in my comfort zone on the lathe or mill than on techie things but surprise surprise I think I have managed to actually achieve one ;D - the time to upload it though seems well out of all proportion to the length of viewing :eek:

Now, before you all rush off to see it rattling round bear in mind I'm no camera man and what you see is a very definite 'first off'. I found the list of categories very limiting - to those in the know - What would this type of video usually be listed under? I put it under Science and Tecnology but thought the subject rather 'late in the day for that' but nothing else seemed to cover it. I have to say though I am very impressed with the new camera - another Nikon CoolPix - this time an S3100 but the software appears at this stage to be nowhere near as straightforward to use as the old one.

So for what it's worth here it is. The creaking sound at some stage is the workshop door. I have no gauge on the air but pressure is well down, just enough to deflect the skin on your hand,

[ame=http://www.youtube.com/watch?v=CkNLvfGuApo&feature=channel]http://www.youtube.com/watch?v=CkNLvfGuApo&feature=channel[/ame]


So there you go guys - the new owner has ensured that nut was fitted so there really can be only just one thing left to say .......

- THE END -​

 
Fantastic Ramon, I expect that Sue loves it!!!

:bow: :bow: :bow: :bow: :bow: :bow: :bow: :bow: :bow: :bow: :bow: :bow: :bow:

Andy
 
My hand was up. It's been great fun watching this engine progress and very educational to boot. I, along with others I'm sure, am looking forward to your next build to see what other tricks are up those sleeves. In the end it's an amazing looking and running model and would be a thrill for any of us to show. Hope the next one isn't too far in the future.

Ray
 
Ramon, thanks for sharing all your expertise. Amazing work, descriptions and a stunning engine. :bow:

Vince
 
Ramon I am breathless, :bow: you have exceed all expectations. I am so jealous,if I could achieve in my life half of your quality of craftsmanship I would be happy. I look forward to you next creation. Excellent job and please gives a video of it running. :bow:

Best regards Don
 
Hi Ramon
I loved the Video Great work Mate
Pete
 
Back
Top