A Table Engine Tale

Home Model Engine Machinist Forum

Help Support Home Model Engine Machinist Forum:

This site may earn a commission from merchant affiliate links, including eBay, Amazon, and others.
Thanks Ramon:- I think this engine will be a contender.

I always learn somthing for your post's this time it was about leaving the etch primer to do its job.

Cheers

Stew
 
Welcome back Ramon,
Glad that you took your time healing from your procedure. NOW GET BACK TO WORK!
;D
 
Good to hear from you Ramon!

Day by day bud, day by day.

dave
 
Good to see you back in the workshop and posting again Ramon. Plan to do the base for the Benso this weekend so we are at a similar stage.

J
 
Welcome back Ramon, it's good to know that you are on the mend.

And my lessons continue - this time about painting. I realised how far behind I am when I read that you finish rubbing down the undercoat with a microfibre cloth. I do know that the quality of the finish depends mostly on the preparation but I had never thought to go to those lengths.
Thank you

Jim
 
Welcome back Ramon, :big: I am glad to see the lessons continue. You just keep amazing me with your skills and professionalism. You should be writing a book on what you know. The Shop wisdom of Ramon series and I really mean that with a good heart. I would buy your first book. Please stay healthy and continue your thread. I want to see your engine run.

Kind Regards Don
 
Welcome back Ramon.

Regarding the masking, I found some masking tape that has a barrier that is activated by the paint to stop paint from bleeding under the edge of the tape. Found out about it on a home improvement site. I's called "Frog" tape and is green. I got it at Lowes. Masked off and repainted my stairs and was amazed at how clean the edges were when I took the tape off. Worked excellent with Latex paint. I haven't tried anything else yet.


Ron
 
Good to see you back in the shop Ramon and on the mend. There's still many days of updates left on this one and then we get to watch your next project take shape. ;)

Ray
 
Hi Guy's just a small update - I'm afraid theres not much progress watching paint dry ::).

But first my thanks as usual for your response ...

Looking forward to seeing the Benson up and running Jason - looks like you will be ahead of me by a couple of weeks, you are so close to the end too.

Don 1966 - That's a very nice thing to say and I'm touched by your confidence :-[. I'm afraid though I don't see myself in quite the same way, just someone doing what he loves and passing it on to those who may gain some benefit and hopefully, by input from others, learn something myself.

Ozzie - Thanks for the tip - I have read of 'Frog' tape but have as yet to see any.

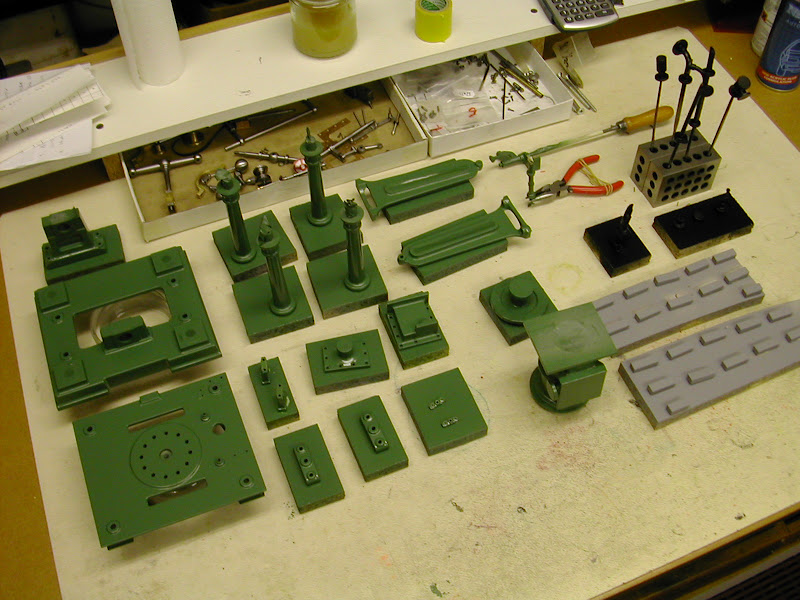
I should perhaps have made it a little clearer re masking that when masking something up like these parts I find it's fine to use conventional, household masking tape to mask unpainted areas but where there are previously painted areas to mask then a much thinner, lower tack tape would be used. The very best I have used for this purpose is what was called 'Betto' tape. This was a tan coloured tape, very thin and capable of being cut into extremely thin strips without disintegrating. It was replaced by a white coloured tape - still with the same name but nowhere as good as the tan stuff. A good alternative is 'Tamiya' tape. This yellow coloured tape can be cut similarly but doesn't quite have the strength as the original Betto. It's readily available at most model shops though and if bought in the 40mm wide roll as opposed to the narrower rolls in dispensers is very economical.

One little tip on masking that some may find useful. Instead of using news paper or similar to mask out areas from over spray consider using ordinary kitchen tinfoil. This is totally impervious to the solvents and is easilly wrapped around any shape with ease. Make sure you buy your own though ;)


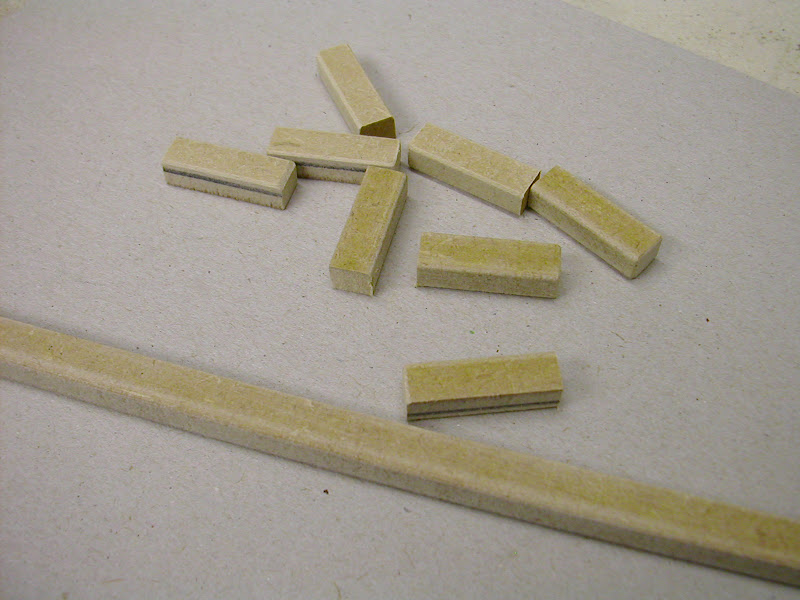
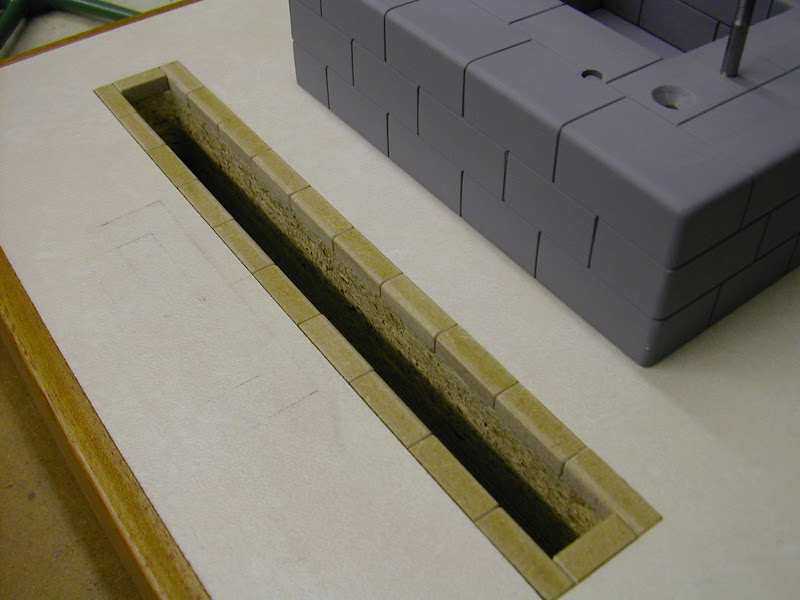
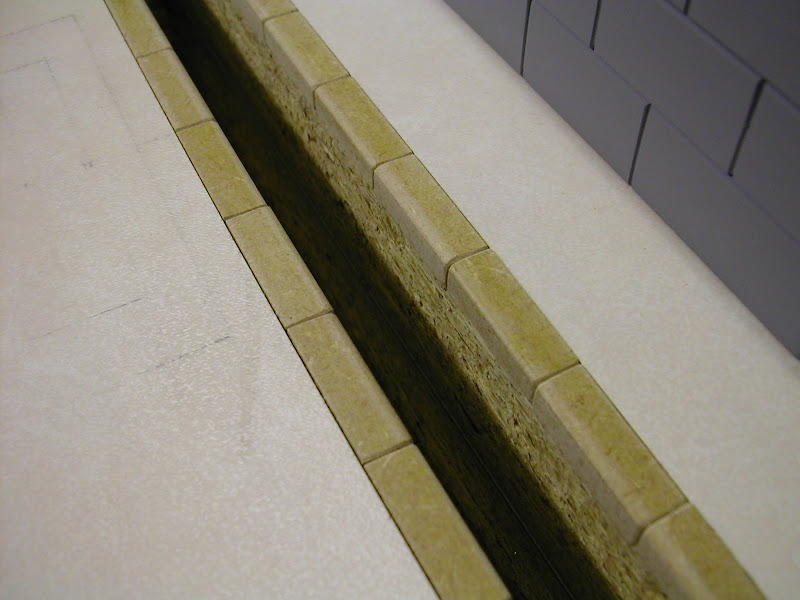
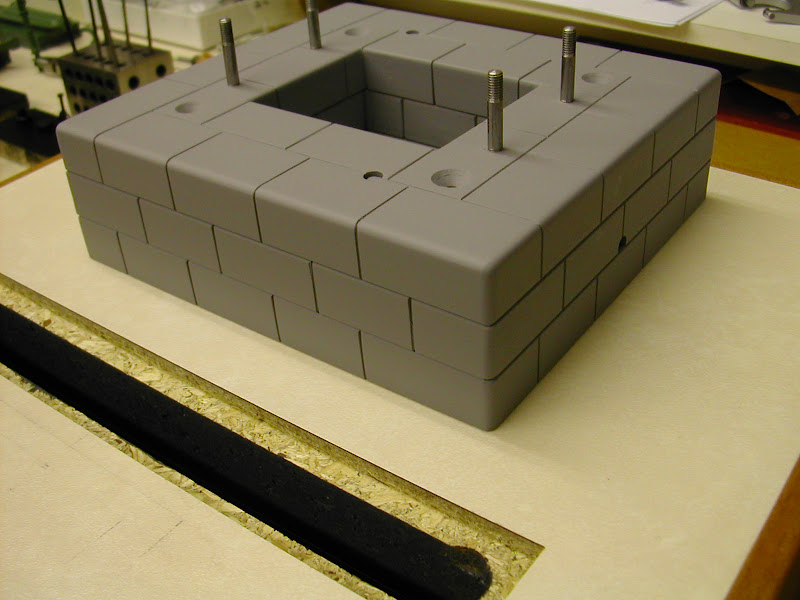
Whilst it was intended to edge the flywheel pit with 'bricks' as mentioned on the last post no real thought had been given as to what to make them from. After a fair bit of poking around under the bench for something suitable it occurred that perhaps they could be made from MDF board which is what was used for the 'stone' plinth. The edge of a piece of board was sanded to a suitable section on the two 'as seen' faces then cut off on the band saw. Treated gently as it easily snaps in thin sections the inner face was sanded smooth then the strips sealed using very thin cellulose 'Sanding Sealer'. This was then cut into brick sized lengths which were milled to length to give a good uniform fit in the rebate
DSCN4451.JPG


DSCN4452.JPG


DSCN4455.JPG


Once dry fitted they were removed and all given a second coat of sealer before being painted and left ready to fit using PVA glue.

The first hint of a warm day and it was time for the top coat. All painting was done using aerosols. Priming including the plinth used about two and a half 300ml cans and the two topcoats just under two cans of the same size

Again, some masking utilised the parts themselves.. the bearings will be washed in cellulose thinner to remove the paint
DSCN4457.JPG


Taken tonight, this is where patience will be sorely tried as though touch dry they need to harden off for at least a couple of days before reassembly. The keen eyed might note that 3-2-1 blocks truly are versatile ;)
DSCN4469.JPG


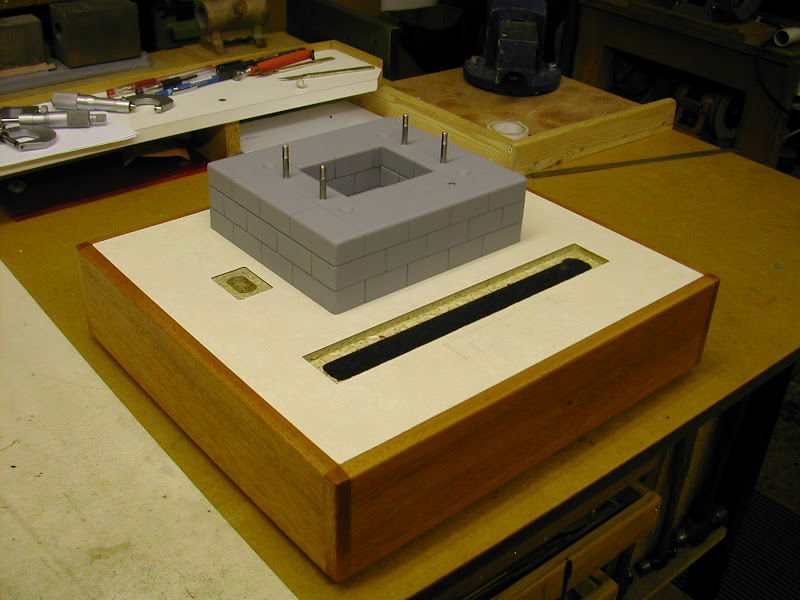
The base as finished and ready to fit those 'bricks' tomorrow
DSCN4472.JPG


The plinth, three layers of 18mm MDF board is very solid, no glue just four screws hold the layers together. The grooves were cut using a hand saw against a straight edge. Pleased with the colour of the primer the surface will be oiled and left as is. The out rigger bearing plinth has yet to be made as it's thickness will need to be ascertained after the engine is securely bolted in position
DSCN4473.JPG


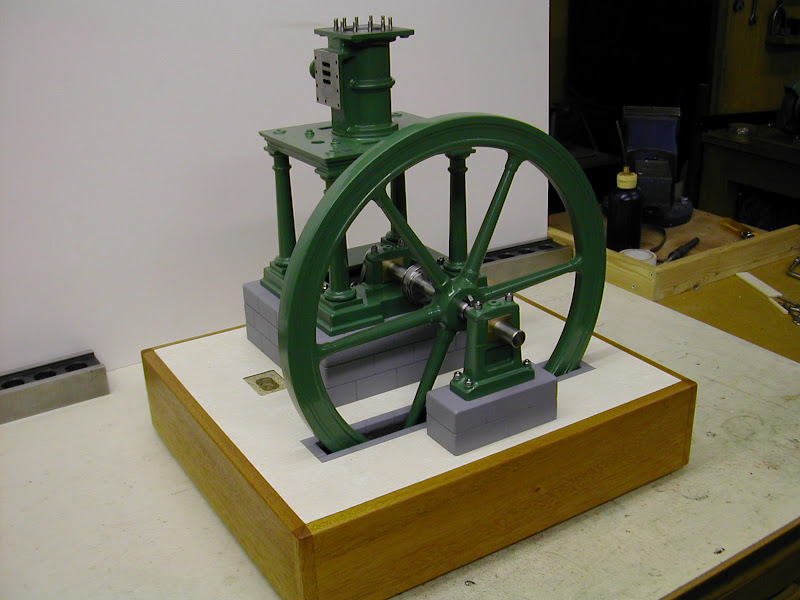
Well another small step, but getting closer. The interim time has been spent on drawing out a new I/C engine but more on that later ;)

Regards for now - Ramon
 
It is good to see you back in the saddle Ramon. Hooray! Your inventiveness in achieving scale, real-life pieces from household goods is incredible and fun to watch.

Regards

BC1
Jim
 
Ramon glad to see back :bow: great work, you are getting so close to finishing. I am just like a little kid and very anxious to see the completed engine. Your paint job has taught me things I would of never thought of, your talents keeps us searching for your new post.

Regards Don
 
Looking great Ramon. Really interesting to see your use materials for the stonework. Also, I'm glad to hear you have another one in the works.

Ray
 

Well, the old patience finally ran out this morning ::) so spent the day polishing nuts, fitting studs and sundry other little things like drilling the oil holes in the main bearings as the re-assembly began. It's all going well so far but getting the valve set right without damaging the paintwork should prove a challenge. The initial set up saw several steam chest removals to get it right which was a right pain with the attendant rocker shaft and bearing blocks. The eccentric is still locked in position and the valve rod marked so with luck it should be somewhere near.

Any way here's how it stands at end of play today - should give you an idea of how it will look - hopefully it will be finished this week all being well. ;D

DSCN4499.JPG


That's all for now - back in a day or two

Regards - Ramon
 
It is certainly living up to expectations. What a lovely job.

Jim
 
Ramon - Your workmanship is just astounding.... This project is almost beyond words.... Keep up the good work and it is good to have you working on it again.

Harold
 
Fantastic! Can't wait to see this one run!
 
Ramon are you leaving the base as white melamine or going to apply a tile/stone finish?

Its comming along well.

J
 
'Morning Jason, Actually its not white melamine though it certainly looks like it in the pic. The colour is a very light tan and yes I have decided to leave it as such. I was going to paint it the usual (for me) rusty red that previous bases have been painted but I felt that might clash a bit besides - the 'govenor' likes it and it is for her after all ;)

Ramon
 
Very, very impressive indeed! Something for us lesser mortals to aspire towards.
 
What a beautiful looking engine. The base is outstanding. It's amazing what a fellow can make out of found materials.
gbritnelll
 

Latest posts

Back
Top